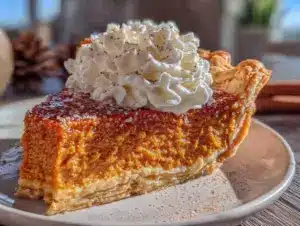
The pan was almost licked clean before I even got a picture. My husband stood at the counter, fork in hand, scraping the corners. “Did you save some for the kids’ lunchboxes?” I asked. He just looked at me, guilty smile, and shrugged. That’s when I knew these Easy Candy Corn Sugar Cookie Bars were a keeper. Not because they were pretty, though they are. Not because they’re simple, though they absolutely are. But because they disappeared without a single complaint, without a single crumb left behind. That’s the kind of recipe you hang onto.
I’d been messing around with sugar cookie bars for a while, trying to get that perfect balance between chewy center and slightly crisp edge. Regular sugar cookies are lovely, but rolling, cutting, and decorating? Let’s face it, sometimes you just want the payoff without the fuss. So I started pressing dough into a pan, throwing on some frosting, and calling it a day. Then Halloween rolled around, and I spotted a bag of candy corn at the grocery store. Honestly, I’m not even a huge candy corn fan on its own. But something clicked. What if I layered the dough with those little tri-colored triangles and turned it into something that actually tastes like fall?
The first batch was good. The second batch was dangerous. By the third, I had the method down so well I could practically make it in my sleep. These Easy Candy Corn Sugar Cookie Bars have that soft, buttery sugar cookie base you crave, topped with a light, fluffy frosting and a generous sprinkle of candy corn. It’s nostalgic, it’s fun, and it comes together in under an hour. No chilling dough, no rolling pins, no messing with royal icing. Just pure, unapologetic fall dessert joy. And honestly? That’s exactly the kind of recipe we all need more of.
Why You’ll Love This Recipe
These bars aren’t just another sugar cookie recipe. They’re a solution to the age-old problem of wanting something festive without the headache. Here’s why they work so well:
- Quick & Easy: From start to finish, you’re looking at about 45 minutes. That’s less time than it takes to watch a single episode of your favorite show. Perfect for last-minute Halloween parties or a Tuesday night craving.
- Simple Ingredients: You probably already have butter, sugar, eggs, and flour in your pantry. No weird extracts, no specialty flours, no hunting down obscure ingredients. The candy corn is the only thing you might need to grab, and you can find it everywhere this time of year.
- Perfect for Fall Celebrations: Whether it’s a Halloween party, a Thanksgiving dessert table, or just a fun after-school treat, these bars fit right in. They’re colorful without being over-the-top, and they appeal to kids and adults alike.
- Crowd-Pleaser: I’ve brought these to potlucks, bake sales, and family gatherings. They always go fast. There’s something about the combination of soft cookie, creamy frosting, and that slight crunch from the candy corn that people just can’t resist.
- Unbelievably Delicious: The texture here is key. The bars are soft and tender, almost like a sugar cookie crossed with a blondie. The frosting is light and sweet, and the candy corn adds a little chewy, sugary pop. It’s comfort food at its finest, and it tastes exactly like fall should taste.
What makes these bars different from every other sugar cookie recipe out there? It’s the method. By pressing the dough into a pan instead of rolling it out, you get a perfectly even thickness every single time. No thin edges, no puffy centers, no uneven baking. Plus, the frosting-to-cookie ratio is spot on. You get enough sweetness to satisfy that sugar craving, but not so much that you feel like you’re eating a candy bar. It’s balanced, it’s thoughtful, and it’s been tested until it was just right.
Honestly, this recipe has become my go-to for fall. It’s the kind of dessert that makes you close your eyes after the first bite, just for a second. It’s simple, it’s satisfying, and it’s exactly what a cozy autumn afternoon calls for.
What Ingredients You Will Need
This recipe uses mostly pantry staples, so you don’t need to make a special trip to the store. The ingredients work together to create a soft, buttery bar that’s sturdy enough to hold the frosting and candy corn without falling apart.
- Unsalted Butter, softened (1 cup / 2 sticks / 226g): Butter is the backbone of any good sugar cookie. I use unsalted so I can control the salt level myself. Make sure it’s truly softened to room temperature, not melted. Softened butter creams properly with the sugar, creating that light, tender texture we’re after. If your butter is too cold, it won’t cream well. If it’s too warm, your dough will be greasy.
- Granulated Sugar (1 cup / 200g): Regular white sugar adds sweetness and helps create that slightly crisp edge on the bars. It also helps with browning during baking.
- Large Egg (1, room temperature): The egg binds everything together and adds richness. A room-temperature egg incorporates more easily into the creamed butter and sugar, giving you a smoother dough.
- Vanilla Extract (1 teaspoon): Pure vanilla extract adds warmth and depth. I prefer it over imitation vanilla for baking, but in a pinch, the imitation stuff works fine. You could also use vanilla bean paste for a more intense flavor.
- All-Purpose Flour (2 cups / 250g): Standard all-purpose flour gives the bars structure without making them tough. Spoon and level your flour for the most accurate measurement. Scooping directly from the bag can pack in too much flour, leading to dry, crumbly bars.
- Baking Powder (1/2 teaspoon): A little baking powder helps the bars rise just slightly, giving them a softer, more cake-like texture. Don’t skip it, or your bars will be dense and flat.
- Salt (1/2 teaspoon): Salt balances the sweetness and enhances the buttery flavor. I use fine sea salt for baking, but table salt works too.
- Candy Corn (1 cup / about 150g, plus more for topping): The star of the show. You’ll mix some into the dough and sprinkle more on top. I’ve used both classic Brach’s candy corn and some store-brand versions. They all work, but the classic brand holds its shape a little better during baking.
For the Frosting:
- Unsalted Butter, softened (1/4 cup / 1/2 stick / 57g): The base of the frosting. Softened butter creates a smooth, creamy base that’s easy to spread.
- Powdered Sugar (1 1/2 cups / 180g): Also called confectioners’ sugar, this is what gives the frosting its sweetness and structure. Sift it if it’s lumpy for the smoothest results.
- Heavy Cream or Milk (2-3 tablespoons): A splash of liquid thins the frosting to a spreadable consistency. Heavy cream makes it richer, but milk works perfectly fine.
- Vanilla Extract (1/2 teaspoon): A little more vanilla in the frosting ties everything together.
- Pinch of Salt: Don’t skip this. A tiny bit of salt in the frosting keeps it from being cloyingly sweet.
One quick note on ingredient selection: I’ve tested this recipe with both salted and unsalted butter. If you only have salted, just reduce the added salt in the dough to 1/4 teaspoon. Also, if you’re looking for a slightly different texture, you can substitute 1/2 cup of the all-purpose flour with cake flour. This will give you an even more tender, delicate bar. But honestly, the all-purpose version is already pretty perfect.
Equipment Needed
You don’t need a fancy kitchen to pull these off. Here’s what you’ll need:
- 9×13-inch Baking Pan: This is the ideal size for these bars. A metal pan will give you slightly crispier edges, while a glass or ceramic pan will produce softer, more evenly baked bars. I prefer metal for that little bit of crunch on the sides.
- Electric Mixer (Hand or Stand): You can cream the butter and sugar by hand with a wooden spoon, but it takes some elbow grease. A hand mixer or stand mixer makes the job much easier and ensures the butter and sugar are properly creamed.
- Mixing Bowls: You’ll need one large bowl for the dough and one medium bowl for the frosting. I like using glass or stainless steel bowls because they don’t hold onto odors.
- Rubber Spatula: Essential for scraping down the sides of the bowl and for pressing the dough evenly into the pan.
- Parchment Paper: Lining the pan with parchment paper makes lifting the bars out a breeze. Leave a little overhang on two sides to create “handles.”
- Cooling Rack: A wire rack allows the bars to cool evenly, preventing a soggy bottom. If you don’t have one, you can let them cool in the pan, but it will take longer.
- Offset Spatula (Optional): Not strictly necessary, but an offset spatula makes spreading the frosting nice and even. A butter knife works just fine too.
I’ve made these bars in a 9×13 pan from a dollar store, and they turned out great. Don’t stress about having the perfect equipment. As long as you have a pan and a way to mix, you’re golden.
Preparation Method
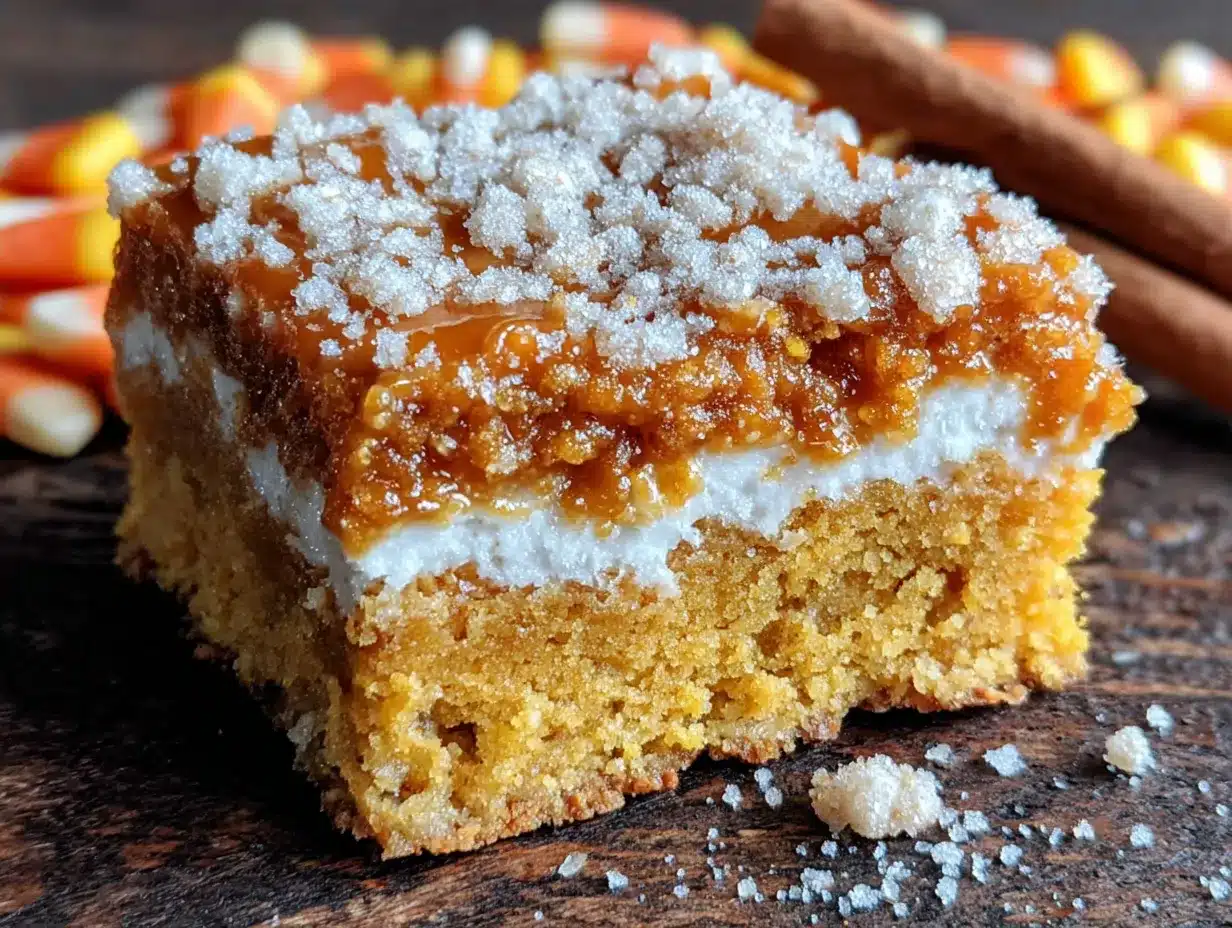
Let’s get baking. The process is straightforward, but I’ll walk you through each step with some tips I’ve learned along the way.
- Preheat and Prep: Preheat your oven to 350°F (175°C). Line your 9×13-inch baking pan with parchment paper, leaving a couple of inches of overhang on the long sides. This will be your lifeline later when you lift the bars out. Lightly grease the parchment with non-stick spray or a little butter, just to be safe.
- Cream the Butter and Sugar: In a large mixing bowl, beat the softened unsalted butter and granulated sugar together on medium speed until light and fluffy, about 2-3 minutes. You’re looking for a pale, creamy mixture that’s increased slightly in volume. Scrape down the sides of the bowl with your spatula halfway through. This step is crucial. Proper creaming incorporates air into the dough, which gives the bars a tender, soft texture. If you under-cream, the bars will be denser.
- Add the Egg and Vanilla: Add the room-temperature egg and vanilla extract to the butter-sugar mixture. Beat on medium speed until fully combined, about 30 seconds. The mixture might look a little separated at this point, but that’s fine. Scrape the bowl again to make sure everything is incorporated.
- Combine Dry Ingredients: In a separate medium bowl, whisk together the all-purpose flour, baking powder, and salt. Whisking ensures the baking powder and salt are evenly distributed throughout the flour. No one wants a bite with a pocket of baking powder.
- Mix Wet and Dry: Gradually add the dry ingredients to the wet ingredients, mixing on low speed. Add about a third of the flour mixture at a time, mixing just until it disappears before adding the next batch. Stop mixing as soon as the flour is incorporated. Over-mixing at this stage can develop the gluten in the flour, leading to tough, chewy bars instead of soft, tender ones.
- Fold in the Candy Corn: Using a rubber spatula, gently fold in 1 cup of candy corn. Fold just until the candy corn is evenly distributed throughout the dough. Be gentle here. You don’t want to crush the candy corn into little pieces, though a few broken bits are inevitable and actually add a nice little surprise.
- Press the Dough into the Pan: Transfer the dough to your prepared baking pan. It will be thick and slightly sticky. Using your hands or the back of a spatula, press the dough into an even layer, making sure it reaches all the corners. Wet your fingers slightly with a little water if the dough is sticking to them. Take your time here—an even layer ensures even baking.
- Bake the Bars: Place the pan in the preheated oven and bake for 18-22 minutes. The bars are done when the edges are lightly golden brown and the center looks set and no longer glossy. A toothpick inserted into the center should come out with a few moist crumbs, not wet batter. Every oven runs a little differently, so start checking at the 18-minute mark. Over-baking will result in dry bars, so err on the side of under-done if you’re unsure.
- Cool Completely: Remove the pan from the oven and place it on a cooling rack. Let the bars cool in the pan for at least 30 minutes. Then, using the parchment paper overhang, lift the entire block of bars out of the pan and transfer it to the cooling rack to cool completely. This is important. If you frost the bars while they’re still warm, the frosting will melt and slide right off. Patience is a virtue here.
- Make the Frosting: While the bars are cooling, make the frosting. In a medium bowl, beat the softened butter on medium speed until smooth and creamy, about 1 minute. Gradually add the powdered sugar, about 1/2 cup at a time, beating on low speed to prevent a sugar cloud. Once all the sugar is incorporated, add the vanilla extract and a pinch of salt. Add the heavy cream or milk, one tablespoon at a time, and beat on medium-high speed until the frosting is light, fluffy, and spreadable. If it’s too thick, add another splash of cream. If it’s too thin, add a little more powdered sugar.
- Frost and Decorate: Once the bars are completely cool, spread the frosting evenly over the top using an offset spatula or a butter knife. Sprinkle the remaining candy corn over the frosting, pressing them in gently so they stick. You can arrange them in rows for a neat look, or just scatter them randomly for a more rustic feel. I like to do a mix of both.
- Slice and Serve: Use a sharp knife to slice the bars into squares. For clean cuts, wipe the knife clean between each slice. I usually cut them into 24 squares, but you can make them bigger or smaller depending on your crowd. For Halloween parties, I sometimes use a cookie cutter to cut them into fun shapes, like pumpkins or ghosts. Just be aware that you’ll have scraps to snack on.
Cooking Tips & Techniques
I’ve made these bars more times than I can count, and I’ve learned a few things along the way. Here are some tips to help you nail them on your first try.
Don’t Overmix the Dough. This is the number one mistake people make with any cookie recipe. Once you add the flour, mix just until it’s combined. Over-mixing develops gluten, which makes the bars tough and chewy instead of soft and tender. You want to see a few streaks of flour still in the dough when you stop mixing. The folding will take care of the rest.
Press the Dough Evenly. An uneven layer of dough will lead to uneven baking. Some parts will be overdone while others are underdone. Take the extra minute to press the dough into a nice, even layer. I use my fingertips and then go over it with the bottom of a measuring cup to smooth it out.
Watch the Baking Time. Ovens are liars. They all run at slightly different temperatures. Start checking your bars at the 18-minute mark. The edges should be lightly golden, and the center should be set but still soft. A toothpick inserted into the center should come out with a few moist crumbs. If it comes out clean, you’ve over-baked them. If it comes out with wet batter, they need more time.
Cool Completely Before Frosting. I cannot stress this enough. If you frost warm bars, the frosting will melt into a puddle. You’ll end up with a sticky mess instead of a beautiful, frosted bar. Let the bars cool in the pan for 30 minutes, then lift them out and let them cool completely on a wire rack. This usually takes another 30-45 minutes. If you’re in a hurry, you can pop them in the fridge for 15 minutes to speed things up.
Use Room Temperature Ingredients. Your butter and egg should be at room temperature for the best results. Cold ingredients don’t cream together properly, which can affect the texture of your bars. If you forgot to take your butter out ahead of time, you can soften it in the microwave in 5-second bursts, just be careful not to melt it. For the egg, place it in a bowl of warm water for 5 minutes.
Store Them Right. These bars are best enjoyed within 2-3 days. Store them in an airtight container at room temperature. If you stack them, place a layer of parchment paper between the layers to prevent the frosting from sticking. Do not refrigerate them, as the fridge can dry out the bars and make the candy corn hard.
I once forgot to add the candy corn to the dough and only remembered after I’d pressed it into the pan. I just poked the candy corn into the top of the dough before baking. It worked fine, though some of the candy corn sank to the bottom. Lesson learned: always fold the candy corn into the dough before pressing it into the pan.
Variations & Adaptations
One of the best things about this recipe is how adaptable it is. Here are a few variations I’ve tried and loved.
Chocolate Drizzle: Melt 1/2 cup of semi-sweet chocolate chips with 1 teaspoon of coconut oil and drizzle it over the frosted bars. The combination of sweet vanilla frosting, salty-sweet candy corn, and rich dark chocolate is absolutely incredible. It adds a little sophistication to the bars, making them feel more like a bakery treat.
Pumpkin Spice Twist: Add 1 teaspoon of pumpkin pie spice to the dry ingredients for a fall-flavored twist. The warm spices of cinnamon, nutmeg, ginger, and cloves pair beautifully with the buttery sugar cookie base. You could also swap the vanilla extract in the frosting for 1/2 teaspoon of maple extract for an even more autumnal flavor. If you love pumpkin coffee cake with streusel, you’ll enjoy this seasonal adaptation.
Gluten-Free Version: Substitute the all-purpose flour with a 1:1 gluten-free baking flour blend. I’ve tested this with Bob’s Red Mill 1:1 Baking Flour, and it works beautifully. The texture is slightly more delicate, but the flavor is spot on. Just make sure your blend contains xanthan gum, which helps mimic the structure of gluten.
Dairy-Free Option: Use vegan butter sticks (like Earth Balance) and a dairy-free milk alternative (like oat or almond milk) in the frosting. The bars will still be soft and delicious. I’ve found that vegan butter works best when it’s cold, so don’t let it soften too much before creaming.
Mix-In Madness: Fold in 1/2 cup of white chocolate chips or chopped pecans along with the candy corn. The white chocolate adds extra sweetness, while the pecans add a nice crunch and a little savory balance. I made a batch with toasted pecans and white chocolate for Thanksgiving one year, and it was gone before the turkey even hit the table.
Halloween Fun: Swap the candy corn for candy pumpkins or a mix of both. You can also use orange and black sprinkles on top for a more festive look. For a spookier vibe, try making these alongside spooky witch finger cookies for a full Halloween dessert spread.
My personal favorite variation is the chocolate drizzle. There’s something about that combo of sweet, salty, and rich that just hits every note. I’ve also made a version where I added a layer of salted caramel sauce between the cookie and the frosting. It was messy, but oh so worth it.
Serving & Storage Suggestions
These bars are incredibly versatile when it comes to serving. Here’s how to make the most of them.
Serving Temperature: These bars are best served at room temperature. The cookie is soft and tender, and the frosting is creamy and smooth. If you’ve stored them in the fridge, let them sit out for about 15-20 minutes before serving to take the chill off.
Presentation: For a Halloween party, arrange the bars on a platter lined with festive napkins or a black and orange tablecloth. You can also cut them into smaller bite-sized squares and serve them on a tiered tray for a more elegant presentation. A dusting of powdered sugar or a few extra candy corns on top adds a nice finishing touch.
Complementary Dishes: These bars pair beautifully with a hot cup of coffee, a glass of cold milk, or a warm mug of apple cider. For a full fall dessert table, serve them alongside pumpkin chocolate chip cookies with sea salt or a slice of maple pumpkin sourdough bread. The combination of flavors is pure autumn bliss.
Storage: Store leftover bars in an airtight container at room temperature for up to 3 days. If you need to stack them, place a sheet of parchment paper or wax paper between each layer to prevent the frosting from sticking. Do not refrigerate them, as the cold temperature can dry out the bars and make the candy corn hard and unpleasant.
Freezing: These bars freeze surprisingly well. To freeze, place the unfrosted bars in a single layer on a baking sheet and freeze until solid, about 1 hour. Then wrap them tightly in plastic wrap and place them in a freezer-safe bag or container. They’ll keep for up to 3 months. When you’re ready to serve, thaw the bars in the refrigerator overnight, then bring them to room temperature before frosting and serving. You can also freeze the frosted bars, but the candy corn may lose some of its crunch.
Reheating: I don’t recommend reheating these bars, as the frosting will melt. If you prefer a warm cookie, you can microwave an unfrosted bar for about 10-15 seconds and then add the frosting. But honestly, they’re perfect at room temperature.
Flavor Development: These bars actually taste even better the next day. The flavors meld together overnight, and the cookie becomes even more tender. If you can resist the urge to eat them all on day one, you’ll be rewarded on day two.
Nutritional Information & Benefits
Let’s be real: these are a treat, not a health food. But here’s the nutritional breakdown for one bar (based on 24 servings), along with a few thoughts on the ingredients.
- Calories: Approximately 220-250 per bar
- Total Fat: 10-12g
- Saturated Fat: 6-7g
- Cholesterol: 35-40mg
- Sodium: 100-120mg
- Total Carbohydrates: 32-36g
- Sugars: 22-26g
- Protein: 2-3g
Health Benefits of Key Ingredients: While this is definitely a dessert, there are a few bright spots. Butter contains fat-soluble vitamins like A, D, E, and K, and it’s a source of conjugated linoleic acid, which has been linked to some health benefits. Eggs provide high-quality protein and essential amino acids. And the candy corn? Well, it makes people happy. Sometimes that’s enough.
Dietary Considerations: This recipe contains gluten, dairy, and eggs. For a gluten-free version, see the variations section above. For a dairy-free version, use vegan butter and a dairy-free milk alternative. Unfortunately, these bars are not easily made vegan, as the egg is essential for texture.
Potential Allergens: This recipe contains wheat (gluten), dairy (butter, cream), and eggs. Candy corn is typically gluten-free, but always check the label to be sure, especially if you’re serving someone with celiac disease.
Personal Wellness Perspective: I believe in balance. These bars are a treat, meant to be enjoyed in moderation. They’re perfect for a Halloween party, a fall gathering, or a cozy night in. Pair them with a healthy meal and plenty of water, and you’re good to go. Life is too short to skip dessert.
Conclusion
These Easy Candy Corn Sugar Cookie Bars are everything I want in a fall dessert. They’re simple enough to whip up on a Tuesday night, but festive enough to bring to a party. The soft, buttery cookie base, the creamy vanilla frosting, and the sweet, nostalgic pop of candy corn come together in a way that just works. It’s not complicated. It’s not fancy. It’s just really, really good.
I love this recipe because it reminds me that baking doesn’t have to be a production. You don’t need a dozen ingredients, a stand mixer, or hours of free time. Sometimes the best desserts are the ones you can throw together in a single bowl, press into a pan, and call it a day. And when you pull them out of the oven, golden and fragrant, and watch them disappear in minutes? That’s the best feeling in the world.
So go ahead and give these a try. Customize them with your favorite fall flavors, pile on the candy corn, and don’t be afraid to sneak a piece before anyone else gets to it. I won’t tell. And if you come up with a variation I haven’t tried, I’d love to hear about it. Drop a comment below and let me know how they turned out. Happy baking, friends!
Frequently Asked Questions
Can I use salted butter instead of unsalted?
Yes, you can. If you’re using salted butter, just reduce the added salt in the dough to 1/4 teaspoon. The frosting will also be slightly saltier, but that can actually be a nice balance to the sweetness. I’ve done it plenty of times, and it works great.
Can I make these bars ahead of time?
Absolutely. You can bake the bars a day in advance and store them unfrosted in an airtight container at room temperature. Frost them the day you plan to serve them. This actually works in your favor, as the bars become even more tender overnight. Just make sure they’re completely cool before storing.
Why did my candy corn melt into the dough?
Candy corn can melt if the dough is too warm or if it’s over-mixed. Make sure your dough is at room temperature (not warm from over-mixing) before folding in the candy corn. Also, avoid over-folding. If your kitchen is particularly warm, you can chill the dough for 10-15 minutes before baking to help the candy corn hold its shape.
Can I use a different pan size?
You can, but the baking time will change. A 9×13 pan is ideal for this recipe. If you use an 8×8 pan, the bars will be thicker and will need to bake for 25-30 minutes. If you use a 9×9 pan, check them at 22-25 minutes. Just keep an eye on them and use the toothpick test to determine doneness.
How do I get clean slices without the frosting smearing?
Use a sharp knife and wipe it clean between each slice. For the cleanest cuts, you can also chill the frosted bars in the refrigerator for about 15-20 minutes before slicing. This firms up the frosting and makes it less likely to smear. Just remember to let them come back to room temperature before serving for the best texture.
Pin This Recipe!
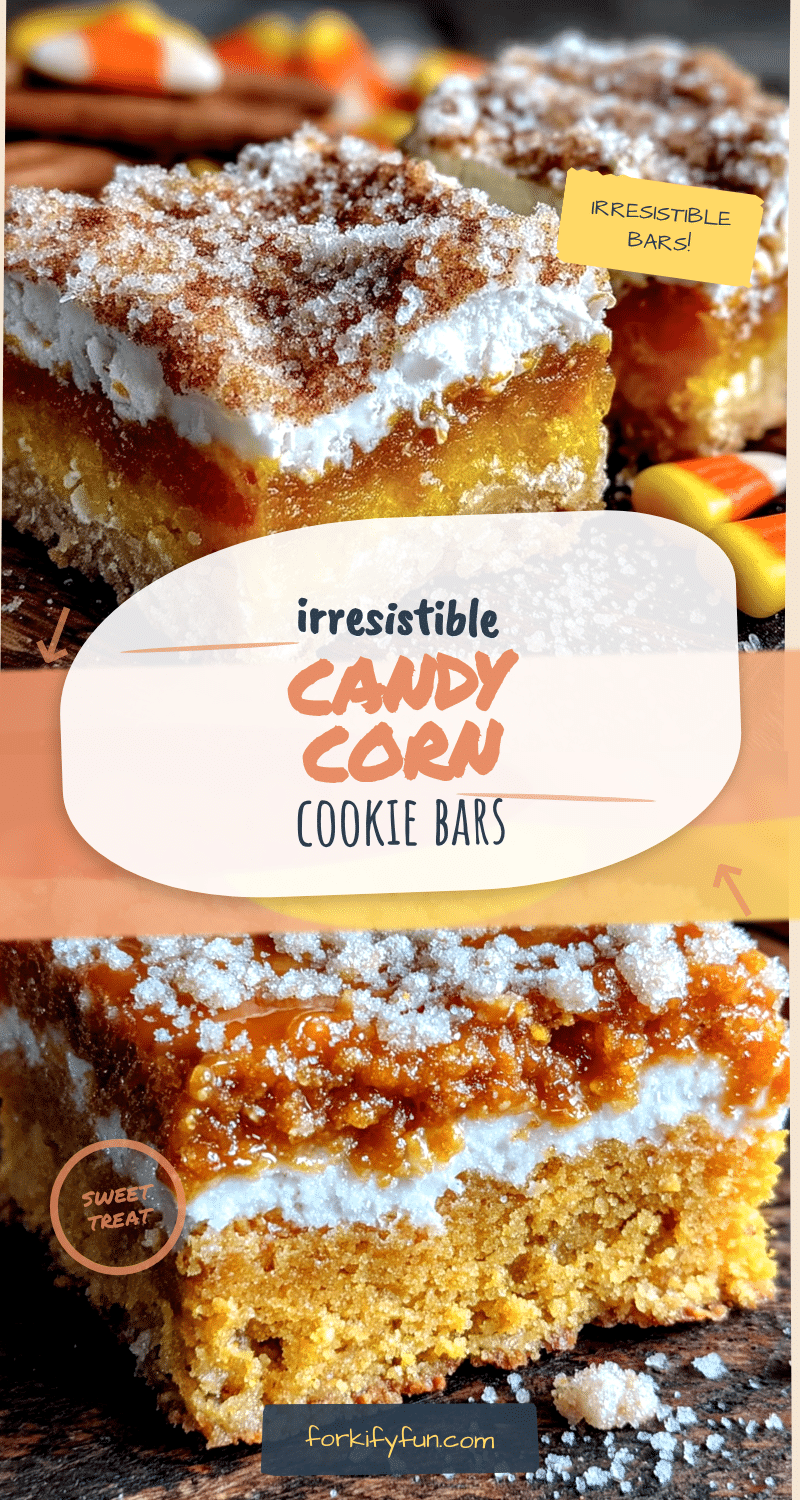
Easy Candy Corn Sugar Cookie Bars: Best Fall Dessert
Soft, buttery sugar cookie bars topped with creamy vanilla frosting and festive candy corn. An easy, no-roll fall dessert that comes together in under an hour and is perfect for Halloween parties or cozy autumn afternoons.
- Prep Time: 15 minutes
- Cook Time: 20 minutes
- Total Time: 45 minutes
- Yield: 24 servings 1x
- Category: Dessert
- Cuisine: American
Ingredients
- 1 cup (2 sticks / 226g) unsalted butter, softened
- 1 cup (200g) granulated sugar
- 1 large egg, room temperature
- 1 teaspoon vanilla extract
- 2 cups (250g) all-purpose flour
- 1/2 teaspoon baking powder
- 1/2 teaspoon salt
- 1 cup (about 150g) candy corn, plus more for topping
- 1/4 cup (1/2 stick / 57g) unsalted butter, softened (for frosting)
- 1 1/2 cups (180g) powdered sugar
- 2–3 tablespoons heavy cream or milk
- 1/2 teaspoon vanilla extract (for frosting)
- Pinch of salt (for frosting)
Instructions
- Preheat oven to 350°F (175°C). Line a 9×13-inch baking pan with parchment paper, leaving overhang on the long sides. Lightly grease the parchment.
- In a large bowl, beat softened butter and granulated sugar on medium speed until light and fluffy, about 2-3 minutes. Scrape down the sides.
- Add the egg and vanilla extract; beat on medium speed until fully combined, about 30 seconds. Scrape the bowl again.
- In a separate bowl, whisk together flour, baking powder, and salt.
- Gradually add the dry ingredients to the wet mixture, mixing on low speed until just combined. Do not overmix.
- Gently fold in 1 cup of candy corn with a rubber spatula until evenly distributed.
- Transfer dough to the prepared pan. Press into an even layer using your hands or the back of a spatula. Slightly wet your fingers if the dough sticks.
- Bake for 18-22 minutes, until edges are lightly golden and center is set. A toothpick inserted should come out with moist crumbs, not wet batter.
- Cool in the pan on a wire rack for 30 minutes. Then lift the bars out using the parchment overhang and cool completely on the rack.
- For the frosting: In a medium bowl, beat softened butter until smooth. Gradually add powdered sugar, beating on low. Add vanilla, salt, and 2 tablespoons of cream; beat on medium-high until fluffy. Add more cream if needed for spreadable consistency.
- Once bars are completely cool, spread frosting evenly over the top. Sprinkle remaining candy corn on top, pressing gently to adhere.
- Slice into 24 squares using a sharp knife, wiping the blade clean between cuts. Serve at room temperature.
Notes
Don’t overmix the dough to keep bars tender. Cool completely before frosting to prevent melting. Store in an airtight container at room temperature for up to 3 days. For clean slices, chill frosted bars for 15-20 minutes before cutting. Bars taste even better the next day.
Nutrition
- Serving Size: 1 bar
- Calories: 235
- Sugar: 24
- Sodium: 110
- Fat: 11
- Saturated Fat: 6.5
- Carbohydrates: 34
- Fiber: 0.5
- Protein: 2.5
Keywords: candy corn sugar cookie bars, easy fall dessert, Halloween cookies, sugar cookie bars, no-roll sugar cookies, festive dessert, candy corn recipe