I watched my roommate take a bite, then just stand there in the middle of the kitchen, chewing slowly. She didn’t say anything for a solid ten seconds. Finally, she looked at the cookie in her hand and said, “This is from a bakery, right? You didn’t make this.” That moment—the quiet disbelief—that’s when I knew I’d finally cracked it.
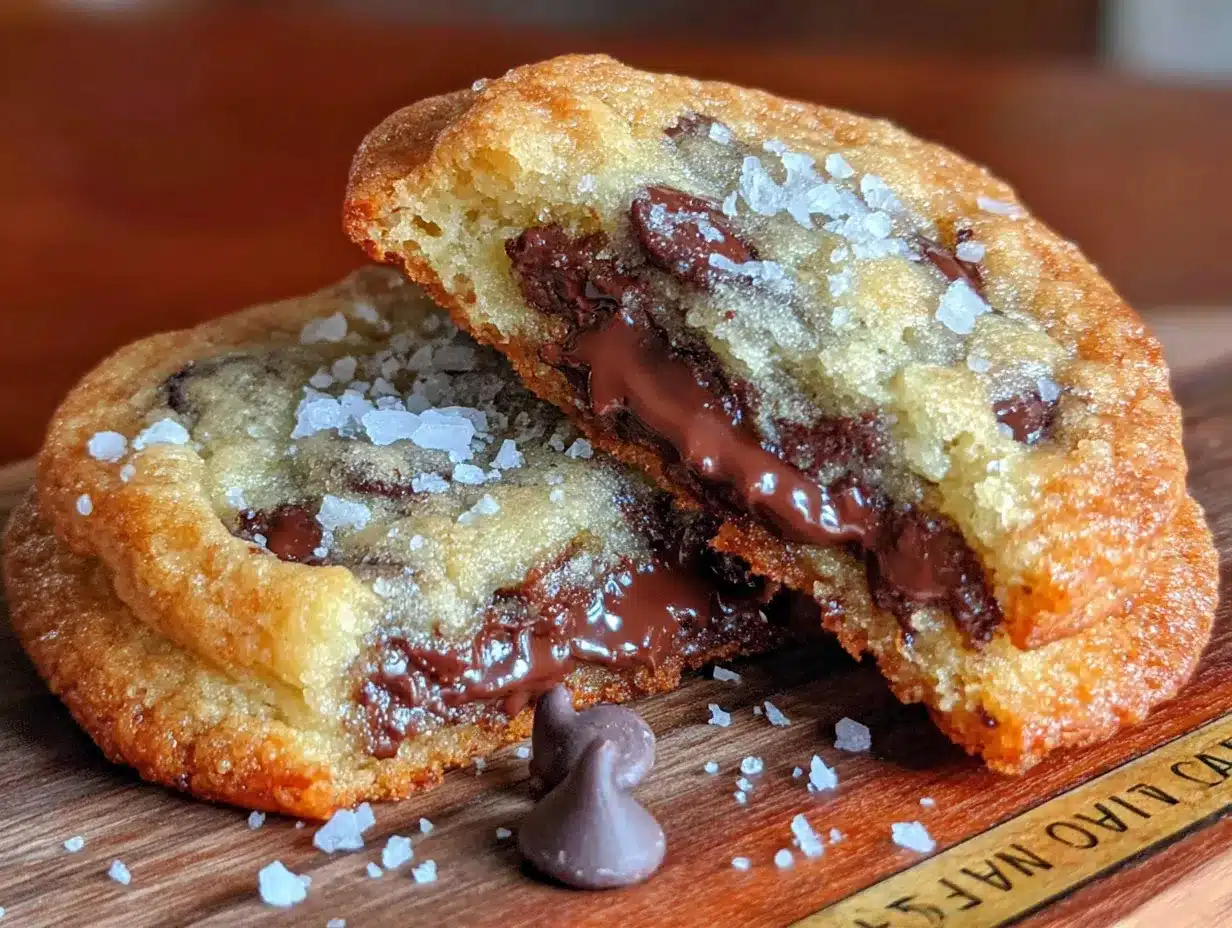
The search for the perfect thick and chewy chocolate chip cookie is a serious journey. I’ve been through flat, sad cookies, cookies that crumbled into dust, and cookies that were more cake than cookie. I wanted that specific texture—the one you get from a proper bakery. You know the one. A cookie that’s thick enough to sink your teeth into, with a slightly crisp edge, a soft, dense center, and pockets of melted chocolate in every bite. It took a lot of trial and error, a few batches that went straight in the trash, and one very important lesson about melted butter.
This recipe isn’t complicated. It uses the same basic ingredients you probably already have in your pantry. But it’s the method—the way you handle the butter, the chill time, the ratio of brown to white sugar—that makes all the difference. Honestly, I was surprised something so simple could produce such a professional result. It’s the kind of cookie that makes you look like a hero, even if you’re just making them for a Tuesday night. And the best part? That thick, chewy texture stays for days—if they last that long.
Why You’ll Love This Recipe
I’ve tested this recipe more times than I can count. I’ve played with different flours, different ratios of sugars, and different chill times. What I’ve landed on is a foolproof method that delivers consistent, bakery-quality results every single time. This isn’t just another chocolate chip cookie—it’s the one you’ll come back to again and again.
- Thick & Chewy Perfection: This recipe is engineered for that signature bakery texture. The combination of melted butter and an extra egg yolk creates a dense, fudge-like center with beautifully crinkled tops.
- Simple, Pantry Ingredients: No weird ingredients or special trips to the store. You likely have everything you need to make these right now—flour, butter, sugars, eggs, vanilla, baking soda, salt, and chocolate chips.
- Perfect for Any Occasion: Need a last-minute dessert for a potluck? A sweet treat for a cozy night in? These cookies are the answer. They’re also fantastic for holiday cookie swaps or just because it’s Wednesday.
- Crowd-Pleasing Classic: Let’s be real—everyone loves a good chocolate chip cookie. These are the kind that disappear from the cooling rack before you can even get them in the cookie jar. Kids and adults alike go crazy for them.
- Unbelievably Delicious: The flavor is deep and rich, thanks to the browned butter notes and the balance of sweet and salty. The texture is pure comfort—chewy, soft, and loaded with melty chocolate. It’s the kind of cookie that makes you close your eyes after the first bite.
What makes this recipe different from the rest is the technique. Melting the butter is the secret to a chewier cookie, and the extended chill time allows the flavors to meld and the dough to firm up, preventing spreading. It’s a small extra step that makes a world of difference.
What Ingredients You Will Need
This recipe uses simple, everyday ingredients to create something truly special. The magic is in how they work together. Here’s what you’ll need to gather for these Easy Bakery-Style Thick & Chewy Chocolate Chip Cookies.
- Unsalted Butter (1 cup / 2 sticks): We melt the butter for this recipe, which is the key to a chewier texture. Using unsalted butter lets us control the salt level. I prefer using a good quality butter like Kerrygold for the best flavor, but any standard brand works great.
- Dark Brown Sugar (1 cup, packed): This is where the deep, molasses-like flavor and chewiness come from. Pack it firmly into the measuring cup. Light brown sugar will work in a pinch, but dark brown gives a richer result.
- Granulated Sugar (½ cup): This adds sweetness and helps create those slightly crispy edges. The balance of brown to white sugar is crucial for the perfect texture.
- Large Eggs (2, plus 1 egg yolk): Eggs provide structure and moisture. The extra egg yolk adds richness and tenderness, contributing to that dense, fudge-like center. Make sure they are at room temperature for the best emulsion.
- Vanilla Extract (2 teaspoons): Use pure vanilla extract if you can. It adds a warmth and depth that imitation vanilla just can’t replicate. It’s a small detail that matters.
- All-Purpose Flour (2 ¼ cups): This is the backbone of the cookie. I recommend using a brand like King Arthur Flour for consistent protein content. Do not over-measure your flour—spoon it into the cup and level it off.
- Baking Soda (1 teaspoon): This is our leavening agent. It helps the cookies spread just enough and gives them a nice lift. Make sure it’s fresh for the best results.
- Salt (1 teaspoon): Salt is not just for flavor—it balances the sweetness and enhances the chocolate. I use fine sea salt. A sprinkle of flaky sea salt on top before baking is a game-changer if you have it.
- Semi-Sweet Chocolate Chips (2 cups): Use a high-quality brand like Ghirardelli or Guittard. The quality of the chocolate makes a huge difference. You can also chop up a good chocolate bar for a more rustic look and varied meltiness.
Equipment Needed
You don’t need a professional bakery kitchen to make these cookies. Here’s the basic equipment that will make the process smooth and easy.
- Large Mixing Bowls (2): One for the wet ingredients and one for the dry. I prefer stainless steel or glass.
- Electric Hand Mixer or Stand Mixer: While you can do this by hand with a whisk and some elbow grease, a mixer makes creaming the butter and sugars much easier and faster.
- Rubber Spatula: Essential for scraping down the sides of the bowl and folding in the chocolate chips.
- Measuring Cups and Spoons: Accurate measurements are key to baking success. Use dry measuring cups for flour and sugar, and liquid measuring cups for vanilla.
- Baking Sheets (2-3): Rimmed baking sheets are best. I’ve learned the hard way that dark, non-stick sheets can cause cookies to brown too quickly on the bottom. Light-colored, aluminum sheets are my go-to.
- Parchment Paper or Silicone Baking Mats: These are non-negotiable for preventing sticking and ensuring even baking. Parchment paper is cheap and disposable; silicone mats are reusable and eco-friendly.
- Cookie Scoop (about 3 tablespoons): This is the secret to uniform cookies that bake evenly. It’s worth the investment for consistent results.
- Wire Cooling Rack: Crucial for cooling cookies properly. If you leave them on the hot baking sheet, they will continue to cook and can become overdone.
Preparation Method
This is where the magic happens. Follow these steps carefully, and you will be rewarded with the best thick and chewy chocolate chip cookies of your life.
- Melt the Butter (5 minutes): In a small saucepan or in the microwave, melt the 1 cup of unsalted butter. Let it cool for a few minutes—it should be warm, not hot. If it’s too hot, it will cook the eggs. You want it just melted.
- Combine Wet Ingredients (5 minutes): In a large mixing bowl, whisk together the melted butter, 1 cup packed dark brown sugar, and ½ cup granulated sugar. Whisk vigorously for about 2 minutes until the mixture is smooth, glossy, and looks like a thick paste. This is important for dissolving the sugar.
- Add Eggs and Vanilla (3 minutes): Whisk in the 2 large eggs and 1 egg yolk, one at a time, making sure each is fully incorporated before adding the next. Then, whisk in the 2 teaspoons of vanilla extract. The mixture should be pale, smooth, and slightly thickened.
- Combine Dry Ingredients (5 minutes): In a separate medium bowl, whisk together the 2 ¼ cups all-purpose flour, 1 teaspoon baking soda, and 1 teaspoon salt. Whisking ensures the leavening and salt are evenly distributed.
- Mix Wet and Dry (5 minutes): Gradually add the dry ingredients to the wet ingredients. Use a rubber spatula to fold them together. Mix just until the last streaks of flour disappear. Do not overmix! Overmixing develops gluten, which can make your cookies tough instead of tender.
- Fold in the Chocolate Chips (2 minutes): Gently fold in the 2 cups of semi-sweet chocolate chips with your spatula. Make sure they are evenly distributed throughout the dough.
- Chill the Dough (Minimum 2 hours, ideally 24-48 hours): This is the most important step. Cover the bowl with plastic wrap and refrigerate the dough for at least 2 hours. Chilling solidifies the fat, which prevents the cookies from spreading too much in the oven. It also allows the flavors to meld and deepen. The longer you chill, the better the flavor and texture. I’ve left it for up to 72 hours with amazing results.
- Preheat and Prep (15 minutes before baking): When you’re ready to bake, preheat your oven to 350°F (175°C). Line your baking sheets with parchment paper or silicone baking mats.
- Scoop the Dough (5 minutes): Use a 3-tablespoon cookie scoop to portion out the dough. Place the dough balls about 3 inches apart on the prepared baking sheets. For that real bakery look, you can press a few extra chocolate chips into the tops of the dough balls.
- Bake (10-12 minutes): Bake one sheet at a time in the center of the preheated oven. Bake for 10-12 minutes. The edges should be golden brown, but the centers will still look pale, soft, and slightly underdone. This is exactly what you want. The cookies will continue to set as they cool on the baking sheet.
- Cool and Enjoy (10 minutes): Let the cookies cool on the baking sheet for 10 minutes. This allows them to firm up. Then, transfer them to a wire cooling rack to cool completely. Or, you know, eat one warm with a glass of cold milk. No judgment here.
Cooking Tips & Techniques
I’ve made every mistake in the book so you don’t have to. Here are the tips and tricks I’ve learned along the way to ensure your cookies turn out perfect every single time.
- Don’t Skip the Chill: I cannot stress this enough. I once tried to rush the process and baked a batch after only 30 minutes of chilling. They spread into thin, flat discs. The chill time is non-negotiable for thick cookies. It solidifies the butter, which means less spreading and a chewier texture.
- The Flour Spoon-and-Level Method: Scooping flour directly from the bag with your measuring cup packs it in, leading to too much flour and dry, cakey cookies. Instead, fluff the flour in its container, spoon it into your measuring cup, and level it off with a knife. It’s a simple step that makes a huge difference.
- Room Temperature Eggs: Cold eggs can seize the melted butter, creating a lumpy dough. Place your eggs in a bowl of warm water for 5-10 minutes before you start to bring them to room temperature. This ensures a smooth, emulsified batter.
- Underbake Slightly: The key to a chewy cookie is to pull it out of the oven when the edges are set but the center is still soft and puffy. They will look underdone, but trust the process. They will finish baking on the hot baking sheet. Overbaking is the fastest way to a dry, crumbly cookie.
- Use a Cookie Scoop for Uniformity: Uniform dough balls mean uniform baking. A cookie scoop ensures every cookie is the same size, so they all bake at the same rate. No more burnt edges on small cookies and raw centers on big ones.
Variations & Adaptations
This recipe is a fantastic base for endless creativity. Here are a few of my favorite ways to switch it up.
- Chocolate Lover’s Dream: Swap 1 cup of the semi-sweet chips for dark chocolate chunks or even white chocolate chips. You can also add ¼ cup of unsweetened cocoa powder to the dry ingredients for a double-chocolate version.
- Nutty Crunch: Add 1 cup of toasted, chopped walnuts or pecans along with the chocolate chips. Toasting the nuts first really brings out their flavor and adds a wonderful crunch that contrasts with the soft cookie.
- Sea Salt Finish: Before baking, sprinkle a few flakes of flaky sea salt (like Maldon) on top of each dough ball. This is my favorite variation. The salty crunch against the sweet, chewy cookie is absolutely divine. It’s what makes them truly taste like they’re from a high-end bakery.
- Gluten-Free Option: I’ve tested this with a 1:1 gluten-free all-purpose flour blend (like Bob’s Red Mill) and it works beautifully. Just make sure the blend contains xanthan gum. The texture is slightly different—a little more delicate—but still thick and chewy.
- M&M Cookies: For a fun, colorful twist, replace the chocolate chips with 1 ½ cups of M&M’s. This is a huge hit with kids and perfect for birthday parties or holidays.
Serving & Storage Suggestions
These cookies are best enjoyed warm, but they’re pretty fantastic at any temperature. Here’s how to serve and store them like a pro.
For the ultimate experience, serve these cookies slightly warm with a tall glass of cold milk. The contrast between the warm, melty chocolate and the cold milk is unbeatable. They are also perfect for packing in lunchboxes, bringing to potlucks, or serving alongside a scoop of vanilla ice cream for an easy dessert. They pair wonderfully with a hot cup of coffee or a mug of hot cocoa on a chilly day.
To store, place the completely cooled cookies in an airtight container at room temperature. They will stay soft and chewy for up to 5 days. I like to add a slice of bread to the container—it absorbs excess moisture and helps keep the cookies extra soft. Just replace the bread slice every day or two.
These cookies freeze beautifully. You can freeze the baked cookies in a freezer-safe bag for up to 3 months. Thaw them at room temperature, or pop them in the microwave for 10-15 seconds for that fresh-from-the-oven warmth. Even better, you can freeze the unbaked dough balls. Scoop them onto a baking sheet, freeze until solid, then transfer them to a freezer bag. You can bake them directly from frozen, just add 2-3 minutes to the baking time.
Nutritional Information & Benefits
Let’s be honest—these are a treat, not a health food. But that doesn’t mean we can’t talk about what’s in them. One cookie (based on a recipe yielding about 20 cookies) contains approximately 280-320 calories, 16g of fat, 36g of carbohydrates, and 4g of protein.
The dark chocolate chips offer a small dose of antioxidants, and the eggs provide a bit of protein. The butter and sugar are, well, what makes them so delicious. This recipe is not suitable for gluten-free or vegan diets unless you make the specified adaptations. It contains gluten, dairy, and eggs.
My personal perspective? Food is about joy and connection. These cookies are a celebration. They’re for movie nights, holiday baking days, and moments when you just need something comforting. Enjoy them without guilt, but also without eating the whole batch in one sitting. Balance, you know?
Conclusion
These Easy Bakery-Style Thick & Chewy Chocolate Chip Cookies are more than just a recipe—they’re a reliable joy. They’re the cookies I turn to when I need a guaranteed win, whether it’s for a bake sale, a friend in need of cheering up, or just a quiet evening at home. The thick, soft center, the slightly crisp edges, the pools of melted chocolate—it’s a perfect combination that never gets old.
I really hope you give these a try. Don’t be intimidated by the chill time—it’s a passive step that does all the work for you. And don’t be afraid to make them your own. Add your favorite nuts, swap the chocolate, sprinkle on some sea salt. The best recipes are the ones you make your own.
I’d love to hear how they turn out! Drop a comment below and let me know if you tried any fun variations. Did you chill them for the full 48 hours? Did you add flaky salt? Share your cookie triumphs with me. Happy baking, friends!
Frequently Asked Questions
Why did my cookies turn out flat?
Flat cookies are usually the result of butter that was too warm or dough that wasn’t chilled long enough. Make sure your melted butter has cooled to room temperature before mixing, and commit to that minimum 2-hour chill time. Also, check that your baking soda is fresh—old baking soda loses its leavening power.
Can I use margarine instead of butter?
I don’t recommend it. Butter provides the best flavor and texture. Margarine has a higher water content, which can lead to more spreading and a less chewy, more cake-like cookie. Stick with real butter for the best results.
Can I make these cookies without an electric mixer?
Absolutely! You can make this dough entirely by hand. Use a wooden spoon or a sturdy whisk to cream the butter and sugars. It will take a bit more elbow grease, but it’s totally doable. Just make sure you mix thoroughly, especially when incorporating the eggs.
How do I get that crinkly, bakery-style top?
The crinkly top comes from the combination of melted butter and a good chill. The melted butter creates a denser dough that forms a beautiful, crackly surface as it bakes. The chill time ensures the dough is firm enough to hold its shape, leading to those signature crinkles instead of just spreading out flat.
Can I halve this recipe?
Yes, you can easily halve this recipe. Just use one whole egg instead of two eggs plus a yolk. The rest of the ingredients can be halved directly. The chill time and baking instructions remain the same.
Pin This Recipe!
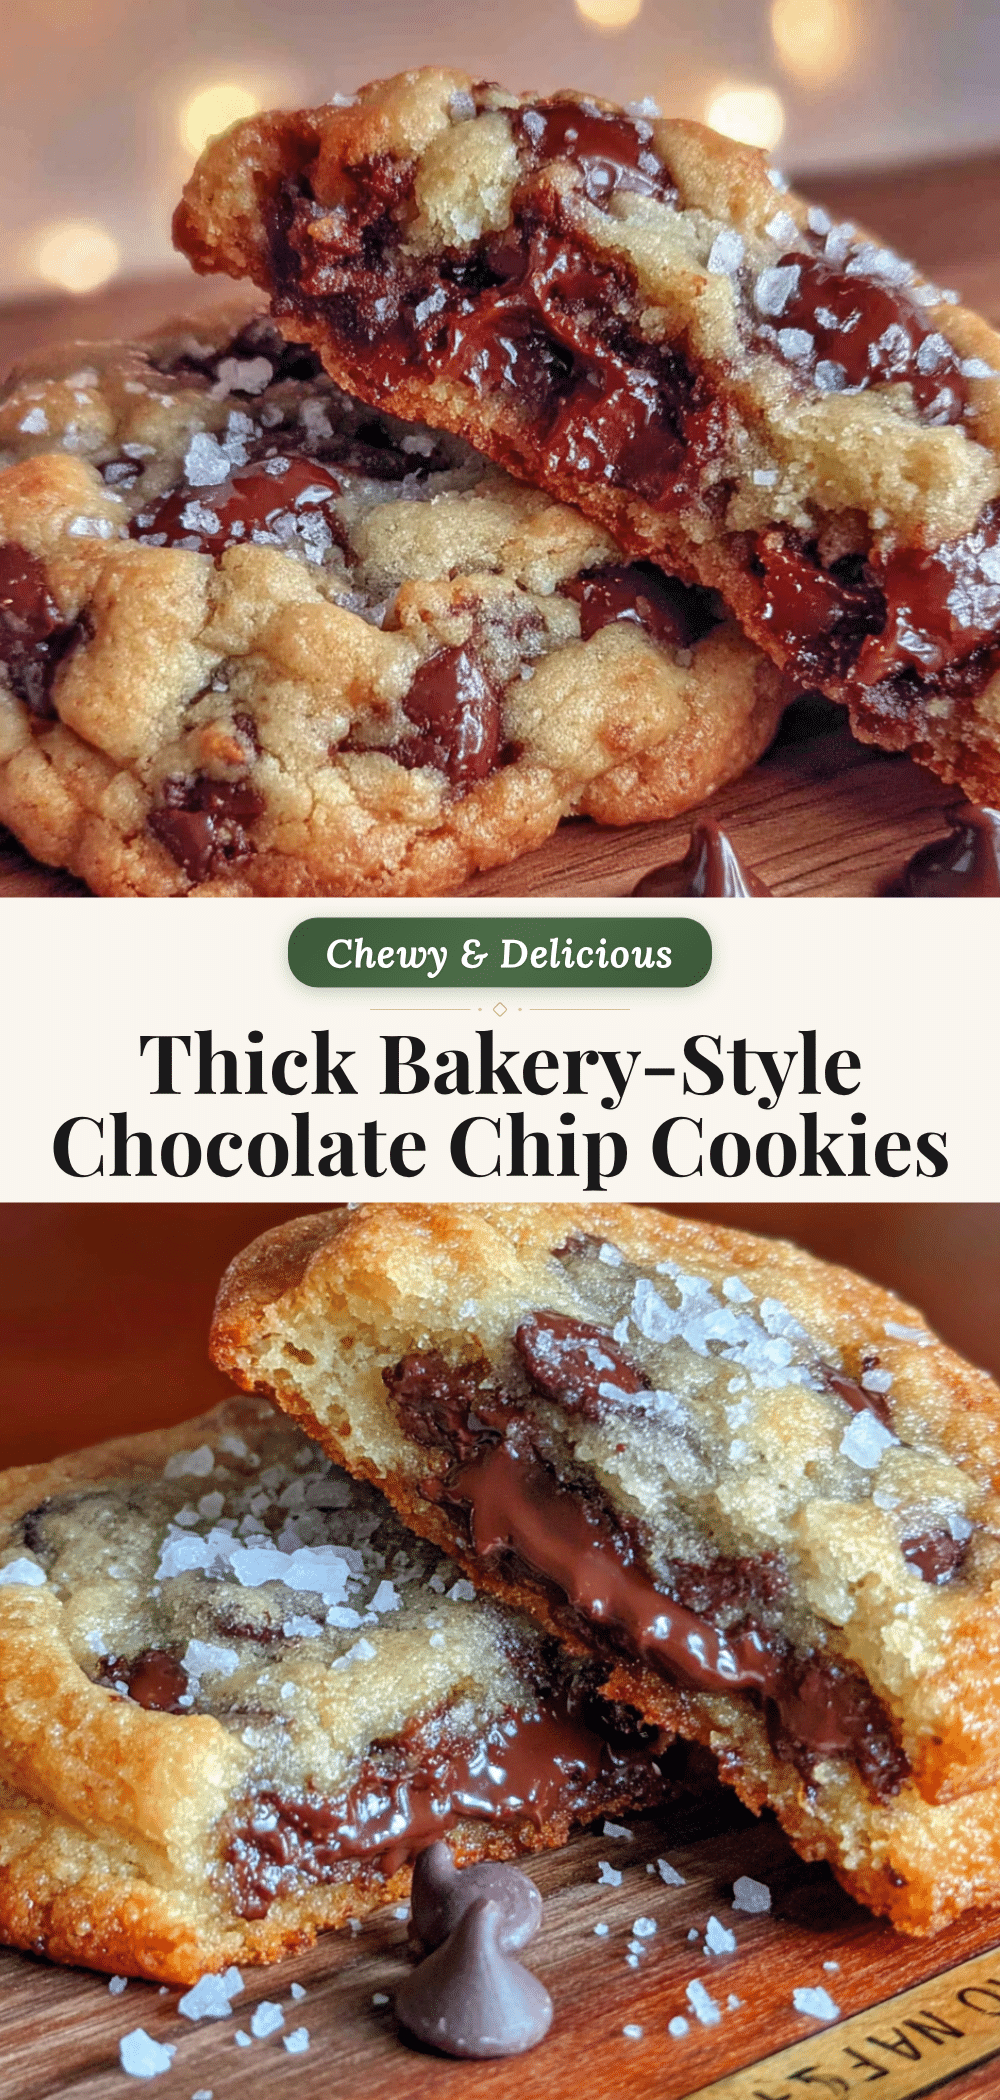
Easy Bakery-Style Thick & Chewy Chocolate Chip Cookies

These thick and chewy chocolate chip cookies have a slightly crisp edge, a soft, dense center, and pockets of melted chocolate in every bite. The secret is melted butter and an extended chill time for that perfect bakery texture.
- Prep Time: 15 minutes
- Cook Time: 12 minutes
- Total Time: 2 hours 27 minutes (includes minimum 2 hours chilling)
- Yield: 20 cookies 1x
- Category: Dessert
- Cuisine: American
Ingredients
- 1 cup (2 sticks) unsalted butter
- 1 cup dark brown sugar, packed
- ½ cup granulated sugar
- 2 large eggs plus 1 egg yolk
- 2 teaspoons vanilla extract
- 2 ¼ cups all-purpose flour
- 1 teaspoon baking soda
- 1 teaspoon salt
- 2 cups semi-sweet chocolate chips
Instructions
- Melt the butter in a small saucepan or microwave. Let it cool for a few minutes until warm, not hot.
- In a large mixing bowl, whisk together the melted butter, dark brown sugar, and granulated sugar for about 2 minutes until smooth and glossy.
- Whisk in the eggs and egg yolk one at a time, then add the vanilla extract. The mixture should be pale, smooth, and slightly thickened.
- In a separate bowl, whisk together the flour, baking soda, and salt.
- Gradually add the dry ingredients to the wet ingredients, folding with a rubber spatula until just combined. Do not overmix.
- Gently fold in the chocolate chips until evenly distributed.
- Cover the bowl with plastic wrap and refrigerate for at least 2 hours (ideally 24-48 hours).
- When ready to bake, preheat the oven to 350°F (175°C) and line baking sheets with parchment paper or silicone mats.
- Use a 3-tablespoon cookie scoop to portion the dough and place the balls about 3 inches apart on the prepared sheets. Optionally press extra chocolate chips into the tops.
- Bake one sheet at a time for 10-12 minutes, until the edges are golden brown but the centers are still pale and soft.
- Let the cookies cool on the baking sheet for 10 minutes, then transfer to a wire rack to cool completely.
Notes
Chilling the dough is essential for thick cookies. Do not skip it. For best flavor, chill for 24-48 hours. Underbake slightly for a chewy texture. Use room temperature eggs to prevent the butter from seizing.
Nutrition
- Serving Size: 1 cookie
- Calories: 300
- Sugar: 24
- Sodium: 180
- Fat: 16
- Saturated Fat: 10
- Carbohydrates: 36
- Fiber: 2
- Protein: 4
Keywords: chocolate chip cookies, thick and chewy cookies, bakery-style cookies, easy cookie recipe, homemade cookies