I was sitting on a rickety stool in the back of a hardware store on a Tuesday afternoon, waiting for my husband to decide which drill bit he absolutely needed, when the woman behind the counter—this tiny lady with flour dusted on her apron—started talking about bread. Not the kind you build with, obviously. She was ringing up someone’s order for paint thinner and drop cloths, and out of nowhere she says, “You know, the secret to a good cranberry orange loaf is zesting the orange right before you mix it in. Not ten minutes before. Right before.” I blinked at her. I wasn’t expecting baking advice from a hardware store clerk, but there I was, surrounded by power tools and PVC pipes, listening to her describe exactly how to make the most tender, bakery-style cranberry orange bread I’d ever tasted. She even scribbled the recipe on the back of a receipt. I still have that receipt tucked into my favorite cookbook.
Honestly, I was skeptical at first. I’ve made a lot of quick breads in my day—some that turned out beautifully, others that came out dense enough to use as a doorstop. But this one was different. The first time I baked it, the smell of orange and sugar filled the whole house, and my kids came wandering into the kitchen like I’d summoned them with a spell. The crust was golden and slightly crackly, the inside was soft and moist, and those tart little cranberries? They burst in all the right places. I mean, I actually did a little happy dance right there by the oven. Maybe you’ve been there—when a recipe just works, and you can’t wait to make it again.
What makes this easy bakery-style cranberry orange bread so special is how simple it is. You don’t need a stand mixer or any fancy techniques. Just a bowl, a whisk, and maybe a little patience while it bakes. It’s the kind of bread that feels fancy enough to give as a gift but easy enough to whip up on a random Wednesday night when you’re craving something sweet. And let me tell you, the texture is everything—light, tender, with a lovely crumb that holds together without being heavy. That hardware store lady knew what she was talking about. This recipe stayed with me because it works every single time, and it makes people happy. That’s the kind of recipe worth keeping.
Why You’ll Love This Recipe
Let’s be real—there are a lot of cranberry orange bread recipes out there. But this one is different. I’ve tested it more times than I care to admit, tweaking the ratios, playing with the temperature, and even accidentally forgetting the sugar once (don’t ask). What I landed on is a recipe that delivers consistent, bakery-quality results with minimal effort. Here’s why you’ll love it:
- Quick & Easy: This bread comes together in about 15 minutes of active prep time. No stand mixer needed, no complicated steps. Just mix, pour, and bake. Perfect for busy weeknights or last-minute cravings when you need something comforting fast.
- Simple Ingredients: You probably already have most of these in your pantry—flour, sugar, eggs, butter, baking powder. The only special items are fresh or frozen cranberries and a juicy orange, both of which are easy to find year-round.
- Perfect for Sharing: Whether it’s a holiday brunch, a neighborly gift, or a cozy weekend breakfast, this bread fits right in. It’s not too sweet, not too tart, and everyone from kids to grandparents seems to love it.
- Crowd-Pleaser: I’ve brought this to potlucks, book club meetings, and even a soccer game snack table. It disappears fast. People always ask for the recipe, and I love telling them the story about the hardware store.
- Unbelievably Delicious: The texture is what gets me every time. It’s soft and tender with a delicate crumb, thanks to the buttermilk and the way the orange zest is handled. The cranberries add little bursts of tartness that balance the sweet, citrusy batter perfectly.
What really sets this recipe apart is the technique. Most quick breads call for mixing the wet and dry ingredients separately, then combining them. But here, we cream the butter and sugar together first—just for a minute—to create a lighter, fluffier texture. It’s a small step that makes a big difference. Plus, the orange zest gets rubbed into the sugar before anything else, which releases those essential oils and makes the flavor pop. It’s not just another version of cranberry orange bread. It’s the best version I’ve ever made, and I think you’ll agree.
What Ingredients You Will Need
This recipe uses simple, wholesome ingredients to deliver bold flavor and satisfying texture without the fuss. Most of these are pantry staples, and the fresh ingredients are easy to find at any grocery store. Let’s break down what you’ll need and why each one matters.
For the Bread
- All-purpose flour – 2 cups (250g). This gives the bread structure without making it too dense. I use Gold Medal or King Arthur for consistent results. Spoon and level your flour—don’t scoop directly from the bag or you’ll end up with a dry loaf.
- Granulated sugar – 1 cup (200g). Adds sweetness and helps create a tender crumb. The orange zest gets rubbed into this sugar, which is a game-changer for flavor.
- Baking powder – 1½ teaspoons. The leavening agent that helps the bread rise. Make sure it’s fresh—test it by dropping a little in hot water; if it fizzes, it’s good.
- Baking soda – ½ teaspoon. Works with the buttermilk to create lift and browning. Don’t skip it.
- Salt – ½ teaspoon. Balances the sweetness and enhances all the other flavors. I use fine sea salt.
- Unsalted butter – ½ cup (113g), softened to room temperature. Butter adds richness and flavor. If you only have salted butter, reduce the added salt to ¼ teaspoon.
- Large eggs – 2, at room temperature. Eggs provide structure and moisture. Let them sit out for 30 minutes before starting, or place them in a bowl of warm water for 5 minutes.
- Buttermilk – ¾ cup (180ml). This is the secret to a tender, moist crumb. The acidity reacts with the baking soda to create a soft texture. If you don’t have buttermilk, you can make a quick substitute: add 1 tablespoon of lemon juice or white vinegar to ¾ cup of regular milk, stir, and let it sit for 5 minutes.
- Fresh orange juice – ¼ cup (60ml), from about 1 medium orange. Use freshly squeezed—the bottled stuff has a different flavor and can be too acidic.
- Orange zest – 2 tablespoons, from about 2 medium oranges. This is where the magic happens. Zest the oranges right before you use them for the brightest flavor. Avoid the white pith—it’s bitter.
- Vanilla extract – 1 teaspoon. Adds warmth and depth. Pure vanilla extract is best, but imitation works fine in a pinch.
- Fresh or frozen cranberries – 1½ cups (170g). If using frozen, don’t thaw them first. Toss them in a tablespoon of flour before folding into the batter to prevent them from sinking to the bottom.
For the Glaze (Optional but Recommended)
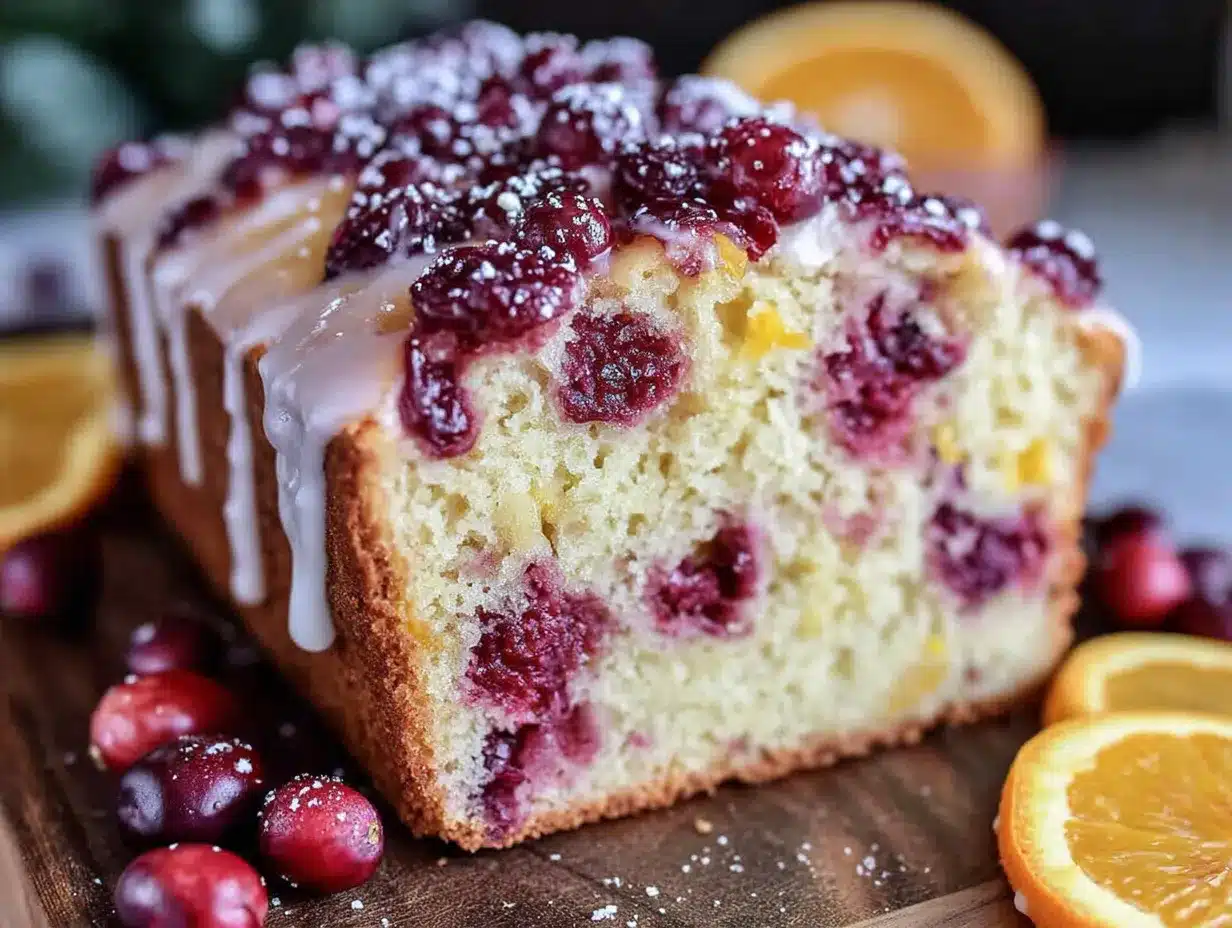
- Powdered sugar – 1 cup (120g), sifted to remove lumps.
- Fresh orange juice – 2 to 3 tablespoons, enough to make a pourable glaze.
- Orange zest – 1 teaspoon, for garnish.
I personally prefer a simple glaze that lets the bread shine. But if you want to skip it, the bread is still delicious on its own—especially warm with a pat of butter.
Equipment Needed
You don’t need a professional bakery setup for this recipe. Most of these tools are probably already in your kitchen. Here’s what you’ll need:
- 9×5-inch loaf pan – This is the standard size for quick breads. If you use a different size, adjust the baking time. A metal pan works best for even browning.
- Parchment paper – Lining the pan makes it easy to lift the bread out. I learned this the hard way after a few stuck loaves. Just cut a strip long enough to overhang on two sides.
- Mixing bowls – One large bowl for the dry ingredients, one medium bowl for the wet ingredients, and a small bowl for the glaze.
- Whisk – For mixing the dry ingredients. A fork works in a pinch, but a whisk is faster.
- Electric hand mixer or stand mixer – For creaming the butter and sugar. You can do this by hand with a wooden spoon, but it takes more elbow grease. I’ve done both—the mixer is easier, but hand-mixing builds character.
- Microplane or fine grater – For zesting the oranges. A box grater works too, but a microplane gives you finer zest that blends more evenly.
- Citrus juicer – Not necessary, but it makes juicing cleaner and faster. I usually just squeeze by hand and catch the seeds.
- Rubber spatula – For folding in the cranberries and scraping the bowl clean.
- Cooling rack – Lets the bread cool evenly so the bottom doesn’t get soggy. If you don’t have one, you can use the oven rack turned upside down—just be careful.
- Toothpick or cake tester – To check for doneness. A clean toothpick means the bread is ready.
If you’re on a budget, don’t worry about buying specialty tools. A regular grater works for zest, and you can use a fork instead of a whisk. The most important thing is having a good loaf pan. I’ve used cheap ones before, and they sometimes warp or conduct heat unevenly. A mid-range metal pan is worth the investment.
Preparation Method
Alright, let’s get baking. This method is straightforward, but I’ve included plenty of little tips I’ve picked up along the way. Follow these steps, and you’ll have a beautiful loaf every time.
Step 1: Preheat and Prep
Preheat your oven to 350°F (175°C). While it’s heating, grease a 9×5-inch loaf pan with butter or non-stick spray. Then line it with a strip of parchment paper, leaving an overhang on the two long sides. This will help you lift the bread out later. I once forgot the parchment and ended up with half the bread stuck to the pan. Learn from my mistake!
Step 2: Rub the Zest into the Sugar
In a large mixing bowl, combine 1 cup of granulated sugar with 2 tablespoons of orange zest. Use your fingertips to rub the zest into the sugar until it becomes fragrant and slightly damp. This releases the oils from the zest and infuses the sugar with that bright citrus flavor. It takes about a minute, and it smells amazing. Don’t skip this step—it’s the secret to a truly orangey bread.
Step 3: Cream the Butter and Sugar
Add ½ cup of softened unsalted butter to the sugar-zest mixture. Beat with an electric mixer on medium speed for about 2 minutes, until light and fluffy. Scrape down the sides of the bowl with a spatula halfway through. If you’re mixing by hand, give it a good 3-4 minutes. You want the mixture to look pale and airy.
Step 4: Add the Eggs and Vanilla
Add the 2 room-temperature eggs, one at a time, beating well after each addition. Then mix in 1 teaspoon of vanilla extract. The batter might look slightly curdled at this point—that’s totally normal. Don’t panic. It will come together once we add the dry ingredients.
Step 5: Combine the Dry Ingredients
In a separate bowl, whisk together 2 cups of all-purpose flour, 1½ teaspoons of baking powder, ½ teaspoon of baking soda, and ½ teaspoon of salt. Make sure there are no lumps. I like to give it a good 10-15 whisks to ensure everything is evenly distributed.
Step 6: Alternate the Dry and Wet Ingredients
With the mixer on low speed (or using a spatula if mixing by hand), add about one-third of the flour mixture to the butter mixture, mixing until just combined. Then add half of the buttermilk (about ⅓ cup), mixing until incorporated. Repeat with another third of the flour, the remaining buttermilk, and finally the last of the flour. Mix until just combined—overmixing will make the bread tough. A few streaks of flour are okay at this point.
Step 7: Add the Orange Juice
Pour in ¼ cup of fresh orange juice and fold it in gently with a spatula. The batter will look smooth and slightly thick. It should drop off a spoon in a soft ribbon. If it seems too stiff, add a tablespoon more buttermilk.
Step 8: Fold in the Cranberries
Toss the 1½ cups of cranberries with 1 tablespoon of flour (this helps prevent sinking). Then gently fold them into the batter using a spatula. Be careful not to overmix—just fold until the cranberries are evenly distributed. If you’re using frozen cranberries, fold them in straight from the freezer. They’ll hold their shape better during baking.
Step 9: Bake
Pour the batter into the prepared loaf pan and spread it evenly. Bake at 350°F (175°C) for 55-65 minutes, or until a toothpick inserted into the center comes out clean or with just a few moist crumbs. The top should be golden brown and slightly cracked—that’s the bakery-style look you’re after. If the top is browning too quickly (around the 45-minute mark), tent the pan loosely with aluminum foil.
Step 10: Cool
Let the bread cool in the pan on a wire rack for about 15 minutes. Then use the parchment overhang to lift it out and transfer it to the rack to cool completely. Don’t try to glaze it while it’s still warm, or the glaze will melt right off. Patience is hard, I know, but it’s worth it.
Cooking Tips & Techniques
I’ve made this bread more times than I can count, and I’ve learned a few things the hard way. Here are my best tips for getting it right every time.
Room temperature ingredients matter. I know it’s tempting to use cold eggs straight from the fridge, but they won’t incorporate as smoothly into the butter-sugar mixture, and the batter can end up lumpy. If you’re short on time, place the eggs in a bowl of warm water for 5 minutes. Same goes for the buttermilk—let it sit out for 15 minutes before using.
Don’t overmix the batter. This is probably the most common mistake with quick breads. Once you add the flour, mix only until you don’t see any more dry streaks. Overmixing develops gluten, which makes the bread tough and dense. A few lumps are fine—they’ll bake out.
Check your baking powder and soda. If your bread doesn’t rise properly, it might be because your leavening agents are old. To test baking powder, drop a teaspoon into hot water—it should fizz immediately. For baking soda, drop it into vinegar. If there’s no reaction, it’s time to buy new ones.
Use the toothpick test. Ovens vary, so don’t rely solely on the timer. Start checking at 55 minutes. Insert a toothpick into the center—if it comes out clean or with a few moist crumbs, it’s done. If it’s wet with batter, give it another 5 minutes. I once pulled a loaf out at 50 minutes because the top looked perfect, and the inside was still raw. Learn from my impatience.
Let it cool completely before slicing. I know the smell is intoxicating, but slicing warm bread will result in a gummy, crumbly mess. The bread continues to set as it cools. If you absolutely can’t wait, at least let it cool for an hour. Trust me—it’s worth the wait.
Glaze at the right time. If you’re using the glaze, make sure the bread is completely cool. A warm loaf will absorb the glaze and become soggy. I usually make the glaze while the bread is cooling, so it’s ready to go.
Variations & Adaptations
One of the best things about this cranberry orange bread is how flexible it is. Here are some variations I’ve tried and loved.
Gluten-Free Option
Substitute the all-purpose flour with a 1:1 gluten-free baking flour blend that contains xanthan gum. I’ve used Bob’s Red Mill with great results. The texture will be slightly more crumbly, but the flavor is still fantastic. Add an extra tablespoon of buttermilk if the batter seems too thick.
Dairy-Free Adaptation
Replace the butter with a plant-based butter stick (not the spreadable kind in a tub) and use unsweetened almond milk or oat milk mixed with 1 tablespoon of lemon juice as a buttermilk substitute. The bread will be a little less tender, but still delicious. I’ve made this version for friends with dairy allergies, and they always ask for seconds.
Nutty Crunch
Fold in ½ cup of chopped pecans or walnuts along with the cranberries. Toast the nuts first for extra flavor—just spread them on a baking sheet and bake at 350°F for 5-7 minutes until fragrant. The crunch adds a lovely contrast to the soft bread.
Blueberry Orange Bread
Swap the cranberries for fresh or frozen blueberries. The flavor profile changes to a sweeter, more summery vibe. I love making this version in July when blueberries are at their peak. Reduce the sugar by 2 tablespoons since blueberries are sweeter than cranberries.
Spiced Cranberry Orange Bread
Add 1 teaspoon of ground cinnamon and ½ teaspoon of ground ginger to the dry ingredients. The warm spices pair beautifully with the citrus and tart berries. This is my go-to version for fall baking—it makes the house smell incredible.
Mini Loaves or Muffins
Divide the batter among 4 mini loaf pans (bake for 30-35 minutes) or a 12-cup muffin tin (bake for 18-22 minutes). Adjust the time based on size, and always use the toothpick test. Mini loaves make great gifts!
Serving & Storage Suggestions
This bread is versatile enough for breakfast, brunch, dessert, or a midday snack. Here’s how to serve and store it for the best experience.
Serving Temperature: I prefer this bread at room temperature, but it’s also lovely warm. To warm individual slices, pop them in the toaster for about a minute or microwave for 10-15 seconds. The glaze will get a little melty, which is honestly delightful.
Presentation Ideas: For a pretty presentation, slice the bread and arrange it on a wooden board or a cake stand. Drizzle extra glaze on top and sprinkle with fresh orange zest and a few dried cranberries. It looks bakery-fancy with almost no effort.
Perfect Pairings: Serve with a hot cup of coffee, chai tea, or a glass of cold milk. For a more indulgent treat, spread a slice with softened butter or cream cheese. The tanginess of the cream cheese plays beautifully with the sweet orange and tart cranberries.
Storage Instructions: Store the bread in an airtight container at room temperature for up to 3 days. If you’ve glazed it, let the glaze set completely before covering, or place a piece of parchment paper between the bread and the lid to prevent sticking. For longer storage, wrap the unglazed loaf tightly in plastic wrap, then in aluminum foil, and freeze for up to 3 months. Thaw overnight in the refrigerator, then bring to room temperature before glazing and serving.
Reheating: To reheat a frozen slice, microwave for 20-30 seconds or toast it lightly. The texture stays remarkably good. I often bake two loaves at once and freeze one for later—it’s a lifesaver when unexpected guests show up.
Flavor Development: Honestly, this bread tastes even better the next day. The flavors meld together overnight, and the texture becomes even more moist. If you can resist eating it right away, wrap it tightly and let it sit on the counter overnight. You’ll thank me tomorrow.
Nutritional Information & Benefits
While this bread is definitely a treat, it does have some redeeming qualities. Here’s a rough estimate of the nutritional values per slice (based on 12 slices, without glaze):
| Nutrient | Amount per Slice |
|---|---|
| Calories | 285 |
| Total Fat | 10g |
| Saturated Fat | 6g |
| Cholesterol | 55mg |
| Sodium | 220mg |
| Total Carbohydrates | 44g |
| Dietary Fiber | 2g |
| Sugars | 24g |
| Protein | 4g |
Health Benefits: Cranberries are packed with antioxidants and vitamin C, which support immune health. Oranges are also a great source of vitamin C and fiber. The buttermilk adds calcium and probiotics (if using cultured buttermilk). While this isn’t a health food, it’s a more wholesome option than many store-bought pastries.
Dietary Considerations: This recipe contains gluten, dairy, and eggs. For a gluten-free version, see the variations section. For a dairy-free version, use plant-based butter and a buttermilk substitute. The bread is nut-free as written, but check your ingredients if you have allergies.
Personal Perspective: I believe in balance. This bread is a celebration—a way to enjoy seasonal flavors and share something homemade with people you love. It’s not about deprivation. One slice with your morning coffee won’t derail your goals, but it might just make your day a little brighter.
Conclusion
This easy bakery-style cranberry orange bread has become a staple in my kitchen, and I have a feeling it will become one in yours too. It’s everything I want in a quick bread—tender, flavorful, beautiful, and surprisingly simple to make. The story behind it makes me smile every time I bake it, and I love sharing that little piece of hardware store magic with anyone who asks for the recipe.
I hope you’ll give this recipe a try and make it your own. Maybe you’ll add nuts, swap the cranberries for blueberries, or double the orange zest like I sometimes do. That’s the beauty of baking—you can tweak and adjust until it feels like yours. Don’t be afraid to experiment. And if you forget the parchment paper or overmix the batter a little, it’s okay. The bread will still taste amazing, and you’ll know better next time.
I’d love to hear how it turns out for you. Did you try a variation? Did your family love it? Drop a comment below and let me know. And if you’re feeling generous, share this recipe with a friend who could use a little homemade happiness. Happy baking, friends!
Frequently Asked Questions
Can I use dried cranberries instead of fresh or frozen?
Yes, you can, but the texture will be different. Dried cranberries are chewier and sweeter than fresh or frozen ones. If using dried, reduce the sugar in the recipe by 2 tablespoons and rehydrate the cranberries in hot water for 10 minutes, then drain them before folding into the batter. This helps plump them up so they don’t end up too dry in the finished bread.
Why did my bread sink in the middle?
A sunken middle usually means the bread was underbaked or the oven temperature was too low. Make sure your oven is properly preheated to 350°F (175°C) and use an oven thermometer to double-check. Also, avoid opening the oven door during the first 40 minutes of baking—the sudden temperature drop can cause the bread to collapse. Finally, make sure your baking powder and baking soda are fresh.
Can I make this bread without a mixer?
Absolutely! You can mix everything by hand with a wooden spoon or a sturdy whisk. The key is to cream the butter and sugar thoroughly—give it a good 3-4 minutes of vigorous stirring until the mixture is light and fluffy. It’s a small arm workout, but totally doable. The rest of the steps are easy to do by hand.
How do I prevent the cranberries from sinking to the bottom?
Tossing the cranberries in a tablespoon of flour before folding them into the batter is the best trick. The flour creates a little coating that helps the berries stay suspended in the batter. Also, make sure your batter is thick enough—if it’s too thin, the cranberries will sink. If you’re using frozen cranberries, don’t thaw them; add them straight from the freezer.
Can I double this recipe?
Yes, this recipe doubles beautifully. Simply double all the ingredients and bake in two separate loaf pans. Don’t try to bake it in one large pan—it won’t cook through evenly. You can also bake one loaf and turn the other into muffins or mini loaves. If baking two loaves at once, rotate the pans halfway through baking for even browning.
Pin This Recipe!
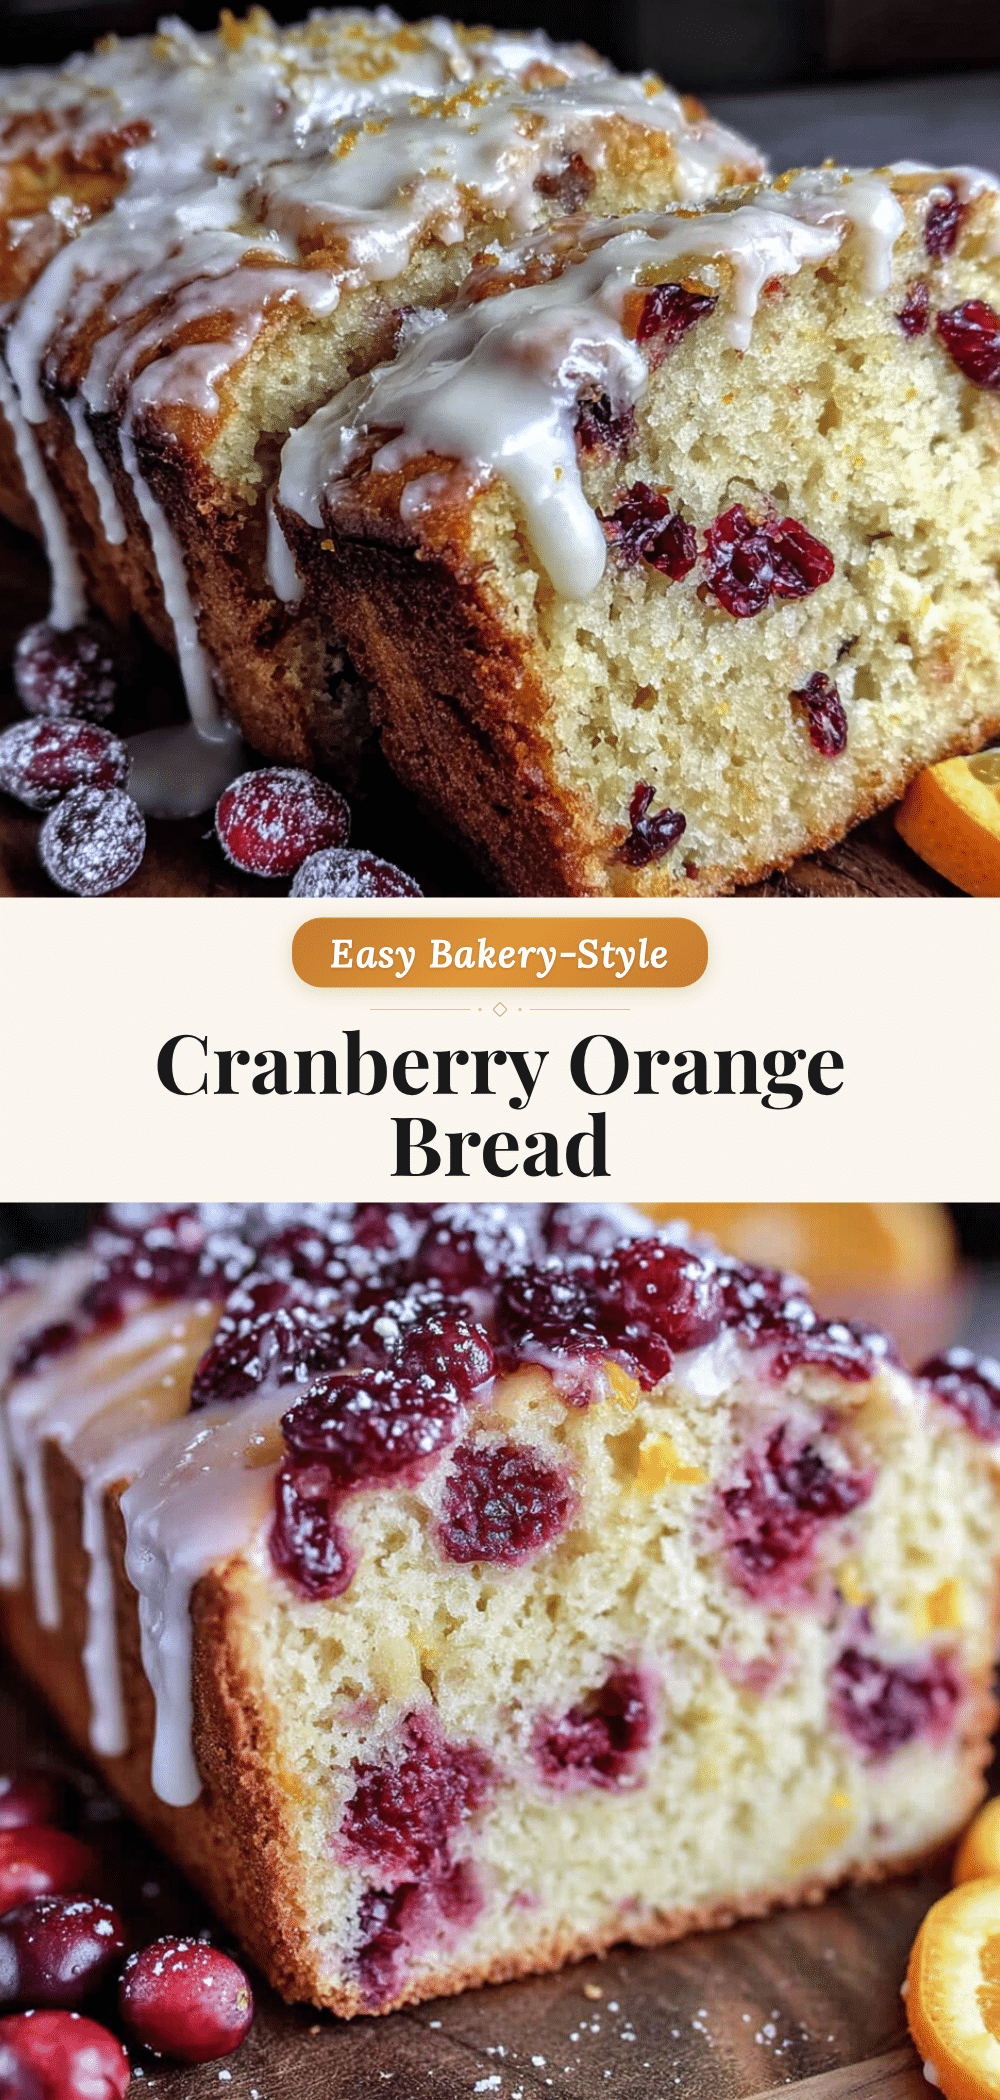
Easy Bakery-Style Cranberry Orange Bread Recipe
This tender, moist cranberry orange bread is bursting with tart berries and bright citrus flavor. It’s easy to make with simple ingredients and delivers bakery-quality results every time.
- Prep Time: 15 minutes
- Cook Time: 55-65 minutes
- Total Time: 1 hour 10 minutes
- Yield: 12 servings 1x
- Category: Bread
- Cuisine: American
Ingredients
- 2 cups (250g) all-purpose flour
- 1 cup (200g) granulated sugar
- 1½ teaspoons baking powder
- ½ teaspoon baking soda
- ½ teaspoon salt
- ½ cup (113g) unsalted butter, softened
- 2 large eggs, room temperature
- ¾ cup (180ml) buttermilk
- ¼ cup (60ml) fresh orange juice
- 2 tablespoons orange zest
- 1 teaspoon vanilla extract
- 1½ cups (170g) fresh or frozen cranberries
- 1 tablespoon all-purpose flour (for tossing cranberries)
- For the glaze (optional):
- 1 cup (120g) powdered sugar, sifted
- 2–3 tablespoons fresh orange juice
- 1 teaspoon orange zest (for garnish)
Instructions
- Preheat oven to 350°F (175°C). Grease a 9×5-inch loaf pan and line with parchment paper, leaving overhang on two sides.
- In a large bowl, combine sugar and orange zest. Rub together with fingertips until fragrant and slightly damp, about 1 minute.
- Add softened butter to sugar-zest mixture. Beat with an electric mixer on medium speed until light and fluffy, about 2 minutes.
- Add eggs one at a time, beating well after each. Mix in vanilla extract.
- In a separate bowl, whisk together flour, baking powder, baking soda, and salt.
- With mixer on low, add one-third of flour mixture to butter mixture, mixing until just combined. Add half of buttermilk, mixing until incorporated. Repeat with another third of flour, remaining buttermilk, and final third of flour. Mix until just combined; do not overmix.
- Fold in orange juice gently with a spatula until smooth.
- Toss cranberries with 1 tablespoon flour, then gently fold into batter.
- Pour batter into prepared pan and spread evenly. Bake for 55-65 minutes, until a toothpick inserted in center comes out clean or with a few moist crumbs. If browning too quickly, tent with foil after 45 minutes.
- Cool in pan on wire rack for 15 minutes, then lift out using parchment and cool completely on rack.
- For glaze: whisk together powdered sugar and orange juice until smooth. Drizzle over cooled bread and sprinkle with orange zest.
Notes
For best flavor, zest oranges right before using. If using frozen cranberries, do not thaw. Let bread cool completely before glazing. Bread tastes even better the next day.
Nutrition
- Serving Size: 1 slice
- Calories: 285
- Sugar: 24
- Sodium: 220
- Fat: 10
- Saturated Fat: 6
- Carbohydrates: 44
- Fiber: 2
- Protein: 4
Keywords: cranberry orange bread, quick bread, bakery-style, easy bread recipe, holiday bread, cranberry bread, orange bread


