I was digging through my coat pocket for parking change last Tuesday when the smell hit me—that unmistakable, buttery-savory scent of onion and garlic cooking down in hot oil. It was coming from a little takeout spot near the grocery store, but I wasn’t in that parking lot anymore. Suddenly I was ten years old, standing in my Aunt Lena’s tiny kitchen on a rainy Saturday afternoon, watching her pull a steaming baking dish out of the oven. She’d always make this chicken and rice thing on days when the power flickered or the weather turned gloomy, and the whole apartment would fill with that same smell—comfort in its purest form. I honestly haven’t thought about that kitchen in years.
Aunt Lena passed when I was fifteen, and I never got her recipe. For the longest time, I just assumed I’d never taste anything like it again. But here’s the thing about cooking—you can chase a memory if you’re stubborn enough. I spent about six months testing chicken and rice bakes, trying to get that exact feeling back. Some were too dry, some were too soupy, and some just tasted like… nothing special. You know that disappointment when you take a bite and it’s just fine? I was tired of fine.
Then one night, I was rushing to throw dinner together before guests arrived—I’d forgotten to defrost anything, classic move—and I grabbed a bag of chicken thighs, a box of rice, and whatever was in the pantry. I figured I’d just make it work. And honestly? That chaotic, under-pressure version was the closest I’d gotten to Aunt Lena’s. I scribbled down what I did before I forgot, and after a few tweaks, this $10 chicken and rice bake was born. It’s not her exact recipe—I’ll never know that—but it has the same soul. The kind of dish that makes people close their eyes after the first bite, and that’s close enough for me.
Why You’ll Love This Recipe
Let me be straight with you—I’ve made this chicken and rice bake for dinner parties, potlucks, and casual weeknight hangs, and it has never, not once, let me down. Here’s why it works so well for hosts like us:
- Incredibly Budget-Friendly: The entire dish comes together for about $10, and it feeds six to eight people easily. That’s around $1.25 per serving for a meal that tastes like you spent all day in the kitchen.
- Simple, Pantry-Friendly Ingredients: You likely already have most of what you need—rice, chicken, broth, onions, garlic. No fancy trips to specialty stores required.
- Perfect for Entertaining: This dish is designed for hosting. It scales beautifully for a crowd, you can prep it ahead of time, and it holds well in the oven while you greet guests and pour drinks.
- Always a Crowd-Pleaser: I’ve served this to picky eaters, foodie friends, and relatives who “don’t usually like casseroles.” Empty plates every single time.
- Unbelievably Comforting: The rice stays tender and creamy, the chicken gets fall-apart tender, and the whole thing has this rich, savory flavor that just hits different.
What makes this version different from all the other chicken and rice bakes out there? It’s the technique. Instead of just dumping everything in a dish and hoping for the best, I sauté the aromatics first, toast the rice briefly, and use the right ratio of liquid to ensure perfectly cooked rice every time. No mushy texture, no dry chicken, no bland flavor. It’s the kind of recipe that makes you look like a hero with almost zero effort.
This isn’t just a weeknight dinner—it’s the meal you bring to a friend’s house when they need comfort, the dish you serve when you want to impress without stress, and the recipe that’ll have people asking for the details before they’ve even finished eating.
What Ingredients You Will Need
This recipe uses simple, honest ingredients that work together to create something genuinely special. Most of these are pantry staples, which makes this dish perfect for last-minute hosting or when you need to feed a crowd on a budget.
For the Chicken and Rice Bake:
- 2 pounds (900g) boneless, skinless chicken thighs – I prefer thighs here because they stay juicy and tender during the longer bake. Chicken breasts work too, but watch the cooking time so they don’t dry out.
- 1 ½ cups (300g) long-grain white rice – Basmati or jasmine work beautifully. Avoid instant rice or short-grain varieties, as they’ll turn mushy during the baking time.
- 1 medium yellow onion, finely diced – About 1 cup. The onion melts into the rice as it bakes, adding sweetness and depth.
- 4 cloves garlic, minced – Fresh garlic is non-negotiable here. Pre-minced stuff won’t give you the same punch.
- 3 cups (720ml) low-sodium chicken broth – I use Swanson’s or Kitchen Basics. Low-sodium is important so you can control the salt level yourself.
- 1 can (10.5 oz / 298g) condensed cream of mushroom soup – This is my secret weapon for creamy texture without extra work. Campbell’s is my go-to, but any brand works.
- 2 tablespoons (30ml) olive oil – For sautéing. Avocado oil works too.
- 1 teaspoon paprika – Adds a subtle smokiness and beautiful color to the dish.
- 1 teaspoon dried thyme – Earthy and aromatic, it pairs perfectly with chicken and rice.
- ½ teaspoon garlic powder – Because you can never have too much garlic flavor.
- ½ teaspoon onion powder – Rounds out the savory profile.
- Salt and black pepper, to taste – I start with 1 teaspoon salt and ½ teaspoon pepper, then adjust at the end.
- 2 tablespoons (28g) unsalted butter, cut into small pieces – Dotting the top with butter before baking adds richness and helps the rice stay moist.
- Fresh parsley, chopped (for garnish) – Optional but nice for color when serving guests.
Optional Add-Ins for Hosting:
- 1 cup frozen peas or mixed vegetables – Stir these in during the last 10 minutes of baking for color and nutrition.
- ½ cup shredded cheddar cheese – Sprinkle on top during the last 5 minutes for a golden, bubbly crust.
- ¼ cup grated Parmesan – Adds a salty, nutty kick that elevates the whole dish.
Ingredient Selection Tip: When buying chicken thighs, look for ones that are similar in size so they cook evenly. If you’re using frozen thighs, thaw them completely in the refrigerator overnight before starting. And for the rice—trust me on the long-grain. I learned the hard way that short-grain rice turns into a gluey mess in this dish.
Equipment Needed
You don’t need a fancy kitchen to pull this off. Here’s what you’ll need:
- 9×13-inch (3-quart) baking dish – This is the ideal size for this recipe. A slightly larger dish works too, but the rice layer will be thinner and may cook faster.
- Large skillet or sauté pan – For browning the chicken and sautéing the aromatics. A 12-inch skillet works perfectly.
- Medium mixing bowl – For whisking together the broth and soup mixture.
- Sharp knife and cutting board – For dicing the onion and mincing the garlic.
- Measuring cups and spoons – Accuracy matters for the rice-to-liquid ratio.
- Aluminum foil – For covering the dish during the first part of baking.
- Tongs – Helpful for flipping the chicken thighs without splattering hot oil.
Budget-Friendly Alternative: If you don’t have a 9×13 dish, you can use a large cast-iron skillet or even two smaller baking dishes. Just adjust the baking time slightly and check for doneness earlier. I’ve made this in a disposable aluminum pan for potlucks before—works great and no cleanup!
Preparation Method
Alright, let’s get cooking. This comes together in about an hour, and most of that is hands-off oven time. Perfect for when you want to actually enjoy your guests instead of sweating over the stove.
- Preheat your oven to 375°F (190°C). Position the rack in the middle of the oven. While it’s heating, pat the chicken thighs dry with paper towels and season both sides generously with salt, pepper, and a sprinkle of paprika.
- Heat 1 tablespoon of olive oil in a large skillet over medium-high heat. Once it’s shimmering (about 2 minutes), add the chicken thighs in a single layer. Don’t crowd the pan—work in batches if needed. Sear for 4-5 minutes per side until golden brown. The chicken won’t be cooked through yet, and that’s fine. Transfer the seared thighs to a plate and set aside.
- Reduce the heat to medium and add the remaining 1 tablespoon of olive oil. Toss in the diced onion and cook for 3-4 minutes, stirring occasionally, until it turns translucent and starts to soften. Add the minced garlic and cook for another 30 seconds until fragrant. Your kitchen should smell amazing right about now.
- Add the rice to the skillet with the onions and garlic. Stir constantly for 2 minutes until the rice grains become slightly translucent at the edges and you can hear them crackling. This toasting step is crucial—it helps the rice hold its texture during baking and adds a subtle nutty flavor.
- In a medium bowl, whisk together the chicken broth, cream of mushroom soup, paprika, thyme, garlic powder, onion powder, and ½ teaspoon of black pepper. Make sure the soup is fully incorporated—no lumps allowed. Taste the mixture and add salt if needed, but remember the soup already has some sodium.
- Spread the toasted rice mixture evenly across the bottom of your 9×13 baking dish. Pour the broth-soup mixture over the rice and give it a gentle stir to distribute everything evenly.
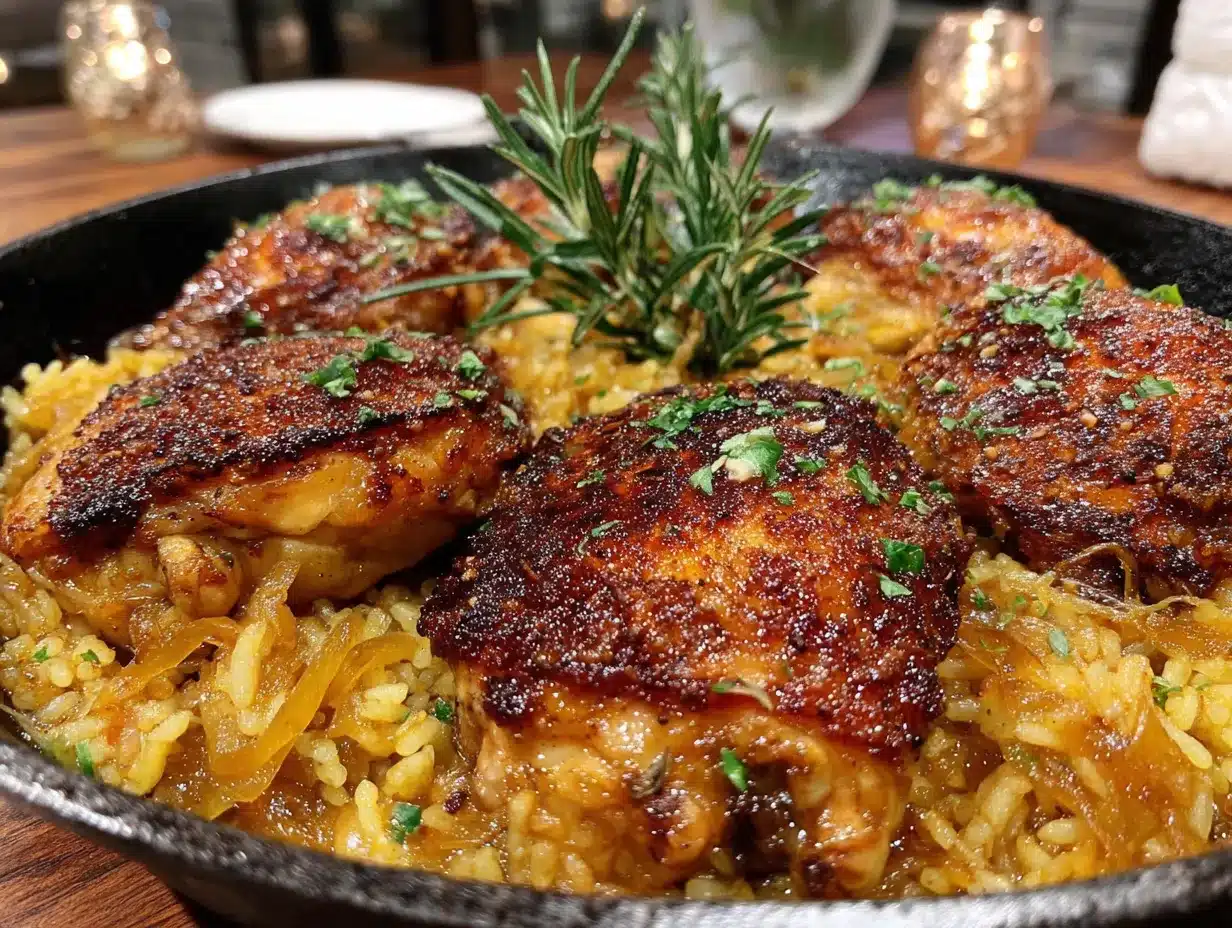
- Nestle the seared chicken thighs into the rice mixture. Push them down slightly so they’re partially submerged. Don’t worry if they stick up a bit—they’ll release juices as they bake that will flavor the rice.
- Dot the top of the dish with the small pieces of butter. This might seem like a small detail, but it makes a real difference in keeping the rice moist and adding richness to the final dish.
- Cover the baking dish tightly with aluminum foil. This traps steam and ensures the rice cooks evenly without drying out. Bake for 35 minutes.
- After 35 minutes, carefully remove the foil. The rice should be tender and most of the liquid should be absorbed. If you’re adding frozen peas or vegetables, sprinkle them in now. Return the dish to the oven, uncovered, and bake for another 10-15 minutes until the chicken is golden on top and the rice is fully cooked.
- Check for doneness: The chicken should register 165°F (74°C) on an instant-read thermometer, and the rice should be tender but not mushy. If the rice still seems a bit firm, cover it back up and bake for another 5-10 minutes.
- Let the dish rest for 5-10 minutes before serving. This allows the rice to absorb any remaining liquid and makes serving much easier. Garnish with fresh parsley and serve directly from the baking dish.
Sensory Cue: When you pull off the foil, you should see a gently bubbling surface with steam rising. The rice should look plump and moist, not swimming in liquid. If there’s still visible liquid pooling, give it another 5 minutes uncovered.
Cooking Tips & Techniques
After making this chicken and rice bake more times than I can count (and messing it up plenty along the way), here are the things I wish someone had told me from the start:
Don’t Skip Toasting the Rice. I know it seems like an extra step, but I’ve tested this both ways, and toasting makes a noticeable difference. Untoasted rice turns out a little flat and can get mushy. Toasted rice holds its shape better and has a deeper, nuttier flavor that elevates the whole dish.
Watch Your Liquid Ratio. The first time I made this, I used too much broth because I thought “more liquid = more moist rice.” Nope. I ended up with soupy, overcooked rice that nobody wanted to eat. Stick to the 3 cups of broth plus the soup—it’s the perfect amount for 1 ½ cups of long-grain rice. Trust the math.
Bone-In Chicken Works Too. If you’re on a tight budget, bone-in, skin-on chicken thighs are even cheaper and add more flavor. Just increase the initial sear time to 6-7 minutes per side, and expect the baking time to be about 10 minutes longer. The skin won’t stay crispy since it’s covered, but it’ll still be delicious.
Make It Ahead for Hosting. Here’s my favorite hosting hack: Assemble the entire dish up to step 8, cover it, and refrigerate for up to 24 hours. When you’re ready to bake, add 10-15 minutes to the covered baking time since you’re starting from cold. This is a lifesaver when you have guests coming and want to actually enjoy their company instead of being stuck in the kitchen.
Don’t Over-Stir. Once the dish goes in the oven, leave it alone. I know it’s tempting to peek and stir, but every time you open the oven, heat escapes and the cooking time gets thrown off. Trust the process and resist the urge.
Variations & Adaptations
This recipe is incredibly forgiving, and I’ve tried quite a few variations depending on who I’m cooking for and what I have on hand:
Dietary Adaptations: For a gluten-free version, swap the cream of mushroom soup for a gluten-free cream soup or make a quick homemade version with cornstarch. Use certified gluten-free broth as well. For a dairy-free version, use dairy-free butter and check your cream soup label—many are dairy-free now.
Flavor Twists: I once made this with a tablespoon of curry powder stirred into the broth mixture, and it was a huge hit at a potluck. Another time, I used Italian seasoning instead of thyme and added a handful of sun-dried tomatoes. Both were completely different but equally delicious. You can also swap the cream of mushroom for cream of chicken or cream of celery soup for a different flavor profile.
Vegetable Additions: Beyond peas, I’ve added sautéed mushrooms, diced carrots, and even chopped broccoli (add it during the last 15 minutes). The key is to keep the total volume of add-ins reasonable—about 1 cup total—so you don’t throw off the rice-to-liquid ratio.
Spice It Up: For guests who like heat, add ½ teaspoon of cayenne pepper or a diced jalapeño to the onion mixture. I did this for a game-day gathering, and it disappeared faster than anything else on the table.
Cheesy Version: Stir ½ cup of shredded cheddar into the rice mixture before baking, and sprinkle another ½ cup on top during the last 5 minutes. The cheese forms a golden crust that’s absolutely irresistible.
Serving & Storage Suggestions
This dish is designed for sharing, so here’s how to make it shine when you’re hosting:
Serving Temperature and Presentation: Serve this chicken and rice bake hot, straight from the oven. I like to bring the baking dish to the table on a trivet with a big serving spoon and let people help themselves. Sprinkle fresh parsley or chives on top right before serving for a pop of color. A side of crusty bread is perfect for sopping up any extra juices, and a simple green salad with lemon vinaigrette balances the richness beautifully.
What to Serve Alongside: This dish is a complete meal on its own, but if you’re feeding a crowd, add a simple roasted vegetable like asparagus or green beans, and maybe a light cucumber-tomato salad. For drinks, a crisp white wine like Sauvignon Blanc or a light beer pairs wonderfully.
Storage Instructions: Leftovers keep well in an airtight container in the refrigerator for up to 4 days. The flavors actually meld together overnight, so it might even taste better the next day. To reheat, add a splash of chicken broth or water to restore moisture, cover, and microwave in 30-second bursts or reheat in a 350°F oven for 15-20 minutes.
Freezer Instructions: This dish freezes beautifully. Let it cool completely, then transfer to a freezer-safe container or wrap the entire baking dish tightly in plastic wrap and foil. Freeze for up to 3 months. Thaw overnight in the refrigerator and reheat covered at 350°F until warmed through, about 25-30 minutes.
Flavor Development Note: I’ve noticed that this dish is somehow even better the next day. The rice absorbs all the flavors overnight, and the chicken becomes even more tender. If you’re planning ahead, I actually recommend making this a day in advance and reheating it for your gathering.
Nutritional Information & Benefits
Here’s the approximate nutritional breakdown per serving (based on 8 servings):
| Nutrient | Amount Per Serving |
|---|---|
| Calories | 385 |
| Protein | 28g |
| Carbohydrates | 38g |
| Fat | 12g |
| Saturated Fat | 4g |
| Fiber | 1g |
| Sodium | 680mg |
This dish provides a solid balance of protein from the chicken, energy from the rice, and essential vitamins from the onion and garlic. Chicken thighs are rich in B vitamins, particularly B6 and B12, which support energy metabolism and brain function. The olive oil adds heart-healthy monounsaturated fats. If you’re watching your sodium, use unsalted broth and low-sodium cream soup, and skip the added salt during cooking.
Dietary Considerations: This recipe is nut-free and egg-free. As mentioned, it can be made gluten-free and dairy-free with simple substitutions. It’s not suitable for low-carb or keto diets due to the rice, but it’s a great option for balanced, family-friendly eating.
Conclusion
This $10 chicken and rice bake has become my go-to for pretty much every gathering I host. It’s the dish I bring to friends who just had a baby, the meal I make when I want to show up without showing off, and the recipe that’s saved me more times than I can count when unexpected guests show up at the door.
What I love most about it is how unpretentious it is. There’s nothing fancy here—just honest ingredients cooked with a little care and a lot of love. And somehow, that’s exactly what makes it so special. It tastes like someone took the time to make something good, even if that someone was you, rushing around, trying to get dinner on the table before everyone arrived.
I’d love to hear how this turns out for you. Did you add your own twist? Serve it at a big gathering? Make it for a quiet weeknight dinner? Drop a comment below and let me know—your variations might inspire someone else’s next great meal. And if you loved it, share this recipe with a friend who needs a reliable, budget-friendly dish in their back pocket. Happy cooking, friends!
Frequently Asked Questions
Can I use chicken breasts instead of thighs?
Yes, you can substitute boneless, skinless chicken breasts. However, they cook faster and can dry out more easily. I recommend checking the internal temperature at the 30-minute mark and removing the chicken if it’s already at 165°F, then returning the dish to the oven to finish cooking the rice.
Can I make this in a slow cooker or Instant Pot?
I don’t recommend it for this particular recipe. The rice-to-liquid ratio is designed for oven baking, and slow cookers tend to make rice mushy. If you’re in a pinch, you can try it, but the texture won’t be the same. Stick with the oven for best results.
Why is my rice still crunchy after baking?
This usually happens for one of three reasons: not enough liquid, the oven temperature was too low, or the dish wasn’t covered tightly enough. Make sure your foil is sealed well around the edges, and check that your oven is actually at 375°F. If the rice is still firm, add ¼ cup of hot broth, re-cover, and bake for another 10 minutes.
Can I double this recipe for a larger crowd?
Absolutely! Double all ingredients and use a larger baking dish (at least 11×15 inches) or two 9×13 dishes. The baking time may increase by 10-15 minutes since the dish is fuller. Check the rice and chicken for doneness before serving.
How do I prevent the rice from becoming mushy?
Use long-grain rice, toast it briefly before baking, and don’t over-stir once it’s in the oven. Also, make sure you’re using the correct liquid ratio—too much liquid is the number one cause of mushy rice in baked dishes.
Pin This Recipe!

Easy $10 Chicken and Rice Bake: Guest-Favorite Dinner

A budget-friendly, comforting chicken and rice bake that feeds a crowd for about $10. Perfect for entertaining, this dish features tender chicken thighs, creamy rice, and rich savory flavor.
- Prep Time: 15 minutes
- Cook Time: 50 minutes
- Total Time: 1 hour 5 minutes
- Yield: 8 servings 1x
- Category: Main Course
- Cuisine: American
Ingredients
- 2 pounds (900g) boneless, skinless chicken thighs
- 1 ½ cups (300g) long-grain white rice
- 1 medium yellow onion, finely diced
- 4 cloves garlic, minced
- 3 cups (720ml) low-sodium chicken broth
- 1 can (10.5 oz / 298g) condensed cream of mushroom soup
- 2 tablespoons (30ml) olive oil
- 1 teaspoon paprika
- 1 teaspoon dried thyme
- ½ teaspoon garlic powder
- ½ teaspoon onion powder
- Salt and black pepper, to taste
- 2 tablespoons (28g) unsalted butter, cut into small pieces
- Fresh parsley, chopped (for garnish)
- 1 cup frozen peas or mixed vegetables (optional)
- ½ cup shredded cheddar cheese (optional)
- ¼ cup grated Parmesan (optional)
Instructions
- Preheat your oven to 375°F (190°C). Pat the chicken thighs dry with paper towels and season both sides generously with salt, pepper, and a sprinkle of paprika.
- Heat 1 tablespoon of olive oil in a large skillet over medium-high heat. Once shimmering, add the chicken thighs in a single layer. Sear for 4-5 minutes per side until golden brown. Transfer to a plate and set aside.
- Reduce heat to medium and add the remaining 1 tablespoon of olive oil. Add the diced onion and cook for 3-4 minutes until translucent. Add the minced garlic and cook for another 30 seconds until fragrant.
- Add the rice to the skillet with the onions and garlic. Stir constantly for 2 minutes until the rice becomes slightly translucent at the edges and crackles.
- In a medium bowl, whisk together the chicken broth, cream of mushroom soup, paprika, thyme, garlic powder, onion powder, and ½ teaspoon of black pepper until smooth.
- Spread the toasted rice mixture evenly across the bottom of a 9×13-inch baking dish. Pour the broth-soup mixture over the rice and stir gently.
- Nestle the seared chicken thighs into the rice mixture, pushing them down slightly so they are partially submerged.
- Dot the top of the dish with the small pieces of butter.
- Cover the baking dish tightly with aluminum foil. Bake for 35 minutes.
- After 35 minutes, carefully remove the foil. If adding frozen peas or vegetables, sprinkle them in now. Return to the oven, uncovered, and bake for another 10-15 minutes until the chicken is golden and the rice is fully cooked.
- Check for doneness: chicken should register 165°F (74°C) on an instant-read thermometer, and rice should be tender but not mushy. If rice is still firm, cover and bake for another 5-10 minutes.
- Let the dish rest for 5-10 minutes before serving. Garnish with fresh parsley and serve directly from the baking dish.
Notes
For best results, toast the rice before baking. Use long-grain rice to avoid mushiness. The dish can be assembled up to 24 hours in advance and refrigerated; add 10-15 minutes to covered baking time if starting from cold. Leftovers keep for up to 4 days in the refrigerator or freeze for up to 3 months.
Nutrition
- Serving Size: 1 serving (approxima
- Calories: 385
- Sugar: 2
- Sodium: 680
- Fat: 12
- Saturated Fat: 4
- Carbohydrates: 38
- Fiber: 1
- Protein: 28
Keywords: chicken and rice bake, budget-friendly dinner, easy chicken recipe, comfort food, casserole, guest-favorite, $10 meal


