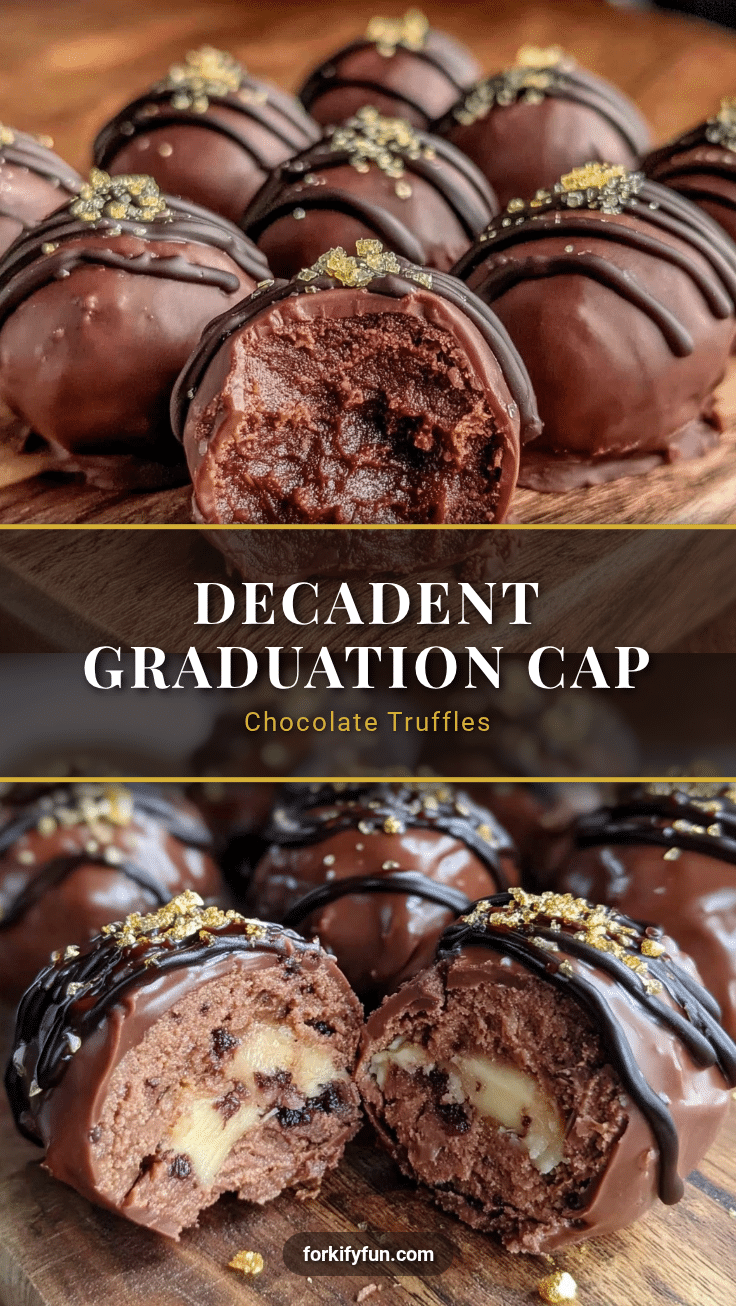
“You brought the *most* adorable treats!” my cousin exclaimed through the video call, eyes bright with surprise. Honestly, I wasn’t expecting much when I whipped up these Decadent Graduation Cap Chocolate Truffle Balls last minute. It was one of those chaotic afternoons where the graduation party felt overwhelming — invitations, decorations, last-minute errands. I needed a quick, no-fail dessert that screamed celebration without demanding too much fuss.
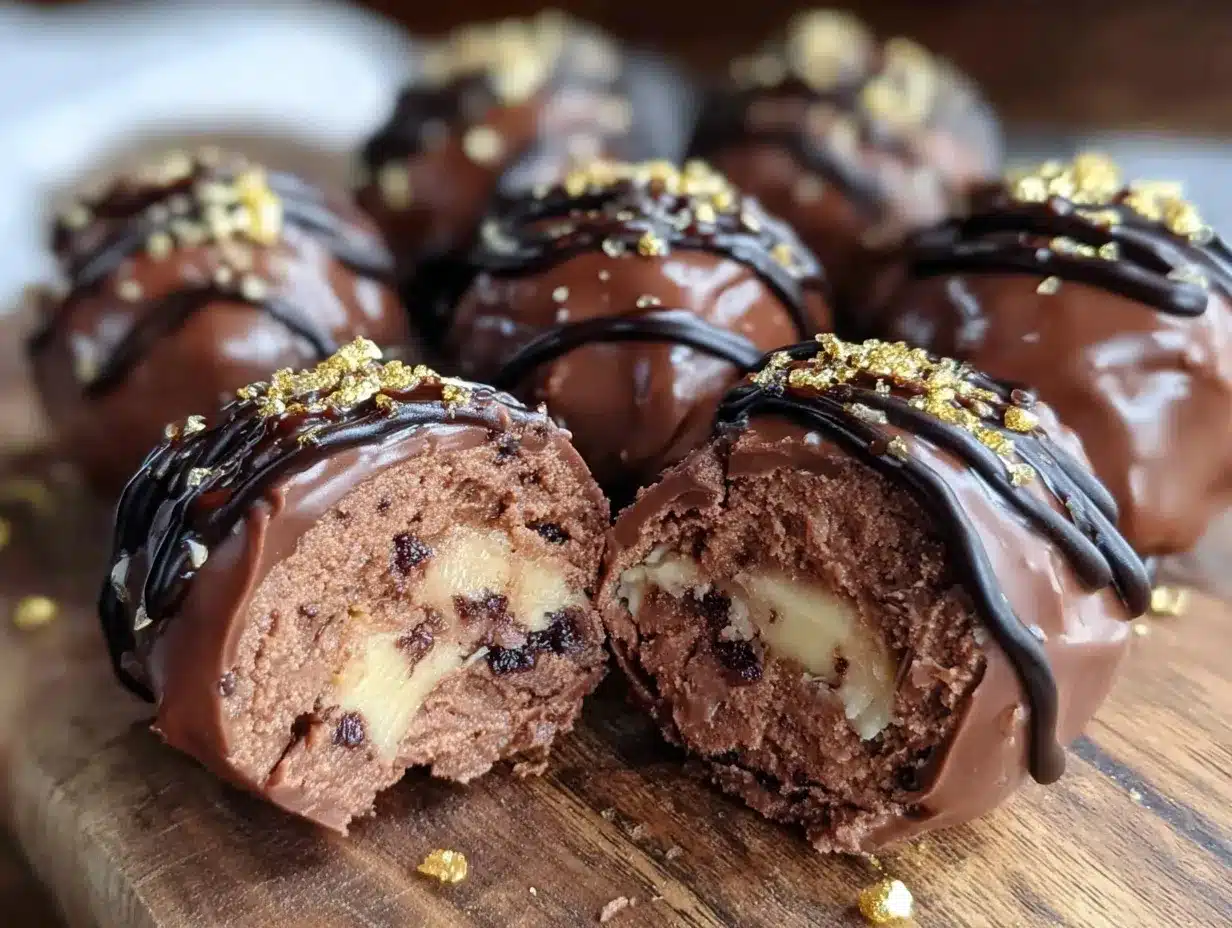
So there I was, rummaging through my pantry, spotting some quality dark chocolate, cream, and a box of crackers. An idea sparked, though I wasn’t sure it’d look the part. But hey, a little creativity — and a messy kitchen — brought these rich, glossy chocolate truffle balls shaped like graduation caps to life. The best part? They were gone in a flash, with friends and family asking for the recipe afterward.
It’s funny how something so simple can carry so much meaning. These truffle balls aren’t just chocolatey bites; they’re little tokens of accomplishment, perfect for marking milestones with a touch of indulgence. And honestly, making them became my own little ritual that turned a hectic day into something sweet and memorable. If you’ve ever had that craving for a dessert that’s both impressive and easy, you might find yourself coming back to these as often as I did during graduation season.
Why You’ll Love This Recipe
After testing and retesting this recipe, I can say it’s truly a celebration staple. Whether you’re hosting a graduation party or just want to impress your guests with a fun, festive treat, these chocolate truffle balls hit all the right notes. Here’s why they stand out:
- Quick & Easy: Ready in under 30 minutes, perfect when you’re juggling a million party details (trust me, I’ve been there!).
- Simple Ingredients: Uses pantry basics like dark chocolate, cream, and a few sprinkles — no scavenger hunts at the store.
- Perfect for Celebrations: Their playful graduation cap design adds charm to any party table, from casual backyard gatherings to formal receptions.
- Crowd-Pleaser: Rich, smooth, and just the right amount of sweetness — kids and adults alike keep reaching for more.
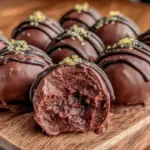
- Unbelievably Delicious: The creamy center with a thin chocolate shell creates that irresistible melt-in-your-mouth moment.
This recipe isn’t just about chocolate truffles — it’s about making a statement with a little bit of flair. The trick? Using crushed cookies inside the truffle to add texture and a hint of buttery flavor, which makes these balls stand apart from your average truffle. Plus, the graduation cap topping is a fun twist that’s easier than it looks but gets all the compliments.
If you’ve ever had a craving for a simple, celebratory dessert that feels special without being complicated, these truffle balls might just become your go-to. They’re a sweet way to mark success and savor the moment, whether it’s for a graduation or any achievement worth celebrating.
What Ingredients You Will Need
This recipe uses straightforward ingredients — nothing fancy, just quality basics that come together beautifully to create an indulgent treat. Most of these are pantry staples, and if you’re like me, you probably have them on hand already. The ingredients break down into the truffle base and the decorative touches that make them graduation-ready.
- Dark chocolate (8 oz / 225 g): Use good-quality baking chocolate or couverture chocolate for the smoothest melt — I prefer Ghirardelli for its rich flavor and easy melting.
- Heavy cream (½ cup / 120 ml): Adds creaminess and richness to the truffle center.
- Unsalted butter (2 tbsp / 28 g): Softened; balances the chocolate’s intensity and adds a silky texture.
- Crushed vanilla wafers or graham crackers (1 cup / 100 g): Provides a subtle crunch and depth to the truffle filling — I usually crush mine finely but leave a few small pieces for texture.
- Powdered sugar (¼ cup / 30 g): For sweetness and to bind the truffle mixture just right.
- Black fondant or black candy melts (for the graduation cap top): Easy to shape and decorate — Wilton brand candy melts work well.
- Mini white fondant or edible pearl sprinkles: For the graduation cap tassel detail.
- Optional: vanilla extract (1 tsp / 5 ml): Enhances flavor depth.
If you want to tweak things, almond flour can swap in for the crushed crackers for a gluten-free option. Or if you’re dairy-free, coconut cream and dairy-free chocolate can stand in nicely, though the texture shifts a bit. In the summer, fresh berries on the side can complement these truffles beautifully, making your celebration spread even more festive.
Equipment Needed
Making these chocolate truffle balls doesn’t require a fancy setup, but having the right tools helps keep things smooth and enjoyable. Here’s what I use:
- Mixing bowls: Two medium-sized bowls to melt chocolate and mix ingredients.
- Double boiler or heatproof bowl over a pot: For gently melting the chocolate without scorching it. I once tried microwaving (bad idea—burnt chocolate alert!), so I stick with this method now.
- Electric mixer or sturdy spatula: To blend the cream, butter, and chocolate smoothly.
- Baking sheet lined with parchment paper: Perfect for chilling the truffle balls.
- Small cookie scoop or tablespoon: For portioning out even truffle balls quickly.
- Rolling pin or food processor: To crush the wafers or crackers.
- Toothpicks or small decorating tools: For placing tassel details on the graduation caps.
For budget-friendly options, you can substitute a microwave-safe bowl for the double boiler (just microwave in short bursts), and use a fork to crush the crackers if you don’t have a rolling pin. Keeping your tools clean and dry is key — especially when working with chocolate, since moisture is chocolate’s enemy.
Preparation Method
- Crush the wafers or graham crackers: Place them in a ziplock bag and gently crush with a rolling pin until mostly fine with a few small pieces left for texture. Set aside. (About 5 minutes)
- Melt the dark chocolate: Set up a double boiler by simmering water in a pot and placing a heatproof bowl over it without touching the water. Add chopped chocolate to the bowl and stir gently until melted and smooth. Remove from heat. (10 minutes)
- Heat the heavy cream: In a small saucepan, warm the cream just until it starts to simmer—don’t boil. Pour the warm cream over the melted chocolate and let sit for 2 minutes, then stir until smooth and glossy. (5 minutes)
- Add butter and powdered sugar: Stir in softened butter and powdered sugar into the chocolate mixture until fully combined. If using, add vanilla extract here. The mixture should be thick but spreadable. (3 minutes)
- Fold in crushed wafers: Gently mix the crushed wafers into the chocolate mixture until evenly distributed. This adds a subtle crunch and body to the truffle. (2 minutes)
- Chill the mixture: Cover the bowl with plastic wrap and refrigerate for at least 1 hour, or until firm enough to scoop and shape. (60 minutes)
- Form the truffle balls: Use a small cookie scoop or tablespoon to portion the mixture. Roll between your palms to form smooth balls about 1 inch (2.5 cm) in diameter. Place on the parchment-lined baking sheet. (15 minutes)
- Create graduation caps: Melt the black candy melts or soften black fondant. Flatten small discs for the cap tops and press gently onto each truffle ball. Use mini white fondant pieces or edible pearls to craft tassels, attaching them with a dab of melted candy or water if using fondant. (20 minutes)
- Chill again: Return the decorated truffle balls to the refrigerator for another 30 minutes to set completely before serving.
Tip: If the chocolate mixture feels too soft when scooping, pop it back in the fridge for 10-15 minutes to firm up. The texture should be creamy but hold shape well. When rolling, cold hands help prevent sticking.
Cooking Tips & Techniques
Creating smooth, glossy chocolate truffles is an art — but don’t worry, a few tricks from my kitchen will help you nail it every time.
- Melting chocolate gently: Chocolate burns easily, so low heat and patience are your best friends. Stir often and remove from heat as soon as it’s mostly melted; residual heat will finish the job.
- Chilling times matter: Rushing the chilling can make shaping difficult. I learned this the hard way when my first batch stuck to everything — letting the mixture chill fully makes rolling smooth.
- Texture balance: Adding crushed wafers or crackers is a game-changer for texture. Too fine, and the truffles feel dense; too chunky, and they crumble. Aim for a mix of fine crumbs and small pieces.
- Decoration finesse: Using fondant for the graduation caps is easier than piping chocolate decorations. If you’re not into fondant, candy melts are a great alternative — just melt and shape quickly before they harden.
- Storage tip: Store truffles in an airtight container in the fridge to keep them fresh. Bring to room temperature before serving for the best flavor and texture.
One time, I skipped chilling the mixture long enough and ended up with a gooey mess. Since then, the fridge has become my best friend during this recipe! Also, multitasking by prepping the decorations while the mixture chills saves loads of time.
Variations & Adaptations
These truffle balls are a great canvas for customizing to your taste or dietary needs. Here are a few ideas I’ve tried or think you’ll enjoy:
- Nutty twist: Add a tablespoon of finely chopped toasted hazelnuts or almonds to the truffle mixture for a pleasant crunch and nutty flavor.
- Flavored truffles: Swap vanilla extract for a splash of coffee liqueur, orange zest, or peppermint extract to give the chocolate a festive twist.
- Dairy-free version: Use coconut cream instead of heavy cream and dairy-free chocolate to make these suitable for vegan or lactose-intolerant guests. The texture will be slightly different but still delicious.
- Alternative coatings: Instead of black fondant or candy melts, try rolling the truffles in cocoa powder, crushed cookies, or colored sugar sprinkles for a simpler yet tasty finish.
- Mini truffles: Make bite-sized versions for a daintier dessert option. They’re perfect for passing around at cocktail parties or as part of a dessert platter.
Once, I made a batch with a hint of chili powder for a subtle heat surprise — surprisingly good! If you want to see more fun, easy treats with a creative edge, you might like my funfetti dip recipe or the quick fudgy mug brownie for last-minute dessert inspiration.
Serving & Storage Suggestions
These chocolate truffle balls are best served slightly chilled but not icy cold — about 10 minutes at room temperature lets the flavors shine and the texture soften just right. Arrange them on a platter with fresh berries or mint leaves for a festive touch that pops visually and flavor-wise.
If you’re hosting a graduation party buffet, place them near coffee or sparkling drinks to balance their richness. They pair surprisingly well with a crisp sparkling wine or even a cold glass of milk for the younger guests.
For storage, keep the truffles in an airtight container in the refrigerator for up to one week. They also freeze well — just thaw in the fridge overnight before serving to avoid condensation ruining the chocolate finish. If you want to reheat gently, a few seconds in a warm (not hot) oven or microwave on low power can soften them up, though I prefer serving chilled to preserve the structure.
Over time, the flavors deepen and the texture becomes even creamier, so if you’re making these ahead of time, that’s actually a bonus! Just keep an eye on the decorations, as fondant can dry out a bit in the fridge.
Nutritional Information & Benefits
Each Decadent Graduation Cap Chocolate Truffle Ball contains approximately 110-130 calories, depending on size and specific ingredients used. They provide a modest amount of fat and sugar, making them a treat best enjoyed in moderation.
The dark chocolate offers antioxidants and a richer flavor with less sugar than milk chocolate. Using quality dark chocolate with at least 60% cacao content gives a more intense, less sweet profile — perfect for balancing the creamy filling. The crushed wafers add a touch of whole grain, depending on the brand you choose.
For those mindful of allergens, this recipe contains dairy and gluten by default but can be adjusted with dairy-free cream and gluten-free crackers or almond flour to fit specific diets. They’re not low-carb, but for a special occasion like graduation, a little indulgence is part of the fun.
Personally, I appreciate how these truffles offer a rich, satisfying dessert that doesn’t require a ton of sugar or complicated ingredients, making them a smarter choice for celebrations compared to heavier cakes or store-bought sweets.
Conclusion
These Decadent Graduation Cap Chocolate Truffle Balls are more than just a sweet treat — they’re a festive way to honor achievement with a homemade touch. Easy to make, irresistibly rich, and full of personality, they bring a little extra joy to any graduation celebration.
Feel free to tweak the flavors or decorations to suit your style, and don’t hesitate to make them your own. I love how these truffles turned a hectic party prep into a fun, rewarding project that everyone enjoyed — and I’m sure they’ll do the same for you.
If you try this recipe, I’d love to hear how you decorated your truffles or any creative twists you added. Sharing your ideas helps keep the celebration going strong!
FAQs
How long can I store these chocolate truffle balls?
Store them in an airtight container in the refrigerator for up to one week. They also freeze well for up to one month.
Can I make these truffle balls ahead of time?
Absolutely! You can prepare them a day or two in advance. Just keep them chilled and decorate just before serving if you want the best appearance.
What if I don’t have fondant for decoration?
You can use black candy melts or even pipe melted chocolate for the graduation caps. Cocoa powder or edible glitter can add a fun finish too.
Are there any gluten-free options for this recipe?
Yes, swap the crushed wafers for gluten-free cookies or almond flour to make it gluten-free.
Can I use milk chocolate instead of dark chocolate?
Yes, but keep in mind milk chocolate is sweeter and less intense. You might want to reduce powdered sugar slightly to balance sweetness.
Pin This Recipe!
Decadent Graduation Cap Chocolate Truffle Balls Easy Recipe for Celebrations
These rich, glossy chocolate truffle balls shaped like graduation caps are a quick and easy celebratory dessert perfect for marking milestones with a touch of indulgence.
- Prep Time: 20 minutes
- Cook Time: 15 minutes
- Total Time: 1 hour 65 minutes
- Yield: 24 truffle balls 1x
- Category: Dessert
- Cuisine: American
Ingredients
- 8 oz (225 g) dark chocolate (good-quality baking or couverture chocolate)
- ½ cup (120 ml) heavy cream
- 2 tbsp (28 g) unsalted butter, softened
- 1 cup (100 g) crushed vanilla wafers or graham crackers
- ¼ cup (30 g) powdered sugar
- Black fondant or black candy melts (for the graduation cap top)
- Mini white fondant or edible pearl sprinkles (for tassel detail)
- Optional: 1 tsp (5 ml) vanilla extract
Instructions
- Crush the wafers or graham crackers in a ziplock bag with a rolling pin until mostly fine with some small pieces left for texture. Set aside.
- Melt the dark chocolate using a double boiler by simmering water in a pot and placing a heatproof bowl over it without touching the water. Stir gently until melted and smooth. Remove from heat.
- Heat the heavy cream in a small saucepan just until it starts to simmer; do not boil. Pour the warm cream over the melted chocolate and let sit for 2 minutes, then stir until smooth and glossy.
- Stir in softened butter and powdered sugar into the chocolate mixture until fully combined. Add vanilla extract if using. The mixture should be thick but spreadable.
- Fold in the crushed wafers gently until evenly distributed.
- Cover the bowl with plastic wrap and refrigerate for at least 1 hour or until firm enough to scoop and shape.
- Use a small cookie scoop or tablespoon to portion the mixture. Roll between palms to form smooth balls about 1 inch (2.5 cm) in diameter. Place on a parchment-lined baking sheet.
- Melt black candy melts or soften black fondant. Flatten small discs for the cap tops and press gently onto each truffle ball. Use mini white fondant pieces or edible pearls to craft tassels, attaching them with a dab of melted candy or water if using fondant.
- Return the decorated truffle balls to the refrigerator for another 30 minutes to set completely before serving.
Notes
Use low heat when melting chocolate to avoid burning. Chill mixture fully before shaping to ensure smooth rolling. Cold hands help prevent sticking. Store truffles in an airtight container in the fridge for up to one week or freeze for up to one month. Bring to room temperature before serving for best flavor and texture.
Nutrition
- Serving Size: 1 truffle ball (abou
- Calories: 120
- Sugar: 10
- Sodium: 30
- Fat: 8
- Saturated Fat: 5
- Carbohydrates: 12
- Fiber: 1
- Protein: 2
Keywords: chocolate truffle balls, graduation treats, easy dessert, celebration recipe, chocolate truffles, party dessert, homemade truffles