The sound stopped me mid-bite. That sharp, glassy crack when my teeth broke through the bottom crust, followed by the soft, airy collapse of the crumb inside. I actually looked down at the slice in my hand, genuinely surprised. I had been chasing that texture for weeks. My kitchen counter had seen more failed focaccia attempts than I cared to admit. Dense loaves, pale bottoms, tops that looked golden but felt like rubber. But this one. This one was different.
It happened on a random Tuesday afternoon. I had a bubbly, active sourdough starter that was practically begging to be used. I was tired, honestly. Tired of following complicated bread formulas that required a dozen folds and a strict schedule. So I did something reckless. I ignored the standard hydration warnings, used more olive oil than any recipe I had ever seen, and let the dough rest in the fridge for nearly 48 hours. I figured I had nothing left to lose.
When I pulled that tray out of the oven, the kitchen smelled like a proper Italian bakery. The rosemary had crisped up in the hot oil, and the sea salt had formed tiny, glittering crystals across the surface. I flipped a corner over and saw that deep, golden-brown bottom. That is when I knew. This was the one. The recipe I had been looking for. The one that would make me stop searching.
It is not complicated. It just requires patience. And maybe a little bit of faith in your starter.
Why You Will Love This Recipe
This is not your average focaccia. It is the kind of bread that makes you rethink everything you thought you knew about sourdough. The crust shatters when you bite into it. The inside is light, airy, and full of those beautiful irregular holes that home bakers obsess over.
- Crispy Bottom Crust : The secret is a generous pool of olive oil in the pan. It fries the bottom of the dough as it bakes, creating a crust that is almost cracker-like in its crunch.
- Deep, Tangy Flavor : The long cold fermentation gives the bread a complex sourdough flavor that you simply cannot get from commercial yeast. It is savory, slightly tangy, and incredibly satisfying.
- Minimal Hands-On Time : Yes, the dough rests for a long time. But you only work with it for about 15 minutes total. The fermentation does all the heavy lifting for you.
- Simple, Clean Ingredients : Flour, water, sourdough starter, olive oil, rosemary, and salt. That is it. No fancy additives or hard-to-find specialty items.
- Foolproof for Beginners : This dough is incredibly forgiving. It is high hydration, which means it is wet and sticky. But that is exactly what gives you that open, airy crumb. You do not need to knead it perfectly. Just let time do the work.
I have tested this recipe at least a dozen times. I have made it in a cast iron skillet, a metal baking pan, and even a glass dish. Every single time, that crispy bottom delivered. It is the kind of bread that makes you want to eat it plain, straight off the cutting board, before you even think about dipping it in anything.
Honestly, this is the focaccia I always wanted to make but never thought I could. Turns out, I just needed to trust the process and give it time.
What Ingredients You Will Need
This recipe relies on a short list of quality ingredients. Each one plays a specific role in building that signature crispy texture and deep flavor. Here is what you need and why it matters.
- Bread Flour (400g / about 3 cups) : Bread flour has a higher protein content than all-purpose flour. This protein is what develops the gluten network that traps air bubbles and gives the focaccia its chewy, open crumb. I prefer King Arthur Bread Flour for its consistent protein content, but any good-quality bread flour will work. If you only have all-purpose flour, you can use it, but the crumb will be slightly less airy and the crust a bit softer.
- Active Sourdough Starter (150g / about ¾ cup) : Your starter needs to be bubbly and active. I feed mine about 8-10 hours before I plan to mix the dough. It should be at its peak, meaning it has doubled in volume and is full of bubbles. A hungry, sluggish starter will not give you the same rise or flavor. If your starter is new or weak, you can add a tiny pinch (⅛ teaspoon) of commercial yeast to help the fermentation along.
- Warm Water (300g / about 1 ¼ cups) : The water should be lukewarm, around 90°F (32°C). Too hot and it will kill the good bacteria in your starter. Too cold and the fermentation will slow down significantly. I use filtered water because chlorine in tap water can sometimes inhibit fermentation.
- Extra Virgin Olive Oil (80g / about ⅓ cup, plus more for the pan) : Do not skimp on the olive oil. It is not just for flavor. The oil in the pan creates that fried, crispy bottom crust. It also enriches the dough, making the crumb tender. Use a good quality extra virgin olive oil. You will taste the difference. I use about ¼ cup in the pan itself and reserve some for drizzling on top.
- Fine Sea Salt (10g / about 1 ½ teaspoons) : Salt is crucial for flavor and for controlling fermentation. It strengthens the gluten structure and prevents the dough from over-proofing. I use fine sea salt because it dissolves evenly into the dough. If you use kosher salt, you may need to increase the amount slightly.
- Fresh Rosemary (2-3 sprigs) : Fresh rosemary is non-negotiable here. Dried rosemary is too brittle and burns easily in the hot oven. Strip the leaves from the woody stems and roughly chop them. You want the pieces small enough to distribute evenly but large enough to see and taste.
- Flaky Sea Salt (for finishing) : Maldon sea salt is my go-to for finishing. The large, delicate crystals provide a satisfying crunch and a burst of salty flavor that contrasts beautifully with the rich olive oil and aromatic rosemary. Sprinkle it right before the bread goes into the oven.
That is the entire list. I love recipes like this because they force you to focus on technique and patience rather than a long, complicated ingredient list. Every single component earns its place.
Equipment Needed
You do not need a stand mixer or any fancy gadgets for this recipe. In fact, I prefer to mix this dough by hand. It gives you a better feel for the texture.
- Digital Kitchen Scale : This is the most important tool for consistent sourdough baking. Measuring flour by volume (cups) is wildly inaccurate. A scale ensures you get the exact hydration every time. I use a simple OXO scale that cost me twenty dollars. It has paid for itself a hundred times over.
- Large Mixing Bowl : Any large bowl will work. I prefer a wide, shallow bowl because it makes the stretch and fold process easier. A glass or ceramic bowl works great.
- 9×13 Inch Metal Baking Pan : A metal pan conducts heat better than glass or ceramic, which helps create that crispy bottom crust. I have a simple Nordic Ware aluminum pan that I use exclusively for focaccia. Avoid non-stick pans if possible, as the dark coating can sometimes cause the bottom to burn before the top is golden.
- Bench Scraper : This is incredibly useful for handling the sticky, high-hydration dough. It helps you fold the dough without it sticking to your hands. You can find a plastic or metal one for a few dollars.
- Plastic Dough Scraper or Bowl Scraper : A flexible plastic scraper is perfect for getting every last bit of dough out of the bowl. It also helps with the initial mixing.
- Plastic Wrap or a Shower Cap : You need to cover the dough during its long fermentation to prevent it from drying out. A reusable shower cap is actually my favorite tool for this. It fits perfectly over the bowl and creates a tight seal.
- Cooling Rack : After baking, you must remove the focaccia from the hot pan immediately. If you leave it in the pan, the steam will soften the crispy bottom crust. A wire cooling rack allows air to circulate around the bread, keeping it crisp.
If you do not have a 9×13 pan, you can use a 10-inch cast iron skillet. The focaccia will be thicker and rounder, but it will still be delicious. Just make sure to use plenty of oil in the skillet.
Preparation Method
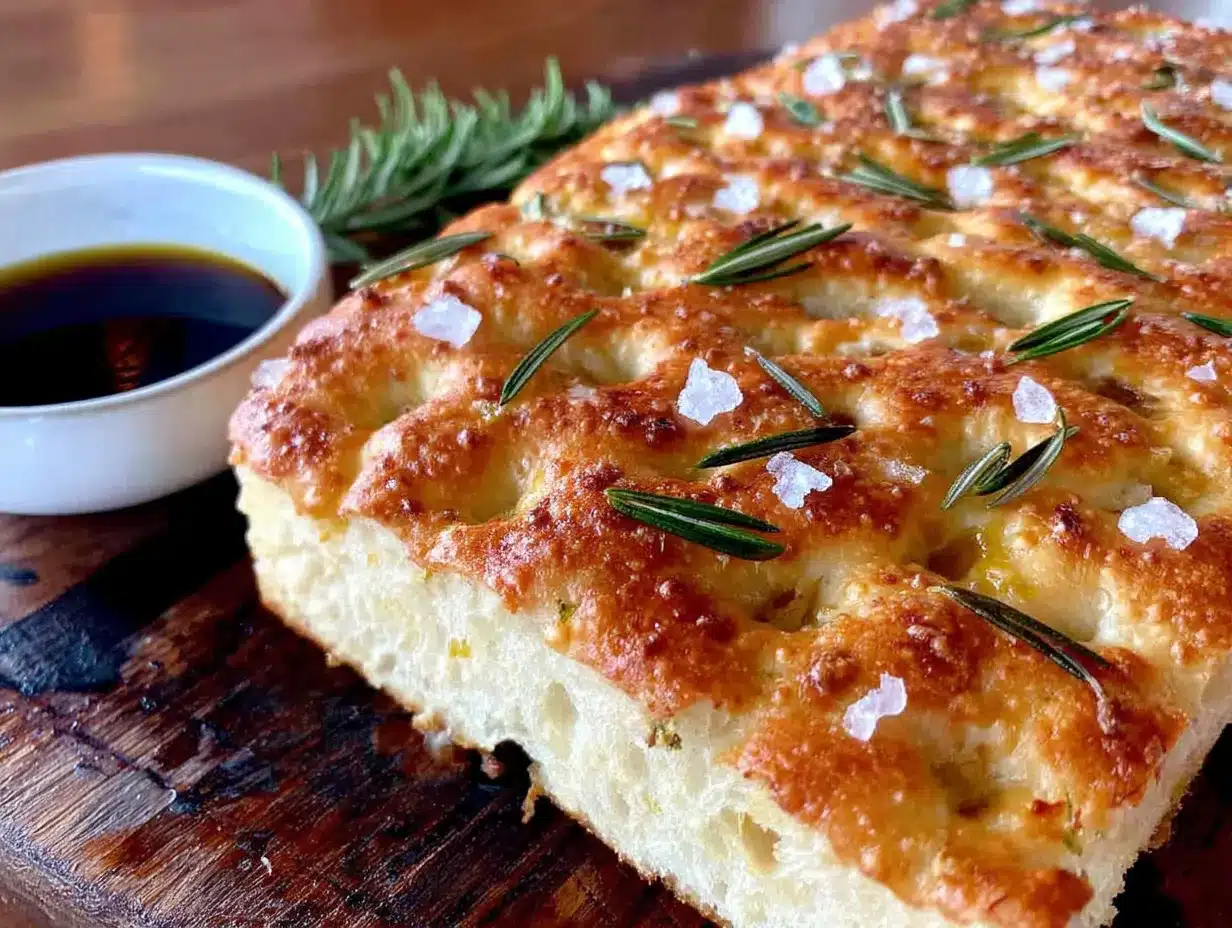
This process spans about 48 hours, but do not let that scare you. The actual hands-on time is about 15 minutes. The rest is just waiting. Here is exactly how I do it.
- Feed Your Starter (Day 1, Morning) : About 8-10 hours before you plan to mix the dough, feed your sourdough starter. I use a 1:1:1 ratio. 50g starter, 50g flour, 50g water. Leave it in a warm spot until it is bubbly and has at least doubled in volume. It should smell fruity and slightly acidic.
- Mix the Dough (Day 1, Evening) : In your large mixing bowl, combine 300g of warm water and 150g of your active, bubbly starter. Whisk them together until the starter is fully dissolved into the water. The mixture should look milky and slightly cloudy. Add 400g of bread flour and 10g of fine sea salt. Use your hands or a dough scraper to mix until no dry flour remains. The dough will be very shaggy and sticky. Do not worry. That is exactly how it should look. Cover the bowl with plastic wrap and let it rest for 30 minutes. This is called the autolyse. It allows the flour to fully hydrate and starts the gluten development process.
- Stretch and Fold (Day 1, Evening) : After the 30-minute rest, it is time for the stretch and folds. Wet your hands slightly to prevent the dough from sticking. Grab one side of the dough, stretch it up as high as it will go without tearing, and fold it over the top of the dough. Rotate the bowl a quarter turn and repeat. Do this four times total, so you have folded all four sides. Cover the bowl again. Repeat this stretch and fold process three more times, with 30-minute rests in between. After the fourth set of folds, the dough will feel significantly smoother and more elastic. It will still be sticky, but it will hold its shape better.
- Bulk Fermentation (Day 1, Night through Day 3, Morning) : Cover the bowl tightly with plastic wrap or a shower cap. Place it in the refrigerator. Let it ferment for 24 to 48 hours. The longer it ferments, the more complex the flavor will be. I usually go for 36 hours. The dough will have risen significantly and will be dotted with small and large bubbles on the surface. It should smell wonderfully sour and yeasty.
- Prepare the Pan (Day of Baking) : About 3-4 hours before you want to bake, remove the dough from the refrigerator. Pour a generous amount of olive oil into your 9×13 baking pan. I use about ¼ cup. Tilt the pan to coat the bottom evenly. The oil should be about ⅛ inch deep. Gently tip the cold dough out of the bowl and into the oiled pan. Do not punch it down. You want to preserve as many of those beautiful bubbles as possible.
- Dimple and Proof (Day of Baking) : Let the dough sit in the pan, uncovered, for about 30 minutes. This allows it to come up to room temperature slightly. Then, using oiled fingertips, gently press the dough out to the edges of the pan. The dough will resist at first. Be patient. If it springs back too much, let it rest for 10 more minutes and try again. Once it is spread out, use your fingertips to press deep dimples all over the surface of the dough. Push all the way down to the bottom of the pan. Drizzle the top with another tablespoon or two of olive oil. Sprinkle the chopped fresh rosemary and a generous amount of flaky sea salt over the top. Cover the pan loosely with plastic wrap and let it proof at room temperature for 2 to 3 hours. The dough should become puffy and jiggly. It will have risen noticeably.
- Bake (Day of Baking) : About 30 minutes before you are ready to bake, place your oven rack in the middle position and preheat the oven to 425°F (220°C). Uncover the proofed focaccia. Place the pan on the middle rack and bake for 25 to 30 minutes. The top should be deep golden brown, and the edges should look crispy and slightly caramelized. If the top is browning too quickly but the bottom is not dark enough, tent the pan loosely with aluminum foil for the last 5-10 minutes.
- Cool and Serve (Immediately) : The most important step. As soon as the focaccia comes out of the oven, run a thin spatula around the edges to loosen it. Carefully lift the entire focaccia out of the pan and transfer it to a wire cooling rack. If you leave it in the hot pan, the steam will soften the crispy bottom crust. Let it cool for at least 15 minutes before slicing. The crust will continue to crisp as it cools. Serve warm or at room temperature.
I remember the first time I successfully transferred the focaccia to the cooling rack. I held my breath, listening for that crackling sound. When I heard it, I actually laughed out loud. It felt like a genuine achievement.
Cooking Tips & Techniques
I have made every mistake you can imagine with this recipe. Here is what I learned so you do not have to repeat my failures.
The Oil is Not Optional : I know it seems like a lot of olive oil. It is not. That pool of oil in the pan is what creates the crispy, fried bottom crust. If you use too little oil, you will get a pale, soft bottom. Do not be shy with it. The focaccia will absorb what it needs and leave the rest behind.
Cold Dough is Easier to Handle : When you take the dough out of the fridge after its long fermentation, it will be cold and stiff. This is actually a good thing. Cold dough is much easier to handle and stretch into the pan without deflating all those precious bubbles. Work quickly and gently.
Do Not Skip the Dimpling : Those deep dimples are not just for decoration. They serve a critical purpose. They prevent the dough from puffing up into a giant balloon in the oven. They also create little pockets where the olive oil and salt can pool, creating intensely flavorful, crispy spots. Press firmly and confidently. You want to see the oil bubble up through the holes.
Listen for the Crackle : The best way to tell if your focaccia is perfectly baked is by the sound. When you take it out of the pan and place it on the cooling rack, you should hear a distinct crackling and popping sound. That is the sound of the crispy crust cooling and contracting. If you hear silence, your bottom crust is not crispy enough. Next time, add more oil or bake for a few more minutes.
Patience with the Proof : The final proof (the 2-3 hours after dimpling) is where the magic happens. Do not rush it. The dough needs to become puffy and jiggly. If you bake it before it is fully proofed, the crumb will be dense and the crust will be tough. If it is over-proofed, it might collapse in the oven. Look for a dough that has visibly risen, feels airy to the touch, and wobbles slightly when you shake the pan.
Variations & Adaptations
This base recipe is incredibly versatile. Once you master the technique, you can play with the flavors endlessly.
- Caramelized Onion & Thyme : While the dough is doing its final proof, slowly caramelize two large sliced onions in a tablespoon of butter and a pinch of salt. Cook them low and slow for about 30 minutes until they are deep golden and jammy. Dot the caramelized onions over the dimpled dough along with fresh thyme leaves before baking.
- Roasted Garlic & Parmesan : Roast a whole head of garlic in the oven until it is soft and spreadable. Squeeze the soft cloves out of their skins and mash them into a paste. Mix this paste into the olive oil before drizzling it over the dimpled dough. Sprinkle generously with grated Parmesan cheese before baking.
- Sun-Dried Tomato & Basil : Finely chop about ¼ cup of oil-packed sun-dried tomatoes. Sprinkle them over the dimpled dough along with torn fresh basil leaves. The sun-dried tomatoes add a concentrated, sweet, and tangy flavor that pairs beautifully with the olive oil.
- Everything Bagel Seasoning : For a savory, crunchy twist, skip the rosemary and sprinkle the dimpled dough generously with everything bagel seasoning (sesame seeds, poppy seeds, dried garlic, dried onion, and salt). This version is incredible served alongside a bowl of soup or used for sandwiches.
- Gluten-Free Adaptation : I have tested this with a high-quality gluten-free bread flour blend. The texture is different—less airy and more tender—but it is still delicious. You will need to add about 25g more water to the dough, and the proofing time will be shorter, around 1-2 hours. The crispy bottom crust still works beautifully.
I personally love the caramelized onion and thyme variation. I make it every fall when the onions are at their sweetest. It turns a simple bread into a full meal.
Serving & Storage Suggestions
This focaccia is best served warm, within an hour of baking. The contrast between the crispy, oily bottom and the soft, airy interior is at its peak right out of the oven.
How to Serve : Slice it into squares or rectangles using a sharp serrated knife. Do not press down too hard. Use a gentle sawing motion to avoid crushing the delicate crumb. Serve it as a side to a bowl of tomato soup, alongside a BLT pasta salad for a hearty lunch, or simply on its own with a small dish of high-quality balsamic vinegar for dipping. It also makes incredible sandwiches. Split a square horizontally and fill it with roasted vegetables, fresh mozzarella, and pesto.
Storage : If you have leftovers (which rarely happens in my house), store them in an airtight container at room temperature for up to 2 days. Do not refrigerate the focaccia. The refrigerator will dry it out and make the crumb stale. The crispy bottom will soften over time, but it will still be delicious.
Reheating : To revive the crispiness, reheat the focaccia in a 350°F (175°C) oven for about 5-7 minutes. Place it directly on the oven rack or on a baking sheet. Avoid the microwave, as it will make the bread rubbery and the crust soggy. If you are in a hurry, you can reheat it in a dry skillet over medium heat for about a minute per side. The bottom will crisp up nicely.
Freezing : This focaccia freezes beautifully. Let it cool completely, then wrap it tightly in plastic wrap, followed by a layer of aluminum foil. Freeze for up to 3 months. To thaw, leave it at room temperature for about an hour, then reheat it in a 350°F oven for 10 minutes to restore the crispiness.
The flavors actually develop a bit overnight. The olive oil soaks deeper into the crumb, and the rosemary becomes more aromatic. Leftover focaccia is perfect for making croutons or breadcrumbs.
Nutritional Information & Benefits
This is real, wholesome food. It is not diet food, but it is made with simple, natural ingredients that your body recognizes.
Estimated Per Serving (1 square, based on 12 servings) :
- Calories: 220
- Fat: 10g (mostly from heart-healthy olive oil)
- Carbohydrates: 28g
- Fiber: 1g
- Protein: 5g
- Sodium: 290mg
Health Benefits : The long fermentation process does more than just build flavor. It breaks down the phytic acid in the flour, which makes the minerals in the bread more bioavailable and easier for your body to absorb. The sourdough fermentation also creates beneficial lactic acid bacteria, which can support gut health. The olive oil is rich in monounsaturated fats and antioxidants, which are great for heart health.
Dietary Considerations : This recipe is naturally vegan and contains no dairy or eggs. It is not gluten-free in its standard form, but I have included a gluten-free adaptation above. The sodium content comes primarily from the finishing salt, so you can easily adjust it to your preference.
I love that this bread feels indulgent and special, but it is made from the same basic ingredients that humans have been baking for thousands of years. It is good for the soul as much as it is for the body.
Conclusion
This crispy sourdough focaccia is more than just a bread recipe. It is a lesson in patience and trust. Trusting your starter, trusting the long, slow fermentation, and trusting that a simple pool of olive oil can create something truly extraordinary. The first time you hear that crackling sound when you flip it out of the pan, you will understand exactly what I mean.
I have made this focaccia for dinner parties, for quiet Sunday afternoons, and for no reason at all. Every single time, it disappears. People fight over the crispy corner pieces. They ask for the recipe. They look at me like I am some kind of bread wizard. But the secret is not magic. It is just time and a little bit of courage to break the rules.
I encourage you to make this recipe your own. Experiment with the toppings. Try different herbs. Add some olives or roasted red peppers. The base dough is forgiving and versatile. And if you love this approach to bread, you will probably also enjoy my crispy garlic herb smashed potatoes for another side dish that delivers that same satisfying crunch.
I would love to hear how your focaccia turns out. Did you get that perfect crispy bottom? What toppings did you use? Drop a comment below and let me know. And if you loved this recipe, share it with a friend who needs a little more homemade bread in their life. Happy baking, friends.
Frequently Asked Questions
Can I use all-purpose flour instead of bread flour?
Yes, you can. The focaccia will still be delicious, but the crumb will be slightly less airy and the crust will be a bit softer. Bread flour has more protein, which creates a stronger gluten network and a chewier texture. If you use all-purpose flour, you might want to reduce the water by about 20g to account for the lower protein content.
My dough is very sticky. Is that normal?
Absolutely. This is a high-hydration dough, meaning it contains a lot of water relative to the flour. It is supposed to be very sticky. That is what gives you the open, airy crumb with those beautiful holes. Resist the urge to add more flour. Wet your hands and your bench scraper to handle the dough, and trust the stretch and fold process to develop the gluten.
Can I speed up the fermentation process?
You can, but you will sacrifice flavor and texture. If you are in a hurry, you can let the dough ferment at room temperature for 4-6 hours instead of in the fridge for 24-48 hours. The dough will still rise, but it will lack the complex, tangy sourdough flavor that develops during the long cold fermentation. The texture will also be less open and airy.
Why is my bottom crust not crispy?
The most common reason is not using enough olive oil in the pan. You need a generous pool of oil, about ¼ inch deep, for the dough to fry in as it bakes. Another reason could be that you are baking on a lower oven rack. Try moving the pan to the middle or lower-middle rack. Finally, make sure you are transferring the focaccia to a wire cooling rack immediately after baking. Leaving it in the hot pan traps steam and softens the crust.
Can I double this recipe?
Yes, you can easily double the recipe. Use two separate 9×13 pans. Do not try to fit all the dough into one larger pan, as it will be too thick and the bottom crust will not get crispy. Divide the dough evenly between the two pans and follow the same proofing and baking instructions. You may need to rotate the pans halfway through baking for even browning.
Pin This Recipe!

Crispy Sourdough Focaccia with Rosemary & Sea Salt

This crispy sourdough focaccia features a shatteringly crisp bottom crust, a light and airy interior, and a deep tangy flavor from a long cold fermentation. Made with simple ingredients and minimal hands-on time, it’s a foolproof recipe for beginners and experienced bakers alike.
- Prep Time: 15 minutes
- Cook Time: 30 minutes
- Total Time: 48 hours (including fermentation and proofing)
- Yield: 12 servings 1x
- Category: Bread
- Cuisine: Italian
Ingredients
- 400g bread flour (about 3 cups)
- 150g active sourdough starter (about ¾ cup)
- 300g warm water (about 1 ¼ cups, around 90°F/32°C)
- 80g extra virgin olive oil (about ⅓ cup, plus more for the pan)
- 10g fine sea salt (about 1 ½ teaspoons)
- 2–3 sprigs fresh rosemary, leaves stripped and roughly chopped
- Flaky sea salt (such as Maldon, for finishing)
Instructions
- Feed your starter 8-10 hours before mixing the dough. Use a 1:1:1 ratio (50g starter, 50g flour, 50g water) and leave in a warm spot until bubbly and doubled.
- In a large mixing bowl, combine 300g warm water and 150g active starter. Whisk until dissolved. Add 400g bread flour and 10g fine sea salt. Mix with your hands or a dough scraper until no dry flour remains. The dough will be shaggy and sticky. Cover and let rest for 30 minutes (autolyse).
- After the rest, wet your hands slightly. Perform a stretch and fold: grab one side of the dough, stretch it up, and fold it over the top. Rotate the bowl a quarter turn and repeat for all four sides. Cover and rest 30 minutes. Repeat this stretch and fold process three more times (total of 4 sets).
- Cover the bowl tightly with plastic wrap or a shower cap and refrigerate for 24 to 48 hours (bulk fermentation). The dough will rise and develop bubbles.
- About 3-4 hours before baking, remove the dough from the fridge. Pour about ¼ cup olive oil into a 9×13-inch metal baking pan, tilting to coat the bottom. Gently tip the cold dough into the pan without deflating it.
- Let the dough sit uncovered for 30 minutes. Then, using oiled fingertips, gently press the dough to the edges of the pan. If it resists, let it rest 10 more minutes. Press deep dimples all over the surface. Drizzle with another 1-2 tablespoons olive oil, sprinkle with chopped rosemary and flaky sea salt. Cover loosely with plastic wrap and proof at room temperature for 2-3 hours until puffy and jiggly.
- About 30 minutes before baking, preheat the oven to 425°F (220°C) with the rack in the middle position. Uncover the focaccia and bake for 25-30 minutes until deep golden brown and the edges are crispy. If browning too quickly, tent with foil for the last 5-10 minutes.
- Immediately after baking, run a thin spatula around the edges to loosen the focaccia. Transfer to a wire cooling rack. Let cool for at least 15 minutes before slicing. Serve warm or at room temperature.
Notes
The long cold fermentation (24-48 hours) is key for flavor and texture. Do not skimp on the olive oil in the pan—it creates the crispy bottom crust. For best results, transfer the focaccia to a cooling rack immediately after baking to prevent the bottom from softening.
Nutrition
- Serving Size: 1 square
- Calories: 220
- Sodium: 290
- Fat: 10
- Saturated Fat: 1.5
- Carbohydrates: 28
- Fiber: 1
- Protein: 5
Keywords: sourdough focaccia, crispy focaccia, rosemary focaccia, sea salt focaccia, homemade bread, sourdough bread, Italian bread