I figured Nashville hot chicken meant a deep fryer, a mess of oil splatters, and a whole Saturday afternoon dedicated to one meal. It took about one pandemic-era craving and a serious lack of patience for that assumption to fall apart completely. I wanted that burn — the kind that makes your lips tingle and your nose run — but I wanted it on a Tuesday, without pulling out my Dutch oven.
So I did what any reasonable person would do. I grabbed a sheet pan, tossed some chicken in buttermilk, and crossed my fingers. The result? Crispy, sticky, fiery chicken bites that honestly rival anything I ever ordered from a hot chicken joint. The crunch comes from the oven, not a vat of oil, and the heat level is entirely up to you. That first batch taught me something: you don’t need a deep fryer to get that signature crackle. You just need a hot oven, a little patience, and a willingness to get cayenne under your fingernails.
These crispy sheet-pan Nashville hot chicken bites became my weeknight secret weapon. They solve the craving without the cleanup drama. And once you taste that first bite — the one where the spicy oil meets the crunchy coating — you will understand why I stopped trying to replicate the restaurant version and started making my own.
Why You Will Love This Recipe
This recipe is not just another chicken dinner. It is the answer to the question “what can I make that feels like a treat but does not require deep cleaning my kitchen?” I have tested this method at least a dozen times, tweaking the breading and the heat, and I can tell you with confidence — this version works every single time.
- Quick & Easy : From fridge to table in about 45 minutes. No marinating overnight, no complicated steps.
- Simple Ingredients : You probably have most of this in your pantry right now. Buttermilk, flour, cayenne, paprika, brown sugar. That is it.
- Perfect for Game Day or Weeknight Cravings : These bites disappear fast at parties, but they are also perfect for a cozy dinner when you want something spicy and satisfying.
- Crowd-Pleaser : I have served these to friends who swear they do not like spicy food, and they went back for seconds. The heat builds gradually, so it is approachable.
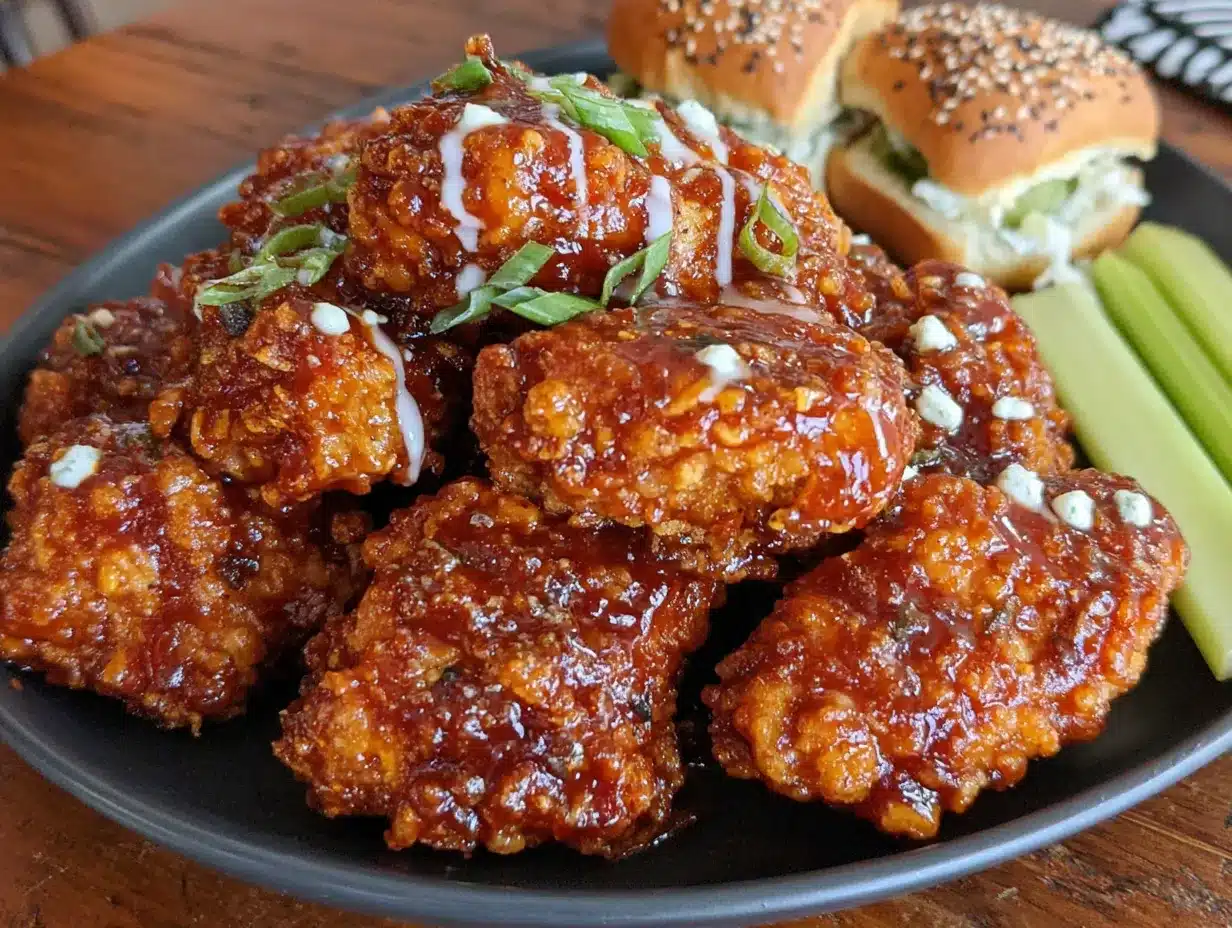
- Unbelievably Delicious : The texture is the real star here. Crispy on the outside, tender and juicy on the inside, and coated in that signature glossy, spicy oil.
What makes this recipe different from the rest is the technique. Instead of deep frying, we use a high-heat sheet-pan method that creates an incredibly crunchy crust without all the oil. The secret is in the double-dip — a buttermilk soak followed by a seasoned flour dredge — and a final brush of that cayenne-infused oil that gives Nashville hot chicken its signature kick. It is comfort food reimagined: faster, cleaner, but with the same soul-soothing satisfaction.
What Ingredients You Will Need
This recipe uses straightforward ingredients, but each one plays a specific role in building that perfect crunch and heat. Here is what you will need and why each ingredient matters.
For the Chicken and Brine
- Boneless, skinless chicken thighs (1.5 lbs or 680g) — I prefer thighs here because they stay juicy under the high heat. Cut them into bite-sized pieces, about 1.5 inches each. You can use chicken breast if you prefer, just watch the cook time so they do not dry out.
- Buttermilk (1 cup or 240ml) — This is not just for flavor. The acidity in buttermilk helps tenderize the chicken and helps the flour coating stick. If you do not have buttermilk, you can sour regular milk with a tablespoon of lemon juice or vinegar and let it sit for 5 minutes.
- Hot sauce (2 tablespoons, like Frank’s RedHot) — Adds a little extra tang and a whisper of heat into the brine. It is subtle but noticeable.
For the Breading
- All-purpose flour (1.5 cups or 190g) — Creates the base of the crunchy coating. I have tried gluten-free all-purpose blends here and they work, but the texture is slightly less crispy.
- Cornstarch (1/4 cup or 30g) — This is the secret to extra crunch. Cornstarch lightens the coating and helps it crisp up beautifully in the oven.
- Paprika (2 teaspoons) — Adds color and a mild sweetness that balances the heat. I use sweet paprika, but smoked paprika works too for a deeper flavor.
- Garlic powder (1 teaspoon) — Essential for savory depth.
- Onion powder (1 teaspoon) — Rounds out the savory notes.
- Cayenne pepper (1 teaspoon for mild, up to 1 tablespoon for hot) — Adjust this based on your tolerance. Start with less and taste the oil mixture later to gauge the heat.
- Salt (1 teaspoon) and black pepper (1/2 teaspoon) — Season the flour mixture generously.
For the Nashville Hot Oil Glaze
- Neutral oil (1/2 cup or 120ml, like canola or avocado) — This carries the heat and creates that glossy, sticky coating. Do not use olive oil here; its flavor is too strong.
- Cayenne pepper (2 to 4 tablespoons, depending on your heat preference) — This is where the real fire comes from. I usually use 3 tablespoons for a solid medium heat that makes your nose run but does not ruin your evening.
- Brown sugar (1 tablespoon, packed) — Adds a touch of sweetness that balances the heat and helps the glaze stick to the chicken.
- Paprika (1 teaspoon) — For color and a little extra depth.
- Garlic powder (1/2 teaspoon) — Infuses the oil with savory flavor.
- Salt (1/2 teaspoon) — Seasons the glaze.
For Serving (Optional but Recommended)
- White bread slices — Classic Nashville hot chicken is served on white bread to soak up the spicy oil. It is traditional and delicious.
- Pickle slices — Dill pickles cut through the heat and add acidity. Do not skip these.
Equipment Needed
You do not need much for this recipe, which is part of the appeal. Here is what you will need:
- Large sheet pan (18×13 inches or half-sheet pan) — A rimmed baking sheet is essential to catch any drips and to give the chicken space to crisp. If your pan is too small, the chicken will steam instead of crisp.
- Wire rack that fits inside the sheet pan — This is the key to crispy chicken. Elevating the chicken allows air to circulate underneath, preventing a soggy bottom. If you do not have a wire rack, you can flip the chicken halfway through cooking, but the texture will not be as good.
- Two shallow bowls or pie plates — One for the buttermilk mixture and one for the flour dredge.
- Tongs — For transferring the chicken without making a mess of your fingers.
- Small saucepan — For making the hot oil glaze.
- Pastry brush — For brushing the glaze onto the cooked chicken. A silicone brush works best here.
I have made this recipe with a cheap baking sheet and a flimsy wire rack, and honestly, it still worked. But investing in a good heavy-duty sheet pan and a sturdy rack makes a noticeable difference in even browning and crispiness.
Preparation Method
Step 1: Prep the Chicken and Oven
Preheat your oven to 425°F (220°C). Place a wire rack inside your sheet pan and spray it lightly with nonstick cooking spray. This prevents the chicken from sticking. Cut your chicken thighs into bite-sized pieces, about 1.5 inches each. Pat them dry with paper towels — this helps the buttermilk stick better.
Step 2: The Buttermilk Soak
In a shallow bowl, whisk together the buttermilk and hot sauce. Add the chicken pieces and toss to coat. Let them sit for at least 10 minutes while you prepare the breading. If you have more time, you can let them soak for up to 2 hours in the fridge — the chicken gets even more tender. But honestly, 10 minutes is enough for a weeknight.
Step 3: Prepare the Breading
In another shallow bowl, whisk together the flour, cornstarch, paprika, garlic powder, onion powder, cayenne pepper, salt, and black pepper. Make sure everything is evenly distributed. The cornstarch tends to settle at the bottom, so give it a good stir.
Step 4: Dredge the Chicken
Working with a few pieces at a time, remove the chicken from the buttermilk, letting the excess drip off. Dredge each piece in the flour mixture, pressing gently so the coating adheres. Shake off any excess flour and place the chicken on the prepared wire rack. Do not overcrowd the rack — leave a little space between each piece so the heat can circulate. If you crowd them, they will steam and the coating will not get crispy.
Step 5: Bake the Chicken
Bake the chicken for 18 to 22 minutes, flipping the pieces halfway through. You are looking for a deep golden brown color and an internal temperature of 165°F (74°C). The exact time depends on the size of your pieces, so start checking at 18 minutes. The coating should feel firm and crunchy to the touch.
Step 6: Make the Hot Oil Glaze
While the chicken bakes, prepare the glaze. In a small saucepan, combine the neutral oil, cayenne pepper, brown sugar, paprika, garlic powder, and salt. Warm the mixture over low heat, stirring constantly, until the sugar dissolves and the oil is fragrant — about 2 to 3 minutes. Do not let it boil or the cayenne can burn and turn bitter. Remove from heat and set aside.
Step 7: Glaze the Chicken
As soon as the chicken comes out of the oven, brush each piece generously with the hot oil mixture. Use a pastry brush to coat every nook and cranny. The residual heat from the chicken will help the glaze adhere and create that signature sticky, glossy finish. Serve immediately on white bread with pickle slices.
Cooking Tips & Techniques
I have learned a few things the hard way while developing this recipe. Here are the tips that make the biggest difference.
Do not skip the wire rack. I tried baking these directly on the sheet pan once, and the bottoms turned out soggy. The wire rack allows hot air to circulate underneath the chicken, ensuring every side gets crispy. If you do not have a rack, flip the chicken halfway through and use a spatula to gently lift the pieces off the pan.
Let the chicken rest after breading. After you dredge each piece, let it sit on the wire rack for about 5 minutes before baking. This helps the coating adhere better and prevents it from sliding off during cooking. I know it is tempting to rush, but this small step makes a big difference.
Adjust the heat gradually. Cayenne pepper varies in potency. I once used a fresh batch of cayenne that was significantly hotter than my usual brand, and the glaze was almost too spicy to eat. Start with the lower amount of cayenne in the glaze, taste it, and add more if you want more heat. You can always add, but you cannot take away.
Brush the glaze while the chicken is hot. This is non-negotiable. If you let the chicken cool down, the glaze will not stick properly and will just pool on the plate. Work quickly and brush generously.
Double the recipe if you are feeding a crowd. These bites disappear fast. I learned this the hard way when I made a single batch for a game-day gathering and they were gone in 10 minutes. If you need to double it, use two sheet pans and rotate them halfway through baking.
Variations & Adaptations
This recipe is incredibly flexible. Here are some ways to make it your own.
Dietary Adaptations
Gluten-Free : Substitute the all-purpose flour with a gluten-free all-purpose blend. I have used Bob’s Red Mill 1-to-1 Baking Flour with good results. Add an extra tablespoon of cornstarch to help with crispiness.
Dairy-Free : Use a dairy-free buttermilk substitute. Combine 1 cup of unsweetened almond milk or oat milk with 1 tablespoon of lemon juice or vinegar, and let it sit for 5 minutes. It works perfectly.
Flavor Twists
Honey Heat : Add 2 tablespoons of honey to the hot oil glaze for a sweet-and-spicy version. The honey will make the glaze slightly thicker and stickier, which is delicious.
Garlic Lover’s : Add 2 minced garlic cloves to the oil glaze while it warms. Let them infuse for a minute before adding the cayenne. The garlic adds a savory depth that complements the heat.
Smoky Nashville : Replace the sweet paprika in the glaze with smoked paprika. It adds a subtle smokiness that makes the chicken taste like it came off a grill.
Serving Variations
Instead of serving on white bread, try these bites over a simple salad with ranch dressing, or on top of creamy white chicken chili for a spicy twist. They are also fantastic on their own as a snack with a side of blue cheese dip.
Serving & Storage Suggestions
These bites are best served immediately, straight from the oven, while the coating is still crunchy and the glaze is glossy. Arrange them on a platter lined with white bread slices and top with pickle slices. The bread soaks up the spicy oil and becomes a delicious little bonus bite.
If you have leftovers (which is rare in my house), store them in an airtight container in the refrigerator for up to 3 days. The coating will soften, but the flavor will still be fantastic. To reheat, place them on a wire rack in a 375°F (190°C) oven for about 8 to 10 minutes. This helps restore some of the crunch. Avoid the microwave — it turns the coating into a sad, soggy mess.
For meal prep, you can bread the chicken and keep it on the wire rack in the fridge for up to 4 hours before baking. Just cover it loosely with plastic wrap. This is a great way to get ahead if you are hosting a party.
The flavors actually deepen overnight. The next day, the spicy oil has soaked into the chicken a little more, and the heat mellows slightly. I have been known to make a double batch just so I can have leftovers for lunch the next day — cold, straight from the fridge, with extra pickles.
Nutritional Information & Benefits
Here is the approximate nutritional breakdown for one serving (about 6 ounces of chicken, not including bread or pickles):
- Calories: 420
- Protein: 32g
- Fat: 24g
- Carbohydrates: 18g
- Fiber: 1g
- Sugar: 4g
Chicken thighs are a great source of protein and contain essential B vitamins like niacin and B6, which support energy metabolism. Cayenne pepper contains capsaicin, which has been shown to boost metabolism and reduce inflammation. The buttermilk adds calcium and probiotics, especially if you use a cultured variety.
This recipe is naturally gluten-free if you use a gluten-free flour blend, and dairy-free if you use a plant-based buttermilk. It is also lower in fat than traditional deep-fried Nashville hot chicken, making it a smarter choice for weeknight indulgence.
While this is not a health food, it is a meal that satisfies a craving without derailing your week. And honestly, the fact that it is baked instead of fried makes me feel a little better about going back for seconds.
Conclusion
This crispy sheet-pan Nashville hot chicken bites recipe is proof that you do not need a deep fryer to get that perfect crunch and fiery flavor. It is quick enough for a weeknight, impressive enough for guests, and endlessly customizable to suit your heat tolerance. Whether you serve it on white bread with pickles, over a salad, or alongside some green chili smash burgers for a spicy feast, this recipe delivers every single time.
I love this recipe because it solves a real problem — how to get that Nashville hot chicken experience without the mess and time commitment of deep frying. It has become my go-to for game days, lazy Sundays, and those nights when only something spicy will do. I hope you try it and make it your own. Adjust the heat, try a new variation, and let me know how it turns out.
Have you made these bites? What is your favorite way to customize the heat? Drop a comment below and share your version. And if you loved this recipe, share it with a friend who needs a little spice in their life!
Frequently Asked Questions
Can I use chicken breast instead of thighs?
Yes, you can. Chicken breast works, but it will cook faster and can dry out more easily. Cut the breast into slightly larger pieces (about 2 inches) and start checking for doneness at 15 minutes. The internal temperature should reach 165°F (74°C).
How do I make this recipe less spicy?
Reduce the cayenne pepper in both the breading and the glaze. Start with just 1/2 teaspoon in the breading and 1 tablespoon in the glaze. You can also add more brown sugar to the glaze to balance the heat. For a completely mild version, omit the cayenne from the glaze and use only paprika.
Can I make these in an air fryer?
Absolutely. Preheat your air fryer to 400°F (200°C) and cook the breaded chicken in a single layer for 12 to 15 minutes, flipping halfway through. The cooking time will depend on the size of your air fryer and the chicken pieces. Brush with the glaze immediately after cooking.
How do I keep the coating crispy after glazing?
Serve the chicken immediately after brushing on the glaze. The longer it sits, the more the oil will soften the coating. If you need to hold it for a party, keep the glaze separate and brush it on right before serving. You can also reheat glazed chicken in a 375°F (190°C) oven for 5 minutes to restore some crunch.
Can I freeze these chicken bites?
Yes, but freeze them before glazing. Bake the chicken as directed, let it cool completely, and then freeze it in a single layer on a sheet pan. Once frozen, transfer the pieces to a freezer bag. To reheat, bake from frozen at 400°F (200°C) for 12 to 15 minutes, then brush with freshly made glaze. The texture will not be as crispy as fresh, but the flavor will still be fantastic.
Pin This Recipe!
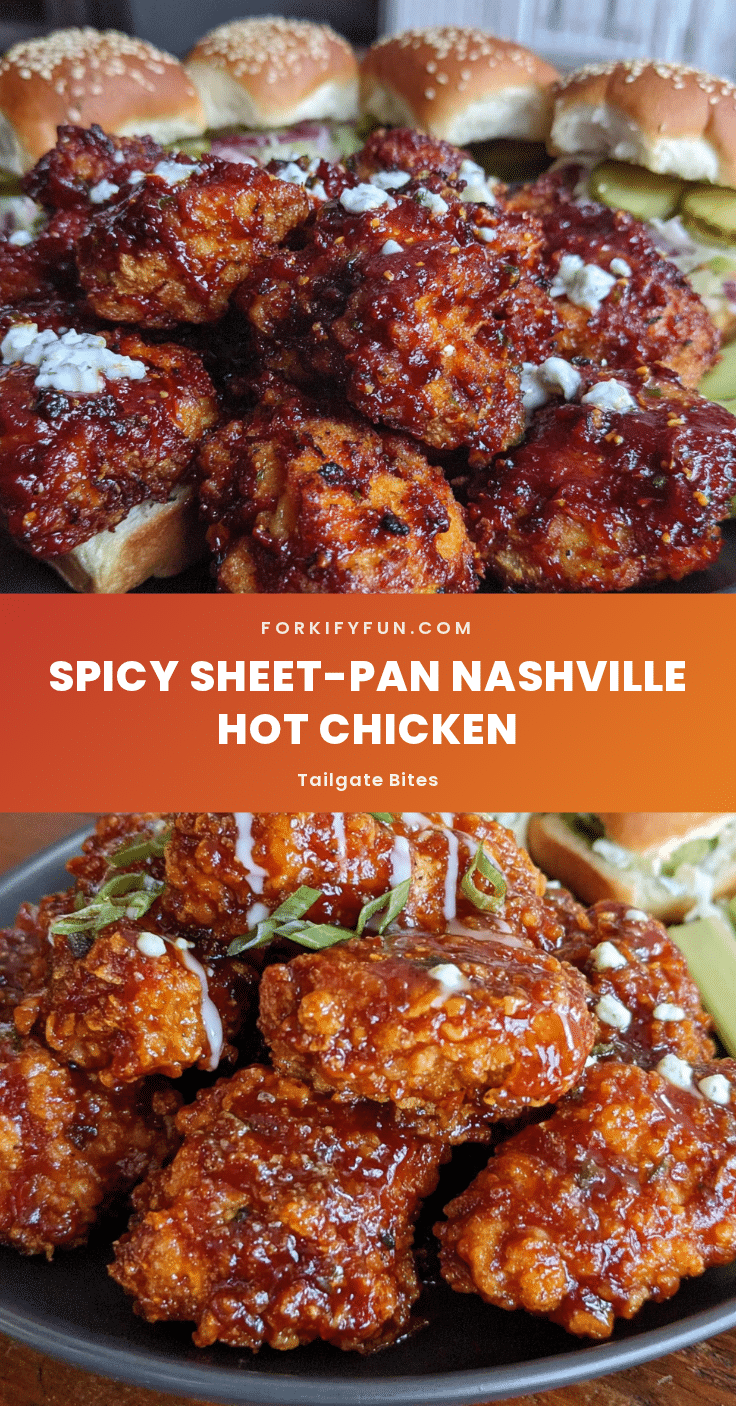
Crispy Nashville Hot Chicken Bites: Easy Sheet-Pan Recipe

Crispy, sticky, fiery chicken bites made on a sheet pan without deep frying. This weeknight-friendly recipe delivers the signature crunch and heat of Nashville hot chicken in about 45 minutes.
- Prep Time: 15 minutes
- Cook Time: 22 minutes
- Total Time: 45 minutes
- Yield: 4 servings 1x
- Category: Main Course
- Cuisine: American
Ingredients
- 1.5 lbs (680g) boneless, skinless chicken thighs, cut into 1.5-inch pieces
- 1 cup (240ml) buttermilk
- 2 tablespoons hot sauce (e.g., Frank’s RedHot)
- 1.5 cups (190g) all-purpose flour
- 1/4 cup (30g) cornstarch
- 2 teaspoons paprika
- 1 teaspoon garlic powder
- 1 teaspoon onion powder
- 1 teaspoon cayenne pepper (for mild) to 1 tablespoon (for hot)
- 1 teaspoon salt
- 1/2 teaspoon black pepper
- 1/2 cup (120ml) neutral oil (e.g., canola or avocado)
- 2 to 4 tablespoons cayenne pepper (for glaze, adjust to taste)
- 1 tablespoon packed brown sugar
- 1 teaspoon paprika (for glaze)
- 1/2 teaspoon garlic powder (for glaze)
- 1/2 teaspoon salt (for glaze)
- White bread slices (for serving, optional)
- Dill pickle slices (for serving, optional)
Instructions
- Preheat oven to 425°F (220°C). Place a wire rack inside a large sheet pan and spray lightly with nonstick cooking spray.
- Cut chicken thighs into bite-sized pieces (about 1.5 inches). Pat dry with paper towels.
- In a shallow bowl, whisk together buttermilk and hot sauce. Add chicken pieces and toss to coat. Let sit for at least 10 minutes (or up to 2 hours in the fridge).
- In another shallow bowl, whisk together flour, cornstarch, paprika, garlic powder, onion powder, cayenne pepper, salt, and black pepper.
- Working a few pieces at a time, remove chicken from buttermilk, letting excess drip off. Dredge in flour mixture, pressing gently to adhere. Shake off excess and place on prepared wire rack, leaving space between pieces.
- Bake chicken for 18 to 22 minutes, flipping halfway through, until deep golden brown and internal temperature reaches 165°F (74°C).
- While chicken bakes, prepare glaze: In a small saucepan, combine neutral oil, cayenne pepper (2 to 4 tablespoons), brown sugar, paprika, garlic powder, and salt. Warm over low heat, stirring constantly, until sugar dissolves and oil is fragrant (2 to 3 minutes). Do not boil. Remove from heat.
- As soon as chicken comes out of the oven, brush each piece generously with the hot oil glaze. Serve immediately on white bread with pickle slices.
Notes
Do not skip the wire rack for maximum crispiness. Let breaded chicken rest 5 minutes before baking to help coating adhere. Adjust cayenne gradually in the glaze—start with less and add more to taste. Brush glaze while chicken is hot for best adhesion. For meal prep, bread chicken and refrigerate on wire rack up to 4 hours before baking. Leftovers keep in fridge up to 3 days; reheat in oven at 375°F for 8-10 minutes to restore crunch.
Nutrition
- Serving Size: 6 ounces of chicken
- Calories: 420
- Sugar: 4
- Fat: 24
- Carbohydrates: 18
- Fiber: 1
- Protein: 32
Keywords: Nashville hot chicken, sheet pan chicken, crispy chicken bites, spicy chicken, baked chicken, weeknight dinner, game day snack


