“You call that an egg tart?” my friend joked while eyeing my attempt at Hong Kong egg tarts during an impromptu weekend baking session. Honestly, I was skeptical myself. I’d always thought those golden, flaky pastries with their silky custard filling were a bakery-only indulgence—too delicate to master in a home kitchen. But after a few tweaks and, well, a couple of slightly soggy failures, something clicked.
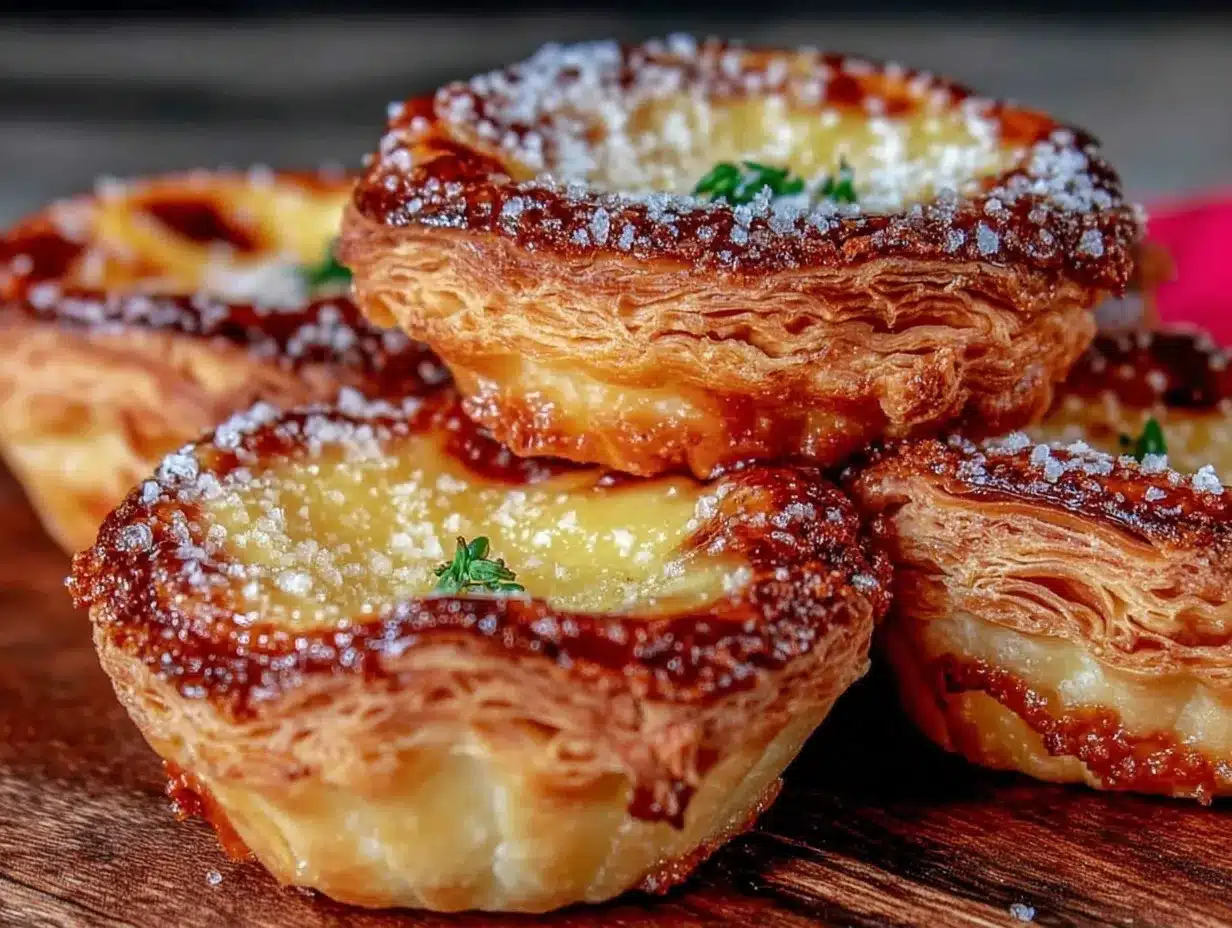
The crust finally crisped just right, whispering that perfect crunch under my fork, while the custard set smooth as silk, barely shimmering in the afternoon light. That first bite—comforting, buttery, and just sweet enough—felt like a quiet nod from my kitchen, saying, “You’ve got this.” It wasn’t just about recreating a classic; it was about making it approachable, even for a “not really a baker” type like me.
Now, these crispy Hong Kong egg tarts with silky custard filling pop out of my oven regularly, especially when I want something that feels both fancy and homey without the fuss. They’re the kind of treat that makes you pause for a moment, close your eyes, and appreciate simple things done well. If you’ve ever wondered whether you can master that delicate balance of crisp and creamy at home, this recipe is the one that quietly proves you can.
Why You’ll Love This Recipe
This recipe isn’t just another egg tart—it’s a result of trial, error, and a little stubbornness to get every element just right. After making these tarts multiple times, I’ve learned exactly what works and what trips you up. Here’s why you’ll want to keep this recipe handy:
- Quick & Easy: Comes together in about 45 minutes, perfect for a weekend treat or last-minute dessert craving.
- Simple Ingredients: No exotic items here—just things you probably already have in your pantry or fridge.
- Perfect for Special Occasions: Whether it’s tea time, brunch, or a cozy night in, these tarts add a touch of elegance effortlessly.
- Crowd-Pleaser: Family, friends, or even that skeptical friend will be asking for seconds.
- Unbelievably Delicious: The contrast between the flaky, buttery crust and the smooth, melt-in-your-mouth custard is pure magic.
What sets this recipe apart is the technique I use for the crust and custard. The crust is made with a simple homemade pastry dough that crisps up beautifully without becoming tough. For the custard, I blend the eggs with a touch of cream and sugar just enough to keep it silky but not rubbery. Plus, I avoid fancy equipment or ingredients, so this is genuinely homemade comfort food that you can whip up anytime.
Honestly, it’s the kind of recipe that makes you want to slow down, savor the moment, and maybe even share a few with neighbors (or keep them all to yourself). It’s a little bit fancy but totally doable, with results that feel like a warm hug from the inside out.
What Ingredients You Will Need
This recipe uses simple, wholesome ingredients to deliver bold flavor and satisfying texture without the fuss. Most are pantry staples or easy to find at your local grocery store.
- For the Pastry Crust:
- All-purpose flour, 1 1/4 cups (160 g) – I prefer King Arthur for consistent results
- Unsalted butter, 1/2 cup (113 g), cold and cubed (adds that flaky, buttery crunch)
- Powdered sugar, 2 tablespoons (to lightly sweeten the crust)
- Cold water, 2-3 tablespoons (to bring the dough together)
- A pinch of salt (balances sweetness)
- For the Silky Custard Filling:
- Large eggs, 3 (room temperature for smooth mixing)
- Granulated sugar, 1/3 cup (65 g) – adjust to taste, but this hits the sweet spot
- Evaporated milk, 1/2 cup (120 ml) – gives the custard richness without heaviness
- Whole milk, 1/2 cup (120 ml) – adds creaminess
- Vanilla extract, 1 teaspoon (for that subtle aromatic lift)
Optional: If you want to experiment, try swapping evaporated milk with coconut milk for a tropical twist or almond milk for a lighter version. For a gluten-free crust, almond or oat flour can work but expect a slightly different texture.
Pro tip: Look for small-curd evaporated milk and fresh eggs to get the smoothest custard texture. And if you’re curious about the science behind the custard, the ratio of eggs to milk is key to keeping it silky rather than rubbery.
Equipment Needed
- Standard muffin tin or dedicated tart pans (I use a non-stick 12-cup muffin tin for easy portioning)
- Mixing bowls (preferably glass or stainless steel)
- Whisk and fork (for beating eggs and mixing dough)
- Rolling pin (a small one works fine for this dough)
- Measuring cups and spoons (accuracy matters for custard)
- Baking sheet (to place under the muffin tin for catching drips or easy handling)
- Fine mesh strainer (optional, for straining custard filling to ensure smoothness)
If you don’t have tart pans, the muffin tin is your best friend. I’ve also done this recipe using disposable foil tart shells when I was short on time. Maintenance-wise, keeping your rolling pin and mixing bowls clean and dry will make prep smoother next time.
Budget-friendly tip: You don’t need expensive equipment to nail this recipe. Even a humble muffin tin from the dollar store with a little non-stick spray works surprisingly well.
Preparation Method
- Make the Pastry Dough: In a bowl, whisk together flour, powdered sugar, and a pinch of salt. Cut in the cold, cubed butter with a pastry cutter or your fingers until the mixture looks like coarse crumbs. Add cold water, 1 tablespoon at a time, mixing gently until the dough just comes together. Don’t overwork it! Wrap the dough in plastic wrap and chill for at least 30 minutes. (This resting step is key for a tender crust.)
- Prepare the Custard Filling: While the dough chills, whisk the eggs and sugar in a bowl until the sugar dissolves. Stir in evaporated milk, whole milk, and vanilla extract. For extra silky smoothness, strain the mixture through a fine mesh sieve to remove any chalaza or lumps. Set aside.
- Roll Out the Dough: Lightly flour a clean surface and roll the chilled dough to about 1/8 inch (3 mm) thickness. Using a round cutter about 3 inches (7.5 cm) wide, cut circles. Gently press each circle into your muffin tin or tart pans, making sure to press evenly up the sides. Trim any excess dough. (If the dough shrinks when you bake, chilling again after shaping helps.)
- Fill and Bake: Preheat your oven to 375°F (190°C). Pour the custard filling gently into each tart shell, filling about 3/4 full. Place the muffin tin on a baking sheet and bake for 20-25 minutes, or until the custard is set but still jiggles slightly in the center and the crust edges are golden brown.
- Cool and Serve: Let the tarts cool in the tin for about 10 minutes before transferring to a wire rack. They’re best enjoyed warm or at room temperature, when the custard is silky and the crust stays crispy.
If you notice the custard bubbling too much or browning unevenly, lowering the oven temperature slightly or covering loosely with foil halfway through baking can help. Also, avoid overfilling as the custard can spill and make a mess.
One little trick I’ve learned: baking these alongside a batch of crispy garlic butter salmon makes for a fantastic meal—savory and sweet, all in one.
Cooking Tips & Techniques
Mastering crispy Hong Kong egg tarts is about attention to detail, but honestly, it’s not rocket science. Here are some tips I’ve picked up:
- Keep Butter Cold: For that flaky, crisp crust, cold butter is your best friend. Warm butter means a tough dough.
- Don’t Overwork the Dough: Handle the pastry dough just enough to bring it together. Over-kneading develops gluten, making the crust chewy instead of tender.
- Strain the Custard: Straining removes lumps and gives a silky smooth filling, which is what sets this recipe apart.
- Watch the Bake Time: Custard should be just set with a slight jiggle. Overbaking leads to a rubbery texture.
- Chill Dough After Shaping: If you have time, chilling the dough again after lining the tart cups helps prevent shrinkage during baking.
Believe me, I’ve had my fair share of custards that curdled or crusts that got soggy. The biggest lesson? Patience. Let the dough rest, don’t rush the baking, and trust your oven’s quirks.
Also, multitasking is your friend here—while the custard sets in the oven, you can prep a quick creamy dip or even a simple salad to round out your snack spread.
Variations & Adaptations
Hong Kong egg tarts are wonderfully versatile. Here are a few ways to mix things up:
- Dairy-Free Version: Swap evaporated and whole milk with coconut milk for a tropical, dairy-free custard that’s just as silky.
- Herbal Infusion: Add a small pinch of ground cinnamon or a few drops of orange blossom water to the custard for a subtle aromatic twist.
- Mini Tartlets: Use mini muffin tins to make bite-sized tarts perfect for parties or snack platters.
- Gluten-Free: Use almond flour or a gluten-free flour blend for the crust, though expect a slightly different texture.
- Sweet Topping: Lightly dust with powdered sugar or brush the crust edges with an egg wash before baking for added color and shine.
One of my favorite personal tweaks was trying a version with a sourdough discard crust, which added a nice tang and crunch. It’s a fun way to reduce waste and bring a little extra flavor complexity.
Serving & Storage Suggestions
These crispy Hong Kong egg tarts are best served warm or at room temperature, right after baking when the custard shines silky and the crust stays crisp. They’re perfect alongside a cup of jasmine tea or a lightly brewed coffee.
If you want to serve them a bit later, store tarts in an airtight container in the fridge for up to 3 days. When ready to eat, reheat gently in a 325°F (160°C) oven for about 5-7 minutes to bring back that crispness. Avoid microwaving, as it can make the crust soggy.
Freezing is possible too—wrap individual tarts in plastic wrap and foil, then freeze up to a month. Thaw overnight in the fridge and reheat as above. Flavors actually mellow overnight, making the custard taste richer the next day.
For a full meal, these tarts pair wonderfully with lighter dishes like a fresh salad or even a savory bite like the blackened shrimp tacos with zesty mango slaw, balancing sweet and savory flavors.
Nutritional Information & Benefits
Each crispy Hong Kong egg tart contains approximately 180-220 calories, depending on size. They offer a moderate amount of protein from the eggs and calcium from the milk, making them a satisfying treat rather than just empty calories.
The eggs provide essential vitamins like B12 and choline, which support brain health. Using evaporated milk adds richness without excessive fat, and you can tweak sugar amounts to suit your preference or dietary needs.
For gluten-free or dairy-free adaptations, this recipe can easily fit into many dietary plans. Just keep in mind the custard contains eggs, a common allergen.
Personally, I appreciate that these tarts are a homemade indulgence with simple ingredients, letting me enjoy a classic flavor without processed additives. It’s comfort food that feels honest and real.
Conclusion
Crispy Hong Kong egg tarts with silky custard filling are the kind of recipe that surprises you. Not just because they’re doable at home, but because they show how straightforward ingredients and a little patience can create something truly special. Whether you’re sharing with friends or enjoying a quiet moment alone, these tarts bring a little extra joy without fuss.
Feel free to customize the crust or custard to your taste, experiment with flavors, or even make mini versions for sharing. I keep coming back to this recipe—it’s that comforting, reliable little piece of sweetness in my kitchen.
If you try it, I’d love to hear how it went or what twists you added. There’s something about baking that connects us, and these tarts are my way of sharing a bit of that warmth with you. Happy baking!
FAQs
Can I use store-bought pie crust to make Hong Kong egg tarts?
Yes, store-bought pie crust can be a convenient shortcut. Just roll it thinner to mimic the delicate texture, but homemade dough tends to crisp better and taste fresher.
How can I tell when the custard is perfectly baked?
Look for custard that’s set around the edges but still jiggles gently in the center when you shake the pan. It will firm up more as it cools.
Why did my tart crust turn out soggy?
Common reasons include overfilling the custard, not chilling the dough enough, or baking at too low a temperature. Chilling the shaped dough and baking at 375°F helps keep it crisp.
Can I make the custard filling ahead of time?
Yes, you can prepare the custard mixture a few hours ahead and keep it refrigerated. Just stir gently before filling the crusts to recombine any settled ingredients.
What’s the best way to store leftover egg tarts?
Store leftovers in an airtight container in the fridge for up to 3 days. Reheat in the oven to keep the crust crisp. Avoid microwaving if you want to preserve texture.
Pin This Recipe!
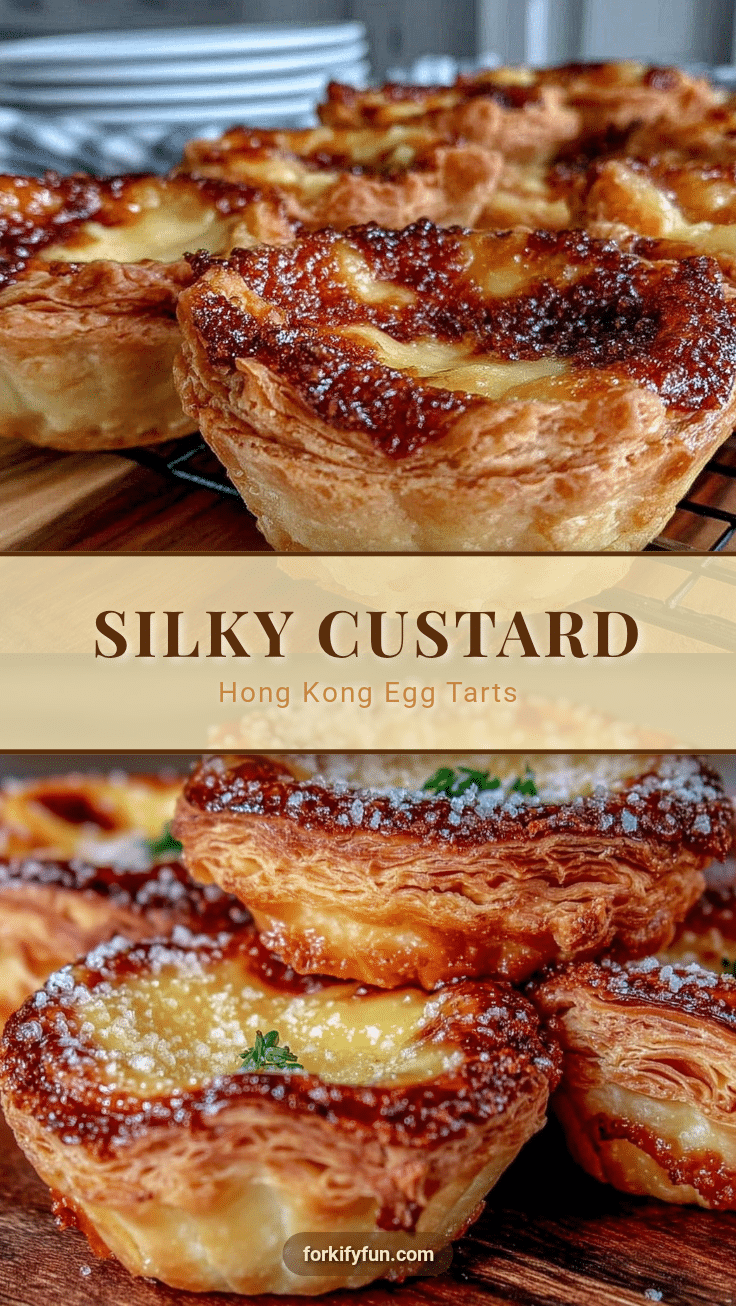
Crispy Hong Kong Egg Tarts Recipe Easy Homemade Silky Custard Filling

This recipe delivers crispy, flaky Hong Kong egg tarts with a silky smooth custard filling that is approachable for home bakers. Perfect for a quick treat or special occasion, these tarts balance buttery crust and melt-in-your-mouth custard.
- Prep Time: 15 minutes
- Cook Time: 25 minutes
- Total Time: 40 minutes
- Yield: 12 tarts 1x
- Category: Dessert
- Cuisine: Hong Kong
Ingredients
- 1 1/4 cups all-purpose flour (160 g)
- 1/2 cup unsalted butter, cold and cubed (113 g)
- 2 tablespoons powdered sugar
- 2–3 tablespoons cold water
- A pinch of salt
- 3 large eggs, room temperature
- 1/3 cup granulated sugar (65 g)
- 1/2 cup evaporated milk (120 ml)
- 1/2 cup whole milk (120 ml)
- 1 teaspoon vanilla extract
Instructions
- Make the Pastry Dough: In a bowl, whisk together flour, powdered sugar, and a pinch of salt. Cut in the cold, cubed butter with a pastry cutter or your fingers until the mixture looks like coarse crumbs. Add cold water, 1 tablespoon at a time, mixing gently until the dough just comes together. Don’t overwork it! Wrap the dough in plastic wrap and chill for at least 30 minutes.
- Prepare the Custard Filling: While the dough chills, whisk the eggs and sugar in a bowl until the sugar dissolves. Stir in evaporated milk, whole milk, and vanilla extract. For extra silky smoothness, strain the mixture through a fine mesh sieve to remove any chalaza or lumps. Set aside.
- Roll Out the Dough: Lightly flour a clean surface and roll the chilled dough to about 1/8 inch (3 mm) thickness. Using a round cutter about 3 inches (7.5 cm) wide, cut circles. Gently press each circle into your muffin tin or tart pans, making sure to press evenly up the sides. Trim any excess dough.
- Fill and Bake: Preheat your oven to 375°F (190°C). Pour the custard filling gently into each tart shell, filling about 3/4 full. Place the muffin tin on a baking sheet and bake for 20-25 minutes, or until the custard is set but still jiggles slightly in the center and the crust edges are golden brown.
- Cool and Serve: Let the tarts cool in the tin for about 10 minutes before transferring to a wire rack. They’re best enjoyed warm or at room temperature.
Notes
Keep butter cold for a flaky crust. Don’t overwork the dough to avoid toughness. Strain custard for smooth texture. Bake custard until set but still slightly jiggly to avoid rubberiness. Chill dough after shaping to prevent shrinkage. Reheat leftovers in oven to maintain crispness; avoid microwaving.
Nutrition
- Serving Size: 1 tart
- Calories: 200
- Sugar: 10
- Sodium: 90
- Fat: 11
- Saturated Fat: 7
- Carbohydrates: 20
- Fiber: 0.5
- Protein: 4
Keywords: Hong Kong egg tarts, crispy egg tarts, silky custard, homemade egg tarts, flaky pastry, easy dessert, baking


