I want crispy skin. Not just crispy—shatteringly, audibly crispy. And I want it without babysitting a splattering pan for twenty minutes, without flipping three times, without the chicken sticking and tearing. I want butter, obviously. And garlic, lots of it. I want a whole meal—chicken, a vegetable, maybe some potatoes—all from one pan, all hitting the table at the same temperature. This is what I think about at 4:47 PM on a Tuesday, staring into the fridge like it owes me something. And this is the recipe that finally, mercifully, delivered. No flipping. No sticking. Just absurdly good chicken thighs with that garlic butter situation pooling underneath, ready to be sopped up with whatever is on the plate. It took me six attempts to get the skin exactly right without drying out the meat, and now I am annoyingly proud of it.
Why You’ll Love This Recipe
Let me tell you why this particular method has earned a permanent spot in my weekly rotation. I have tested this recipe more times than I care to admit, tweaking temperatures and timings until every single element works together beautifully.
- One Pan, Minimal Mess : Everything cooks in a single skillet, which means you get crispy chicken, tender vegetables, and that luscious garlic butter sauce without a mountain of dishes afterward. Your future self will thank you.
- Crispy Skin Without the Fuss : The secret here is starting the chicken skin-side down in a cold pan. I know it sounds backwards, but trust me—this technique renders the fat slowly, giving you that golden, crackling crust without any splattering or sticking.
- Ready in Under 40 Minutes : From fridge to table in about 35 minutes. This is weeknight cooking that actually works with your schedule, not against it.
- Simple Pantry Ingredients : Chicken thighs, butter, garlic, a few herbs, and whatever vegetables you have on hand. No exotic shopping trips required.
- Naturally Juicy Every Time : Chicken thighs are forgiving by nature, but this method locks in moisture while giving you that restaurant-quality exterior. It is practically foolproof.
- Endlessly Adaptable : Swap the vegetables, change the herbs, add some heat—this recipe bends to whatever you are craving without breaking.
I have made this for dinner parties where people went back for seconds (and thirds). I have made it on lazy Sundays when I wanted something that felt special but required almost no effort. It is the kind of recipe that makes you look like you know what you are doing in the kitchen—because now, honestly, you do.
What Ingredients You Will Need
This recipe uses straightforward ingredients that work together to build layers of flavor. Most of these are probably already in your kitchen, which is exactly how I like it. Here is what you need and why each one matters.
- Bone-in, skin-on chicken thighs (4-6 thighs, about 2 pounds) : This is non-negotiable for the crispiest skin. The bone keeps the meat moist during cooking, and the skin gives you that golden, crunchy exterior. I prefer thighs from Bell & Evans or Springer Mountain Farms for consistent quality.
- Unsalted butter (4 tablespoons, softened) : Butter is the backbone of this dish. Using unsalted lets you control the salt level. Make sure it is softened so it blends easily with the garlic and herbs.
- Garlic cloves (6-8 cloves, minced) : Fresh garlic only here. The pre-minced stuff in jars will burn and turn bitter. Take the extra two minutes to mince fresh cloves—your taste buds will notice the difference.
- Fresh parsley (2 tablespoons, chopped) : Adds freshness and color at the end. Flat-leaf parsley works best, but curly parsley is fine too.
- Fresh thyme (4-5 sprigs) : Thyme and chicken are a classic pairing. The earthy, slightly floral notes infuse the butter beautifully. You can substitute 1 teaspoon dried thyme if fresh is unavailable.
- Baby potatoes (1 pound, halved or quartered) : Yukon Gold or red potatoes work wonderfully. They soak up the garlic butter juices while getting tender and slightly crispy on the cut sides.
- Green beans (8 ounces, trimmed) : These cook right alongside the chicken, absorbing all those delicious pan drippings. Fresh green beans hold up better than frozen here.
- Olive oil (2 tablespoons) : A little oil helps the potatoes and green beans roast without drying out. Use a good quality extra virgin for better flavor.
- Salt and black pepper (to taste) : Diamond Crystal kosher salt is my go-to for even seasoning. Freshly cracked black pepper makes a noticeable difference.
- Red pepper flakes (optional, ¼ teaspoon) : Adds a gentle warmth without making it spicy. Leave it out if you prefer a milder dish.
- Lemon (½ lemon, for juicing) : A squeeze of fresh lemon juice right before serving brightens all the rich, buttery flavors.
One thing I learned the hard way—pat the chicken thighs dry with paper towels before seasoning. Moisture is the enemy of crispy skin, and taking that extra step makes all the difference. Also, if you want to switch up the vegetables, try this with asparagus in spring or butternut squash in fall. The technique stays the same, and the results are always fantastic.
Equipment Needed
You do not need a fancy kitchen to pull this off. Here is what you will actually use.
- Large oven-safe skillet (12-inch) : Cast iron is ideal because it holds heat evenly and gives you that beautiful sear. A stainless steel skillet works too, just make sure it is oven-safe up to 425°F. I use my trusty Lodge cast iron for this—it has never let me down.
- Tongs : For flipping the chicken and turning the vegetables. Silicone-tipped tongs are gentle on non-stick pans if that is what you are using.
- Sharp chef’s knife : For mincing garlic and chopping herbs. A dull knife makes everything harder and more dangerous.
- Cutting board : Preferably wood or plastic. Keep one dedicated for raw chicken to avoid cross-contamination.
- Paper towels : For drying the chicken skin thoroughly. This step is crucial, so do not skip it.
- Instant-read thermometer : The most reliable way to know your chicken is done. I recommend the Thermapen One for accuracy, but any decent digital thermometer works.
- Measuring spoons : For the butter, oil, and seasonings.
If you do not have an oven-safe skillet, you can transfer the chicken and vegetables to a baking dish before roasting. It adds one extra step but still works perfectly. I have done it in a pinch, and the results were almost as good.
Preparation Method
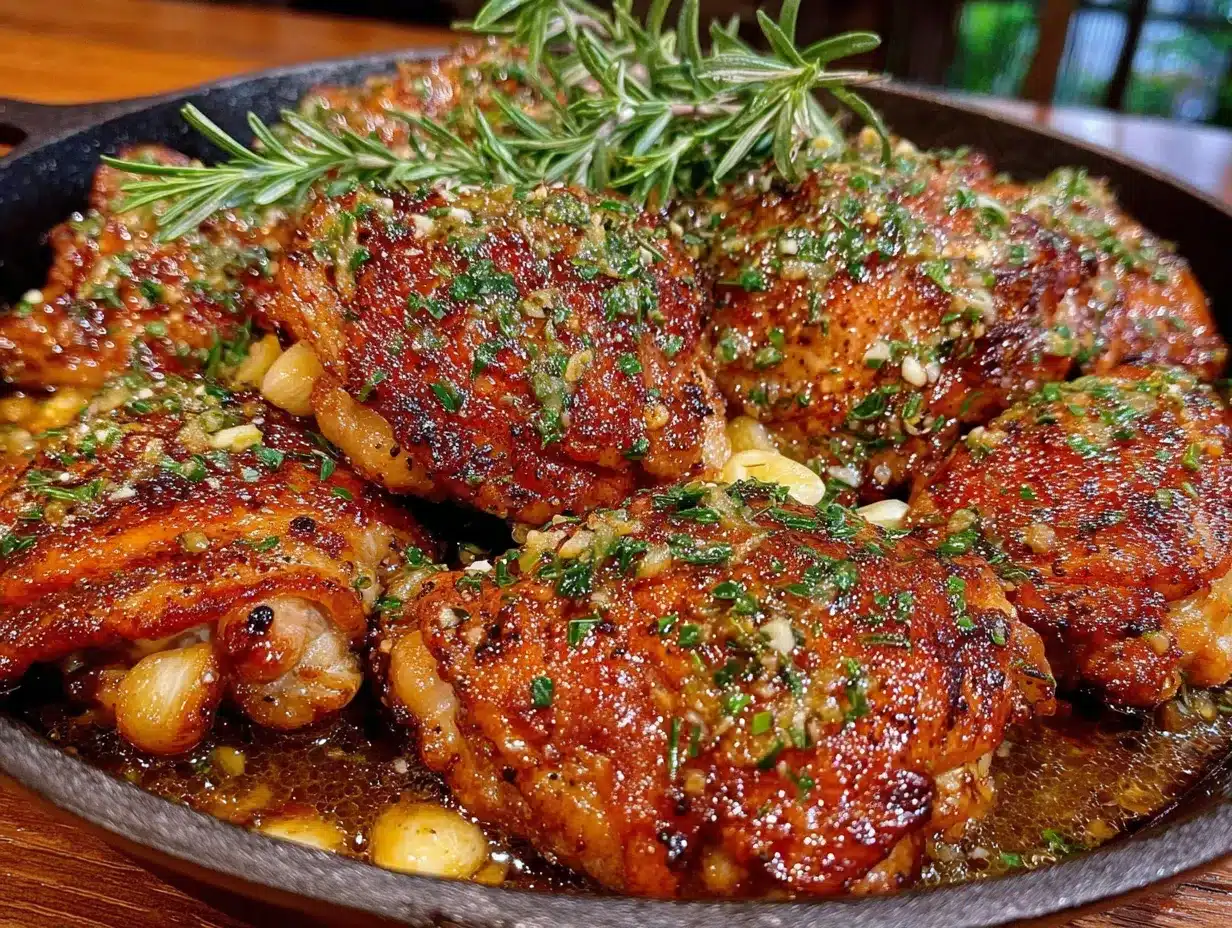
Let me walk you through this step by step. I have included all the little details that make the difference between good chicken and unforgettable chicken.
- Preheat your oven to 425°F (220°C) and position a rack in the middle. While it heats, take the chicken thighs out of the fridge and let them sit at room temperature for about 15 minutes. Cold chicken cooks unevenly, and we want everything to come together at the same time.
- Pat the chicken thighs completely dry with paper towels. This is not optional—moisture is the number one enemy of crispy skin. Season both sides generously with salt and pepper. I use about 1 teaspoon of salt per pound of chicken. Place the thighs skin-side up on a plate and let them rest while you prep the vegetables.
- Prepare the garlic butter by combining 4 tablespoons softened unsalted butter with the minced garlic, 1 tablespoon chopped parsley, and the leaves from 2 sprigs of thyme. Mash it together with a fork until everything is evenly distributed. Set aside at room temperature.
- Toss the baby potatoes with 1 tablespoon olive oil, salt, pepper, and a few thyme leaves. Spread them cut-side down in your cold cast iron skillet. Yes, cold. This is important.
- Place the chicken thighs skin-side down directly on top of the potatoes. I know it feels wrong to put chicken on cold metal, but trust the process. The gradual heat renders the fat slowly, giving you incredibly crispy skin without burning. Drizzle the remaining 1 tablespoon olive oil over the chicken.
- Turn the heat to medium-high and let the pan heat up gradually. You will hear a gentle sizzle after about 4-5 minutes. Let it cook undisturbed for 8-10 minutes total, until the skin is deep golden brown and releases easily from the pan. If it sticks, it is not ready yet—give it another minute.
- Flip the chicken thighs using tongs, so they are now skin-side up. The skin should be beautifully browned and crispy. Add the trimmed green beans around the chicken, tucking them into the spaces between thighs. Spoon about half of the garlic butter mixture over each chicken thigh, letting it melt into the crevices.
- Transfer the skillet to the preheated oven and roast for 18-22 minutes, until the chicken reaches an internal temperature of 175°F (80°C) when tested with an instant-read thermometer inserted into the thickest part without touching bone. The potatoes should be fork-tender and the green beans tender-crisp.
- Remove the skillet from the oven and let it rest for 5 minutes. This resting period lets the juices redistribute throughout the meat. Spoon any pan juices over the chicken and vegetables.
- Squeeze fresh lemon juice over everything and sprinkle with the remaining chopped parsley and a pinch of red pepper flakes if using. Serve directly from the skillet for maximum visual impact and minimal cleanup.
One thing I want to emphasize—do not rush the initial searing step. That quiet, patient rendering is what gives you the crust you are after. I ruined my first two batches by cranking the heat too high, thinking faster would be better. It was not. Slow and steady wins this race.
Cooking Tips & Techniques
Over the course of developing this recipe, I made every mistake you can imagine. Here is what I learned so you do not have to repeat my errors.
The cold pan trick is non-negotiable. I know it defies conventional cooking wisdom, but starting the chicken in a cold skillet allows the fat to render gradually. The result is skin so crispy it shatters when you bite into it. If you start with a hot pan, the outside burns before the fat has a chance to render, and you end up with leathery skin. I learned this the hard way after three disappointing attempts.
Use an instant-read thermometer. Chicken thighs are done at 175°F, not 165°F like breasts. The higher temperature breaks down connective tissue and renders the fat, giving you that tender, juicy texture. I used to guess by cutting into the meat, but that lets all the juices escape. A thermometer is a small investment that pays off every single time.
Do not overcrowd the pan. If you are cooking for a crowd, use two skillets or work in batches. Crowding traps steam, which softens the skin and prevents browning. Give each thigh room to breathe.
Let the chicken rest. That 5-minute rest after roasting is not optional. The juices need time to redistribute, or they will run out the moment you cut into the meat. I have ruined perfectly good chicken by being impatient, and I regret every single time.
Multitask strategically. While the chicken is searing on the stovetop, prep your green beans and clean up your workspace. While it roasts in the oven, set the table or make a quick salad. This recipe actually gives you pockets of downtime—use them wisely.
Variations & Adaptations
This recipe is incredibly flexible. Here are some of my favorite variations that I have tested and loved.
Spicy Honey Garlic Version : Add 2 tablespoons honey and 1 teaspoon sriracha to the garlic butter mixture. The sweetness caramelizes beautifully in the oven, and the heat balances the richness. I made this for a game day gathering, and it disappeared in minutes.
Lemon Herb Adaptation : Swap the thyme for rosemary and add the zest of one lemon to the garlic butter. Replace the green beans with asparagus spears. This version feels brighter and more suited to spring or summer dinners.
Low-Carb Option : Replace the baby potatoes with cauliflower florets or halved Brussels sprouts. Both vegetables roast beautifully and soak up the garlic butter juices without the extra carbs. I have made this for keto friends, and they raved about it.
Dairy-Free Version : Substitute the butter with a high-quality vegan butter or ghee if you tolerate dairy derivatives. The technique remains exactly the same, and the results are still remarkably good.
Add Some Heat : Toss the potatoes with ½ teaspoon smoked paprika and ¼ teaspoon cayenne before cooking. The smoky heat pairs wonderfully with the garlic butter. This has become my go-to version when I want something with a little kick.
I have also tried adding sliced mushrooms during the last 10 minutes of roasting, and they absorb the pan juices beautifully. It is not a traditional variation, but it works surprisingly well.
Serving & Storage Suggestions
This dish is meant to be served immediately, right from the skillet, while the skin is still audibly crispy. The contrast between the hot, juicy chicken and the tender vegetables is at its peak within the first few minutes.
Serving temperature : Serve hot, straight from the oven. The garlic butter should still be bubbling slightly around the edges of the pan.
Presentation : Garnish with extra fresh parsley and a few lemon wedges on the side. If you want to get fancy, sprinkle some flaky sea salt over the skin right before serving—it adds a wonderful crunch and pop of saltiness.
What to serve alongside : This is already a complete one-pan meal, but if you want to stretch it, a simple green salad with a lemon vinaigrette works beautifully. Crusty bread is also excellent for sopping up every last drop of that garlic butter sauce. If you are in the mood for something different, try serving it with a side of crispy garlic herb smashed potatoes for double the potato action.
Storage : Leftovers keep well in an airtight container in the refrigerator for up to 3 days. The skin will lose its crispiness, but the flavor remains fantastic.
Reheating : The best way to reheat is in a 350°F oven for about 10 minutes, which helps re-crisp the skin slightly. A microwave will work in a pinch, but the skin will be soft. I often shred leftover chicken and use it in salads or tacos the next day.
Freezing : You can freeze the cooked chicken and vegetables for up to 2 months. Thaw overnight in the refrigerator and reheat in the oven. The texture will not be quite as good as fresh, but it is still miles better than takeout.
The flavors actually deepen overnight as the garlic and herbs meld together. I have been known to make extra on purpose just for next-day lunches.
Nutritional Information & Benefits
Here is the approximate nutritional breakdown per serving (based on 4 servings, using 2 chicken thighs per person).
| Nutrient | Amount |
|---|---|
| Calories | 485 |
| Protein | 35g |
| Fat | 32g |
| Saturated Fat | 12g |
| Carbohydrates | 18g |
| Fiber | 3g |
| Sugar | 2g |
| Sodium | 620mg |
Health benefits : Chicken thighs are an excellent source of protein, iron, and B vitamins. The skin contains healthy fats that aid in nutrient absorption. Garlic is known for its anti-inflammatory properties and immune-boosting compounds. Potatoes provide potassium and vitamin C, while green beans add fiber and vitamin K.
Dietary considerations : This recipe is naturally gluten-free and nut-free. For a lower-fat option, you can remove the skin before eating, though you will lose the crispy texture. The dairy-free substitution mentioned above works well for those avoiding dairy.
Potential allergens : Dairy (butter). If you are serving guests with dietary restrictions, the dairy-free version is a simple swap that does not compromise flavor.
I personally love that this meal feels indulgent but is actually quite balanced. You get protein, healthy fats, and vegetables all in one sitting. It is comfort food that does not make you feel heavy afterward.
Conclusion
This crispy garlic butter chicken thighs recipe has become my go-to answer for the eternal question of what to make for dinner. It delivers on every level—crispy skin, juicy meat, tender vegetables, and that luscious garlic butter sauce that ties everything together. And it all happens in one pan, which means more time enjoying your meal and less time scrubbing dishes.
I have made this for friends who claimed they could not cook, and they texted me photos of their successful attempts. I have made it on nights when I had zero energy and needed something that felt like a hug on a plate. It works every single time.
Now I want to hear from you. Did you try the cold pan trick? Did you add your own twist? Drop a comment below and let me know how it turned out. And if you loved it as much as I do, share this recipe with someone who needs a reliable weeknight dinner in their life. Trust me—they will thank you.
Frequently Asked Questions
Can I use boneless, skinless chicken thighs instead?
You can, but you will lose the crispy skin that makes this recipe special. Boneless thighs cook faster (about 12-15 minutes in the oven), so adjust your timing accordingly. The texture will be different, but the flavor will still be delicious.
Why did my chicken skin stick to the pan?
Most likely, you tried to flip it too early. The skin needs time to render and develop a crust before it releases naturally. If it is sticking, let it cook another 2-3 minutes and try again. Patting the skin dry before cooking also helps prevent sticking.
Can I make this recipe ahead of time?
This dish is best served fresh for optimal crispy skin. However, you can prep the garlic butter and trim the vegetables up to a day in advance. Store the garlic butter in the refrigerator and let it come to room temperature before using.
What other vegetables can I use?
Almost any sturdy vegetable works here. Try broccoli florets, halved Brussels sprouts, sliced bell peppers, or chunks of zucchini. Just make sure to cut them into similar-sized pieces so they cook evenly. Root vegetables like carrots or parsnips are excellent in fall and winter.
How do I know when the chicken is fully cooked?
Use an instant-read thermometer inserted into the thickest part of the thigh without touching bone. You are looking for 175°F (80°C). The juices should run clear, and the meat should pull away from the bone easily. Do not rely on timing alone—every oven runs slightly differently.
Pin This Recipe!

Crispy Garlic Butter Chicken Thighs: Easy One Pan Meal

Shatteringly crispy chicken thighs with a luscious garlic butter sauce, tender potatoes, and green beans—all from one pan in under 40 minutes. No flipping, no sticking, just absurdly good results every time.
- Prep Time: 15 minutes
- Cook Time: 30 minutes
- Total Time: 45 minutes
- Yield: 4 servings 1x
- Category: Main Course
- Cuisine: American
Ingredients
- 4–6 bone-in, skin-on chicken thighs (about 2 pounds)
- 4 tablespoons unsalted butter, softened
- 6–8 garlic cloves, minced
- 2 tablespoons fresh parsley, chopped
- 4–5 sprigs fresh thyme
- 1 pound baby potatoes, halved or quartered
- 8 ounces green beans, trimmed
- 2 tablespoons olive oil
- Salt and black pepper to taste
- ¼ teaspoon red pepper flakes (optional)
- ½ lemon, for juicing
Instructions
- Preheat oven to 425°F (220°C) and position a rack in the middle. Let chicken thighs sit at room temperature for 15 minutes.
- Pat chicken thighs completely dry with paper towels. Season both sides generously with salt and pepper. Place skin-side up on a plate and rest while prepping vegetables.
- Prepare garlic butter: combine softened butter, minced garlic, 1 tablespoon parsley, and leaves from 2 sprigs thyme. Mash together with a fork and set aside.
- Toss baby potatoes with 1 tablespoon olive oil, salt, pepper, and a few thyme leaves. Spread cut-side down in a cold cast iron skillet.
- Place chicken thighs skin-side down directly on top of potatoes. Drizzle remaining 1 tablespoon olive oil over chicken.
- Turn heat to medium-high and let pan heat gradually. Cook undisturbed for 8-10 minutes until skin is deep golden brown and releases easily.
- Flip chicken thighs skin-side up. Add trimmed green beans around chicken. Spoon half the garlic butter over each thigh.
- Transfer skillet to preheated oven and roast 18-22 minutes until chicken reaches 175°F (80°C) internal temperature and potatoes are fork-tender.
- Remove from oven and let rest 5 minutes. Spoon pan juices over chicken and vegetables.
- Squeeze fresh lemon juice over everything, sprinkle with remaining parsley and red pepper flakes if using. Serve directly from skillet.
Notes
Start chicken in a cold pan for the crispiest skin. Pat chicken dry thoroughly before seasoning. Do not rush the initial searing step. Let chicken rest 5 minutes after roasting. For best results, use an instant-read thermometer to ensure chicken reaches 175°F.
Nutrition
- Serving Size: 2 chicken thighs wit
- Calories: 485
- Sugar: 2
- Sodium: 620
- Fat: 32
- Saturated Fat: 12
- Carbohydrates: 18
- Fiber: 3
- Protein: 35
Keywords: crispy chicken thighs, garlic butter chicken, one pan meal, easy weeknight dinner, chicken and potatoes, cast iron skillet chicken


