It was 11:47 PM on a random Tuesday in October, and I was struck by a very specific, almost aggressive craving for something salty, crunchy, and deeply satisfying. I had just finished carving a pumpkin for a party the next weekend—you know, the kind where you try to look like you have your life together—and my kitchen looked like a crime scene of orange pulp and slippery seeds. Normally, I would have just tossed the seeds in the trash, too tired to deal with the whole boiling-and-baking routine. But that night, something clicked. I didn’t have the patience for the oven, honestly. But I had a brand-new air fryer sitting on my counter, still smelling like plastic and possibility, and I had a wild idea. What if I just… skipped the boil? What if I tossed them straight in with some oil and salt and hoped for the best? It felt a little reckless, maybe even a little wrong. Let me tell you, that late-night impulse changed my entire hosting game. The result was so ridiculously crispy, so perfectly seasoned, that I literally ate half of them standing over the sink at midnight. I mean, it was a mess—seeds everywhere, salt on my shirt—but I knew I had stumbled onto something special. And honestly, that’s how this recipe was born: from a late-night craving, a dirty kitchen, and a willingness to break the rules. Maybe you’ve been there, staring at a pile of pumpkin guts and wondering if there’s a better way. There is. This is it.
Why You’ll Love This Recipe
Let’s be real for a second. Most pumpkin seeds you’ve had are either burnt on the outside and soft in the middle, or they’re so tough you feel like you’re chewing on gravel. Not these. These air fryer pumpkin seeds are the real deal—crispy all the way through, with a delicate crunch that doesn’t hurt your teeth. And the best part? They’re ridiculously easy to make, especially when you’re trying to impress a crowd without actually sweating in the kitchen.
- Quick & Easy: From seed to snack in under 20 minutes. No boiling, no waiting for the oven to preheat. Just toss, season, and air fry.
- Simple Ingredients: You literally need three things: pumpkin seeds, oil, and sea salt. That’s it. No fancy grocery trips required.
- Perfect for Parties: These are the ultimate party snack. Set out a bowl before guests arrive, and watch them disappear. They’re great for game nights, potlucks, or even as a topping for salads and soups.
- Crowd-Pleaser: I’ve served these to everyone from picky kids to health-conscious friends, and they always get rave reviews. Something about that salty crunch just hits differently.
- Unbelievably Delicious: The texture is what sets these apart. The air fryer creates this perfect, even crispiness that you just can’t get from an oven. It’s next-level comfort snacking.
What makes this recipe different from all the others? It’s the method. By skipping the boiling step and using the air fryer’s rapid air circulation, you get a seed that’s crunchy on the outside but still has a little bit of that nutty, buttery interior. I’ve tested this dozens of times—trust me, I’ve had my share of failures—and this is the version that works every single time. It’s not just another pumpkin seed recipe; it’s the one you’ll come back to year after year.
What Ingredients You Will Need
This recipe uses the simplest ingredients to deliver big flavor and that perfect crispy texture. Most of these are probably already in your pantry, which is exactly how a last-minute party snack should be.
- Fresh Pumpkin Seeds (1 cup / 120g): These come straight from your jack-o’-lantern or sugar pumpkin. You want the seeds to be as clean as possible—rinsed and patted dry. The fresher the seeds, the better the crunch. If you’re using store-bought raw pumpkin seeds, that works too, but fresh ones have a slightly sweeter, more nutty flavor.
- Olive Oil (1 tablespoon / 15ml): This helps the salt stick and promotes even browning. I prefer a good quality extra-virgin olive oil for flavor, but avocado oil or melted coconut oil works beautifully too. Don’t skip this—dry seeds won’t get crispy in the same way.
- Flaky Sea Salt (1 teaspoon, plus more for finishing): This is non-negotiable for that perfect salty crunch. I love using Maldon sea salt flakes because they’re light and shattery, but any good quality sea salt will do. Avoid table salt—it’s too fine and can make the seeds taste overly salty.
- Optional Seasonings: This is where you can get creative. A pinch of smoked paprika adds a subtle warmth, while a dash of garlic powder gives them a savory depth. For a spicy kick, add a pinch of cayenne pepper. I sometimes toss in a teaspoon of everything bagel seasoning for a fun twist.
Ingredient Selection Tips: When choosing a pumpkin to carve, look for one that feels heavy for its size—that means the seeds are plump and full. If you’re buying pre-packaged pumpkin seeds, check the expiration date and avoid any that look shriveled or discolored. For the best texture, use seeds that are still slightly damp after rinsing, but not soaking wet. Too much moisture will make them steam instead of crisp.
Substitution Guidance: If you’re out of olive oil, any neutral oil like grapeseed or sunflower oil will work. For a salt-free version, try using a blend of garlic powder, onion powder, and nutritional yeast for a cheesy, savory flavor. And if you don’t have an air fryer, you can still make these in the oven—just spread them on a baking sheet and bake at 350°F (175°C) for 15-20 minutes, stirring halfway through.
Equipment Needed
You don’t need a ton of fancy gadgets for this recipe, which is part of its beauty. Here’s what you’ll need to get the job done:
- Air Fryer: Any model will work, but I use a 5.8-quart basket-style air fryer. If yours is smaller, you might need to cook the seeds in batches to avoid overcrowding. I learned this the hard way—cramming too many seeds in at once leads to uneven cooking and sad, soggy results.
- Large Bowl: For tossing the seeds with oil and seasonings. A glass or stainless steel bowl works best.
- Fine-Mesh Strainer: For rinsing the seeds and removing the pumpkin guts. A colander works too, but a strainer catches the smaller bits better.
- Paper Towels or Clean Kitchen Towel: For drying the seeds thoroughly. This step is crucial—wet seeds won’t crisp up properly.
- Spatula or Spoon: For stirring the seeds halfway through cooking. A silicone spatula is gentle on the air fryer basket.
Budget-Friendly Options: If you don’t own a fine-mesh strainer, you can rinse the seeds in a colander and pick out the pulp by hand. It’s a little messier, but it works. And if you don’t have an air fryer, a regular oven set to convection mode can mimic the same effect—just keep an eye on them to prevent burning.
Preparation Method

- Clean the Seeds (5 minutes): Start by separating the seeds from the pumpkin guts. Place the seeds in a fine-mesh strainer and rinse them under cool running water, using your fingers to rub off any clinging pulp. Don’t stress about getting every single strand—a little bit of pumpkin fiber adds flavor. Once they’re mostly clean, spread them out on a paper towel and pat them very dry. This is the most important step. I cannot stress this enough: dry seeds are crispy seeds. Let them sit for a few minutes to air-dry while you preheat the air fryer.
- Preheat the Air Fryer (3 minutes): Set your air fryer to 350°F (175°C) and let it preheat for about 3 minutes. Preheating ensures the seeds start cooking immediately, which helps them crisp up evenly. If your air fryer doesn’t have a preheat function, just run it empty for 3 minutes.
- Season the Seeds (2 minutes): Transfer the dried seeds to a large bowl. Drizzle with 1 tablespoon of olive oil and sprinkle with 1 teaspoon of flaky sea salt. Toss everything together with your hands or a spoon until every seed is lightly coated. If you’re adding optional seasonings like smoked paprika or garlic powder, add them now. Taste a seed—it should taste pleasantly salty, not overwhelming. Remember, you can always add more salt later.
- Air Fry the Seeds (10-12 minutes): Spread the seasoned seeds in a single layer in the air fryer basket. Don’t pile them up—they need room for the hot air to circulate. Cook at 350°F (175°C) for 5 minutes, then open the basket and give them a good shake or stir. This ensures even cooking. Continue cooking for another 5-7 minutes, checking frequently after the 8-minute mark. The seeds are done when they’re golden brown and you can hear them rattling around in the basket. They will continue to crisp up as they cool, so don’t overdo it.
- Cool and Season Again (5 minutes): Carefully remove the basket and pour the hot seeds onto a plate or baking sheet. Let them cool completely—about 5 minutes. While they’re still warm, sprinkle with a little extra flaky sea salt. This final touch gives them that irresistible, shattery saltiness. Resist the urge to eat them immediately; they need that cooling time to reach peak crunchiness.
- Serve and Enjoy: Once cooled, transfer the seeds to a serving bowl. They’re perfect on their own, but you can also toss them into a salad, sprinkle them over roasted vegetables, or use them as a crunchy topping for soups. I’ve even been known to sneak a handful into my yogurt for a salty-sweet breakfast treat.
Troubleshooting Tips: If your seeds aren’t crispy after 12 minutes, they might be too wet. Pat them even drier next time, or cook them for an additional 2 minutes. If they’re burning on the outside but still soft inside, your air fryer might run hot—try lowering the temperature to 330°F (165°C) and cooking for a few extra minutes. And if they taste bland, you likely didn’t use enough salt. Don’t be shy with the seasoning!
Cooking Tips & Techniques
After making these seeds more times than I can count—and definitely after a few spectacular failures—I’ve learned a thing or two about getting them just right. Let me save you some trouble.
The Drying Secret: The number one mistake people make is not drying the seeds thoroughly enough. I once made a batch where I was in a hurry and just gave them a quick pat. They came out chewy and sad. Now, I spread them out on a towel and let them sit for at least 10 minutes before seasoning. If you’re really pressed for time, you can even toss them in the air fryer at 200°F (95°C) for 2-3 minutes to dry them out before adding oil. Game changer.
Don’t Overcrowd the Basket: I know it’s tempting to dump all the seeds in at once, especially when you’re making a big batch for a party. But overcrowding is the enemy of crispiness. The seeds need space for the hot air to circulate. If you have a lot of seeds, cook them in batches. It takes a few extra minutes, but the texture is worth it. Trust me on this one—I learned the hard way when I tried to cram two cups of seeds into my air fryer and ended up with a soggy mess.
The Shake Technique: Halfway through cooking, give the basket a good shake. This redistributes the seeds and ensures they cook evenly. I set a timer on my phone so I don’t forget. It’s such a small step, but it makes a huge difference in the final result.
Timing and Multitasking: These seeds come together so fast that you can easily make them while you’re prepping other party food. I like to clean and season the seeds first, then pop them in the air fryer while I’m chopping veggies or setting out dips. By the time I’m done, the seeds are ready to cool. It’s the perfect multitasking recipe.
Variations & Adaptations
One of the best things about this recipe is how endlessly customizable it is. Here are a few of my favorite variations:
- Spicy Chili Lime: Add 1 teaspoon of chili powder and the zest of one lime to the oil and salt mixture. The lime zest adds a bright, citrusy note that pairs beautifully with the heat. I made this version for a taco night, and my guests went absolutely crazy for them.
- Sweet Cinnamon Sugar: Skip the salt and toss the seeds with 1 tablespoon of melted butter, 1 tablespoon of brown sugar, and 1/2 teaspoon of cinnamon. Air fry as directed, then let cool completely. These are dangerously addictive—like a crunchy, healthier version of cinnamon toast.
- Everything Bagel: After tossing with oil and salt, sprinkle the seeds with 2 teaspoons of everything bagel seasoning (poppy seeds, sesame seeds, garlic flakes, onion flakes, and salt). The savory, umami flavor is incredible. I keep a jar of this seasoning in my pantry just for this purpose.
- Ranch Lovers: Mix 1 tablespoon of dry ranch seasoning mix with the oil before tossing with the seeds. This is my go-to for kids’ parties—it’s familiar, delicious, and always a hit.
- Maple Cayenne: For a sweet-and-spicy combo, toss the seeds with 1 tablespoon of maple syrup, 1/2 teaspoon of cayenne pepper, and a pinch of salt. The maple syrup caramelizes slightly in the air fryer, creating a sticky, crunchy coating. Just be careful not to burn them—the sugar can go from golden to burnt very quickly.
Dietary Adaptations: This recipe is naturally gluten-free, dairy-free, and vegan (if you use a plant-based oil). For a nut-free version, just avoid any seasoning blends that might contain tree nuts. And if you’re watching your sodium, use a low-sodium salt alternative or a salt-free seasoning blend like garlic powder and onion powder.
Serving & Storage Suggestions
These seeds are best served at room temperature, straight from the cooling plate. They have the most satisfying crunch when they’re completely cool. For a party, I like to pile them into a large wooden bowl or a ceramic dish and set them out with other snacks like spiced nuts, olives, and cheese cubes. They’re also fantastic as a topping for creamy soups—think butternut squash or tomato bisque—where they add a salty, crunchy contrast.
Storage Instructions: If you have any leftovers (which is rare, honestly), store them in an airtight container at room temperature for up to 5 days. Do not refrigerate them—the moisture in the fridge will make them soft. I keep mine in a glass jar with a tight-fitting lid. They do lose a bit of their crunch after a day or two, but they’re still delicious.
Reheating Tips: To bring back that fresh-from-the-air-fryer crispiness, spread the seeds on a baking sheet and pop them in a 300°F (150°C) oven for 3-4 minutes. You can also reheat them in the air fryer at 300°F (150°C) for 2 minutes. Just keep an eye on them so they don’t burn. I’ve also been known to eat them slightly soft—they’re still tasty, just a different texture.
Flavor Development: Interestingly, these seeds actually taste even better the next day, once the salt has had time to fully penetrate the seed. The flavor becomes more rounded and savory. So if you’re planning ahead, make them a day in advance and store them in an airtight container. Your future self will thank you.
Nutritional Information & Benefits
Pumpkin seeds are a nutritional powerhouse, and this recipe keeps them healthy without sacrificing flavor. Here’s a rough estimate per serving (about 1/4 cup or 30g):
- Calories: 180
- Protein: 9g
- Fat: 15g (mostly healthy unsaturated fats)
- Carbohydrates: 4g
- Fiber: 2g
- Sodium: 200mg (varies with salt)
Health Benefits: Pumpkin seeds are packed with magnesium, zinc, and healthy fats. Magnesium is great for muscle function and sleep, while zinc supports your immune system—perfect for the cold and flu season that often coincides with pumpkin carving season. They’re also a good source of plant-based protein, making them a satisfying snack that keeps you full between meals.
Dietary Considerations: This recipe is naturally gluten-free, dairy-free, and vegan. It’s also low in carbs, making it suitable for keto and low-carb diets in moderation. The only potential allergen is the seeds themselves, but pumpkin seeds are not one of the top common allergens. If you’re serving a crowd, it’s always a good idea to label them clearly.
I love that this snack is both indulgent and nourishing. It satisfies that craving for something crunchy and salty, but it’s made from whole, unprocessed ingredients. It’s the kind of snack you can feel good about eating—and sharing.
Conclusion
So there you have it—the crispy air fryer pumpkin seeds that turned a late-night experiment into my go-to party snack. They’re simple, they’re fast, and they’re absolutely irresistible. Whether you’re hosting a Halloween party, a game day gathering, or just a quiet night in with a movie, these seeds are the kind of snack that makes people hover around the bowl and ask for the recipe.
I encourage you to make them your own. Play with the seasonings, adjust the salt to your taste, and don’t be afraid to experiment. Maybe you’ll discover a combination that becomes your signature snack. That’s the beauty of a simple recipe—it’s a blank canvas for your creativity.
I’d love to hear how yours turn out. Did you try a fun seasoning blend? Did your guests devour them in minutes? Drop a comment below and let me know. And if you’re looking for more easy party snacks, check out my recipe for crispy buffalo cauliflower bites—they’re another crowd-pleaser that comes together in no time. Happy snacking, and remember: the best recipes often start with a little bit of chaos and a whole lot of curiosity.
Frequently Asked Questions
Can I use store-bought raw pumpkin seeds instead of fresh ones?
Absolutely! Store-bought raw pumpkin seeds (also called pepitas) work perfectly in this recipe. Just keep in mind that they’re usually smaller and thinner than fresh seeds, so they may cook a minute or two faster. Keep an eye on them to prevent burning.
Do I really need to dry the seeds before air frying?
Yes, this step is crucial. Wet seeds will steam instead of crisp, leaving you with a chewy, sad texture. Take the extra few minutes to pat them thoroughly dry with a paper towel, and let them air-dry for a bit if you have the time. Your future self—and your taste buds—will thank you.
Can I make these in a regular oven instead of an air fryer?
Definitely. Spread the seasoned seeds in a single layer on a baking sheet lined with parchment paper. Bake at 350°F (175°C) for 15-20 minutes, stirring halfway through. The texture won’t be quite as uniformly crispy as the air fryer version, but they’ll still be delicious. If your oven has a convection setting, use it for better results.
How do I prevent the seeds from burning?
The key is to check them frequently, especially after the 8-minute mark. Every air fryer runs a little differently, so your cooking time may vary. Start checking at 8 minutes, and look for a golden-brown color. They will continue to crisp up as they cool, so it’s better to pull them out a minute early than a minute late.
Can I double this recipe for a party?
Yes, but you’ll need to cook the seeds in batches. Overcrowding the air fryer basket leads to uneven cooking and soggy seeds. Work in batches, giving each batch enough room to crisp up properly. It takes a little longer, but the results are worth it. Your guests won’t mind waiting for fresh, crispy seeds!
Pin This Recipe!
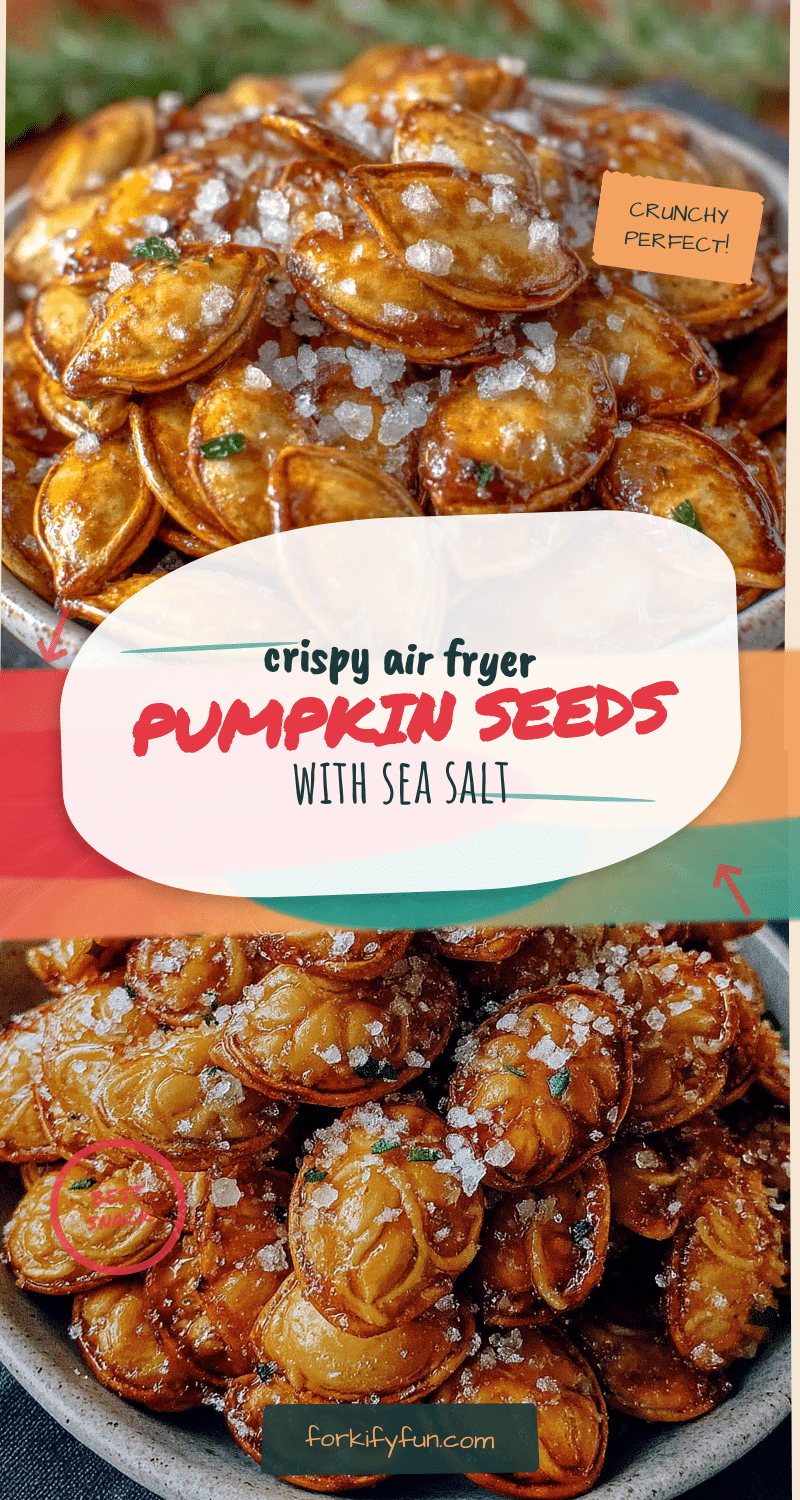
Crispy Air Fryer Pumpkin Seeds with Sea Salt: Easy Party Snack

These air fryer pumpkin seeds are ridiculously crispy, perfectly seasoned, and ready in under 20 minutes. Skip the boiling and get the ultimate crunchy snack that’s perfect for parties, game nights, or a late-night craving.
- Prep Time: 10 minutes
- Cook Time: 12 minutes
- Total Time: 22 minutes
- Yield: 4 servings 1x
- Category: Snack
- Cuisine: American
Ingredients
- 1 cup (120g) fresh pumpkin seeds
- 1 tablespoon (15ml) olive oil
- 1 teaspoon flaky sea salt, plus more for finishing
- Optional: smoked paprika, garlic powder, cayenne pepper, everything bagel seasoning
Instructions
- Clean the seeds: Separate seeds from pumpkin guts, rinse in a fine-mesh strainer under cool water, and pat very dry with paper towels. Let air-dry for a few minutes.
- Preheat the air fryer to 350°F (175°C) for 3 minutes.
- Season the seeds: In a large bowl, toss dried seeds with olive oil and 1 teaspoon flaky sea salt until evenly coated. Add optional seasonings if desired.
- Air fry the seeds: Spread seeds in a single layer in the air fryer basket. Cook at 350°F (175°C) for 5 minutes, shake, then cook for another 5-7 minutes until golden brown and rattling.
- Cool and season again: Pour hot seeds onto a plate and let cool completely (about 5 minutes). Sprinkle with extra flaky sea salt while still warm.
- Serve and enjoy: Transfer to a serving bowl. Serve at room temperature.
Notes
Dry seeds thoroughly for best crispiness. Do not overcrowd the air fryer basket; cook in batches if needed. Seeds continue to crisp as they cool. Store in an airtight container at room temperature for up to 5 days. Reheat at 300°F (150°C) for 2-3 minutes to restore crunch.
Nutrition
- Serving Size: 1/4 cup (30g)
- Calories: 180
- Sodium: 200
- Fat: 15
- Saturated Fat: 2
- Carbohydrates: 4
- Fiber: 2
- Protein: 9
Keywords: air fryer pumpkin seeds, crispy pumpkin seeds, easy party snack, healthy snack, pumpkin seeds recipe