Honestly, I still can’t quite believe it myself. For years, the only way I’d make chicken thighs was in a screaming hot cast iron skillet, convinced that was the only path to crispy skin. The air fryer felt like a compromise, a shortcut for people who didn’t care about texture. Then a dinner party happened, and I found myself eating my own words—literally.
My friend Marcus, who has strong opinions about pretty much everything, especially chicken skin, took one bite of these air fryer chicken thighs and just stopped talking. That’s the moment I knew. He swore he could tell the difference between air-fried and pan-seared. Then I told him the truth, and he didn’t believe me until I showed him the air fryer basket. I mean, I wasn’t trying to prove anything, but watching him have to reconsider his entire stance on air fryers was pretty satisfying.
These crispy air fryer chicken thighs with garlic herb rub have become my go-to for every gathering. They’re the dish I make when I want to look like I spent hours in the kitchen but actually spent most of the time chatting with guests. The skin gets that perfect crackling crunch—you know the kind I mean—while the meat stays impossibly juicy. And the garlic herb rub? It’s simple, but something about how it blooms in the air fryer heat just works.
Maybe you’ve been skeptical about air fryer chicken too. I get it. But let me tell you, these thighs have converted more people than I can count. They’re the reason my air fryer now has a permanent spot on my counter.
Why You’ll Love This Recipe
This isn’t just another chicken recipe. These crispy air fryer chicken thighs with garlic herb rub are designed to make you look like a hero at your next gathering, whether it’s a casual potluck or a more formal dinner party.
- Incredibly Crispy Skin : The air fryer creates that shatteringly crisp skin without the mess of splattering oil on your stovetop. It’s honestly better than pan-fried—and I never thought I’d say that.
- Juicy, Never Dry : Chicken thighs are naturally forgiving, but the air fryer’s rapid circulation locks in moisture while crisping the exterior. You get the best of both worlds every single time.
- Simple Ingredients : You probably have most of these in your pantry right now. No fancy marinades or hard-to-find spices—just good, honest flavors that work together beautifully.
- Perfect for Entertaining : These thighs are the ultimate party food. They’re impressive enough for a dinner table centerpiece but casual enough for a backyard barbecue. Plus, they’re naturally gluten-free and keto-friendly.
- Minimal Hands-On Time : The air fryer does most of the work. You’ll spend about 10 minutes prepping the garlic herb rub and arranging the thighs, then let the machine work its magic.
- Crowd-Pleaser : I’ve served these at everything from game day gatherings to holiday dinners. They disappear fast. People always ask for the recipe—and they’re always surprised when I tell them it’s air-fried.
What makes this recipe different from the dozens of other air fryer chicken recipes out there? It’s the garlic herb rub. I spent weeks testing ratios—too much garlic and it burns, too many herbs and they turn bitter. This version hits that sweet spot where the garlic mellows and sweetens, while the herbs stay fragrant and green. The technique of patting the skin completely dry before seasoning is non-negotiable. It’s the secret to that crackling crust.
This recipe is the kind that makes you close your eyes after the first bite. It’s comfort food reimagined—faster, cleaner, but with the same soul-satisfying crunch you crave.
What Ingredients You Will Need
This recipe relies on simple, high-quality ingredients to deliver bold flavor and that perfect crispy texture. Most of these are pantry staples, which makes this dish perfect for last-minute entertaining.
- Bone-in, skin-on chicken thighs (6-8 thighs, about 2.5-3 pounds total) : This is non-negotiable for the crispiest results. The bone helps keep the meat moist, and the skin is what we’re after. Look for thighs that are roughly the same size for even cooking. I prefer organic or free-range chicken when I can find it—the flavor is noticeably richer.
- Garlic (4-5 cloves, minced) : Fresh garlic is essential here. Don’t use the jarred stuff—it burns more easily and lacks that sharp, pungent kick. I mince mine by hand, but a microplane works beautifully too. The garlic mellows as it cooks, becoming sweet and almost nutty.
- Fresh rosemary (2 tablespoons, finely chopped) : Rosemary and chicken are a classic pairing for good reason. It’s woodsy and aromatic, and it holds up well to the high heat of the air fryer. Strip the leaves from the woody stems before chopping.
- Fresh thyme (1 tablespoon, leaves stripped from stems) : Thyme adds a subtle earthiness that complements the rosemary without overpowering it. If you only have dried, use 1 teaspoon—but fresh really does make a difference here.
- Fresh parsley (2 tablespoons, finely chopped) : Parsley adds a fresh, bright note that balances the richness of the chicken. I add some to the rub and save a bit for garnish at the end.
- Extra-virgin olive oil (2 tablespoons) : This helps the seasoning stick and encourages browning. Don’t use too much—you want just enough to coat the skin lightly. Too much oil can make the skin soggy instead of crispy.
- Salt (1½ teaspoons, or to taste) : I use kosher salt for its clean flavor and easy pinchability. Diamond Crystal is my go-to brand because it’s less salty by volume, giving me more control. If you’re using table salt, reduce to 1 teaspoon.
- Black pepper (1 teaspoon, freshly ground) : Freshly ground pepper has so much more flavor than pre-ground. Be generous here—it adds warmth and a subtle heat that plays well with the herbs.
- Paprika (1 teaspoon) : I use sweet paprika for color and a mild, slightly sweet pepper flavor. It gives the skin that gorgeous deep golden-brown color that makes everyone’s mouth water.
- Onion powder (½ teaspoon) : This adds a savory depth without the moisture of fresh onion. It’s a little trick I picked up from a chef friend—it rounds out the flavor profile beautifully.
- Lemon zest (from 1 lemon) : This is optional but highly recommended. The bright citrus notes cut through the richness of the chicken and make the herbs pop. Zest it right before using for the best flavor.
Equipment Needed
You don’t need much for this recipe, which is part of its appeal. Here’s what you’ll need:
- Air fryer (5.8-quart or larger recommended) : A larger basket means you can cook all the thighs in a single batch without overcrowding. I use a Cosori 5.8-quart model, and it handles 6-8 thighs perfectly. If your air fryer is smaller, cook in batches to avoid steaming instead of crisping.
- Paper towels : You’ll need these to pat the chicken skin completely dry. This step is crucial—don’t skip it or try to rush it.
- Mixing bowl (medium-sized) : For combining the garlic herb rub. A glass or stainless steel bowl works well—avoid plastic if you’re using lemon zest, as it can absorb the oils.
- Chef’s knife and cutting board : For mincing garlic and chopping herbs. A sharp knife makes this task much more pleasant.
- Tongs : For flipping the chicken halfway through cooking. Silicone-tipped tongs won’t scratch your air fryer basket.
- Instant-read thermometer : This is the only way to guarantee perfectly cooked chicken. I don’t trust visual cues alone—the thermometer takes the guesswork out. An inexpensive digital one works great.
Budget-Friendly Tip: Don’t have an air fryer yet? You can achieve similar results using a convection oven or even a regular oven set to 425°F with the convection fan on. Place the thighs on a wire rack set over a baking sheet to allow air circulation underneath.
Preparation Method
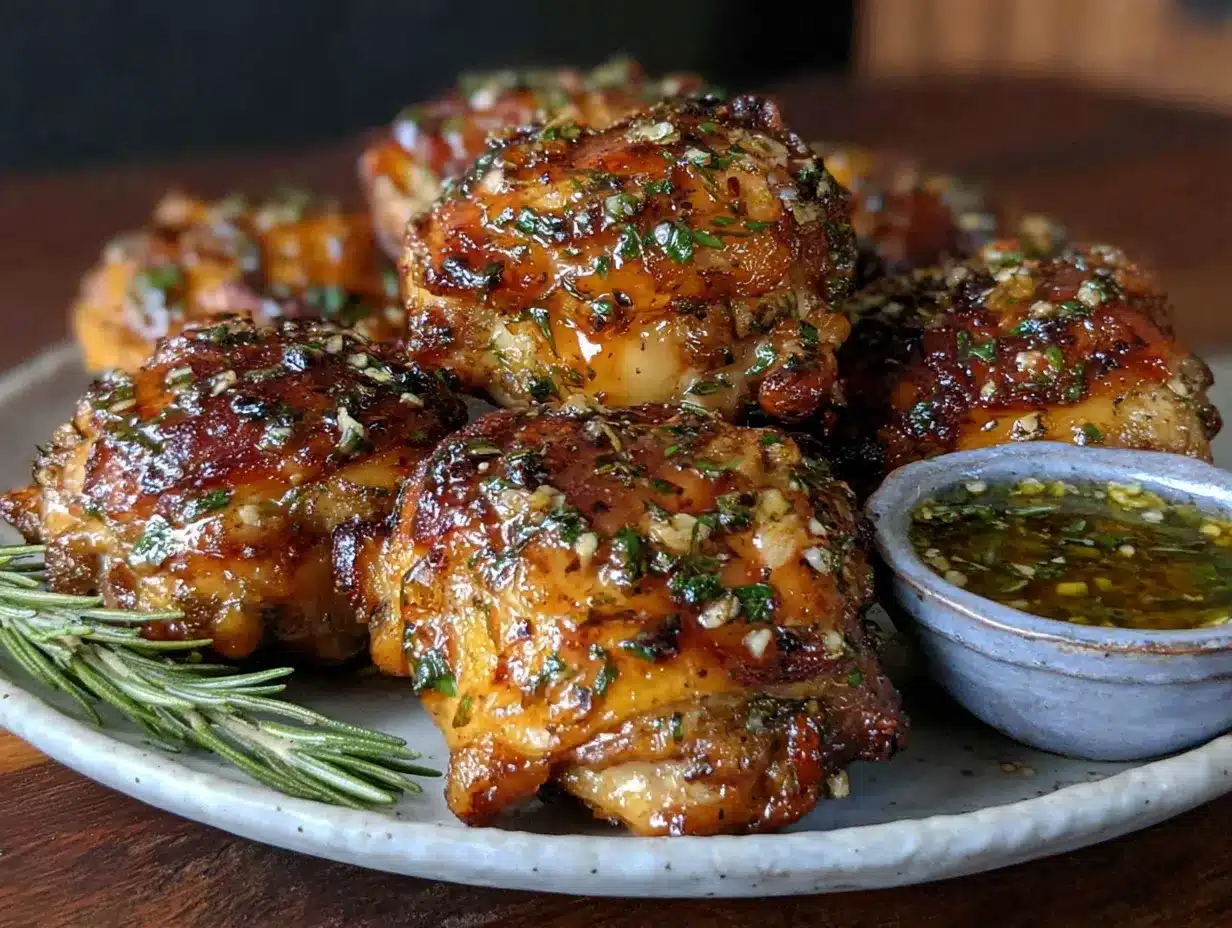
Let me walk you through this step by step. I’ve made these crispy air fryer chicken thighs more times than I can count, and these are the exact steps I follow every time.
- Pat the chicken thighs completely dry. This is the most important step. Take the chicken out of its packaging and use paper towels to dry every surface of the skin. I mean really dry—you should feel no moisture at all. Any leftover moisture will steam instead of crisp. Let the chicken sit on a plate while you prepare the rub, which also helps the skin dry out further.
- Make the garlic herb rub. In a medium bowl, combine the minced garlic, chopped rosemary, thyme, parsley, olive oil, salt, pepper, paprika, onion powder, and lemon zest if using. Stir until everything is well combined. The mixture should look like a thick paste. Taste it—it should be boldly seasoned. Remember, some of that flavor will stay in the air fryer basket.
- Season the chicken. Place the dried chicken thighs in a large bowl. Add the garlic herb mixture and use your hands to rub it all over the chicken, making sure to get it under the skin too. Gently lift the skin with your fingers and rub some of the paste directly onto the meat underneath. This is the secret to flavor that goes all the way through. Don’t be shy—use all the rub.
- Preheat the air fryer. Set your air fryer to 380°F (193°C) and let it preheat for 3-5 minutes. Preheating ensures the chicken starts cooking immediately, which helps the skin crisp up faster. I know some recipes skip this step, but I’ve found it makes a noticeable difference.
- Arrange the chicken in the basket. Place the seasoned thighs skin-side down in the air fryer basket. Make sure they’re in a single layer with a little space between each piece. Overcrowding is the enemy of crispiness—if they’re touching, they’ll steam. If your air fryer is small, cook in batches. I know it’s tempting to cram them all in, but trust me on this.
- Cook for 12 minutes. Set the timer for 12 minutes at 380°F. Don’t open the basket during this time—you want the heat to stay consistent. You’ll start to smell the garlic and herbs, and that’s a good sign.
- Flip and continue cooking. After 12 minutes, carefully open the basket and use tongs to flip each thigh over. They should be golden brown on the bottom. Cook for another 10-12 minutes at 380°F, or until the internal temperature reaches 175-185°F (80-85°C) when measured at the thickest part of the thigh, away from the bone. Chicken thighs are more forgiving than breasts and actually benefit from cooking to a slightly higher temperature—the collagen breaks down and the meat becomes more tender.
- Rest before serving. This step is easy to skip when you’re hungry, but don’t. Let the chicken rest for 5 minutes on a wire rack or plate. This allows the juices to redistribute throughout the meat. If you cut into them immediately, those juices will run out onto the plate instead of staying in the chicken.
- Garnish and serve. Sprinkle with a little fresh parsley and maybe some flaky sea salt right before serving. The contrast of the crispy, herby skin with the tender, juicy meat is everything.
Time-Saving Tip: You can prepare the garlic herb rub up to 2 days in advance and store it in the refrigerator. You can also season the chicken up to 8 hours ahead and keep it covered in the fridge—this actually helps the flavor penetrate deeper.
Cooking Tips & Techniques
I’ve learned a few things the hard way so you don’t have to. Here are my best tips for perfect crispy air fryer chicken thighs every time.
Don’t skip the drying step. I once rushed through this and ended up with soggy, pale skin. It was a sad dinner. The moisture on the surface creates steam, which prevents browning. Take the extra minute to really dry those thighs. I sometimes let them sit uncovered in the fridge for an hour after drying—this removes even more moisture from the skin.
Watch the garlic. Fresh garlic can burn easily in the air fryer because of the intense, direct heat. That’s why I mix it with oil and herbs—the oil helps conduct heat more evenly, and the herbs provide a bit of protection. If you notice the garlic starting to darken too quickly, you can lower the temperature by 10-15 degrees and cook a little longer.
Use a thermometer. I cannot stress this enough. Chicken thighs are done at 175°F, but I prefer them at 180-185°F. At this temperature, the connective tissue breaks down completely, and the meat becomes fall-apart tender. An instant-read thermometer takes all the guesswork out. I’ve ruined enough chicken by guessing—never again.
Batch cooking strategy. If you’re cooking for a crowd, cook the chicken in batches and keep the finished pieces warm in a 200°F oven on a wire rack. The wire rack is important—it prevents the bottom from getting soggy. I’ve kept chicken warm this way for up to 30 minutes with no loss of crispiness.
Multitasking tip. While the chicken cooks, prep your sides. These thighs pair beautifully with a simple arugula salad or roasted vegetables. The timing works out perfectly—by the time the chicken rests, your sides are ready to go.
Variations & Adaptations
One of the best things about this recipe is how adaptable it is. Here are some variations I’ve tried and loved.
- Spicy Version : Add 1 teaspoon of cayenne pepper or red pepper flakes to the garlic herb rub. I made this for a game day gathering, and it was the first thing to disappear. The heat cuts through the richness of the chicken beautifully. You can also add a drizzle of hot honey right before serving for a sweet-heat combo that’s addictive.
- Lemon Herb Version : Increase the lemon zest to 2 lemons and add 2 tablespoons of fresh lemon juice to the rub. This bright, citrusy version is perfect for spring and summer gatherings. I serve it with a side of tzatziki sauce for dipping. The acidity helps balance the richness of the skin.
- Smoky Paprika Version : Replace the sweet paprika with smoked paprika and add ½ teaspoon of cumin. This gives the chicken a deeper, almost barbecue-like flavor. It’s my go-to for fall gatherings when I’m craving something warm and cozy.
- Dairy-Free Adaptation : This recipe is naturally dairy-free, but if you’re serving it with a dipping sauce, make sure to use a dairy-free option. A simple yogurt-based sauce made with coconut yogurt works beautifully.
- Herb Substitutions : Feel free to swap the herbs based on what you have. Oregano, marjoram, or even dried Italian seasoning work well. Just remember that dried herbs are more concentrated—use about one-third of the amount if substituting dried for fresh.
- Boneless Thighs : If you’re using boneless, skin-on thighs, reduce the cooking time to about 15-18 minutes total. The skin will still get crispy, but the meat cooks faster without the bone.
Serving & Storage Suggestions
Serving Temperature: These thighs are best served hot, straight from the air fryer. The skin is at its crispiest within the first 10 minutes. If you’re serving them at a party, I recommend cooking them in batches so guests get them fresh.
Presentation Ideas: Arrange the thighs on a large wooden board or platter. Sprinkle with fresh parsley and flaky sea salt. Add lemon wedges on the side for squeezing. For a dinner party, serve each person one or two thighs on individual plates with a side of roasted vegetables or a fresh salad.
What to Serve Alongside: These thighs pair beautifully with:
- A simple arugula salad with lemon vinaigrette
- Roasted potatoes or sweet potatoes
- Grilled asparagus or green beans
- Rice pilaf or quinoa
- Crusty bread for soaking up any juices
Storage: Store leftover chicken in an airtight container in the refrigerator for up to 4 days. The skin will lose some of its crispiness, but the meat will remain juicy.
Reheating: The air fryer is actually the best way to reheat these. Place the thighs in the air fryer at 350°F for 3-4 minutes, or until heated through and the skin re-crisps. You can also reheat them in a 375°F oven on a wire rack for about 8-10 minutes. Avoid the microwave—it will make the skin rubbery.
Freezing: You can freeze cooked chicken thighs for up to 3 months. Wrap each piece individually in plastic wrap, then place in a freezer bag. Thaw in the refrigerator overnight, then reheat in the air fryer as directed above.
Flavor Development: Honestly, these thighs are even better the next day. The flavors have time to meld, and the meat becomes even more tender. I’ve been known to make a double batch just for leftovers. They’re amazing chopped up over a salad for lunch.
Nutritional Information & Benefits
Here’s the nutritional breakdown for one serving (one chicken thigh with skin):
| Nutrient | Amount per Serving |
|---|---|
| Calories | 285 |
| Protein | 24g |
| Fat | 20g |
| Saturated Fat | 5g |
| Carbohydrates | 1g |
| Fiber | 0g |
| Sugar | 0g |
| Sodium | 420mg |
Health Benefits: Chicken thighs are an excellent source of high-quality protein, which is essential for muscle repair and growth. They’re also rich in B vitamins, particularly B6 and B12, which support energy metabolism. The skin contains healthy fats that help you feel satisfied. Garlic and herbs are packed with antioxidants that support immune health. This recipe is naturally gluten-free, low-carb, and keto-friendly.
Dietary Considerations: This recipe is suitable for gluten-free, low-carb, keto, and paleo diets. It’s also nut-free and dairy-free. If you’re watching your sodium intake, reduce the salt to 1 teaspoon.
Personal Wellness Perspective: I love that this recipe lets me enjoy crispy, flavorful chicken without the mess and extra fat of deep-frying. It’s a satisfying meal that fits into a balanced lifestyle. The air fryer makes it easy to get that restaurant-quality texture at home with minimal effort.
Conclusion
These crispy air fryer chicken thighs with garlic herb rub have become a staple in my kitchen for a reason. They’re the recipe I turn to when I want to impress without stress, when I want to feed a crowd without spending all day in the kitchen, and when I just want a damn good piece of chicken.
The magic is in the simplicity. A handful of fresh herbs, some good garlic, and the right technique—that’s all it takes to create something that tastes like it came from a restaurant. The air fryer does the heavy lifting, and you get to take all the credit.
I’d love to hear how these turn out for you. Did you try any of the variations? Did you serve them at a gathering? Drop a comment below and let me know. And if you have a favorite dipping sauce or side dish that pairs well with these thighs, share that too—I’m always looking for new ideas.
Until next time, happy cooking. And remember: crispy skin is always worth the extra effort.
Frequently Asked Questions
Can I use boneless, skinless chicken thighs for this recipe?
You can, but you’ll lose the crispy skin that makes this recipe so special. If you use boneless, skinless thighs, reduce the cooking time to about 15-18 minutes total, and consider adding a little extra oil to prevent them from drying out. The flavor will still be great, but the texture will be different.
How do I prevent the garlic from burning in the air fryer?
This is a common concern, and the key is to mince the garlic finely and mix it thoroughly with the oil and herbs. The oil helps distribute heat evenly, and the herbs provide a bit of insulation. If you’re still worried, you can use garlic powder instead—use 1 teaspoon in place of the fresh garlic.
Can I make this recipe ahead of time for a party?
Absolutely! You can season the chicken up to 8 hours ahead and keep it covered in the refrigerator. When you’re ready to cook, just pop them in the air fryer. You can also cook them completely and reheat them in the air fryer for 3-4 minutes at 350°F right before serving. The skin won’t be quite as crispy as fresh, but it’s still delicious.
Why are my chicken thighs not getting crispy?
The most common reason is moisture. Make sure you pat the skin completely dry before seasoning. Another culprit is overcrowding—if the thighs are touching in the basket, they’ll steam instead of crisp. Finally, make sure your air fryer is preheated and that you’re cooking at the right temperature. If all else fails, try cooking them skin-side down first for the initial 12 minutes.
What’s the best way to reheat leftover crispy chicken thighs?
The air fryer is your best bet. Reheat at 350°F for 3-4 minutes, and the skin will crisp right back up. You can also use a 375°F oven on a wire rack for about 8-10 minutes. Whatever you do, avoid the microwave—it will make the skin rubbery and sad.
Pin This Recipe!

Crispy Air Fryer Chicken Thighs with Garlic Herb Rub

These crispy air fryer chicken thighs with garlic herb rub are designed to make you look like a hero at your next gathering. The skin gets that perfect crackling crunch while the meat stays impossibly juicy, and the garlic herb rub blooms beautifully in the air fryer heat.
- Prep Time: 10 minutes
- Cook Time: 22-24 minutes
- Total Time: 37-39 minutes
- Yield: 4-6 servings 1x
- Category: Main Course
- Cuisine: American
Ingredients
- 6–8 bone-in, skin-on chicken thighs (about 2.5–3 pounds total)
- 4–5 cloves garlic, minced
- 2 tablespoons fresh rosemary, finely chopped
- 1 tablespoon fresh thyme leaves
- 2 tablespoons fresh parsley, finely chopped
- 2 tablespoons extra-virgin olive oil
- 1½ teaspoons kosher salt (or 1 teaspoon table salt)
- 1 teaspoon freshly ground black pepper
- 1 teaspoon sweet paprika
- ½ teaspoon onion powder
- Zest of 1 lemon (optional)
Instructions
- Pat the chicken thighs completely dry with paper towels. Remove all moisture from the skin. Let sit on a plate while preparing the rub.
- In a medium bowl, combine minced garlic, chopped rosemary, thyme, parsley, olive oil, salt, pepper, paprika, onion powder, and lemon zest (if using). Stir until it forms a thick paste.
- Place dried chicken thighs in a large bowl. Add the garlic herb mixture and rub all over the chicken, including under the skin by gently lifting the skin and applying the paste directly onto the meat.
- Preheat the air fryer to 380°F (193°C) for 3-5 minutes.
- Arrange seasoned thighs skin-side down in the air fryer basket in a single layer with space between each piece. Do not overcrowd.
- Cook for 12 minutes at 380°F. Do not open the basket during this time.
- After 12 minutes, flip each thigh over using tongs. Cook for another 10-12 minutes at 380°F, or until internal temperature reaches 175-185°F (80-85°C) at the thickest part away from the bone.
- Let the chicken rest for 5 minutes on a wire rack or plate to allow juices to redistribute.
- Garnish with fresh parsley and flaky sea salt before serving.
Notes
Pat the skin completely dry for maximum crispiness. Fresh garlic is essential; do not use jarred garlic. If your air fryer is smaller, cook in batches to avoid steaming. For boneless, skin-on thighs, reduce cooking time to 15-18 minutes total. The garlic herb rub can be prepared up to 2 days in advance and stored in the refrigerator. Chicken can be seasoned up to 8 hours ahead for deeper flavor.
Nutrition
- Serving Size: 1 chicken thigh
- Calories: 285
- Sodium: 420
- Fat: 20
- Saturated Fat: 5
- Carbohydrates: 1
- Protein: 24
Keywords: air fryer chicken thighs, crispy chicken thighs, garlic herb chicken, air fryer recipe, chicken dinner, gluten-free chicken, keto chicken