I wasn’t supposed to be there that long. I’d just stopped by my neighbor Harriet’s place to drop off a casserole dish she’d lent me, and I had a million things to do. Groceries to buy, laundry to fold, a whole mental checklist I was already behind on. She cracked the door, and this wave of warm, spiced air just rolled out into the hallway. It smelled like someone had captured the essence of November and bottled it.
“Oh, I’m just throwing a little something together,” she said when I asked, waving her hand like it was nothing. She led me into her kitchen, and there it was. A massive wooden board, practically groaning under the weight of everything good. There were clusters of deep purple grapes, wedges of cheese that looked like they’d been carved from a sunset, and little piles of honeyed walnuts catching the light. It wasn’t for a party. It was just for her and her husband, a quiet Tuesday night thing they did. She didn’t even seem to realize she’d created a masterpiece. I mean, I was standing there, coat still on, just staring, while she casually arranged a few more slices of prosciutto like it was the most boring task in the world. Honestly, I think I forgot to breathe for a second.
That’s the thing about the best recipes, isn’t it? They don’t come from fancy dinner parties or celebrity chefs. They come from people like Harriet, who just know how to make something beautiful without trying. This cozy Thanksgiving charcuterie board is my little tribute to that night. It’s the kind of spread that feels special enough for a holiday but simple enough for a random Tuesday when you just need something pretty to eat. Maybe you’ve been there, staring at a blank table, wondering how to make a simple gathering feel a little more magical. This is your answer.
Why You’ll Love This Recipe
This isn’t just a pile of snacks on a plate. This is an experience. It’s the centerpiece that lets everyone graze, chat, and build their own perfect bite. I’ve tested this combination about a dozen times (tough job, I know) and I can tell you it hits every single note you want for a cozy fall gathering.
- No Cooking Required: Seriously. You just arrange. This is the perfect recipe for when you’re already swamped with turkey and pies and just need one thing to be stress-free.
- Show-Stopping Visuals: The deep reds of the apples, the golden hues of the cheese, the rustic browns of the nuts—it’s a fall color palette that looks like it belongs on a magazine cover.
- Perfect for Pre-Dinner Grazing: While the turkey rests or the rolls finish baking, this board keeps your guests happy and out of your hair. It’s the ultimate Thanksgiving appetizer.
- Totally Customizable: Don’t like blue cheese? Swap it. Allergic to nuts? Leave them out. This board is a template for your own personal fall fantasy.
- Unbelievably Delicious: That first bite of sharp cheddar with a slice of honeycrisp apple and a drizzle of honey? It’s the kind of flavor combination that makes you close your eyes for a second. It’s comfort food, but for your taste buds.
What makes this board different from the rest is the balance. I’ve focused on a mix of textures—creamy, crunchy, chewy, crisp—and a range of flavors from salty prosciutto to sweet dried figs. It’s not just a random assortment; it’s a curated journey. And the best part? It’s the kind of food that soothes the soul. After a long day of cooking, or just a long week, sitting down with a plate like this feels like a hug. It’s simple, it’s beautiful, and it’s exactly what you need.
What Ingredients You Will Need
This recipe uses a beautiful mix of simple, seasonal ingredients to create a board that feels both rustic and elegant. The key is to pick things you love, but also to think about how they’ll play together. Here’s what I used for my ultimate cozy Thanksgiving charcuterie board.
For the Cheeses (The Stars of the Show)
- Sharp Cheddar (8 oz): A classic. I prefer a good aged white cheddar from a local creamery if you can find one. It adds a nice sharp, crumbly texture. (Look for one that’s been aged at least 12 months for maximum flavor.)
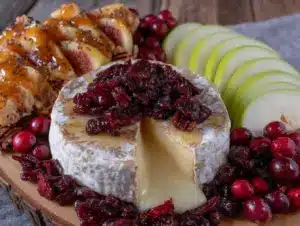
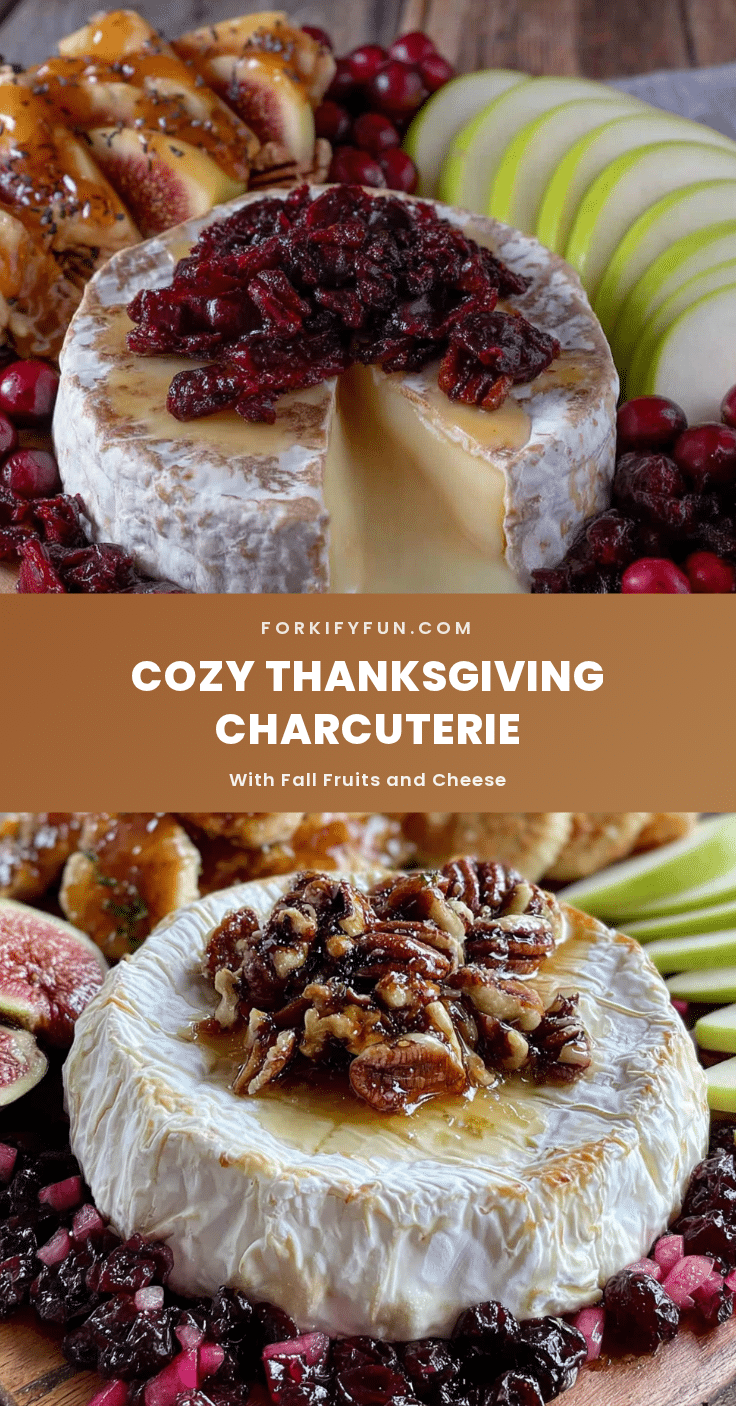
- Brie (8 oz wheel): For that creamy, buttery richness. It’s the pillow of the board. Let it come to room temperature before serving for the best texture.
- Blue Cheese (4 oz): A little bit of funk goes a long way. I love a good Gorgonzola dolce for its milder, creamier bite. It pairs perfectly with the sweet fruit.
- Aged Gouda (6 oz): Those little crunchy crystals of flavor? That’s what you get with a good aged Gouda. It’s sweet, nutty, and a little salty.
For the Fall Fruits (The Sweet & Tart Notes)
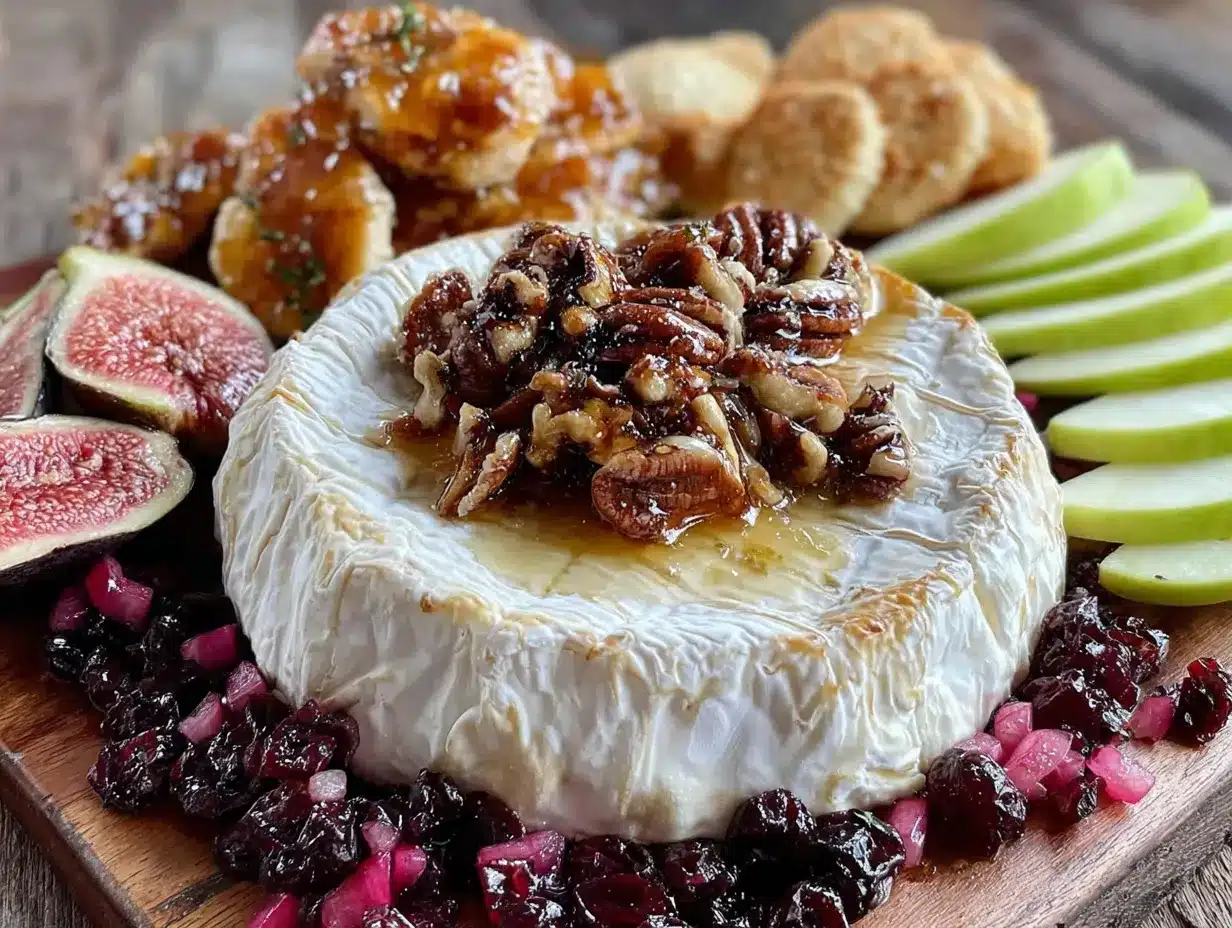
- Honeycrisp Apples (2): They’re crisp, sweet, and hold up well without browning too fast. Slice them just before serving.
- Bartlett Pears (1-2): Soft and sweet. They add a delicate texture that’s lovely against the hard cheeses.
- Dried Figs (1 cup): Chewy and intensely sweet. They’re like little jewels on the board.
- Red Seedless Grapes (1 large bunch): A classic for a reason. They add a pop of color and a burst of juice.
- Pomegranate Seeds (1/2 cup): Those little tart, crunchy gems are like confetti for your board. They add a gorgeous pop of color.
For the Savory Bites (The Salty Crunch)
- Prosciutto (4 oz): Thinly sliced, salty, and silky. I like to buy it from the deli counter and ask for it sliced paper-thin.
- Salami (4 oz): A nice, firm Genoa salami adds a different texture and a bit of spice. Cut it into thin rounds or small cubes.
- Honey-Roasted Almonds (1/2 cup): Sweet and crunchy. They’re a perfect counterpoint to the salty meats.
- Spiced Candied Pecans (1/2 cup): You can buy these or make them yourself. The warm spices (cinnamon, nutmeg) are pure fall.
For the Accompaniments (The Dippers & Spreads)
- Honey (for drizzling): A good local honey is worth it. It brings everything together.
- Fig Jam or Fruit Preserves (1/2 cup): A little bowl of this adds a sweet, sticky element that’s amazing with the brie and crackers.
- Assorted Crackers & Bread (1 box of crackers, 1 baguette): Use a mix of textures. I like water crackers, a seedy crispbread, and slices of a good crusty baguette.
- Fresh Rosemary Sprigs: Not for eating, but for garnish. They add a beautiful, aromatic touch that screams “fall.”
Equipment Needed
You don’t need a ton of fancy gear for this, which is part of the beauty. Here’s what I use to make my boards look their best.
- A Large Wooden Board or Slate Platter: This is your canvas. A big wooden cutting board, a marble slab, or even a large baking sheet lined with parchment paper will work. I have a big, round acacia wood board that I found at a home goods store for twenty bucks. It’s my favorite.
- Small Bowls (2-3): For the jam, honey, and any loose items like the pomegranate seeds. Little ceramic ramekins are perfect.
- Cheese Knives (2-3): A soft cheese knife (the one with holes) for the brie, a hard cheese knife for the cheddar and gouda, and a small spreader for the jam.
- A Sharp Knife & Cutting Board: For slicing the apples, pears, and baguette.
- Paring Knife: For any small trimming or detail work.
If you don’t have a specific cheese knife, don’t sweat it. A regular butter knife works fine for the brie, and a good paring knife can handle the hard cheeses. The key is to just have something for people to use so they aren’t digging into the brie with their fingers (though, no judgment here).
Preparation Method
Okay, let’s build this thing. The process is more about art than science, but there’s a little strategy to making it look like a million bucks. Take your time and have fun with it.
- Prep Your Ingredients (10 minutes): First things first, let’s get everything ready. Take your cheeses out of the fridge about 30 minutes before you plan to serve them. This lets them soften and brings out their full flavor. Wash and dry your grapes and apples. Slice the apples and pears just before you’re ready to assemble to keep them from browning. (A little squeeze of lemon juice on the slices will help, too.) Slice your baguette into thin rounds. Put your jams and honey into their little serving bowls.
- Place Your Bowls & Cheeses (5 minutes): This is the foundation. Start by placing your small bowls of jam and honey on the board. Don’t put them right in the center; offset them a bit to create visual interest. Next, place your cheese wedges. Put them in different spots around the board. I like to put the brie wheel in one corner, the wedge of aged gouda opposite it, and the blue cheese and cheddar somewhere in between. Think of them as anchors for the rest of the ingredients.
- Add the Meats (3 minutes): Now, take your prosciutto and salami. For the prosciutto, I like to fold the thin slices into loose ribbons or little ruffles and place them near one of the cheeses. For the salami, you can fan out the slices in a little row or pile them up. This adds a nice, savory layer to the board.
- Fill in with Fruit (5 minutes): This is where it starts to get beautiful. Place your clusters of grapes in the empty spaces. Fan out your apple and pear slices. Tuck the dried figs and piles of pomegranate seeds into little nooks and crannies. The goal is to fill up the board so you don’t see much bare wood. Don’t be afraid to pile things up a little—height is good!
- Add the Crunch (3 minutes): Now for the nuts and crackers. Don’t just dump them on. Create little piles of the spiced pecans and honey-roasted almonds. Tuck your crackers in around the cheeses and meats, fanning them out or leaning them against the cheese wedges. This adds texture and makes it easy for people to grab.
- Garnish & Serve (2 minutes): The final touch! Tuck a few sprigs of fresh rosemary around the board. It adds a beautiful, earthy green color and that amazing fall scent. Drizzle a little honey over the brie wheel or the pile of figs. Give everything one last look. If there’s a bare spot, fill it with a few extra grapes or a pile of crackers. And that’s it. You’ve just created a masterpiece.
Cooking Tips & Techniques
I’ve made a few boards in my time, and I’ve definitely learned a thing or two the hard way. Here are my best tips for making your charcuterie board look like you know what you’re doing (even if it’s your first time).
- The “Flow” is Real: Don’t just place things randomly. Think about the flavor journey. Put a sharp cheese next to a sweet fruit. Put a salty meat near a creamy cheese. You want people to be able to build a perfect bite without having to reach across the whole board.
- Don’t Overcrowd (at first): It’s tempting to pile everything on, but a slightly under-filled board looks more intentional than one that looks like a food explosion. You can always add more as things get eaten.
- Room Temperature is King: I cannot stress this enough. A cold piece of brie is like eating a block of butter from the fridge. Let your cheeses sit out for at least 30 minutes. It makes a world of difference in both texture and flavor.
- The “Crash” and “Burn”: I once made a beautiful board for a party and then accidentally left the prosciutto out in the sun for an hour. It turned into a sad, greasy mess. Learn from my mistake! Keep your board in a cool place until you’re ready to serve, and don’t put it out until the last minute if it’s a warm day.
- Prep is Your Friend: Do all your washing, slicing, and bowl-filling ahead of time. Then, when your guests arrive or you’re ready to eat, you can assemble the board in about 10 minutes flat. It takes all the stress out of the process.
Variations & Adaptations
The best thing about a charcuterie board is that it’s a choose-your-own-adventure. Here are a few ways to make this board your own.
- Make it Vegetarian: Simply leave out the prosciutto and salami. Load up on extra cheeses, nuts, and fruits. Add some marinated artichoke hearts, roasted red peppers, or stuffed olives for that savory, briny kick.
- Go Gluten-Free: Swap the crackers and baguette for gluten-free crackers, rice cakes, or sliced cucumber and bell pepper “boats.” Most cheeses and meats are naturally gluten-free, so just be mindful of the crackers.
- Add a Little Heat: For a spicy twist, add some soppressata (a spicy Italian salami) and a little bowl of hot honey. The sweet and spicy combo is incredible with the creamy brie.
- Make it a Dessert Board: Swap the cheeses for a triple-cream brie and a manchego. Add dark chocolate bark, fresh berries, dried apricots, and a bowl of whipped honey. It’s a dessert lover’s dream.
- Seasonal Swaps: In the summer, swap the apples and pears for fresh peaches and plums. In the winter, use clementines and dried cranberries. The formula is the same, just change the fruit to match the season.
Serving & Storage Suggestions
This board is best enjoyed fresh, but there are ways to make it last or use up the leftovers.
How to Serve: Serve the board at room temperature. Place it in the center of the table and let everyone dig in. It’s a great appetizer for a Thanksgiving dinner, but it also works perfectly as a light lunch or a cozy dinner for two with a glass of wine. I love to put out little plates and napkins so people can build their own little collections.
How to Store: If you have leftovers (unlikely, but possible), you’ll want to store everything separately. Wrap the cheeses tightly in wax paper or cheese paper (not plastic wrap—it makes them sweat) and put them in the fridge. Store the meats in an airtight container. The fruits and crackers should be stored separately. The cut apples and pears will brown, so they’re best eaten fresh.
How to Reheat: You don’t really reheat a charcuterie board. Just take the cheeses and meats out of the fridge about 30 minutes before you want to eat them again to let them come to room temperature. The flavors actually get better as they sit, so day-old board is still a treat.
Nutritional Information & Benefits
While this is definitely a “treat yourself” kind of food, it’s also packed with some good stuff. The key is balance and portion control.
Estimated Nutritional Values (per serving, based on a 1/6 of the board):
- Calories: ~450-550
- Protein: ~20-25g
- Fat: ~30-35g
- Carbohydrates: ~25-30g
- Fiber: ~5-7g
Health Benefits: The nuts are full of healthy fats and vitamin E. The fruits provide fiber and antioxidants. The cheeses are a good source of calcium and protein. And the pomegranate seeds are little powerhouses of anti-inflammatory goodness. So yes, you’re getting some nutrients in with all that deliciousness. It’s about enjoyment, not guilt.
Dietary Considerations: This board can easily be made gluten-free and vegetarian as noted in the variations. It contains dairy (cheese) and nuts, so be mindful of allergies. For a lower-carb option, focus on the meats, cheeses, and nuts, and go light on the fruit and crackers.
Conclusion
So there you have it. A cozy Thanksgiving charcuterie board that’s more than just a snack—it’s a moment. It’s the thing that gets people talking, laughing, and building their perfect little bites before the big meal even starts. It’s the kind of food that reminds me of that quiet Tuesday night at Harriet’s house, where something simple turned into something unforgettable.
I really hope you give this a try. Don’t be afraid to make it your own. Swap the cheeses, change the fruit, pile it high with your favorite things. That’s the whole point. And when you do, I’d love to hear about it. Come back and leave a comment below, or tag me in your photos on social media. Tell me what your favorite combination was. Did you add something wild? Let me know! Until next time, happy grazing, friends. You’ve got this.
Frequently Asked Questions
Q: How far in advance can I make a charcuterie board?
A: You can prep all the ingredients up to a day in advance. Wash and dry the fruit, slice the baguette, and put the jams in bowls. However, I recommend assembling the board no more than 2-3 hours before you plan to serve it to keep everything fresh and the crackers from getting soggy.
Q: What if I can’t find a specific cheese?
A: No problem at all! The beauty of a charcuterie board is its flexibility. If you can’t find aged gouda, use a manchego or a good parmesan. If brie isn’t your thing, try a camembert or a soft-ripened goat cheese. The goal is to have a mix of textures and flavors.
Q: How do I keep the apple slices from turning brown?
A: Just toss them in a little bit of lemon juice or even a mild vinegar like apple cider vinegar. It won’t affect the taste much and will keep them looking pretty for hours. You can also slice them right before you put the board out.
Q: How much food do I need per person?
A: As a general rule, plan for about 3-4 ounces of cheese and 2-3 ounces of meat per person if this is the main appetizer. If it’s a light meal, you might want a bit more. For a full dinner party, this board as described is perfect for 6-8 people as a starter.
Q: Can I use a baking sheet instead of a wooden board?
A: Absolutely! A large baking sheet is a perfect, budget-friendly alternative. You can even line it with a piece of parchment paper or a festive napkin for a little extra flair. It works just as well for holding everything together.
Pin This Recipe!
Cozy Thanksgiving Charcuterie Board: Easy Fall Fruit & Cheese
A stunning, no-cook charcuterie board featuring sharp cheddar, creamy brie, blue cheese, aged gouda, prosciutto, salami, and an array of fall fruits and nuts. Perfect for pre-dinner grazing or a cozy night in.
- Prep Time: 15 minutes
- Cook Time: 0 minutes
- Total Time: 15 minutes
- Yield: 6-8 servings 1x
- Category: Appetizer
- Cuisine: American
Ingredients
- 8 oz sharp cheddar
- 8 oz brie wheel
- 4 oz blue cheese (Gorgonzola dolce recommended)
- 6 oz aged gouda
- 2 Honeycrisp apples
- 1–2 Bartlett pears
- 1 cup dried figs
- 1 large bunch red seedless grapes
- 1/2 cup pomegranate seeds
- 4 oz prosciutto, thinly sliced
- 4 oz Genoa salami
- 1/2 cup honey-roasted almonds
- 1/2 cup spiced candied pecans
- Honey for drizzling
- 1/2 cup fig jam or fruit preserves
- 1 box assorted crackers
- 1 baguette
- Fresh rosemary sprigs for garnish
Instructions
- Prep your ingredients: Take cheeses out of fridge 30 minutes before serving. Wash and dry grapes and apples. Slice apples and pears just before assembling (toss with lemon juice to prevent browning). Slice baguette into thin rounds. Place jams and honey into small serving bowls.
- Place bowls and cheeses: Position small bowls of jam and honey on the board, offset from center. Place cheese wedges in different spots around the board, anchoring the layout.
- Add meats: Fold prosciutto into loose ribbons or ruffles and place near a cheese. Fan out salami slices in a row or pile.
- Fill in with fruit: Place grape clusters in empty spaces. Fan out apple and pear slices. Tuck dried figs and pomegranate seeds into nooks. Fill the board so little wood shows, piling items for height.
- Add crunch: Create small piles of spiced pecans and honey-roasted almonds. Tuck crackers around cheeses and meats, fanning or leaning them against cheese wedges.
- Garnish and serve: Tuck fresh rosemary sprigs around the board. Drizzle honey over brie or figs. Fill any bare spots with extra grapes or crackers. Serve at room temperature.
Notes
Let cheeses come to room temperature for best flavor. Toss apple slices with lemon juice to prevent browning. Assemble board no more than 2-3 hours before serving. Store leftovers separately: wrap cheeses in wax paper, meats in airtight container, and fruits/crackers separately.
Nutrition
- Serving Size: 1/6 of board
- Calories: 500
- Sugar: 18
- Sodium: 800
- Fat: 32
- Saturated Fat: 14
- Carbohydrates: 28
- Fiber: 6
- Protein: 22
Keywords: charcuterie board, Thanksgiving appetizer, fall fruit and cheese, no-cook appetizer, holiday grazing board