I was at a garage sale last October, digging through a box of mismatched Tupperware, when the woman running the sale—a retired home ec teacher named Doris with bright purple glasses—started talking about deviled eggs. I hadn’t asked. I was just trying to find a lid for a container I didn’t even need. But Doris had a way of talking that made you listen, and before I knew it, she was describing how she used to make “spider eggs” for her son’s Halloween parties back in the eighties. She laughed, saying she’d pipe the filling onto the eggs in a way that looked like spider bodies, then use black olives for the legs. I stood there holding a dusty casserole dish, completely hooked. I mean, who expects a deviled egg tutorial from a garage sale? But honestly, that’s where the best recipes come from—the most unexpected corners of life.
I bought the casserole dish (still don’t know what for) and went home with Doris’s spider egg idea stuck in my head. It took me a few tries to get the look right. The first batch? Let’s just say they looked more like sad, lumpy potatoes than spiders. But I kept at it, tweaking the filling, figuring out how to make the olive legs stay put, and testing the best way to pipe the yolk mixture so it actually looked like a creepy-crawly arachnid. The result is this recipe for Cozy Spooky Spider Deviled Eggs. They’re perfect for a Halloween party, a spooky movie night, or just a Tuesday when you want something fun and delicious. Maybe you’ve been there—wanting a festive appetizer that doesn’t taste like a compromise. These are it. They’re creamy, tangy, and just the right amount of creepy-cute. I’ve been making them every October since that garage sale, and they never fail to get a reaction. Honestly, I think Doris would approve.
Why You’ll Love This Recipe
These Cozy Spooky Spider Deviled Eggs aren’t just another Halloween appetizer. They’re the kind of recipe that makes people stop and smile—then grab another one before you can say “trick or treat.” Here’s why they’re a keeper:
- Quick & Easy: You can have these ready in about 30 minutes, with most of that time being hands-off boiling and cooling. Perfect for last-minute party prep.
- Simple Ingredients: Eggs, mayo, mustard, and olives. That’s it. No weird food coloring or specialty items. You probably have everything already.
- Perfect for Halloween: Whether it’s a costume party, a classroom treat, or a cozy night watching horror movies, these eggs fit right in. They’re spooky without being scary.
- Crowd-Pleaser: Kids love the spider look, and adults appreciate the classic deviled egg flavor. I’ve seen them disappear at every party I’ve brought them to.
- Unbelievably Delicious: The creamy, tangy filling paired with the salty olive “spiders” is a combination that just works. It’s comfort food with a playful twist.
What makes this recipe different from the rest? It’s the attention to detail. I tested multiple ways to pipe the filling so it looks like a spider body—not a blob. I figured out the trick to keeping the olive legs attached without them sliding off. And I perfected the seasoning so the eggs taste as good as they look. This isn’t just another version of deviled eggs; it’s your best version for Halloween. The kind that makes you close your eyes after the first bite, even while you’re surrounded by plastic skeletons and fake cobwebs. It’s comfort food reimagined—festive, fun, and full of soul-soothing satisfaction. Perfect for impressing guests without any stress, or turning a simple snack into something memorable.
What Ingredients You Will Need
This recipe uses simple, everyday ingredients to create something special. No fancy shopping trips required—just good, basic staples that come together beautifully. Here’s what you’ll need:
For the Deviled Eggs
- 6 large eggs (room temperature for easier peeling)
- 3 tablespoons mayonnaise (I prefer Hellmann’s or Duke’s for the creamiest texture)
- 1 teaspoon yellow mustard (adds that classic tangy kick)
- 1/4 teaspoon salt (fine sea salt works best)
- 1/8 teaspoon black pepper (freshly ground if you have it)
- 1/2 teaspoon white vinegar (optional, but brightens the flavor beautifully)
For the Spider Decoration
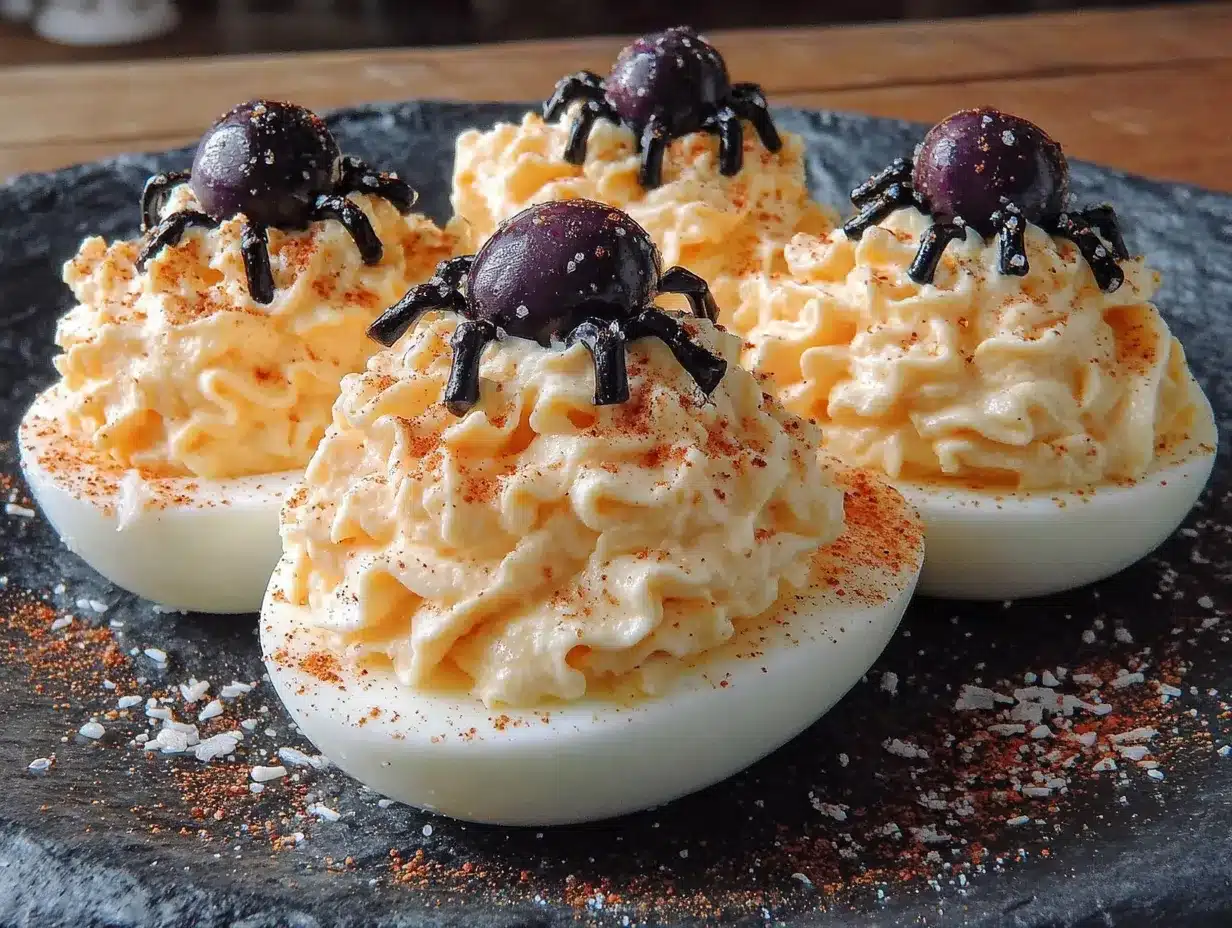
- 6 pitted black olives (large ones, like California Ripe Olives, work best for slicing)
- 1 tablespoon cream cheese (softened, acts as “glue” for the spider legs)
Ingredient Tips & Substitutions:
- Eggs: Older eggs peel more easily than fresh ones. If your eggs are super fresh, add a teaspoon of baking soda to the boiling water—it helps loosen the shells.
- Mayonnaise: For a lighter version, use half mayo and half plain Greek yogurt. It still tastes creamy, just a bit tangier.
- Mustard: Dijon mustard works beautifully if you want a slightly sharper flavor. Spicy brown mustard adds a nice kick, too.
- Olives: Look for large, pitted black olives. The jumbo ones from the deli section are perfect because they give you bigger slices for the spider bodies. Avoid sliced olives—they’re too thin.
- Cream Cheese: This is my secret trick. A tiny dab of cream cheese helps the olive legs stay put on the egg white. Without it, the legs tend to slide off. Use full-fat for best results.
Equipment Needed
You don’t need much to make these spooky deviled eggs. Here’s what I use:
- Medium saucepan (for boiling the eggs)
- Mixing bowl (medium size)
- Fork or potato masher (for mashing the yolks)
- Piping bag or zip-top bag (a quart-size bag works perfectly—just snip the corner)
- Small sharp knife (for slicing olives and cutting the spider legs)
- Cutting board (a small one is fine)
- Toothpicks (handy for positioning the legs)
Budget-Friendly Alternatives: If you don’t have a piping bag, don’t worry. A sturdy zip-top bag does the same job. Just fill it, seal it, and snip a small corner. For the knife, any sharp paring knife works. I’ve used the same $5 knife for years. As for the saucepan, any pot that fits the eggs in a single layer will do. No fancy equipment needed here—just a little patience and a steady hand.
Preparation Method
Let’s make these Cozy Spooky Spider Deviled Eggs. I’ll walk you through every step, including the little tricks I learned from my many failed attempts.
Step 1: Boil the Eggs
Place the eggs in a single layer in your saucepan. Cover them with cold water by about an inch. Bring the water to a rolling boil over high heat. Once it’s boiling, turn off the heat, cover the pot, and let it sit for exactly 12 minutes. This gives you hard-boiled eggs with firm yolks but no green ring. While they cook, prepare an ice bath—a bowl of cold water with a handful of ice cubes. After 12 minutes, transfer the eggs to the ice bath and let them cool for at least 5 minutes. This stops the cooking and makes peeling much easier.
Step 2: Peel the Eggs
Gently tap each egg on the counter to crack the shell all over. Start peeling from the wider end—that’s where the air pocket is, and it gives you an easier starting point. Run the eggs under cold water as you peel to help remove stubborn shell pieces. If you’re struggling, try peeling them under a thin stream of running water. It sounds wasteful, but it works like a charm. Pat the peeled eggs dry with a paper towel.
Step 3: Prepare the Egg Whites
Using a sharp knife, slice each egg in half lengthwise. Gently pop out the yolks into a mixing bowl. Place the egg white halves on a serving platter, cut-side up. Try to keep the whites intact—they’re the canvas for your spiders. If a few tear, don’t stress. You can hide imperfections with the olive decoration later.
Step 4: Make the Filling
Add the mayonnaise, mustard, salt, pepper, and vinegar (if using) to the bowl with the yolks. Mash everything together with a fork until it’s smooth and creamy. I like to press the mixture through a fine-mesh sieve for extra silkiness, but that’s optional. Taste it and adjust the seasoning. You want it tangy and rich, with a slight kick from the mustard. If it seems too thick, add another teaspoon of mayo. Too thin? Add another yolk if you have one, or just chill it for 10 minutes to firm up.
Step 5: Pipe the Filling
Spoon the yolk mixture into your piping bag or zip-top bag. If using a zip-top bag, press the mixture into one corner, seal the bag, and snip about 1/4 inch off the corner. Pipe the filling into each egg white half, using a circular motion to create a slight mound. You want it to look like a spider body—round and slightly domed. Don’t overfill; you want the olive to sit on top without sliding off. Leave a tiny border of egg white visible around the filling.
Step 6: Prepare the Spider Decorations
Now for the fun part. Slice each olive in half lengthwise. One half will be the spider’s body, and the other half will be sliced into legs. Take one olive half and slice it into 4 thin strips lengthwise—these are the legs. Repeat with the other half. You should have 8 thin strips total from each olive. This is where the cream cheese comes in. Dab a tiny amount of cream cheese onto the back of each “leg” strip and press it gently onto the egg white, radiating out from the center of the filling. Place the remaining olive half (the body) on top of the filling, pressing down slightly so it sticks. The cream cheese acts as glue, keeping everything in place.
Step 7: Finish and Serve
Repeat for all 12 egg halves. Once all the spiders are assembled, refrigerate the eggs for at least 15 minutes before serving. This helps the cream cheese set and the flavors meld. Arrange them on a platter, and watch them disappear.
Cooking Tips & Techniques
After making these eggs more times than I can count, I’ve learned a few things the hard way. Here are my best tips:
- Perfect Peeling: The number one mistake is using super fresh eggs. They’re harder to peel. If you can, buy your eggs a week ahead and let them sit in the fridge. The slight aging makes peeling effortless. Also, shocking them in an ice bath is non-negotiable—it contracts the egg inside the shell and creates a gap.
- No Green Yolks: Overcooking causes that ugly green ring around the yolk. The 12-minute off-heat method is foolproof. Set a timer. Don’t guess.
- Piping Without a Mess: Warm filling is runny filling. If your mixture seems too soft, pop it in the fridge for 10 minutes before piping. It’ll hold its shape better. Also, don’t snip too much off the bag corner—start with a small hole and enlarge it if needed.
- Olive Legs That Stay: The cream cheese trick is a game-changer. Without it, the legs slide off as soon as you move the platter. Use just a tiny dab—too much and it gets messy.
- Make Ahead Strategy: You can boil and peel the eggs up to two days ahead. Store them in the fridge in a covered container. Pipe the filling and add the spiders the day of serving for the freshest look.
Variations & Adaptations
This recipe is easy to tweak for different tastes or dietary needs. Here are a few ways I’ve played with it:
- Spicy Spider Eggs: Add 1/4 teaspoon of cayenne pepper or a dash of hot sauce to the yolk mixture. The heat contrasts nicely with the cool, creamy filling. I tried this last year for a Halloween party, and it was a hit with the adults.
- Avocado Deviled Spiders: Swap half the mayonnaise for mashed ripe avocado. It makes the filling greener and adds a healthy twist. The flavor is milder, but the texture is incredibly smooth. Just be aware the filling will brown faster, so serve within a few hours.
- Bacon-Topped Spiders: Sprinkle a few crumbles of crispy bacon over the olive body. It adds a smoky, salty crunch that takes these eggs to another level. I did this for a football party, and they were gone in minutes.
- Gluten-Free: This recipe is naturally gluten-free, so no changes needed. Just double-check your mustard and mayonnaise labels to be safe.
- Vegan Option: Use silken tofu or a vegan egg substitute for the filling, and skip the eggs altogether. It’s not the same texture, but it works for plant-based guests. I haven’t perfected this one yet, but I’m working on it.
Serving & Storage Suggestions
These Cozy Spooky Spider Deviled Eggs are best served chilled, straight from the fridge. Arrange them on a dark platter or a black serving tray to make the spider legs pop. I like to garnish the platter with a few fake spider webs or plastic spiders for extra Halloween flair—just make sure they’re not touching the food.
Storage: Leftover deviled eggs can be stored in an airtight container in the refrigerator for up to two days. Place them in a single layer, and cover them with plastic wrap to prevent them from drying out. The olive decorations may soften slightly, but they’ll still look good.
Reheating: Don’t. Deviled eggs are served cold, and reheating will ruin the texture. If you’ve made them ahead and they’ve been sitting out for more than two hours, discard any leftovers for food safety.
Flavor Development: These eggs actually taste better after a few hours in the fridge. The flavors meld together, and the filling firms up nicely. If you can, make them the morning of your party and let them chill until serving time.
Nutritional Information & Benefits
Here’s the approximate nutritional breakdown for one spider deviled egg (based on the recipe as written):
| Nutrient | Amount per Serving |
|---|---|
| Calories | |
| Protein | 6g |
| Fat | 5g |
| Carbohydrates | 1g |
| Fiber | 0g |
| Sugar | 0g |
Eggs are a fantastic source of high-quality protein and essential nutrients like vitamin B12, vitamin D, and choline, which supports brain health. The olives add healthy monounsaturated fats and a touch of iron. This recipe is naturally low-carb and gluten-free, making it suitable for many dietary preferences. If you’re watching your cholesterol, you can use just the egg whites for the filling and skip the yolks, but you’ll lose some richness. As with all treats, moderation is key. I personally love that these eggs are a protein-packed snack that doesn’t feel like a compromise—even on Halloween.
Conclusion
These Cozy Spooky Spider Deviled Eggs are the perfect addition to any Halloween gathering. They’re fun, festive, and genuinely delicious—not just a gimmick. I love how they bring a smile to people’s faces, from kids who think the spiders are adorable to adults who appreciate a well-made deviled egg. The recipe is simple enough for a weeknight but impressive enough for a party. I hope you give them a try and make them your own. Maybe you’ll add a little extra mustard, or use green olives for a different look. That’s the beauty of cooking—you can tweak and adjust until it feels like yours. If you make these, I’d love to hear how they turned out. Drop a comment below, share a photo, or tell me about your own Halloween food traditions. Happy Halloween, and happy cooking!
Frequently Asked Questions
Can I make these spider deviled eggs a day ahead?
Yes, you can prepare the eggs and the filling separately a day ahead. Boil and peel the eggs, store them in the fridge, and make the filling. Assemble the spiders on the day you plan to serve them for the best appearance.
How do I keep the olive legs from falling off?
The trick is using a tiny dab of cream cheese as “glue.” Just smear a small amount on the back of each olive leg strip before pressing it onto the egg white. It holds everything in place without affecting the flavor.
Can I use green olives instead of black ones?
Absolutely. Green olives will give your spiders a different look—more like alien spiders, maybe. Just note that green olives are usually brinier, so you might want to rinse them first to tone down the saltiness.
My deviled eggs always turn out with green yolks. What am I doing wrong?
That green ring is caused by overcooking. The off-heat method (boil, then let sit covered for 12 minutes) prevents this. Also, shocking the eggs in an ice bath immediately after cooking stops the cooking process and prevents discoloration.
Can I freeze deviled eggs?
Freezing is not recommended. The texture of the filling becomes watery and grainy after thawing. These are best enjoyed fresh or within two days of making them.
Pin This Recipe!
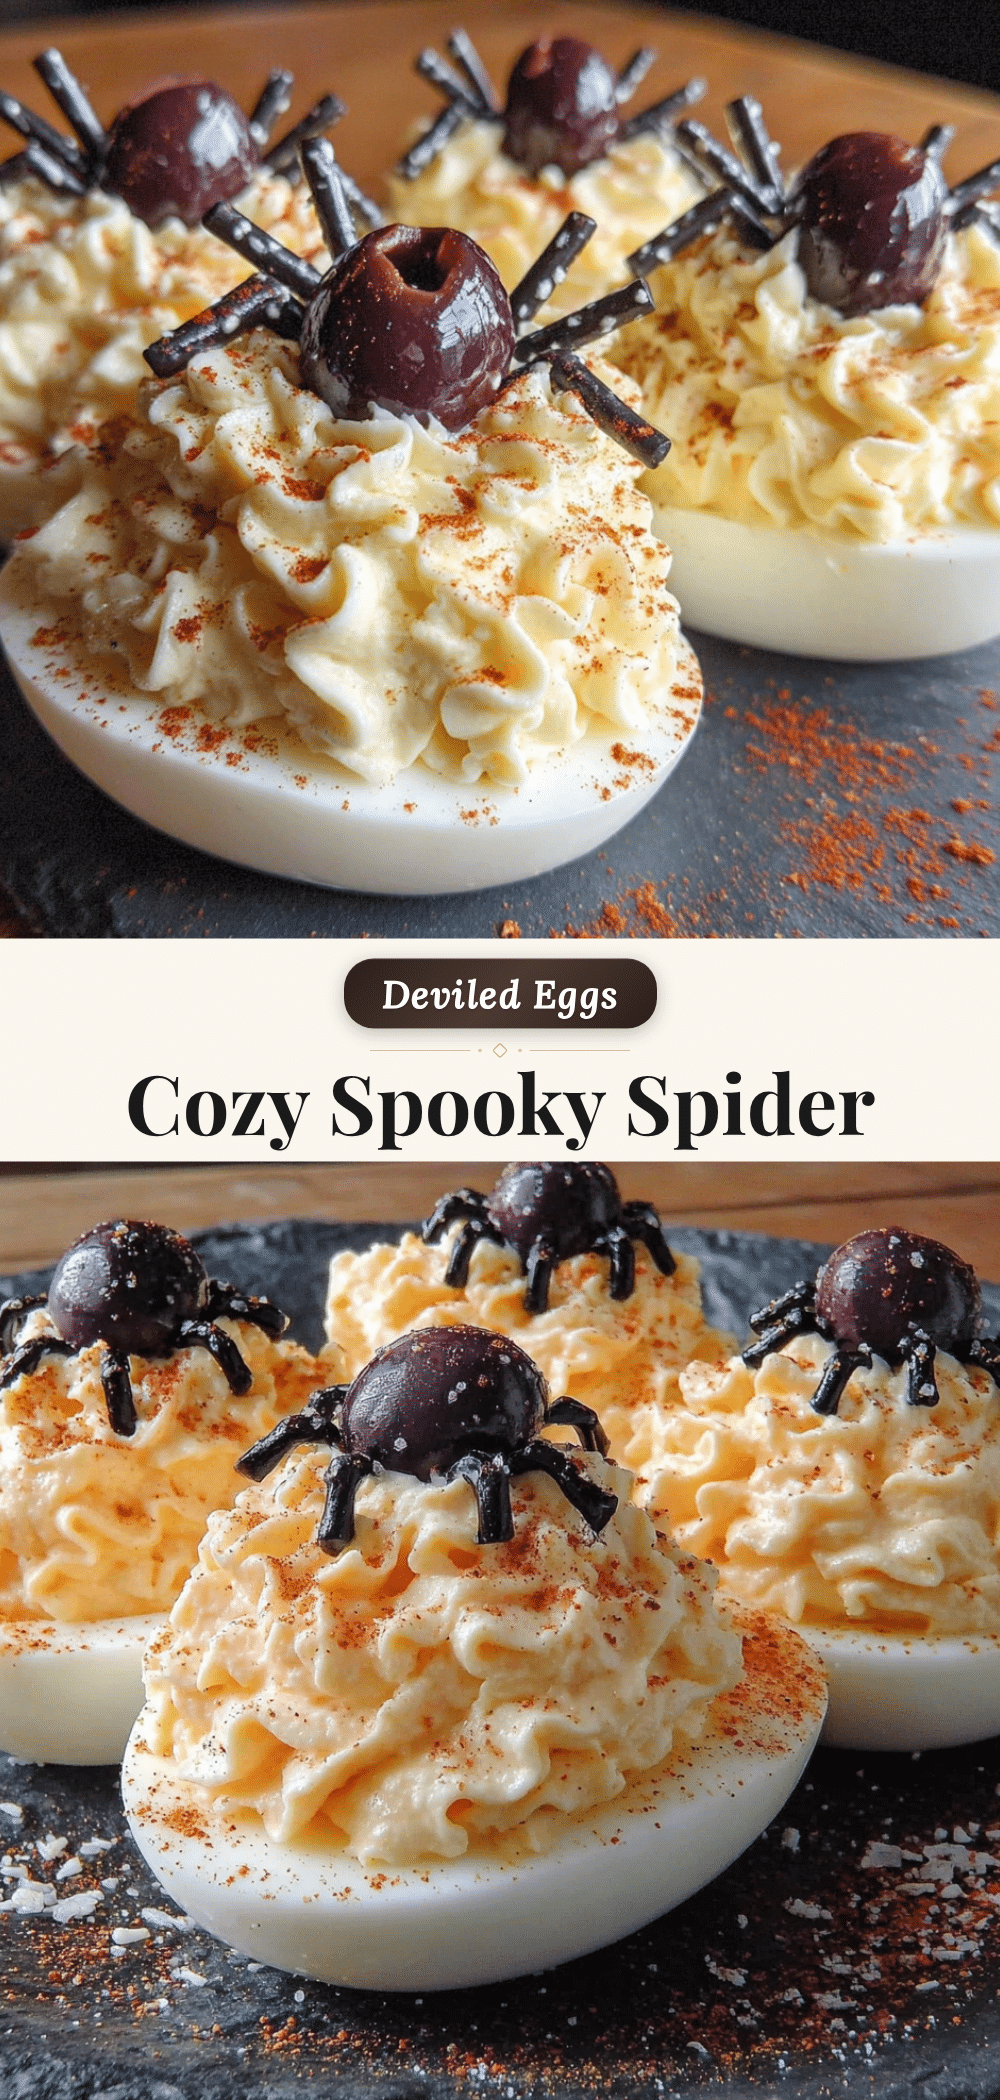
Cozy Spooky Spider Deviled Eggs: Easy Halloween Appetizer
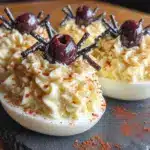
These Cozy Spooky Spider Deviled Eggs are the perfect Halloween appetizer—creamy, tangy, and delightfully creepy-cute. Made with simple ingredients like eggs, mayo, and black olives, they’re quick to prepare and guaranteed to be a crowd-pleaser at any spooky gathering.
- Prep Time: 15 minutes
- Cook Time: 12 minutes
- Total Time: 30 minutes
- Yield: 12 deviled egg halves (6 servings of 2 halves each) 1x
- Category: Appetizer
- Cuisine: American
Ingredients
- 6 large eggs (room temperature)
- 3 tablespoons mayonnaise (Hellmann’s or Duke’s preferred)
- 1 teaspoon yellow mustard
- 1/4 teaspoon fine sea salt
- 1/8 teaspoon freshly ground black pepper
- 1/2 teaspoon white vinegar (optional)
- 6 pitted black olives (large, such as California Ripe Olives)
- 1 tablespoon cream cheese (softened)
Instructions
- Place eggs in a single layer in a saucepan. Cover with cold water by about an inch. Bring to a rolling boil over high heat, then turn off heat, cover, and let sit for exactly 12 minutes.
- Prepare an ice bath (bowl of cold water with ice). Transfer eggs to ice bath and cool for at least 5 minutes.
- Gently tap each egg on the counter to crack the shell all over. Peel starting from the wider end, running under cold water if needed. Pat dry.
- Slice each egg in half lengthwise. Remove yolks to a mixing bowl. Place egg white halves on a serving platter, cut-side up.
- Add mayonnaise, mustard, salt, pepper, and vinegar (if using) to the yolks. Mash with a fork until smooth and creamy. Taste and adjust seasoning.
- Spoon yolk mixture into a piping bag or zip-top bag. Snip 1/4 inch off the corner. Pipe filling into each egg white half in a circular motion to create a slight mound (spider body shape).
- Slice each olive in half lengthwise. Take one half and slice into 4 thin strips (legs). Repeat with the other half (8 strips total per olive).
- Dab a tiny amount of cream cheese onto the back of each leg strip and press onto the egg white, radiating from the center. Place the remaining olive half (body) on top of the filling, pressing slightly.
- Repeat for all 12 egg halves. Refrigerate for at least 15 minutes before serving. Arrange on a platter and serve chilled.
Notes
For easier peeling, use eggs that are at least a week old. The cream cheese trick keeps olive legs attached. Make ahead: boil and peel eggs up to 2 days in advance; assemble day of serving. Do not freeze. Leftovers keep in an airtight container in the refrigerator for up to 2 days.
Nutrition
- Serving Size: 2 deviled egg halves
- Calories: 150
- Sugar: 1
- Sodium: 320
- Fat: 10
- Saturated Fat: 3
- Carbohydrates: 2
- Protein: 12
Keywords: Halloween deviled eggs, spider deviled eggs, spooky appetizer, easy Halloween recipe, deviled eggs with olives, creepy-cute appetizer, party appetizer