My neighbor Karen swore she hated pumpkin desserts. For years. Every fall, when the internet exploded with pumpkin spice everything, she’d roll her eyes so hard I thought they’d get stuck. “It’s a candle flavor,” she’d sniff over the fence. “Not a food group.” So last Tuesday, when I pulled a tray of these small batch pumpkin snickerdoodle cookies out of the oven, I didn’t even bother knocking on her door. I mean, why waste good cookies on a self-proclaimed pumpkin hater, right?
An hour later, I found her standing in my kitchen, caught mid-reach for the cookie jar. “These don’t count,” she mumbled, powdered sugar dusting her chin. “These are… different.” And honestly, she wasn’t wrong. These aren’t your typical pumpkin cookies—the ones that taste like a scented candle aisle. These are warm, cinnamony, chewy-centered pillows that happen to have a whisper of pumpkin puree in them. The kind of cookie that makes you close your eyes after the first bite, even if you’re a little embarrassed about it.
I developed this recipe on a rainy Wednesday afternoon when I wanted something cozy but didn’t want to commit to a full batch of cookies. You know that feeling—when you just want a handful of warm cookies, not three dozen staring at you from the counter, judging your self-control. This small batch recipe makes exactly eight cookies. Enough to share, but just barely. Let me tell you, there’s something about the ratio of pumpkin to spice in these that just works. Not too pumpkiny, not too spicy—just right. The power went out halfway through my first test batch, and I finished baking them in my toaster oven. That’s how determined I was to get this right.
Why You’ll Love This Recipe
Let’s be real for a second. There are a million pumpkin cookie recipes out there. But this one? This one earned its spot in my permanent recipe binder after multiple rounds of testing and a very honest feedback session with my neighbor Karen (who has since requested them three times).
- Small Batch Perfection: This recipe makes exactly 8 cookies. No leftovers tempting you for days, no waste, just the perfect amount for a cozy evening treat.
- Simple Ingredients: You probably have most of these in your pantry right now. No weird specialty flours or hard-to-find extracts.
- Perfect for Fall Evenings: These cookies were made for chilly October nights with a cup of tea and a good book. Or for Tuesday afternoons when you just need something warm.
- Crowd-Pleaser: Even self-proclaimed pumpkin haters (yes, Karen) have been converted. The pumpkin here adds moisture and tenderness, not overwhelming flavor.
- Unbelievably Delicious: The texture is what gets everyone. Soft centers, slightly crisp edges, and that classic snickerdoodle tang from the cream of tartar, all wrapped up in a cozy pumpkin-spice hug.
What makes this different from other pumpkin cookies? It’s the technique. Most pumpkin cookies turn out cakey and domed—more like a muffin top than a cookie. By adjusting the ratio of wet to dry ingredients and using the cream of tartar trick from classic snickerdoodles, these cookies spread beautifully and stay chewy in the center. This isn’t just another pumpkin cookie recipe—it’s the one that finally convinced a pumpkin skeptic to ask for the recipe.
What Ingredients You Will Need
This recipe uses simple, wholesome ingredients to deliver those cozy fall flavors without requiring a special trip to the store. Most of these are pantry staples, which makes these cookies dangerously easy to whip up on a whim.
- Unsalted butter, softened (4 tablespoons, or 56g) — I always use unsalted so I can control the salt level. Let it sit out for about 30 minutes before starting. Cold butter won’t cream properly with the sugar, and nobody wants flat cookies.
- Granulated sugar (⅓ cup, or 66g) — Regular white sugar works perfectly here. It helps create those slightly crisp edges we’re after.
- Light brown sugar, packed (2 tablespoons, or 25g) — This adds a touch of molasses flavor and helps keep the centers soft. Don’t skip it—the combination of sugars is key.
- Pumpkin puree (3 tablespoons, or 42g) — Not pumpkin pie filling! Make sure you’re grabbing 100% pure pumpkin puree. I personally prefer Libby’s for its consistent texture, but any brand works. If you open a whole can, you’ll have leftovers—use the rest in oatmeal, smoothies, or freeze it in tablespoon portions for later.
- Large egg yolk (1 yolk, save the white for something else) — Just the yolk adds richness and tenderness without making the dough too wet. You can save the egg white for breakfast tomorrow or use it in a face mask—your call.
- Vanilla extract (½ teaspoon) — Pure vanilla is worth the splurge here. Imitation works in a pinch, but pure adds a depth that makes these cookies taste bakery-quality.
- All-purpose flour (1 cup, or 120g) — Spoon and level your flour for the best results. Scooping directly from the bag packs in too much flour and gives you dry cookies.
- Cream of tartar (½ teaspoon) — This is the secret ingredient that gives snickerdoodles their signature tangy flavor and chewy texture. Don’t skip it—baking soda isn’t a substitute here.
- Baking soda (¼ teaspoon) — Helps the cookies spread and brown nicely.
- Salt (¼ teaspoon) — Balances the sweetness and brings out the warm spices.
- Pumpkin pie spice (½ teaspoon) — You can use store-bought or make your own blend. If you’re making your own, mix cinnamon, nutmeg, ginger, and a tiny pinch of cloves.
- Ground cinnamon (¼ teaspoon in the dough, plus more for the coating) — Cinnamon is non-negotiable in any snickerdoodle variation.
For the Cinnamon-Sugar Coating:
- Granulated sugar (2 tablespoons, or 25g)
- Ground cinnamon (1 teaspoon)
- Optional: Pinch of pumpkin pie spice (adds extra cozy vibes to the coating)
Equipment Needed
You don’t need a fancy bakery setup for these cookies. Here’s what you’ll need:
- Mixing bowls — One medium bowl for dry ingredients, one larger bowl for creaming the butter and sugars. I use glass bowls because they don’t retain odors, but metal or ceramic work just fine.
- Hand mixer or stand mixer — You can cream the butter and sugar by hand with a wooden spoon, but it takes some elbow grease. A hand mixer makes it much easier and gives you a fluffier texture. I’ve used my trusty KitchenAid hand mixer for years—it’s worth the investment.
- Baking sheet — A standard half-sheet pan works perfectly. If you only have a dark nonstick pan, keep an eye on your cookies—they can brown faster.
- Parchment paper or silicone baking mat — Parchment paper is my go-to for easy cleanup and consistent baking. Silicone mats work too, but your cookies might spread a tiny bit more.
- Cookie scoop or tablespoon — A 1.5-tablespoon cookie scoop makes portioning the dough quick and gives you evenly sized cookies. If you don’t have one, use a regular tablespoon and shape the dough balls by hand.
- Cooling rack — Letting cookies cool on the pan for a few minutes, then transferring to a wire rack, prevents soggy bottoms. I learned this the hard way after a batch of sad, steamy cookies.
- Small bowl for the coating — Any small bowl or shallow dish works for rolling the dough balls in cinnamon sugar.
Preparation Method
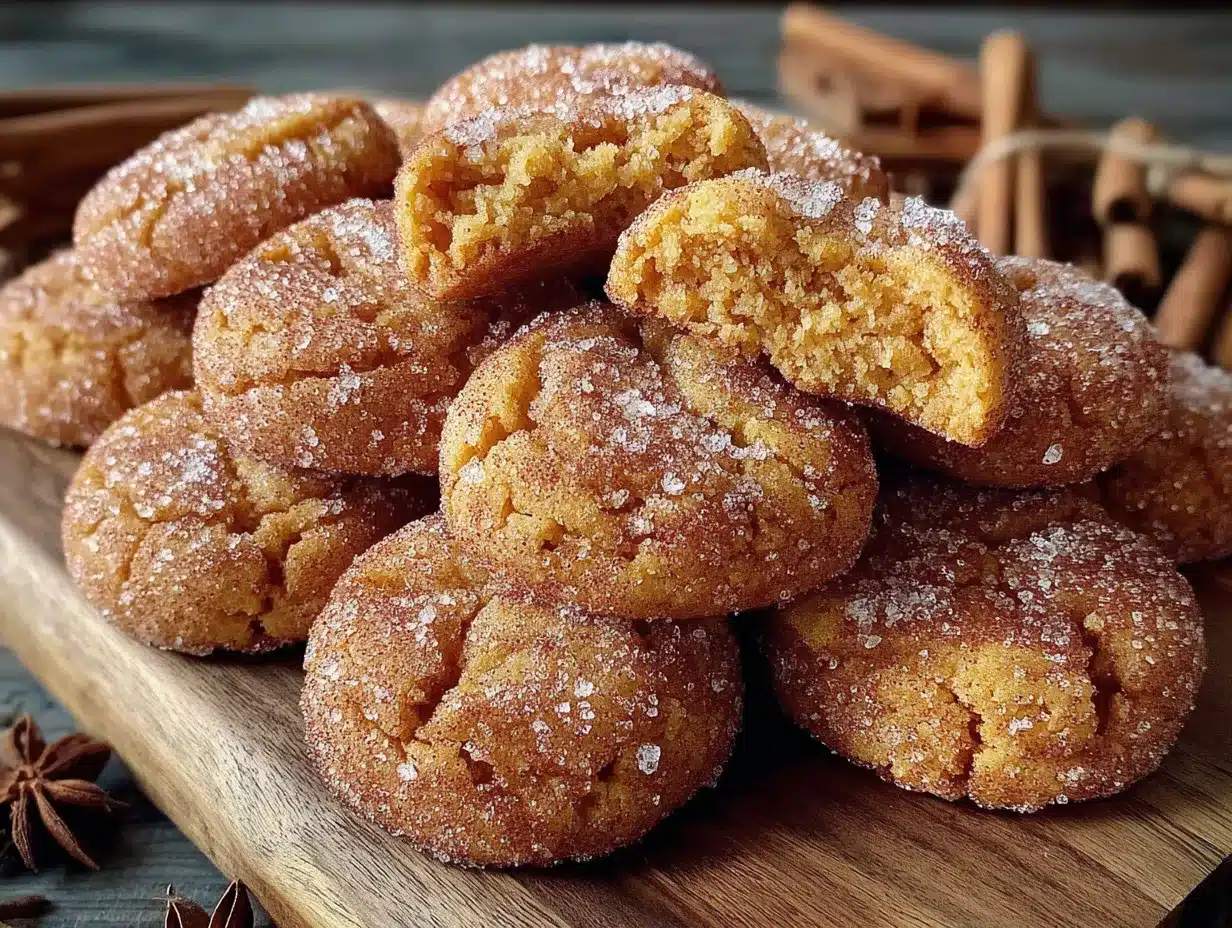
Let’s make some cookies, shall we? This process takes about 25 minutes total, with 10 minutes of active prep and 10-12 minutes of baking. The hardest part is waiting for them to cool enough to eat.
- Preheat your oven to 350°F (175°C). Line your baking sheet with parchment paper or a silicone mat. While the oven heats up, let your butter finish softening if it hasn’t already. Pro tip: if you forgot to take the butter out earlier, cut it into small cubes and let it sit for 10 minutes—it’ll soften faster.
- In a medium bowl, whisk together the dry ingredients: 1 cup all-purpose flour, ½ teaspoon cream of tartar, ¼ teaspoon baking soda, ¼ teaspoon salt, ½ teaspoon pumpkin pie spice, and ¼ teaspoon ground cinnamon. Whisking aerates the flour and distributes the leavening agents evenly. Set this bowl aside for now.
- In a larger bowl, cream the butter and sugars. Beat 4 tablespoons of softened unsalted butter with ⅓ cup granulated sugar and 2 tablespoons packed light brown sugar until the mixture looks light and fluffy, about 2 minutes with a hand mixer on medium speed. Scrape down the sides of the bowl halfway through. The mixture should look pale and slightly increased in volume—that’s how you know you’ve incorporated enough air.
- Add the wet ingredients. Beat in 3 tablespoons of pumpkin puree, 1 large egg yolk, and ½ teaspoon vanilla extract. Mix until just combined. The mixture might look a little separated at this point—don’t panic. That’s normal when adding pumpkin to creamed butter and sugar. It will come together once you add the flour.
- Gradually add the dry ingredients. Add the flour mixture to the wet ingredients in two additions, mixing on low speed after each addition until just incorporated. Stop mixing as soon as you don’t see any more streaks of flour. Overmixing develops gluten and makes cookies tough—we want tender, not tough.
- Chill the dough (optional but recommended). The dough will be quite soft and slightly sticky. For the best texture and easiest handling, cover the bowl and refrigerate for 15-20 minutes. This firms up the butter and makes the dough easier to roll. If you’re impatient (I’ve been there), you can skip this step—just know the cookies will spread a bit more.
- Make the cinnamon-sugar coating. In a small bowl, stir together 2 tablespoons granulated sugar and 1 teaspoon ground cinnamon. If you’re feeling extra festive, add a tiny pinch of pumpkin pie spice to the mix.
- Portion and roll the dough. Using a 1.5-tablespoon cookie scoop or a regular tablespoon, scoop out portions of dough. Roll each portion into a smooth ball between your palms. Then roll each ball in the cinnamon-sugar mixture until completely coated. Place the coated dough balls on the prepared baking sheet, spacing them about 2 inches apart. You should get 8 cookies total.
- Bake for 10-12 minutes. Place the baking sheet in the preheated oven and bake until the edges are set and lightly golden, but the centers still look slightly soft and puffed. The cookies will continue to set as they cool, so don’t wait for them to look fully done in the oven. I usually pull mine at exactly 11 minutes for that perfect chewy center.
- Cool on the baking sheet for 5 minutes. Let the cookies rest on the hot baking sheet for exactly 5 minutes. This allows them to finish setting up without overbaking. Then transfer them to a wire cooling rack to cool completely. Or, you know, eat one warm. I won’t tell anyone.
Cooking Tips & Techniques
After testing this recipe about seven times (tough job, I know), here’s what I learned that makes the difference between good cookies and great ones.
Don’t overmix the dough. I ruined my first batch by being too enthusiastic with the mixer. Once you add the flour, mix just until you don’t see white streaks anymore. Overmixing develops gluten, and gluten makes cookies tough. We want these to be tender little pillows, not hockey pucks.
Measure your pumpkin carefully. Three tablespoons seems like such a small amount, and it is. But that’s intentional. Too much pumpkin makes the dough too wet, and your cookies will spread into flat, sad discs. Level off your measuring spoon. If you accidentally add extra, don’t try to compensate with more flour—just start over with the pumpkin measurement.
Let the butter soften properly. I once tried to speed-soften butter in the microwave and ended up with half-melted butter. The cookies spread way too much and turned out greasy. Room temperature butter should be soft enough to leave a slight indent when you press it, but still hold its shape. Give it 30 minutes on the counter, or cut it into small cubes and give it 15 minutes.
Use a cookie scoop for even sizing. This isn’t just about aesthetics—evenly sized cookies bake at the same rate. If some are bigger than others, you’ll end up with some overdone and some underdone. A 1.5-tablespoon scoop is my favorite tool for this recipe.
Watch the baking time carefully. Ovens vary wildly. My oven runs a little hot, so I check my cookies at the 10-minute mark. The edges should look set and golden, but the centers should still look slightly puffy and soft. They’ll continue baking from residual heat on the pan. Pull them when they look just slightly underdone—trust me on this one.
Let them cool on the pan. I know it’s tempting to move them immediately to a cooling rack, but those 5 minutes on the hot baking sheet are crucial. The cookies are still setting up internally during this time. Moving them too early can cause them to fall apart or become misshapen.
Variations & Adaptations
One of the best things about this recipe is how flexible it is. Here are some ways to make it your own:
- Gluten-Free Version: Substitute the all-purpose flour with a 1:1 gluten-free baking flour blend that contains xanthan gum. I’ve tested this with Bob’s Red Mill 1:1 Baking Flour and the texture was surprisingly close to the original. Add an extra tablespoon of flour if the dough seems too sticky.
- Dairy-Free Adaptation: Use vegan butter sticks (not margarine) in place of regular butter. I recommend Earth Balance or Miyoko’s. Make sure it’s softened to room temperature just like regular butter. The cookies might spread slightly more, so chill the dough for a full 30 minutes before baking.
- Extra Spicy Version: If you’re like me and can’t get enough of warm fall spices, increase the pumpkin pie spice to 1 teaspoon and add an extra ¼ teaspoon of cinnamon to the dough. You can also add a pinch of cardamom for a more complex flavor profile.
- Maple Glaze Drizzle: For an extra touch of sweetness, whisk together ½ cup powdered sugar, 1 tablespoon maple syrup, and 1-2 teaspoons milk (or dairy-free milk) until smooth. Drizzle over cooled cookies and let set for 10 minutes. This turns them into something truly special for holiday gatherings.
- Add Mix-Ins: Fold in ⅓ cup of white chocolate chips, chopped pecans, or dried cranberries after mixing the dough. White chocolate and pumpkin is a match made in heaven—I toss a handful in every other batch.
Serving & Storage Suggestions
These cookies are best enjoyed warm, obviously. But here’s how to make the most of them, whether you’re eating them immediately or saving some for later.
Serving Temperature: Serve these cookies at room temperature or slightly warm. If you’ve stored them, pop one in the microwave for 10 seconds to bring back that fresh-from-the-oven softness. They’re perfect with a cup of chai tea, a latte, or a cold glass of milk. For a fun presentation, arrange them on a rustic wooden board with apple slices and a small bowl of extra cinnamon sugar for dipping.
Pairing Suggestions: These cookies pair beautifully with warm beverages. Try them with hot apple cider, a pumpkin spice latte, or simply a strong cup of black coffee. The slight tang from the cream of tartar cuts through the sweetness and complements the bitterness of coffee perfectly.
Storage Instructions: Store leftover cookies in an airtight container at room temperature for up to 4 days. Place a piece of bread in the container to keep the cookies soft—the bread absorbs excess moisture and releases it slowly, keeping your cookies from drying out. Replace the bread slice every other day if the cookies last that long.
Freezing Instructions: You can freeze either the baked cookies or the unbaked dough. For baked cookies, let them cool completely, then place them in a single layer in a freezer-safe container with parchment paper between layers. Freeze for up to 3 months. Thaw at room temperature for about 30 minutes. For unbaked dough, scoop and roll the dough balls, coat them in cinnamon sugar, and freeze them on a baking sheet until solid. Transfer to a freezer bag and bake directly from frozen, adding 2-3 minutes to the baking time.
Flavor Development: Honestly, these cookies taste even better the next day. The flavors meld together overnight, and the texture becomes even more tender. If you can resist eating them all on day one, you’re in for a treat on day two.
Nutritional Information & Benefits
Let’s be honest—these are cookies, not health food. But they do have some redeeming qualities, and knowing what’s in them helps with mindful indulgence.
Per Cookie (based on 8 cookies):
Approximately 155 calories, 7g fat, 22g carbohydrates, 1g fiber, 12g sugar, 2g protein. These values are estimates and will vary based on specific brands and any substitutions you make.
Health Highlights: Pumpkin puree is packed with vitamin A and fiber, which supports eye health and digestion. The small amount used here adds moisture and nutrients without overwhelming the cookies. Cinnamon has anti-inflammatory properties and may help regulate blood sugar levels. Plus, these cookies are portion-controlled by nature—eight cookies means you’re not tempted by a whole batch staring at you from the counter.
Dietary Considerations: This recipe can be adapted for gluten-free and dairy-free diets (see variations above). It contains eggs and wheat, so it’s not suitable for vegan or celiac diets without modifications. The sugar content is moderate for a cookie, but if you’re watching your sugar intake, you can reduce the granulated sugar to ¼ cup without significantly affecting the texture.
My Take: I believe in enjoying treats in moderation. These small batch cookies let you have that cozy fall experience without a week’s worth of leftovers tempting you. Sometimes the best thing for your wellness is a warm cookie eaten mindfully, with a cup of tea and no guilt attached.
Conclusion
These cozy pumpkin snickerdoodle cookies are proof that you don’t need a complicated recipe or a full day in the kitchen to create something truly special. They’re simple enough for a Tuesday night baking session but impressive enough to bring to a fall gathering. The combination of tender pumpkin-spiced dough and that classic cinnamon-sugar coating is just right—not too sweet, not too spicy, just perfectly cozy.
I love this recipe because it meets me where I am. Some days I want to bake but don’t want to commit to a full batch. Some days I need a little taste of fall without going overboard. These cookies deliver every time, and they’ve even won over a few pumpkin skeptics along the way. (Karen sends her regards, by the way, and a request for the recipe.)
I’d love to hear how these turn out for you! Did you try any of the variations? Did you add mix-ins? Did you manage to save any for the next day? Drop a comment below and let me know—I read every single one, and your feedback helps me create better recipes for you. Happy baking, and may your kitchen smell like cinnamon and pumpkin all season long!
Frequently Asked Questions
Can I use pumpkin pie filling instead of pumpkin puree?
No, please don’t. Pumpkin pie filling is pre-sweetened and spiced, which will throw off the sugar and spice balance in this recipe. Stick with 100% pure pumpkin puree for the best results. If you accidentally bought pie filling, save it for making actual pumpkin pie.
Why do my cookies look flat and spread out?
This usually happens for one of three reasons: your butter was too soft or melted, your dough wasn’t chilled, or you added too much pumpkin puree. Make sure your butter is softened but not greasy, chill the dough for at least 15 minutes, and measure your pumpkin carefully with a level tablespoon.
Can I double this recipe to make more cookies?
Absolutely! This recipe doubles beautifully. Simply multiply all ingredients by two. The baking time stays about the same, but you may need to bake in batches depending on your oven size. The dough also freezes well, so you can make a double batch and freeze half for later.
What can I substitute for cream of tartar?
Cream of tartar gives snickerdoodles their signature tangy flavor and chewy texture. If you don’t have it, you can substitute with 1 teaspoon of lemon juice or white vinegar mixed into the wet ingredients. However, the texture won’t be exactly the same—it’ll be a bit more cakey. For best results, I recommend picking up cream of tartar; it’s inexpensive and lasts forever in your pantry.
How do I know when the cookies are done baking?
Look for set edges that are lightly golden, while the centers still look slightly soft and puffed. The cookies will look a tiny bit underdone in the middle—that’s exactly what you want. They’ll continue baking from residual heat on the pan for the first 5 minutes after you pull them out. If the edges are brown, you’ve baked them too long.
Pin This Recipe!
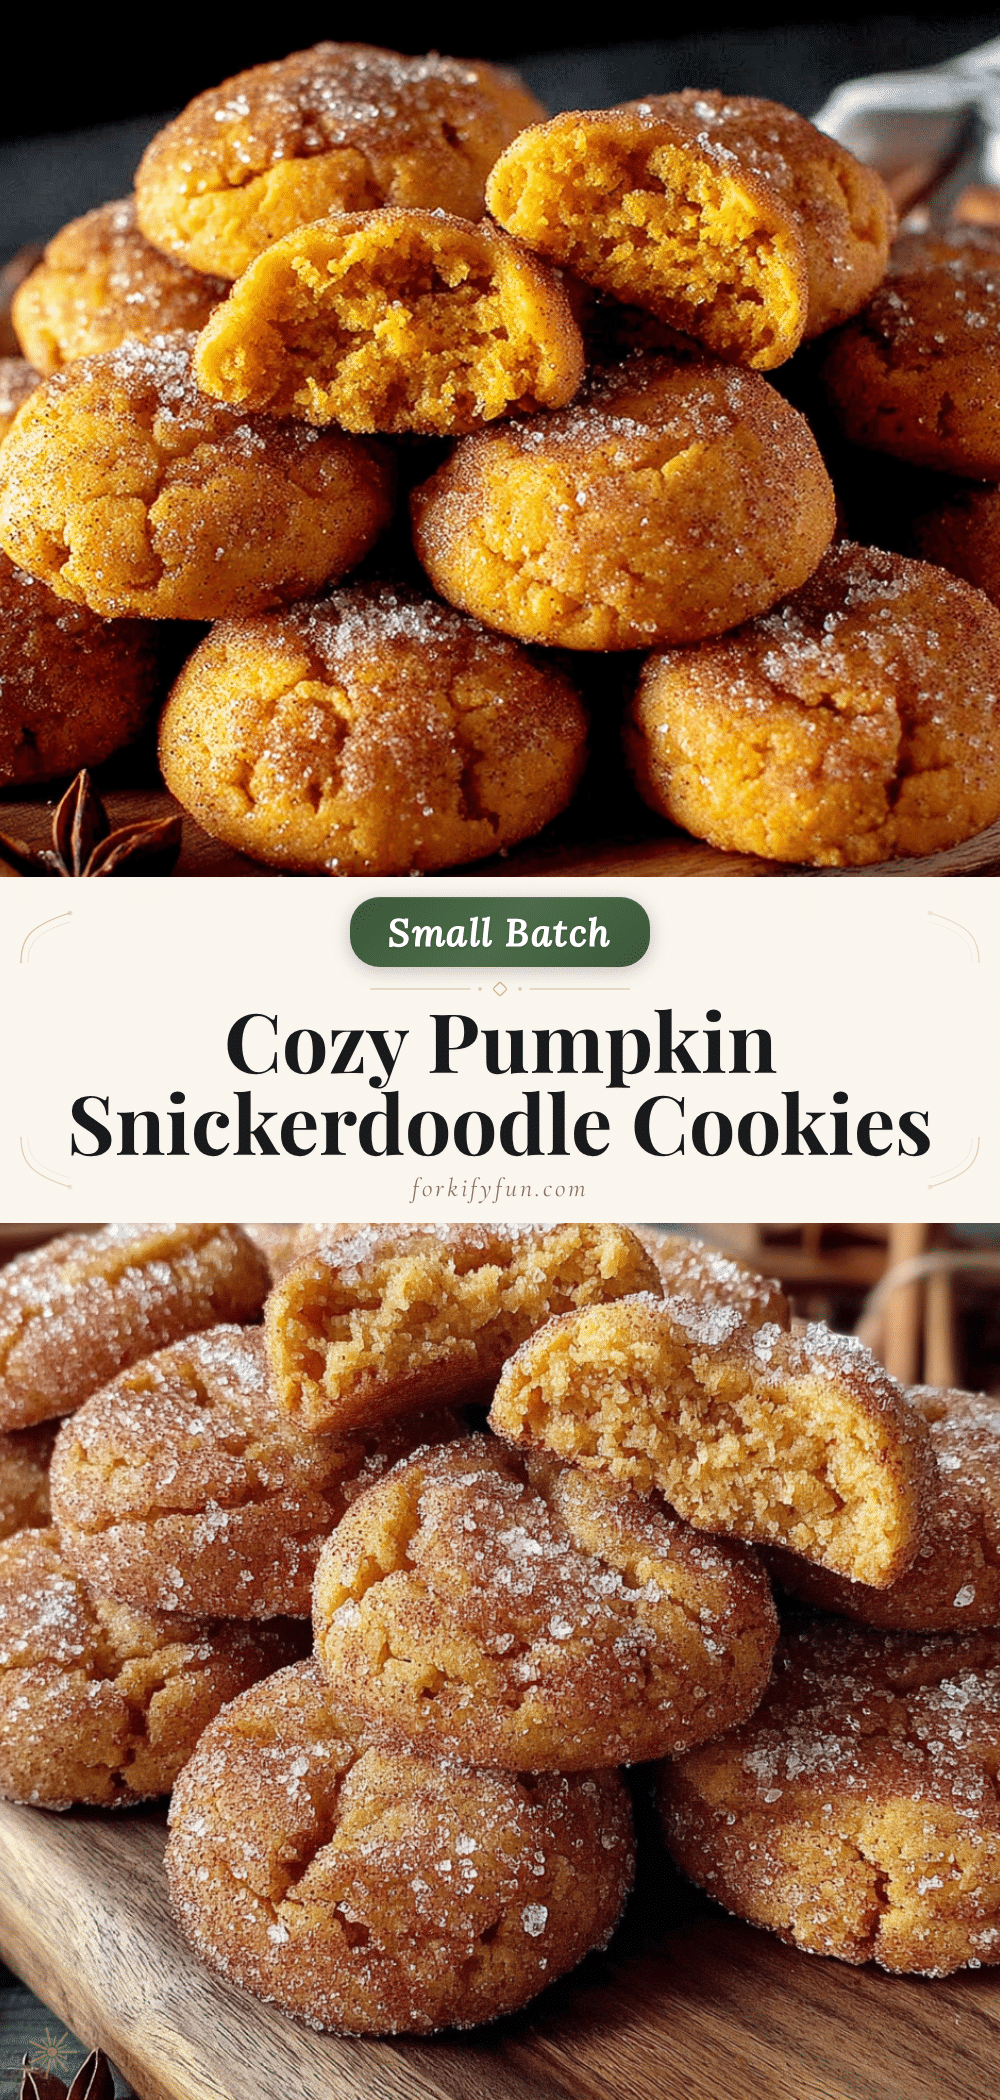
Cozy Pumpkin Snickerdoodle Cookies: Easy Small Batch Recipe

These small batch pumpkin snickerdoodle cookies are warm, cinnamony, and chewy-centered with a whisper of pumpkin puree. Perfect for a cozy evening treat, they make exactly eight cookies and have even converted self-proclaimed pumpkin haters.
- Prep Time: 10 minutes
- Cook Time: 12 minutes
- Total Time: 25 minutes
- Yield: 8 cookies 1x
- Category: Dessert
- Cuisine: American
Ingredients
- 4 tablespoons unsalted butter, softened (56g)
- ⅓ cup granulated sugar (66g)
- 2 tablespoons light brown sugar, packed (25g)
- 3 tablespoons pumpkin puree (42g)
- 1 large egg yolk
- ½ teaspoon vanilla extract
- 1 cup all-purpose flour (120g)
- ½ teaspoon cream of tartar
- ¼ teaspoon baking soda
- ¼ teaspoon salt
- ½ teaspoon pumpkin pie spice
- ¼ teaspoon ground cinnamon
- For the Cinnamon-Sugar Coating:
- 2 tablespoons granulated sugar (25g)
- 1 teaspoon ground cinnamon
- Optional: Pinch of pumpkin pie spice
Instructions
- Preheat your oven to 350°F (175°C). Line your baking sheet with parchment paper or a silicone mat.
- In a medium bowl, whisk together the dry ingredients: 1 cup all-purpose flour, ½ teaspoon cream of tartar, ¼ teaspoon baking soda, ¼ teaspoon salt, ½ teaspoon pumpkin pie spice, and ¼ teaspoon ground cinnamon. Set aside.
- In a larger bowl, cream 4 tablespoons of softened unsalted butter with ⅓ cup granulated sugar and 2 tablespoons packed light brown sugar until light and fluffy, about 2 minutes with a hand mixer on medium speed. Scrape down the sides halfway through.
- Beat in 3 tablespoons of pumpkin puree, 1 large egg yolk, and ½ teaspoon vanilla extract until just combined.
- Gradually add the flour mixture to the wet ingredients in two additions, mixing on low speed after each addition until just incorporated. Do not overmix.
- Chill the dough for 15-20 minutes (optional but recommended for easier handling and less spreading).
- In a small bowl, stir together 2 tablespoons granulated sugar and 1 teaspoon ground cinnamon for the coating. Add a pinch of pumpkin pie spice if desired.
- Using a 1.5-tablespoon cookie scoop or a regular tablespoon, scoop out portions of dough. Roll each into a smooth ball, then roll in the cinnamon-sugar mixture until completely coated. Place on the prepared baking sheet, spacing about 2 inches apart. You should get 8 cookies.
- Bake for 10-12 minutes, until the edges are set and lightly golden but the centers still look slightly soft and puffed.
- Cool on the baking sheet for 5 minutes, then transfer to a wire cooling rack to cool completely.
Notes
For best results, use room temperature butter and measure pumpkin carefully. Chilling the dough helps prevent spreading. Cookies can be stored in an airtight container at room temperature for up to 4 days. Freeze baked cookies or unbaked dough for up to 3 months.
Nutrition
- Serving Size: 1 cookie
- Calories: 155
- Sugar: 12
- Sodium: 95
- Fat: 7
- Saturated Fat: 4
- Carbohydrates: 22
- Fiber: 1
- Protein: 2
Keywords: pumpkin snickerdoodle cookies, small batch cookies, fall cookies, pumpkin cookies, snickerdoodle recipe, easy pumpkin cookies