I’d spent a solid decade claiming I wasn’t a “gift basket person.” You know the type—the ones who show up at holiday parties with homemade jams in hand-tied muslin bags, the ones who make Martha Stewart look like an amateur. That just wasn’t me. I was a last-minute-gift-card-from-the-gas-station kind of gift-giver, and I was fine with it. Or so I thought.
Then my neighbor Carol knocked on my door last December, holding a mason jar filled with what looked like stained glass. “These are for you,” she said, shoving the jar into my hands. “I made too many.” Inside were these translucent, golden-orange slices, rimmed with crystallized sugar, practically glowing in the winter light. I thanked her, set the jar on my counter, and honestly forgot about them for a few days.
Then came the Tuesday from hell—work deadlines, a leaky faucet, and a kid who’d decided sleep was optional. I grabbed a slice out of that jar just to have something to chew on while I stress-cleaned the kitchen. And let me tell you—that first bite stopped me cold. It was chewy and bright, like sunshine concentrated into a single, perfect disc. I ate three more standing over the sink, and by the time the jar was half-empty, I was texting Carol for her method. She sent back a single sentence: “Oven, low heat, patience.” That was it. That was the moment I became a person who makes homemade gifts. Maybe you’ve been there—skeptical of something simple until it proves you wrong in the best possible way.
Why You’ll Love This Recipe
These cozy oven-dried orange slices aren’t just pretty—they’re the kind of project that makes you feel accomplished without breaking a sweat. I’ve made six batches now, tweaking temperatures and timing, and I can tell you with confidence: this is the version that works every single time.
- Incredibly Easy: You only need two ingredients and about 3 hours of low oven heat. No candy thermometers, no complicated techniques.
- Lasts for Months: Properly dried and stored, these slices stay beautiful and edible for up to six months. That’s a gift you can make in November and hand out in February.
- Zero Fancy Equipment: Just an oven, a sharp knife, and a baking sheet. If you’ve got those, you’re ready.
- Customizable for Any Occasion: Christmas, Valentine’s Day, housewarming, or just because—these slices fit every gift-giving moment.
- Naturally Stunning: The way the light catches these slices is genuinely gorgeous. They look like you spent hours, when really you just set a timer and walked away.
What makes this recipe different from the thousand other orange slice tutorials out there? It’s the patience-tested temperature. I burned my first batch at 250°F—crispy, dark, and bitter. Then I under-dried at 170°F and ended up with moldy slices a week later. This 200°F sweet spot gives you chewy, translucent slices that stay shelf-stable without turning into leather. It’s not just another version—it’s my best version, born from actual kitchen failures.
These slices are comfort food for the soul, honestly. They’re the kind of gift that says “I thought about you while the house smelled like oranges for three hours.” Perfect for those slow winter evenings when you want to create something beautiful without the stress.
What Ingredients You Will Need
This recipe uses two simple, wholesome ingredients to create something that feels surprisingly luxurious. The magic is in the quality, not the quantity.
- Fresh Oranges (4-5 medium oranges): The star of the show. Go for navel oranges or Valencia oranges—they’re sweet, seedless, and slice beautifully. Blood oranges work too, but they’re smaller and more tart. Look for firm oranges with bright, unblemished skin. Organic is best if you can swing it, since you’re eating the peel. I’ve had great luck with the navels from my local farmers market in January—they’re at their peak sweetness then.
- Granulated Sugar (¼ cup, plus extra for sprinkling): This does double duty. It helps draw moisture out of the slices during drying, and it leaves that gorgeous crystallized coating on the edges. You can use raw sugar or turbinado for a crunchier texture, but regular white sugar gives the most even crystallization. I’ve tried honey and maple syrup, and they both made the slices sticky and prone to molding—stick with granulated.
- Water (2 cups): Just tap water is fine. You’ll use it to make a quick simple syrup that preps the oranges for drying. Filtered water won’t make a difference here, so don’t stress.
- Optional: Cinnamon Sticks (2-3): If you want to infuse the slices with a little warmth, toss a couple cinnamon sticks into the simmering syrup. It adds a subtle spice that pairs beautifully with the orange flavor. I do this for my holiday batches and skip it for plain ones.
- Optional: Vanilla Extract (1 teaspoon): A tiny splash in the syrup gives the slices a faint vanilla undertone. It’s subtle but lovely, especially if you’re gifting these to someone who appreciates layered flavors.
That’s it. Seriously. Four ingredients max, and two of them are optional. The whole point is that oranges and sugar can become something magical with just a little time and heat. No fancy extracts, no specialty stores, no hunting down obscure ingredients.
Equipment Needed
The beauty of this recipe is how little equipment it demands. You probably already own everything on this list.
- Sharp Chef’s Knife: A dull knife will crush the orange flesh and make uneven slices. I use my 8-inch Wusthof, and it makes clean, even cuts every time. A serrated knife works in a pinch, but you’ll get more ragged edges.
- Cutting Board: Any cutting board works, but a wooden one is gentler on your knife. I’ve used plastic ones too—no difference in the final result.
- Baking Sheet: A standard half-sheet pan (18×13 inches) fits about 20 slices comfortably. You’ll need two sheets if you’re making a double batch.
- Parchment Paper: Non-negotiable. The slices will stick to foil or a bare pan. Parchment makes cleanup effortless and prevents sticking.
- Wire Cooling Rack: Optional but helpful. Placing slices on a rack set inside the baking sheet allows air to circulate underneath, drying them more evenly. I didn’t use one for my first three batches and they still turned out fine—just flipped them halfway through.
- Medium Saucepan: For the simple syrup. Any saucepan works; just make sure it’s big enough to hold the orange slices in a single layer.
- Timer: Your phone timer is perfect. I set mine for 30-minute intervals so I remember to rotate the pans.
Budget-friendly tip: Dollar stores carry parchment paper and basic baking sheets that work perfectly. Don’t feel pressured to buy expensive equipment—I made my first batch with a $5 baking sheet and a thrifted knife, and those slices were beautiful.
Preparation Method
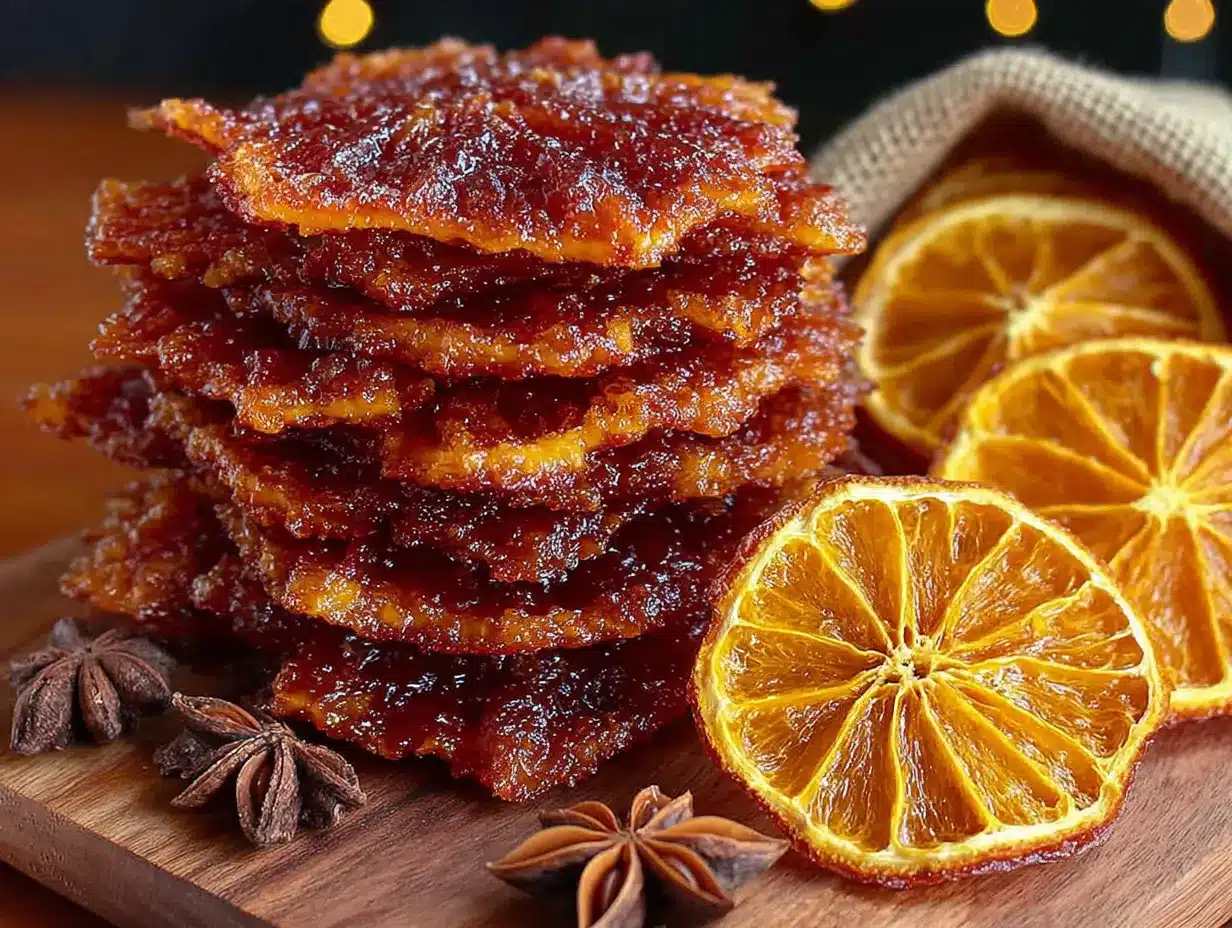
Alright, let’s get to the good part. Here’s exactly how to make these cozy oven-dried orange slices, step by step.
- Preheat your oven to 200°F (93°C). This is crucial. Higher temperatures will cook the oranges instead of drying them, turning them brown and bitter. Lower temperatures take forever and risk spoilage. 200°F is the sweet spot. Give your oven a full 15 minutes to preheat—don’t rush this.
- Wash and slice your oranges. Scrub the oranges under warm water to remove any wax or residue. Pat them dry. Using your sharp knife, slice off both ends of each orange (just the very tips, about ¼ inch). Then slice the oranges into even rounds, about ¼-inch thick. Too thin and they’ll be fragile; too thick and they won’t dry properly. Aim for the thickness of a quarter. You should get 6-8 slices per orange, depending on size.
- Make the simple syrup. In your medium saucepan, combine 2 cups of water and ¼ cup of granulated sugar. Add your cinnamon sticks or vanilla extract now if you’re using them. Bring to a gentle simmer over medium heat, stirring until the sugar dissolves completely. This takes about 3-4 minutes. Don’t let it boil vigorously—just a gentle simmer with small bubbles.
- Blanch the orange slices. Carefully drop 4-5 orange slices into the simmering syrup. Let them cook for 2 minutes, then use a slotted spoon to transfer them to a plate. Repeat with the remaining slices. This blanching step softens the pith and helps the sugar penetrate the fruit. I forgot to do this on my second batch, and those slices were tough and chewy in a bad way—don’t skip it.
- Arrange on baking sheets. Line your baking sheets with parchment paper. Place the blanched orange slices in a single layer, making sure they don’t touch. They’ll shrink as they dry, but starting with space between them ensures even airflow. If they’re crowded, they’ll steam instead of dry.
- Sprinkle with sugar. Lightly sprinkle the tops of the slices with a pinch of granulated sugar. This creates that beautiful crystallized edge. Don’t overdo it—a light dusting is plenty. Too much sugar will make them sticky.
- Bake for 2.5 to 3 hours. Place the baking sheets in the preheated oven. After 1 hour, flip each slice over using a spatula. This ensures even drying. After 2 hours, start checking every 20 minutes. The slices are done when they’re dry to the touch but still slightly pliable—think fruit leather texture. They should not be crispy or brittle. My first batch took exactly 2 hours and 40 minutes, but your oven may vary.
- Cool completely. Remove the baking sheets from the oven and let the slices cool on the pans for 30 minutes. They’ll continue to firm up as they cool. Don’t skip this step—moving them while they’re warm can cause them to stick or tear.
- Check for doneness. A properly dried slice should bend slightly without cracking. If it snaps in half, it’s over-dried (still usable for decoration, just not for eating). If it feels damp or sticky, pop it back in the oven for another 20 minutes.
One more thing—your kitchen is going to smell absolutely incredible during this process. That warm, citrusy, slightly caramelized scent will linger for hours. It’s one of the best parts of making these, honestly.
Cooking Tips & Techniques
I’ve made plenty of mistakes so you don’t have to. Here’s what I learned the hard way.
Don’t rush the temperature. I tried 250°F once because I was impatient, and those slices came out looking like burnt coins. The low-and-slow approach isn’t just a suggestion—it’s the entire secret. At 200°F, the moisture evaporates gradually without cooking the fruit. Trust the process.
Uniform thickness matters more than you think. My third batch had slices ranging from ⅛-inch to ½-inch thick, and the thin ones burned while the thick ones stayed wet. Use a steady hand and aim for consistent ¼-inch slices. If you’re struggling, try a mandoline slicer—it’s worth the extra cleanup for perfectly even slices.
Rotate your pans halfway through. Every oven has hot spots. My oven runs hotter on the left side, so I swap the pans top to bottom and front to back at the 1-hour mark. This prevents uneven drying and ensures all your slices finish at the same time.
Use the parchment paper trick. If your slices are sticking to the parchment, they’re not done yet. Properly dried slices should lift right off without resistance. If they’re stubborn, give them another 15-20 minutes in the oven.
Don’t overcrowd the syrup. When blanching, only add 4-5 slices at a time. Crowding the pan cools the syrup down and prevents even coating. I learned this after dumping all 20 slices in at once and ending up with unevenly blanched fruit.
Watch for condensation. If you’re drying slices on a humid day, they might take longer. I live in a humid climate, and my summer batches take about 30 minutes longer than winter ones. Just keep checking and be patient.
Variations & Adaptations
Once you’ve mastered the basic version, there’s so much room to play. Here are some of my favorite twists.
Spiced Holiday Slices: Add 2 cinnamon sticks, 3 star anise, and 4 whole cloves to the simple syrup. The slices come out tasting like mulled wine—perfect for Christmas gift bags. I made these for my book club last December and they disappeared in minutes.
Citrus Medley: Don’t stop at oranges. Try lemons, limes, grapefruits, or blood oranges. Each citrus brings a different flavor and color. Lemon slices are more tart and take about 30 minutes less to dry. Grapefruit slices are gorgeous but need a little extra sugar to balance the bitterness. My favorite combination is half navel oranges and half blood oranges—the colors are stunning together.
Herb-Infused Version: Add a few sprigs of fresh rosemary or thyme to the syrup. The herbal notes pair surprisingly well with the sweet citrus. I tried this on a whim and now it’s my go-to for spring gifts. Just remove the herbs before adding the orange slices.
Sugar-Free Option: Skip the simple syrup entirely and just dry the slices plain. They’ll be more tart and less pretty (no crystallized edges), but they’re still delicious and work for low-sugar diets. They also dry faster—about 2 hours total.
Chocolate-Dipped Slices: Once your slices are fully dried, dip half of each slice in melted dark chocolate and let it set on parchment paper. The combination of chewy orange and rich chocolate is absolutely addictive. I did this for Valentine’s Day and they were a huge hit.
Spicy Kick: Add a split vanilla bean and a small dried chili pepper to the syrup. The heat is subtle but builds as you chew. It’s unexpected and wonderful—perfect for the adventurous eater in your life.
Serving & Storage Suggestions
These slices are versatile. Here’s how to use and store them.
As a Gift: Layer the dried slices in a clean mason jar or cellophane bag. Tie with a ribbon and add a handwritten tag. They look beautiful on their own or paired with a bag of fancy tea, a bottle of wine, or a small jar of honey. I like to include a little note explaining they can be eaten as is, used in tea, or added to cocktails.
In Beverages: Drop a slice into hot tea, mulled wine, or a cocktail. They rehydrate slightly and release their flavor. A dried orange slice floating in a mug of hot cider is pure winter comfort. For cocktails, try it in a bourbon old fashioned or a gin and tonic.
As a Snack: Eat them straight up. They’re chewy, sweet, and intensely orange-flavored. My kids love them as an after-school treat, and I keep a jar on my desk for afternoon cravings.
For Decorating: Use them to top cakes, cupcakes, or cheese boards. They add a pop of color and a subtle citrus flavor. I’ve used them on winter charcuterie boards alongside sharp cheddar and prosciutto—the combination is surprisingly good.
Storage Instructions: Keep the slices in an airtight container at room temperature. They’ll stay good for up to 6 months. Don’t refrigerate them—the moisture in the fridge can make them sticky. If they do get sticky, just pop them back in a 200°F oven for 15 minutes to crisp up.
Freezer Option: You can freeze dried orange slices for up to a year. Place them in a freezer-safe bag with the air squeezed out. Thaw at room temperature for 30 minutes before using. The texture might be slightly softer, but they’re still perfect for tea or decoration.
Flavor Development: These slices actually get better after a week or two. The flavors mellow and deepen as they sit. I usually make my holiday batches in early November so they’re at their peak by Christmas.
Nutritional Information & Benefits
Here’s what you’re getting with these little sunshine discs.
Per slice (approximate values):
- Calories: 25-30
- Carbohydrates: 7g
- Sugar: 6g
- Fiber: 1g
- Vitamin C: 15% of daily value
- Calcium: 1% of daily value
Health Benefits: Oranges are packed with vitamin C, which supports immune function—especially welcome during cold and flu season. The drying process concentrates these nutrients, so each slice packs a decent antioxidant punch. The pith (that white part) is rich in pectin and fiber, which aids digestion. Plus, the simple act of eating something bright and citrusy can boost your mood during those gray winter months.
Dietary Considerations: These slices are naturally vegan, gluten-free, dairy-free, and nut-free. The sugar content is moderate, but you can reduce it by skipping the sugar sprinkle or using a sugar substitute. They’re not suitable for strict low-carb diets due to the natural fruit sugars.
Allergen Note: Oranges are not a common allergen, but citrus allergies do exist. If you’re gifting these, it’s thoughtful to include a note about the ingredients.
I personally love that these feel like a treat without being a total sugar bomb. They satisfy my sweet tooth with just one or two slices, and the vitamin C boost is a nice bonus during winter.
Conclusion
These cozy oven-dried orange slices are proof that the simplest things often bring the most joy. They’re easy enough for a beginner, impressive enough for a seasoned cook, and versatile enough to fit any occasion. Whether you’re making them for holiday gifts, afternoon snacks, or just to make your kitchen smell amazing, they deliver every single time.
I love that this recipe turned me into someone who makes homemade gifts—someone who takes the time to create something beautiful and edible for the people I care about. It’s a small shift, but it’s changed how I think about gift-giving entirely. And honestly, watching someone’s face light up when they open a jar of these slices is worth every minute of oven time.
Now it’s your turn. Try this recipe, make it your own, and don’t forget to share your results. Drop a comment below and tell me how yours turned out—did you try the chocolate-dipped version? The spiced holiday slices? I’d love to hear about your favorite variations. And if you’re feeling generous, share this post with someone who could use a little homemade sunshine in their life.
Happy drying, friend. Your kitchen is about to smell incredible.
Frequently Asked Questions
Can I use a dehydrator instead of an oven?
Absolutely. Set your dehydrator to 135°F (57°C) and dry for 4-6 hours, checking periodically. The texture will be slightly different—more leathery than the oven version—but they’ll still be delicious and beautiful.
Why did my orange slices turn brown?
This usually happens when the oven temperature is too high. Anything above 225°F will cook the fruit rather than dry it, causing browning. Stick to 200°F and make sure your oven thermometer is accurate. Over-blanching can also cause discoloration—keep it to 2 minutes max.
How do I know when they’re fully dried?
The slices should be dry to the touch but still slightly pliable. They should bend without cracking. If they snap, they’re over-dried. If they feel sticky or damp, they need more time. The edges should look slightly translucent and the center should be firm but not hard.
Can I use these for decoration only?
Yes, and they’re gorgeous for that purpose. For purely decorative slices, you can skip the sugar and dry them at a slightly higher temperature (225°F) for a shorter time. They’ll be more brittle but still beautiful. String them on twine for a rustic garland or use them in wreaths.
Do I have to blanch the slices first?
Technically no, but I highly recommend it. Blanching softens the pith, helps the sugar penetrate, and prevents the slices from becoming tough and chewy. I skipped it once and regretted it—the slices were edible but nowhere near as good. It’s a small extra step that makes a big difference.
Can I use bottled lemon juice instead of fresh oranges?
No, this recipe requires fresh whole oranges. Bottled juice lacks the structure and pith needed for slicing and drying. Plus, the visual appeal of the whole slice is half the magic. Stick with fresh fruit—it’s worth it.
Pin This Recipe!

Cozy Oven-Dried Orange Slices: Easy Homemade Gift Idea

These chewy, translucent orange slices are a simple yet stunning homemade gift. With just two main ingredients and low oven heat, you can create beautiful, shelf-stable treats that last for months.
- Prep Time: 15 minutes
- Cook Time: 2 hours 40 minutes
- Total Time: 3 hours 25 minutes
- Yield: 24 slices 1x
- Category: Snack
- Cuisine: American
Ingredients
- 4–5 medium fresh oranges (navel or Valencia)
- 1/4 cup granulated sugar, plus extra for sprinkling
- 2 cups water
- 2–3 cinnamon sticks (optional)
- 1 teaspoon vanilla extract (optional)
Instructions
- Preheat your oven to 200°F (93°C).
- Wash and slice the oranges: scrub under warm water, pat dry, cut off both ends, then slice into even 1/4-inch rounds.
- Make the simple syrup: in a medium saucepan, combine 2 cups water and 1/4 cup granulated sugar. Add cinnamon sticks or vanilla if using. Bring to a gentle simmer over medium heat, stirring until sugar dissolves (about 3-4 minutes).
- Blanch the orange slices: carefully drop 4-5 slices into the simmering syrup. Cook for 2 minutes, then transfer to a plate with a slotted spoon. Repeat with remaining slices.
- Arrange on baking sheets: line baking sheets with parchment paper. Place blanched slices in a single layer, not touching.
- Sprinkle with sugar: lightly dust the tops of the slices with a pinch of granulated sugar.
- Bake for 2.5 to 3 hours: after 1 hour, flip each slice. After 2 hours, check every 20 minutes. Slices are done when dry to the touch but still slightly pliable (like fruit leather).
- Cool completely: let slices cool on the pans for 30 minutes. They will firm up as they cool.
- Check for doneness: a properly dried slice should bend slightly without cracking. If damp, return to oven for 20 more minutes.
Notes
Don’t rush the temperature—200°F is crucial. Uniform 1/4-inch slices ensure even drying. Rotate pans halfway through. On humid days, drying may take longer. Properly dried slices lift off parchment easily. Store in an airtight container at room temperature for up to 6 months. Flavor improves after a week.
Nutrition
- Serving Size: 1 slice
- Calories: 28
- Sugar: 6
- Carbohydrates: 7
- Fiber: 1
Keywords: dried orange slices, homemade gift, oven-dried oranges, citrus slices, easy recipe, edible gift


