I was standing in the middle of the hardware store last October—the one off Route 9 that always smells like sawdust and dry soil—when the smell hit me. It wasn’t the lumber aisle or the bags of potting mix. It was a woman near the checkout, unloading a cart of mums and a single cast-iron skillet, and the scent of garlic and butter clung to her jacket like she’d been cooking all morning. And just like that, I was seven years old in my Aunt Lydia’s tiny kitchen, watching her sear chicken thighs on a rainy Tuesday while the steam fogged up every window in the house.
Aunt Lydia wasn’t one for fancy recipes. She used a dented old pan, a stick of butter, and enough garlic to ward off a small vampire invasion. But that smell—the way the butter browned and the garlic softened and the chicken skin turned to crackling gold—it meant something. It meant we were safe inside while the rain came down. It meant dinner was coming, and it was going to be good. She passed a few years ago, and I haven’t thought about that kitchen in ages. But standing there in the checkout line, holding a bag of birdseed I didn’t need, I felt that exact warmth again.
So I went home and tried to chase it. I burned the first batch of garlic (honestly, it was a mess), and the second one was okay but not quite right. But the third time? That was it. That was the smell I’d been looking for. This cozy one-pan garlic butter chicken thighs recipe is my best attempt at bottling up that rainy Tuesday feeling. Maybe you’ve had a moment like that—a sudden whiff of something that yanks you right back to a different time. This dish is my way of holding onto that one. And honestly, it’s the kind of dinner that makes you want to close your eyes and just breathe for a second.
Why You’ll Love This Recipe
Let me tell you—this isn’t just another chicken recipe you’ll forget about by Wednesday. This is the one that gets written on a sticky note and taped to your fridge. Here’s why I keep coming back to it, and why I think you will too:
- One Pan, Zero Fuss: Everything cooks in a single skillet. No juggling pots, no mountains of dishes. Just dinner and a quick cleanup.
- Simple Pantry Ingredients: You probably have garlic, butter, and chicken thighs right now. Maybe not the fresh thyme, but it’s worth the tiny extra step.
- Perfect for Crisp Fall Evenings: This dish was made for those nights when you want something warm and satisfying without spending hours in the kitchen.
- Always a Crowd-Pleaser: I’ve served this to picky kids, skeptical in-laws, and friends who “don’t really like dark meat.” Every single plate came back clean.
- Next-Level Comfort Food: The garlic butter sauce is so good you’ll want to spoon it over everything on your plate. Trust me on this.
What makes this recipe different from every other garlic chicken out there? It’s the balance. The butter isn’t greasy, the garlic isn’t bitter, and the chicken stays juicy from the first bite to the last. I’ve tested this more times than I care to admit—burned garlic, soggy skin, you name it—and this version is the one that finally worked. It’s comfort food that feels a little bit special, but doesn’t ask you to go shopping for a dozen obscure ingredients. It’s the kind of meal that makes you feel like you’ve got it all together, even on a Tuesday night when you’re running late.
What Ingredients You Will Need
This recipe relies on a handful of humble ingredients that come together to create something genuinely memorable. Most of these are pantry staples, and the fresh ones are easy to find at any grocery store. Here’s what you’ll need and why each one matters:
For the Chicken
- 4 bone-in, skin-on chicken thighs (about 1.5 lbs total) – The bone keeps the meat moist during cooking, and the skin gets beautifully crispy. You can use boneless thighs, but reduce the cooking time by about 8 minutes.
- 1 teaspoon kosher salt – I use Diamond Crystal brand for its clean flavor and easy pinch-ability. Don’t skip salting the skin—it’s what helps it crisp up.
- ½ teaspoon black pepper, freshly ground
- ½ teaspoon smoked paprika – Adds a subtle warmth and a gorgeous color to the skin. Regular paprika works too, but smoked gives it that little something extra.
For the Garlic Butter Sauce
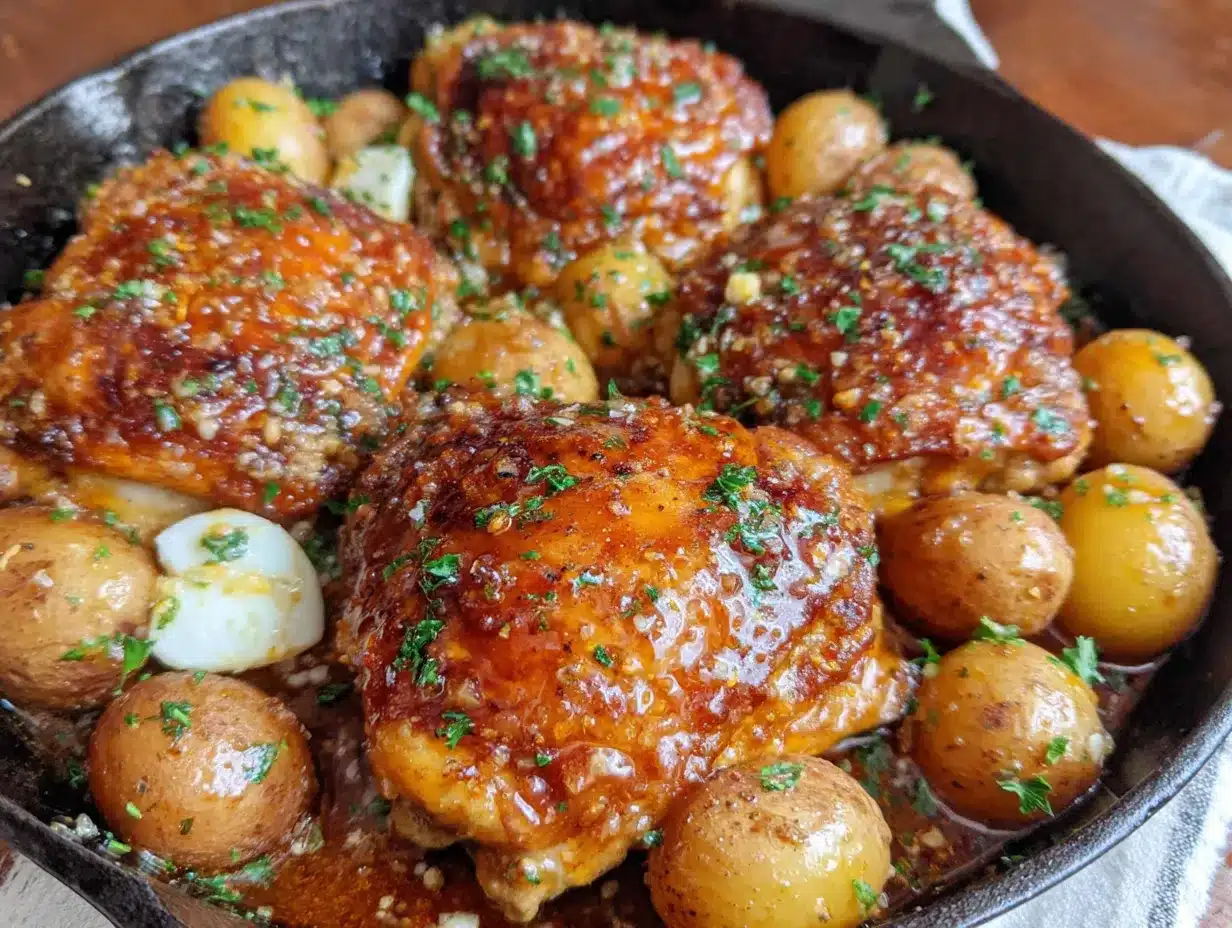
- 4 tablespoons unsalted butter, divided – Butter is the heart of this dish. I prefer unsalted so I can control the salt level. Kerrygold is my go-to for its rich, creamy taste.
- 8 cloves garlic, thinly sliced – Yes, eight. Don’t skimp here. The garlic mellows as it cooks and turns sweet and nutty. Use fresh cloves, not the pre-minced stuff in a jar—it makes a real difference.
- 1 cup low-sodium chicken broth – This deglazes the pan and forms the base of the sauce. Low-sodium is key so the dish doesn’t end up too salty after reduction.
- 1 tablespoon fresh thyme leaves (or 1 teaspoon dried) – Fresh thyme adds a woodsy, slightly floral note that pairs beautifully with garlic. If using dried, add it earlier so it has time to rehydrate.
- ½ cup heavy cream (optional, for a richer sauce) – I add this when I want the sauce to be extra luscious. It’s not traditional, but it’s delicious. For a lighter version, skip it entirely or use half-and-half.
- 1 tablespoon fresh lemon juice – Brightens the whole dish and cuts through the richness. A small squeeze at the end makes everything sing.
For Serving
- Fresh parsley, chopped (for garnish)
- Crusty bread or cooked rice – You’ll want something to soak up every last drop of that garlic butter sauce. No exceptions.
When I’m shopping for chicken thighs, I look for ones that are roughly the same size so they cook evenly. If the thighs are huge (like, almost a pound each), you might need to add 5-7 minutes to the oven time. And if you’re wondering about substitutions—yes, you can use chicken breasts, but they’ll cook faster and won’t be quite as juicy. Just keep an eye on them.
Equipment Needed
You don’t need a fancy kitchen to pull this off. Here’s what I use every time I make this recipe:
- A 12-inch oven-safe skillet – Cast iron is ideal for that perfect sear, but a stainless steel or enameled skillet works great too. Just make sure it can go from stovetop to oven without any issues.
- Tongs – For flipping the chicken without piercing the skin and losing those precious juices.
- A sharp chef’s knife – Thinly slicing garlic is much easier with a good knife. A dull blade will crush the garlic and make it release too much moisture.
- A small whisk or wooden spoon – For stirring the sauce and scraping up the browned bits from the pan (that’s where all the flavor lives).
- An instant-read thermometer – This is my secret weapon for perfectly cooked chicken every time. Aim for 165°F at the thickest part, near the bone but not touching it.
If you don’t have an oven-safe skillet, you can transfer the seared chicken to a baking dish after step 3, then pour the sauce over it and finish in the oven. It adds one extra dish to wash, but the result is still fantastic. And honestly, I’ve made this in a beat-up nonstick pan before—it worked fine, just didn’t get quite as much color on the skin. No judgment here.
Preparation Method
Alright, let’s get cooking. This comes together faster than you’d think, so I like to have everything prepped and measured before I turn on the heat. Trust me—it makes the whole process feel like a breeze.
- Preheat your oven to 400°F (200°C). Position the rack in the center. This gives you even heat circulation while the chicken finishes cooking.
- Pat the chicken thighs completely dry with paper towels. This is a non-negotiable step. Damp skin won’t crisp up—it’ll just steam. Once they’re dry, season both sides with the salt, pepper, and smoked paprika. Let them sit at room temperature for 10 minutes while you get the pan ready.
- Heat 1 tablespoon of the butter in your skillet over medium-high heat. Wait until the butter stops sizzling and just starts to smell nutty—that’s your cue. Place the chicken thighs skin-side down in the pan, being careful not to crowd them. If they’re touching, they won’t brown properly. Cook for 5-7 minutes without moving them. You’ll know they’re ready when the skin is deep golden brown and releases easily from the pan. Flip and cook for another 3 minutes on the other side. Transfer the chicken to a plate and set aside.
- Reduce the heat to medium. Add the remaining 3 tablespoons of butter to the pan. Once it melts, add the sliced garlic and fresh thyme. Stir constantly for about 1 minute—until the garlic is fragrant and just starting to turn golden at the edges. Don’t walk away here. Burnt garlic will ruin the whole dish, and it happens fast.
- Pour in the chicken broth and use your wooden spoon to scrape up all those browned bits from the bottom of the pan. This is called deglazing, and it’s where the sauce gets its deep, savory flavor. Let the broth simmer for 2-3 minutes, until it reduces by about half. If you’re using the heavy cream, stir it in now and let it simmer for another minute until the sauce thickens slightly.
- Return the chicken thighs to the skillet, skin-side up, nestling them into the sauce. Spoon a little of the sauce over the tops. Transfer the skillet to the preheated oven and bake for 18-22 minutes, or until the internal temperature of the thickest thigh reaches 165°F. The sauce will be bubbly and the skin will be even crispier.
- Remove the skillet from the oven and squeeze the fresh lemon juice over the top. Let the chicken rest in the pan for 5 minutes—this lets the juices redistribute so every bite is tender. Sprinkle with chopped parsley and serve immediately with crusty bread or rice.
One thing I learned the hard way: don’t skip the resting time. I was in a rush once and served it straight out of the oven, and the meat was noticeably drier. That five-minute wait makes a real difference.
Cooking Tips & Techniques
After making this dish more times than I can count (and messing it up plenty along the way), here are the things I wish someone had told me from the start:
- Patience is everything with the sear. The biggest mistake I made early on was moving the chicken too soon. If you try to flip it and it sticks, it’s not ready. Give it another minute. A proper sear creates a crust that locks in moisture and adds incredible flavor.
- Slice garlic, don’t mince it. Thin slices cook more evenly and are less likely to burn than minced garlic. Plus, they soften into these buttery little morsels that are honestly the best part of the dish.
- Use low heat for the garlic. Medium heat is plenty. High heat will turn that garlic bitter in seconds. I learned this after ruining two batches in a row—it was frustrating, but now I know better.
- Check the sauce consistency before serving. If it looks too thin after baking, you can simmer it on the stovetop for a minute or two while the chicken rests. If it’s too thick, add a splash of chicken broth to loosen it up.
- Let the chicken come to room temperature before cooking. Cold chicken straight from the fridge will lower the pan temperature and steam instead of searing. Ten minutes on the counter makes a noticeable difference.
I’ve also found that using a meat thermometer takes all the guesswork out of cooking chicken. It’s one of those tools that feels unnecessary until you use it once, and then you can’t imagine going back.
Variations & Adaptations
This recipe is wonderfully flexible. Here are a few ways I’ve played with it over the years:
- Herb Swap: Not a fan of thyme? Try fresh rosemary or sage instead. Rosemary pairs beautifully with garlic, and sage adds an earthy, almost peppery note that feels very fall. Use about 1 tablespoon chopped fresh or 1 teaspoon dried.
- Make It Dairy-Free: Replace the butter with a high-quality vegan butter (I like Miyoko’s) and use full-fat coconut milk instead of heavy cream. The coconut milk adds a subtle sweetness that works surprisingly well with the garlic.
- Add Vegetables: Toss in some quartered mushrooms or thick slices of zucchini along with the garlic in step 4. They’ll cook in the sauce and become tender and flavorful. I’ve also added a handful of baby spinach at the very end—just stir it in until it wilts.
- Spicy Version: Add ½ teaspoon red pepper flakes along with the garlic for a gentle heat. Or stir in a teaspoon of harissa paste with the chicken broth for something more North African-inspired.
- One-Pan Meal: If you want to make this a complete meal, add 1 cup of halved baby potatoes or chunks of butternut squash to the skillet before baking. Toss them in the sauce so they get coated, and they’ll roast right alongside the chicken.
My personal favorite variation? I swap out the thyme for rosemary and add a handful of sliced cremini mushrooms. Something about that earthy combo with the garlic butter just feels like a warm hug on a cold night.
Serving & Storage Suggestions
This dish is best served hot, straight from the skillet, with plenty of crusty bread or a mound of fluffy rice to catch every drop of that garlic butter sauce. I like to set the skillet right on the table—it keeps everything warm and makes for a cozy, rustic presentation. A simple green salad with a lemony vinaigrette on the side balances out the richness beautifully.
If you have leftovers (which, honestly, is rare in my house), here’s how to store them:
- Refrigerator: Place the cooled chicken and sauce in an airtight container. It will keep for up to 4 days. The flavors actually meld together overnight, so leftovers might taste even better the next day.
- Freezer: This dish freezes well for up to 3 months. Let it cool completely, then transfer to a freezer-safe container. To reheat, thaw overnight in the fridge, then warm gently in a covered skillet over low heat, adding a splash of chicken broth if the sauce seems thick.
- Reheating: The best way to reheat is in a skillet over medium-low heat, covered, for about 8-10 minutes. You can also use the microwave, but the skin won’t be as crispy. If you have an air fryer, reheat the chicken there for 3-4 minutes at 375°F—the skin gets wonderfully crunchy again.
One thing I’ve noticed is that the sauce thickens as it sits. If you’re reheating leftovers, don’t be shy about adding a splash of broth or water to loosen it back up.
Nutritional Information & Benefits
Here’s an approximate nutritional breakdown for one serving (one chicken thigh with sauce, without rice or bread):
- Calories: 420-450
- Protein: 28g
- Fat: 34g
- Carbohydrates: 4g
- Fiber: 0g
- Sugar: 1g
Chicken thighs are a great source of iron, zinc, and B vitamins, which support energy metabolism and immune function. Garlic is known for its anti-inflammatory and heart-healthy properties, and the butter provides fat-soluble vitamins A, D, and E. If you use the heavy cream, you’ll also get a little calcium and vitamin D.
This recipe is naturally low-carb and gluten-free, making it a good option for those following a keto or paleo lifestyle. If you’re watching your sodium, use unsalted butter and low-sodium broth, and go easy on the added salt. For a lighter version, you can skip the heavy cream and use just the broth-based sauce—it’s still incredibly flavorful. Honestly, I feel good about serving this to my family because it’s real food, made from scratch, with ingredients I can pronounce.
Conclusion
This cozy one-pan garlic butter chicken thighs recipe is the kind of meal that makes fall feel like fall. It’s warm, it’s comforting, and it comes together without a lot of fuss or fancy techniques. Every time I make it, I think about that rainy Tuesday in Aunt Lydia’s kitchen—the steam on the windows, the sound of the rain, the smell of garlic and butter filling the whole house. It’s a memory I can’t get back, but this dish gets me pretty close.
I hope you give it a try and make it your own. Maybe you’ll add a little extra thyme, or throw in some mushrooms, or serve it over mashed potatoes instead of rice. That’s the beauty of a simple recipe—it leaves room for your own touch. When you make it, I’d love to hear how it turned out. Drop a comment below and let me know what you think, or share a photo of your skillet dinner. And if you have a favorite fall recipe that reminds you of someone special, I’d love to hear about that too. Until next time—happy cooking, and stay cozy.
Frequently Asked Questions
Can I use boneless, skinless chicken thighs instead?
Yes, you can. Boneless thighs will cook faster—about 12-15 minutes in the oven instead of 18-22. They won’t have the crispy skin, but the sauce will keep them moist and flavorful. Just check the internal temperature to be safe.
How do I prevent the garlic from burning?
Keep the heat at medium and stir constantly once the garlic hits the pan. If it starts to brown too quickly, remove the pan from the heat for a few seconds. Thinly sliced garlic also cooks more evenly than minced, which helps prevent burning.
Can I make this recipe ahead of time?
Absolutely. You can sear the chicken and make the sauce up to a day ahead. Store them separately in the fridge, then combine and bake when you’re ready. You may need to add 5 extra minutes to the oven time since the chicken will be cold.
What can I use instead of heavy cream?
You can skip the cream entirely for a lighter sauce, or use half-and-half, full-fat coconut milk, or even a splash of whole milk. Just note that milk may curdle slightly if the sauce is too hot, so add it at the very end and stir gently.
How do I get the skin extra crispy?
Start with completely dry chicken skin (pat it with paper towels), use a hot pan, and don’t move the chicken while it sears. You can also finish the dish under the broiler for 1-2 minutes after baking—just watch it closely so the garlic doesn’t burn.
Pin This Recipe!

Cozy One-Pan Garlic Butter Chicken Thighs – Easy Fall Dinner

This cozy one-pan garlic butter chicken thighs recipe is the kind of meal that makes fall feel like fall. It’s warm, comforting, and comes together without a lot of fuss or fancy techniques, with a garlic butter sauce that’s so good you’ll want to spoon it over everything on your plate.
- Prep Time: 15 minutes
- Cook Time: 30 minutes
- Total Time: 45 minutes
- Yield: 4 servings 1x
- Category: Main Course
- Cuisine: American
Ingredients
- 4 bone-in, skin-on chicken thighs (about 1.5 lbs total)
- 1 teaspoon kosher salt
- ½ teaspoon black pepper, freshly ground
- ½ teaspoon smoked paprika
- 4 tablespoons unsalted butter, divided
- 8 cloves garlic, thinly sliced
- 1 cup low-sodium chicken broth
- 1 tablespoon fresh thyme leaves (or 1 teaspoon dried)
- ½ cup heavy cream (optional, for a richer sauce)
- 1 tablespoon fresh lemon juice
- Fresh parsley, chopped (for garnish)
- Crusty bread or cooked rice (for serving)
Instructions
- Preheat your oven to 400°F (200°C). Position the rack in the center.
- Pat the chicken thighs completely dry with paper towels. Season both sides with the salt, pepper, and smoked paprika. Let them sit at room temperature for 10 minutes.
- Heat 1 tablespoon of the butter in a 12-inch oven-safe skillet over medium-high heat. Place the chicken thighs skin-side down in the pan. Cook for 5-7 minutes without moving them, until the skin is deep golden brown. Flip and cook for another 3 minutes on the other side. Transfer the chicken to a plate and set aside.
- Reduce the heat to medium. Add the remaining 3 tablespoons of butter to the pan. Once melted, add the sliced garlic and fresh thyme. Stir constantly for about 1 minute until the garlic is fragrant and just starting to turn golden.
- Pour in the chicken broth and use a wooden spoon to scrape up the browned bits from the bottom of the pan. Let the broth simmer for 2-3 minutes until reduced by about half. If using heavy cream, stir it in now and let simmer for another minute until the sauce thickens slightly.
- Return the chicken thighs to the skillet, skin-side up, nestling them into the sauce. Spoon a little sauce over the tops. Transfer the skillet to the oven and bake for 18-22 minutes, or until the internal temperature reaches 165°F.
- Remove the skillet from the oven and squeeze the fresh lemon juice over the top. Let the chicken rest in the pan for 5 minutes. Sprinkle with chopped parsley and serve immediately with crusty bread or rice.
Notes
Don’t skip the resting time after baking—it keeps the meat tender. For extra crispy skin, finish under the broiler for 1-2 minutes after baking. If using boneless thighs, reduce oven time to 12-15 minutes.
Nutrition
- Serving Size: 1 chicken thigh with
- Calories: 420450
- Sugar: 1
- Fat: 34
- Carbohydrates: 4
- Protein: 28
Keywords: garlic butter chicken, one-pan chicken, fall dinner, chicken thighs, comfort food, easy dinner, skillet chicken