The woman at the next stall in the winter market watched me eyeing her pecans for what felt like forever. I was trying to decide between the regular ones and the ones she’d candied herself, and I must have looked completely lost. She finally just reached over, grabbed a handful of the candied pecans, and dropped them into my palm. “Try first,” she said with a shrug. “Then decide.”
Her name was Marlene, and she’d been selling nuts at that market for over thirty years. We got to talking—about the weather, about baking, about how the holidays always sneak up on you. She told me her pecan pie was the one thing her grown kids demanded every Thanksgiving, no exceptions. But she also admitted she’d been playing around with a bar version lately, something easier to pack up and send home with people. “Pie is fussy,” she said. “Bars are generous.”
I left that day with a bag of her candied pecans and a rough idea scribbled on a napkin. The maple and bourbon came later, honestly—I was testing a glaze for something else and thought, why not? The first batch I made was too sweet. The second was too boozy. But the third? That was the one where everything clicked. The maple gave it this deep, cozy sweetness that felt like a warm blanket, and the bourbon added just enough warmth to keep it from being cloying.
I brought a pan of these bars to a holiday potluck that year, and Marlene’s words came back to me. Bars really are generous. You can cut them big or small, wrap them up for a neighbor, or just stand at the counter eating one (or two) with a cup of coffee. Maybe you’ve had that moment where a dessert just feels like it was meant for a specific evening—cold outside, lights twinkling, everyone finally relaxed. That’s what these bars are for.
Why You’ll Love This Recipe
These Cozy Maple Bourbon Pecan Pie Bars aren’t just another holiday dessert—they’re the one that’ll have people asking for the recipe before they’ve even finished their first bite. I’ve tested this recipe more times than I care to admit, and trust me, every tweak was worth it.
- Quick & Easy : Comes together in under an hour, with only 15 minutes of hands-on prep. No rolling dough, no blind baking, no stress.
- Simple Ingredients : You probably have most of this in your pantry right now. Butter, flour, sugar, eggs—the usual suspects. The maple and bourbon are the only special guests.
- Perfect for the Holidays : These bars are made for cookie exchanges, Thanksgiving dessert tables, Christmas brunches, or just a cozy night in when you need something sweet.
- Crowd-Pleaser : I’ve brought these to parties where people claimed they “don’t like pecan pie” and watched them go back for seconds. The bar format makes them less intimidating, somehow.
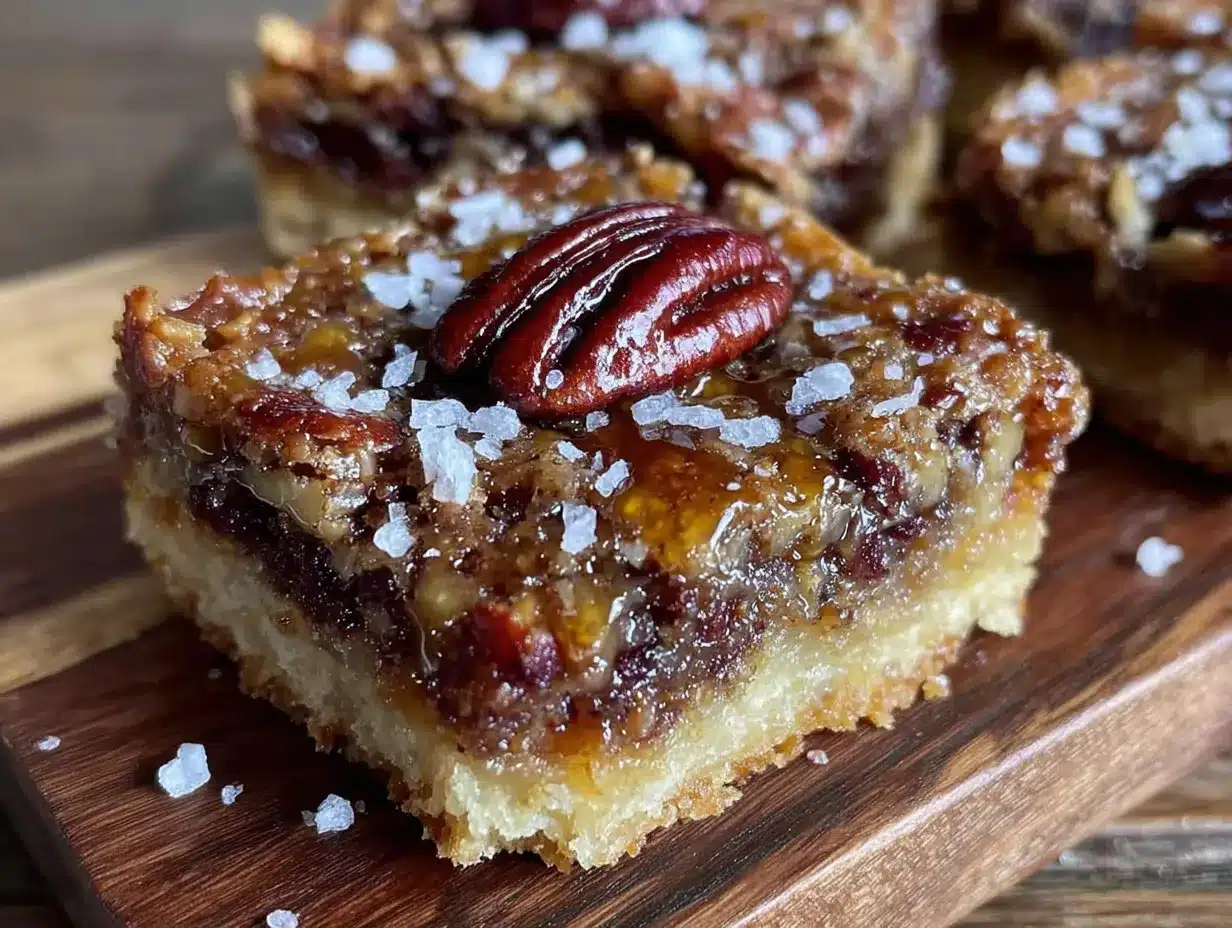
- Unbelievably Delicious : The shortbread crust is buttery and crisp, the filling is rich and gooey without being runny, and that maple-bourbon flavor lingers in the best way possible.
What makes these different from every other pecan bar recipe? It’s the balance. Most pecan bars are either too sweet or too one-note. The maple adds complexity, the bourbon cuts through the richness, and the ratio of filling to crust is something I spent weeks perfecting. You get that satisfying crunch from the pecans, but the filling stays soft and almost caramel-like. It’s not just another version—it’s the version I’d serve to anyone I wanted to impress, which is honestly everyone.
These bars are comfort food at its finest. They’re the kind of dessert that makes you close your eyes after the first bite, because it tastes exactly like what you needed. Whether you’re baking for a crowd or just for yourself on a quiet Sunday afternoon, these bars deliver that warm, soul-soothing satisfaction without any of the fuss of a traditional pie.
What Ingredients You Will Need
This recipe uses simple, wholesome ingredients that come together to create something truly special. Most of these are pantry staples, which means you’re probably already halfway there.
For the Shortbread Crust
- Unsalted butter, cold and cut into small cubes (1 cup / 226g) — Cold butter is key here; it creates that tender, flaky texture in the crust
- All-purpose flour (2 cups / 240g) — I use King Arthur Flour for consistent results, but any brand works
- Powdered sugar (½ cup / 60g) — This gives the crust a melt-in-your-mouth texture that granulated sugar just can’t match
- Salt (¼ teaspoon) — Just enough to balance the sweetness
For the Maple Bourbon Filling
- Unsalted butter, melted (½ cup / 113g) — Adds richness and helps the filling set properly
- Light brown sugar, packed (1 cup / 200g) — The molasses notes in brown sugar pair beautifully with maple
- Pure maple syrup (½ cup / 160ml) — Please use real maple syrup, not pancake syrup. Grade A dark amber works wonderfully here
- Bourbon (3 tablespoons / 45ml) — I prefer Bulleit or Maker’s Mark for their smooth, slightly sweet profile, but any bourbon you like to drink will work
- Large eggs (3, at room temperature) — Room temperature eggs incorporate more evenly into the filling
- Vanilla extract (1 teaspoon) — Enhances the maple and bourbon flavors without overpowering them
- All-purpose flour (3 tablespoons / 22g) — Helps thicken the filling so it stays put when you cut the bars
- Salt (½ teaspoon) — Don’t skip this; it makes all the flavors pop
- Pecan halves (2½ cups / 250g) — I like to use whole halves for a beautiful presentation, but chopped pecans work too if that’s what you have
A quick note on the bourbon: if you don’t drink alcohol or want to keep these bars kid-friendly, you can substitute with 3 tablespoons of apple cider or even just extra maple syrup. The flavor will be slightly different, but still delicious. I’ve also used bourbon vanilla extract in a pinch, and it worked surprisingly well.
For the pecans, I recommend toasting them lightly before using. Just spread them on a baking sheet at 350°F (175°C) for 5-7 minutes, until they smell nutty and fragrant. This step is optional, but it really deepens the flavor. I learned this trick from Marlene, actually—she said toasting nuts is “the difference between good and memorable.” She wasn’t wrong.
Equipment Needed
Nothing too fancy here—just the basics that most kitchens already have. Here’s what you’ll need:
- 9×13-inch baking pan — I use a metal pan for even baking, but glass or ceramic work too. Just note that glass pans may require slightly longer baking time
- Parchment paper — Absolute must for easy removal. Leave some overhang on the sides so you can lift the bars out cleanly
- Food processor or pastry cutter — For cutting the butter into the flour for the crust. A food processor makes it faster, but two forks or a pastry cutter work just fine
- Mixing bowls — One large, one medium
- Whisk — For the filling
- Spatula — For spreading and scraping
- Measuring cups and spoons — Accuracy matters in baking, so use proper measuring tools
- Cooling rack — Essential for letting the bars cool evenly before cutting
- Sharp knife — A chef’s knife works best for clean cuts through the pecan filling
If you don’t have a food processor, don’t worry. I actually made these bars for years using just my hands to work the butter into the flour. It takes a little longer, but honestly, there’s something satisfying about it. Just make sure your hands are cold—run them under cold water first if you need to.
Preparation Method
- Preheat your oven to 350°F (175°C). Line your 9×13-inch baking pan with parchment paper, leaving about 2 inches of overhang on the long sides. This will be your lifeline later when you’re lifting the bars out.
- Make the shortbread crust. In a food processor, combine 2 cups (240g) all-purpose flour, ½ cup (60g) powdered sugar, and ¼ teaspoon salt. Pulse a few times to combine. Add the cold, cubed butter (1 cup / 226g) and pulse until the mixture looks like coarse sand with some pea-sized butter pieces remaining. Don’t overprocess—you want some texture. If doing this by hand, use a pastry cutter or your fingertips to work the butter into the flour mixture until it resembles coarse crumbs.
- Press the crust into the pan. Dump the crumb mixture into your prepared pan and press it down firmly and evenly. I use the bottom of a measuring cup to get it really compact. Make sure you press it into the corners and up the sides slightly—about ¼ inch up the edges is perfect. This little edge helps contain the filling.
- Bake the crust. Place the pan in the oven and bake for 18-20 minutes, until the edges are just starting to turn golden. The center will still look pale—that’s fine. Set it aside to cool slightly while you make the filling. Leave the oven on.
- Prepare the filling. In a large bowl, whisk together ½ cup (113g) melted butter, 1 cup (200g) packed light brown sugar, ½ cup (160ml) pure maple syrup, and 3 tablespoons (45ml) bourbon until smooth. Make sure the butter isn’t too hot when you add it to the sugar—you don’t want to scramble the eggs later.
- Add the eggs and vanilla. Whisk in 3 room-temperature eggs, one at a time, until each is fully incorporated. Then add 1 teaspoon vanilla extract. The mixture should look smooth and glossy at this point.
- Add the flour and salt. Sprinkle 3 tablespoons (22g) all-purpose flour and ½ teaspoon salt over the wet mixture. Whisk gently until just combined—a few small lumps are okay. Overmixing can make the filling tough.
- Fold in the pecans. Gently fold in 2½ cups (250g) pecan halves until they’re evenly coated in the filling. Take your time here; you want every pecan to have a chance to soak up that maple-bourbon goodness.
- Pour the filling over the crust. Carefully pour the filling over the pre-baked crust, spreading it into an even layer with your spatula. The pecans will float a bit—that’s fine. Try to arrange a few extra pecans on top if you want a pretty presentation.
- Bake the bars. Return the pan to the oven and bake for 28-32 minutes, until the edges are set and the center is just slightly jiggly when you gently shake the pan. The top should be a deep golden brown. A toothpick inserted near the center should come out with a few moist crumbs, not wet batter.
- Cool completely. Place the pan on a cooling rack and let the bars cool completely—this takes about 2 hours. I know it’s tempting to cut into them warm, but trust me, they need this time to set properly. The filling continues to firm up as it cools.
- Cut and serve. Once completely cool, use the parchment overhang to lift the entire slab out of the pan. Place it on a cutting board and use a sharp knife to cut into squares. I usually go for 24 bars, but you can cut them larger or smaller depending on your crowd. Wipe the knife clean between cuts for the neatest edges.
One thing I learned the hard way: if your bars seem too soft after cooling, pop them in the fridge for 30 minutes before cutting. That extra chill makes a world of difference for clean slices. I forgot this step once when bringing them to a friend’s house, and let’s just say the bars looked more “rustic” than intended. Still tasted amazing, though.
Cooking Tips & Techniques
After making these bars more times than I can count (and messing up plenty along the way), here are the things I wish someone had told me from the start:
Don’t overwork the crust. The biggest mistake I made early on was pulsing the food processor too long. You want the butter to remain in visible small pieces—about the size of peas. Those little butter pockets create steam as they bake, which gives you that tender, flaky texture. Overprocessed crust turns out dense and tough, and nobody wants that.
Room temperature eggs matter. I know, I know—it’s annoying to wait for eggs to come to room temperature. But cold eggs can seize the butter in your filling, leaving you with a lumpy mess. If you forgot to take them out ahead of time, place the eggs in a bowl of warm water for 5 minutes. Problem solved.
Watch the baking time like a hawk. Every oven runs differently. My old oven would underbake these bars by a full 5 minutes, while my current one runs hot. Start checking at 28 minutes. The edges should be set and slightly puffed, but the center should still have a gentle wobble. Overbaked bars will be dry and crumbly instead of gooey and delicious.
Let them cool—really cool. I cannot stress this enough. I once cut into these bars after only an hour because I was impatient, and the filling ran everywhere like a sad little river of maple syrup. They need that full 2 hours to set properly. If you’re in a hurry, you can speed things up in the fridge, but let them come back to room temperature before serving for the best texture.
Use a sharp knife. A dull knife will drag through the filling and mess up your beautiful bars. Run your knife under hot water, wipe it dry, and make one clean cut. Repeat for each cut. It takes an extra minute, but the difference is worth it.
One more thing: if you’re making these for a crowd, you can prep the crust a day ahead. Just press it into the pan, cover it with plastic wrap, and refrigerate. Then all you have to do the next day is make the filling and bake. It’s a small time-saver that makes a big difference during the holiday chaos.
Variations & Adaptations
One of the best things about this recipe is how flexible it is. Here are some variations I’ve tried and loved:
Bourbon-Free Version: Swap the bourbon with 3 tablespoons of apple cider or apple juice. The maple flavor still shines, and the cider adds a subtle fruity note that’s lovely. I’ve also used non-alcoholic bourbon extract (just 1 teaspoon) with good results.
Chocolate Maple Pecan Bars: Melt ½ cup (85g) dark chocolate chips and swirl it into the filling just before pouring it over the crust. The chocolate and maple combination is honestly dangerous—I couldn’t stop eating them. Add a sprinkle of flaky sea salt on top for extra crunch.
Gluten-Free Option: Substitute the all-purpose flour in both the crust and filling with a 1:1 gluten-free baking flour blend. I’ve tested this with Bob’s Red Mill 1:1 Baking Flour, and the texture is nearly identical. Just make sure your blend contains xanthan gum for structure.
Spiced Maple Pecan Bars: Add 1 teaspoon of cinnamon, ½ teaspoon of nutmeg, and ¼ teaspoon of cloves to the filling. This gives the bars a chai-like warmth that’s perfect for fall. I made this version for a Friendsgiving last year, and it disappeared faster than anything else on the table.
Vegan Adaptation: Use vegan butter (I like Miyoko’s) and substitute the eggs with a flax egg mixture (3 tablespoons ground flaxseed mixed with 9 tablespoons water, let sit for 10 minutes). The texture is slightly less firm, but the flavor is still fantastic. Just note that the bars will be more delicate, so handle them gently.
If you’re feeling adventurous, try swapping half the pecans with walnuts or even salted almonds. The saltiness adds a nice contrast to the sweet filling. I did this once when I ran out of pecans mid-recipe, and honestly, it might be my new favorite version.
Serving & Storage Suggestions
These bars are at their absolute best served at room temperature. The filling is soft and gooey, the crust is crisp, and the flavors are fully developed. If you’ve refrigerated them, let them sit out for about 20 minutes before serving.
For presentation, I love to dust the bars with a light sprinkle of flaky sea salt and a few fresh rosemary sprigs on the serving platter. It sounds weird, I know, but the rosemary adds this earthy, aromatic note that makes the maple and bourbon sing. Plus, it looks gorgeous on a holiday table.
These bars pair beautifully with a scoop of vanilla bean ice cream or a dollop of lightly sweetened whipped cream. For drinks, a cup of black coffee or a warm chai latte is perfect. If you’re feeling festive, a glass of bourbon on the rocks is the obvious choice—though I won’t judge if you go for eggnog instead.
Storage: Keep the bars in an airtight container at room temperature for up to 3 days. If your kitchen is warm, store them in the refrigerator to prevent the filling from getting too soft. They’ll last up to a week in the fridge, though I doubt they’ll make it that long.
Freezing: These bars freeze beautifully. Once completely cooled, cut them into squares and place them in a single layer on a baking sheet. Freeze for 1 hour, then transfer to a freezer-safe container or zip-top bag, separating layers with parchment paper. They’ll keep for up to 3 months. To thaw, just let them sit at room temperature for about 30 minutes.
One thing I love about these bars is that the flavors actually get better after a day or two. The maple and bourbon meld together, and the crust softens slightly, becoming almost like a shortbread cookie. If you can resist eating them all right away, you’re in for a treat.
Nutritional Information & Benefits
Let’s be real—these are a treat, not a health food. But here’s what you should know if you’re keeping track:
Per serving (1 bar, based on 24 servings):
- Calories: 285
- Fat: 18g
- Saturated Fat: 8g
- Carbohydrates: 30g
- Sugar: 20g
- Fiber: 2g
- Protein: 4g
- Sodium: 95mg
Pecans are actually a great source of healthy fats, fiber, and antioxidants. They contain magnesium, which is good for bone health, and thiamine, which supports energy metabolism. Maple syrup also has antioxidants called polyphenols, though it’s still sugar, so moderation is key.
If you’re watching your sugar intake, you can reduce the brown sugar to ¾ cup (150g) without significantly changing the texture. The bars will be slightly less sweet, but the maple flavor will shine through more clearly.
These bars contain gluten, dairy, eggs, and nuts (pecans). For allergen-friendly versions, check the variations section above. I’ve had friends with celiac disease enjoy the gluten-free version, and the vegan adaptation was a hit at a potluck last spring.
Honestly, I believe that food is about more than just numbers. These bars are meant to be enjoyed, shared, and savored. One bar with a cup of tea after a long day? That’s self-care, not indulgence.
Conclusion
These Cozy Maple Bourbon Pecan Pie Bars are everything I want in a holiday dessert: easy to make, impossible to resist, and somehow both fancy and comforting at the same time. They’ve become my go-to for cookie exchanges, Thanksgiving dinners, and those quiet December evenings when I just need something sweet to go with my coffee.
The best part? You can make them your own. Add chocolate, swap the nuts, dial up the spice—whatever feels right to you. That’s the beauty of a good recipe: it’s a starting point, not a rulebook.
I’d love to hear how these turn out for you. Did you try a variation? Did your family fight over the last bar? Drop a comment below and let me know. And if you share them on social media, tag me—I always love seeing your creations. Happy baking, friends. May your kitchen smell like maple and bourbon, and may your holiday table be full of warmth.
Frequently Asked Questions
Can I make these bars ahead of time?
Absolutely. These bars actually taste better the next day, as the flavors have time to meld. You can bake them up to 3 days in advance and store them in an airtight container at room temperature. For longer storage, freeze them for up to 3 months.
Can I use maple-flavored syrup instead of real maple syrup?
I really don’t recommend it. Pancake syrup is mostly corn syrup and artificial flavoring, which will make the bars overly sweet and one-dimensional. Real maple syrup adds complexity and depth that you just can’t replicate. It’s worth the splurge, especially during the holidays.
Why did my filling turn out runny?
This usually happens for one of two reasons: either the bars were underbaked, or they weren’t cooled long enough before cutting. Make sure the edges are set and the center is only slightly jiggly when you take them out. And be patient during the cooling process—that 2-hour wait is non-negotiable for clean slices.
Can I use a different type of nut?
Yes! Walnuts, almonds, or even a mix of pecans and cashews work beautifully. If you’re using salted nuts, reduce the added salt in the filling to ¼ teaspoon. I’ve also made these with toasted hazelnuts, and the flavor was incredible—very European, very cozy.
How do I cut clean bars without the filling sticking to the knife?
Run your knife under hot water, wipe it dry, and make one clean cut. Repeat for each cut, reheating the knife as needed. This creates smooth, clean edges without dragging the filling. A sharp chef’s knife works better than a serrated knife for this.
Pin This Recipe!
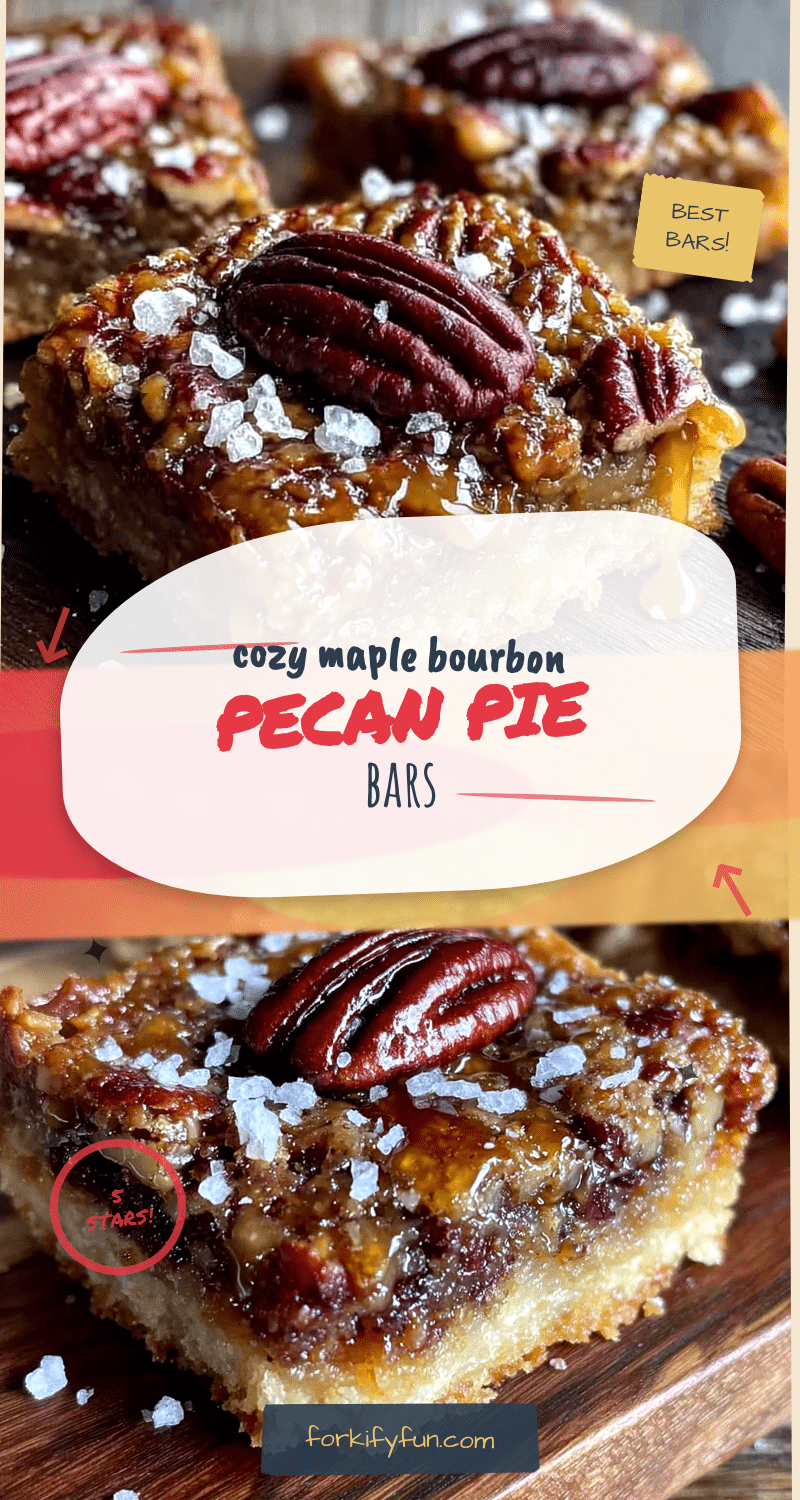
Cozy Maple Bourbon Pecan Pie Bars: Easy Holiday Dessert
These Cozy Maple Bourbon Pecan Pie Bars are the perfect holiday dessert—easy to make, impossible to resist, and somehow both fancy and comforting at the same time. With a buttery shortbread crust, a rich maple-bourbon filling, and plenty of pecans, they’re a crowd-pleaser that will have everyone asking for the recipe.
- Prep Time: 15 minutes
- Cook Time: 48-52 minutes (18-20 minutes for crust + 28-32 minutes for filling)
- Total Time: 2 hours 15 minutes (including cooling time)
- Yield: 24 bars 1x
- Category: Dessert
- Cuisine: American
Ingredients
- For the Shortbread Crust:
- 1 cup (226g) unsalted butter, cold and cut into small cubes
- 2 cups (240g) all-purpose flour
- ½ cup (60g) powdered sugar
- ¼ teaspoon salt
- For the Maple Bourbon Filling:
- ½ cup (113g) unsalted butter, melted
- 1 cup (200g) packed light brown sugar
- ½ cup (160ml) pure maple syrup
- 3 tablespoons (45ml) bourbon
- 3 large eggs, at room temperature
- 1 teaspoon vanilla extract
- 3 tablespoons (22g) all-purpose flour
- ½ teaspoon salt
- 2½ cups (250g) pecan halves
Instructions
- Preheat your oven to 350°F (175°C). Line a 9×13-inch baking pan with parchment paper, leaving about 2 inches of overhang on the long sides.
- Make the shortbread crust: In a food processor, combine 2 cups (240g) all-purpose flour, ½ cup (60g) powdered sugar, and ¼ teaspoon salt. Pulse to combine. Add the cold, cubed butter (1 cup / 226g) and pulse until the mixture looks like coarse sand with some pea-sized butter pieces remaining. If doing by hand, use a pastry cutter or fingertips to work the butter into the flour until it resembles coarse crumbs.
- Press the crust into the pan: Dump the crumb mixture into the prepared pan and press it down firmly and evenly, using the bottom of a measuring cup to compact it. Press into the corners and up the sides slightly (about ¼ inch up the edges).
- Bake the crust: Bake for 18-20 minutes, until the edges are just starting to turn golden. The center will still look pale. Set aside to cool slightly while you make the filling. Leave the oven on.
- Prepare the filling: In a large bowl, whisk together ½ cup (113g) melted butter, 1 cup (200g) packed light brown sugar, ½ cup (160ml) pure maple syrup, and 3 tablespoons (45ml) bourbon until smooth. Make sure the butter isn’t too hot.
- Add the eggs and vanilla: Whisk in 3 room-temperature eggs, one at a time, until each is fully incorporated. Then add 1 teaspoon vanilla extract. The mixture should look smooth and glossy.
- Add the flour and salt: Sprinkle 3 tablespoons (22g) all-purpose flour and ½ teaspoon salt over the wet mixture. Whisk gently until just combined—a few small lumps are okay.
- Fold in the pecans: Gently fold in 2½ cups (250g) pecan halves until they’re evenly coated in the filling.
- Pour the filling over the crust: Carefully pour the filling over the pre-baked crust, spreading it into an even layer with a spatula. Arrange a few extra pecans on top for presentation if desired.
- Bake the bars: Return the pan to the oven and bake for 28-32 minutes, until the edges are set and the center is just slightly jiggly when gently shaken. The top should be deep golden brown. A toothpick inserted near the center should come out with a few moist crumbs.
- Cool completely: Place the pan on a cooling rack and let the bars cool completely—about 2 hours. The filling continues to firm up as it cools.
- Cut and serve: Once completely cool, use the parchment overhang to lift the entire slab out of the pan. Place on a cutting board and use a sharp knife to cut into squares (about 24 bars). Wipe the knife clean between cuts for neat edges.
Notes
For best results, use cold butter for the crust and room temperature eggs for the filling. Let the bars cool completely (about 2 hours) before cutting to ensure clean slices. If bars seem too soft after cooling, refrigerate for 30 minutes before cutting. The flavors actually improve after a day or two. For a bourbon-free version, substitute with 3 tablespoons apple cider or extra maple syrup. To toast pecans, spread on a baking sheet at 350°F (175°C) for 5-7 minutes until fragrant.
Nutrition
- Serving Size: 1 bar
- Calories: 285
- Sugar: 20
- Sodium: 95
- Fat: 18
- Saturated Fat: 8
- Carbohydrates: 30
- Fiber: 2
- Protein: 4
Keywords: pecan pie bars, maple bourbon, holiday dessert, easy dessert, shortbread crust, Thanksgiving dessert, Christmas dessert, cookie exchange