There used to be a tiny bakery tucked behind a bookstore in Portland called “The Gilded Crumb” that made a stuffing loaf every November that I still dream about. When they closed their doors in 2018—the owner told me she was moving to Vermont to raise goats—I honestly panicked. That stuffing was my entire Thanksgiving personality. I brought it to every Friendsgiving, every family dinner, and once, embarrassingly, to a potluck that wasn’t even holiday-themed. After a solid twelve tries—some dry, some soggy, one that I swear tasted like a cardboard box—I finally cracked the code. This cozy gluten-free herb stuffing is that exact loaf, recreated in my own kitchen, and let me tell you, it was worth every single failed batch.
The thing about gluten-free stuffing is that most people get it wrong. They treat it like a punishment, a sad afterthought for the celiac guest. But this recipe? It’s the opposite. It’s the dish people reach for first, the one that gets scraped clean from the baking dish before the turkey even gets carved. I spent months experimenting with different breads—store-bought gluten-free cubes, homemade sourdough, even a disastrous attempt with cauliflower that I will not be discussing further. The key, I discovered, is using a sturdy, day-old gluten-free bread and toasting it until it’s almost too crunchy. That texture holds up against the broth and herbs without turning into mush.
Honestly, the first time I pulled this out of the oven, I almost cried. The smell alone—sage, thyme, a hint of rosemary—brought me right back to that little bakery. The top was golden and crisp, the inside was soft and fragrant, and the flavor was exactly what I had been chasing for years. Maybe you’ve been there, chasing a taste from a place that no longer exists. If you have, you know this feeling. This stuffing is my way of keeping that bakery alive, one cozy, herb-filled bite at a time.
Why You’ll Love This Recipe
This cozy gluten-free herb stuffing isn’t just another recipe you’ll bookmark and forget. It’s the one you’ll make every single year, and probably a few times in between when you’re craving comfort food on a random Tuesday. I’ve tested this recipe more times than I care to count, tweaked it based on feedback from friends, family, and even a few picky eaters who swore they’d never like gluten-free anything. Trust me when I say this one works.
- Quick & Easy: Ready in about 45 minutes, with only 15 minutes of active prep. Perfect for busy holiday mornings or when you need a last-minute side dish.
- Simple Ingredients: No weird gluten-free flours or specialty blends. You’ll find everything at your regular grocery store.
- Perfect for Thanksgiving & Beyond: Great alongside roasted chicken, pork chops, or even as a stuffing for roasted squash.
- Crowd-Pleaser: Gluten-free eaters and gluten lovers alike will go back for seconds. I’ve seen it happen at three separate dinners.
- Unbelievably Delicious: The texture is spot-on—crispy on top, tender inside, and packed with savory herb flavor.
What makes this stuffing different from all the others is the method. Instead of using pre-seasoned stuffing cubes (which are often bland and dry), I start with a good-quality gluten-free bread, cube it myself, and toast it twice. This double-toasting technique ensures every piece stays firm and absorbs the broth without disintegrating. Plus, I use a blend of fresh and dried herbs for that deep, layered flavor that tastes like it simmered all day.
This recipe is the kind that makes you close your eyes after the first bite. It’s comfort food reimagined—gluten-free, but with the same soul-soothing satisfaction that stuffing should always deliver. Perfect for impressing guests without stress, or turning a simple weeknight dinner into something memorable.
What Ingredients You Will Need
This cozy gluten-free herb stuffing uses simple, wholesome ingredients that come together to create something truly special. Most of these are pantry staples, especially during the holiday season, so you probably already have many of them on hand. Let’s break down what you’ll need and why each ingredient matters.
For the Bread Base
- 1 loaf (about 16 oz) day-old gluten-free bread — I recommend a sturdy white or sourdough-style loaf from brands like Schär or Canyon Bakehouse. Avoid soft, airy gluten-free breads—they turn to paste. Cut into ¾-inch cubes.
- 3 tablespoons olive oil or melted butter — For toasting the bread cubes. Use dairy-free butter if needed.
For the Aromatics
- 1 large yellow onion, finely diced (about 1½ cups) — Adds sweetness and depth.
- 3 celery stalks, finely diced (about 1 cup) — The classic stuffing crunch. Don’t skip it.
- 4 cloves garlic, minced — Because garlic makes everything better.
For the Herb & Flavor Base
- 2 tablespoons fresh sage, chopped — The star herb here. If you only have dried, use 2 teaspoons.
- 1 tablespoon fresh rosemary, finely chopped — Piney and aromatic.
- 2 teaspoons fresh thyme leaves — Or 1 teaspoon dried.
- 1 teaspoon dried parsley — Adds a subtle freshness.
- ½ teaspoon black pepper — Freshly ground is best.
- 1 teaspoon salt — I use fine sea salt. Adjust based on your broth’s saltiness.
For the Liquid
- 2 cups low-sodium vegetable or chicken broth — Use gluten-free certified broth. I prefer Pacific Foods or Imagine brand.
- 1 large egg, lightly beaten — Helps bind the stuffing so it holds together when baked. For a vegan version, use a flax egg (1 tablespoon ground flaxseed + 3 tablespoons water).
Optional Add-Ins
- ½ cup dried cranberries — For a touch of sweetness.
- ½ cup toasted pecans or walnuts — Adds crunch and richness.
- ½ cup sautéed mushrooms — For an earthy, umami boost.
Ingredient selection tip: When choosing your gluten-free bread, look for one that lists whole grain flours or brown rice flour as the first ingredient. Avoid breads that are too soft or have a gummy texture—they won’t hold up during toasting and baking. I’ve found that letting the bread sit out uncovered for a day (or even two) makes a huge difference in texture.
Equipment Needed
You don’t need a fancy kitchen to make this cozy gluten-free herb stuffing. Here’s what you’ll need:
- Large baking sheet — For toasting the bread cubes. A rimmed baking sheet works best to prevent cubes from rolling off.
- Large skillet or sauté pan — For cooking the onions, celery, and garlic. A 12-inch pan is ideal.
- 9×13-inch baking dish — The perfect size for this recipe. You can also use a 3-quart casserole dish.
- Large mixing bowl — For combining all the ingredients before baking.
- Chef’s knife and cutting board — For dicing vegetables and chopping herbs.
- Wooden spoon or spatula — For stirring.
- Measuring cups and spoons — Accuracy matters, especially with the broth and herbs.
Alternative options: If you don’t have a 9×13 dish, you can use a 10-inch cast iron skillet or a 2½-quart baking dish. Just adjust the baking time slightly—a wider dish will cook faster, a deeper one will need a few extra minutes. I’ve used my trusty enameled cast iron Dutch oven before and it worked beautifully.
Budget-friendly tip: You don’t need a fancy baking sheet. A basic one from the dollar store works fine—just line it with parchment paper for easy cleanup. And if you don’t have a large mixing bowl, use a pot or even a clean salad bowl. I’ve done it all.
Preparation Method
Let’s get cooking. This cozy gluten-free herb stuffing comes together in a few simple steps. Follow along, and I’ll share all the little tricks I learned the hard way.
- Preheat your oven to 375°F (190°C). This is important—you want the oven hot and ready for both toasting and baking.
- Prepare the bread cubes. Cut the day-old gluten-free bread into ¾-inch cubes. Don’t stress about perfection, but try to keep them uniform for even toasting. Spread the cubes on a large baking sheet in a single layer. Drizzle with 2 tablespoons of olive oil (or melted butter) and toss gently to coat.
- Toast the bread cubes. Bake for 10-12 minutes, stirring halfway through, until the cubes are golden and dry to the touch. They should feel firm and slightly crunchy. This is the double-toasting trick I mentioned—don’t skip it. Remove from the oven and let them cool slightly. Leave the oven on at 375°F.
- Cook the aromatics. While the bread toasts, heat the remaining 1 tablespoon of olive oil in a large skillet over medium heat. Add the diced onion and celery. Cook for 5-7 minutes, stirring occasionally, until the vegetables are soft and translucent. Add the minced garlic and cook for 1 more minute, until fragrant. Your kitchen should smell amazing at this point.
- Add the herbs. Stir in the fresh sage, rosemary, thyme, dried parsley, salt, and pepper. Cook for 1 minute, stirring constantly, to release the oils and flavors. If you’re using dried herbs, this step is even more important—it wakes them up.
- Combine in a large bowl. Transfer the toasted bread cubes to a large mixing bowl. Add the cooked vegetable-herb mixture and toss gently to combine. If you’re adding dried cranberries or nuts, stir them in now.
- Add the broth and egg. In a small bowl or measuring cup, whisk together the beaten egg and 1½ cups of the broth. Pour this mixture over the bread mixture. Toss gently with a wooden spoon until all the cubes are evenly moistened. The bread should look hydrated but not swimming in liquid. If it seems dry, add the remaining ½ cup of broth a little at a time. You want the mixture to hold together when you press it gently with your hand—like a damp sponge.
- Transfer to baking dish. Lightly grease your 9×13-inch baking dish with butter or cooking spray. Spoon the stuffing mixture into the dish and spread it into an even layer. Don’t pack it down too firmly—you want some air pockets for texture.
- Bake. Bake for 25-30 minutes, until the top is golden brown and crispy. The edges should be slightly crunchy, and the center should be hot and set. If you like a crispier top, broil for 1-2 minutes at the end, watching closely so it doesn’t burn.
- Rest and serve. Let the stuffing rest for 5 minutes before serving. This allows the liquid to settle and the flavors to meld. Serve warm, garnished with a few fresh herb sprigs if you’re feeling fancy.
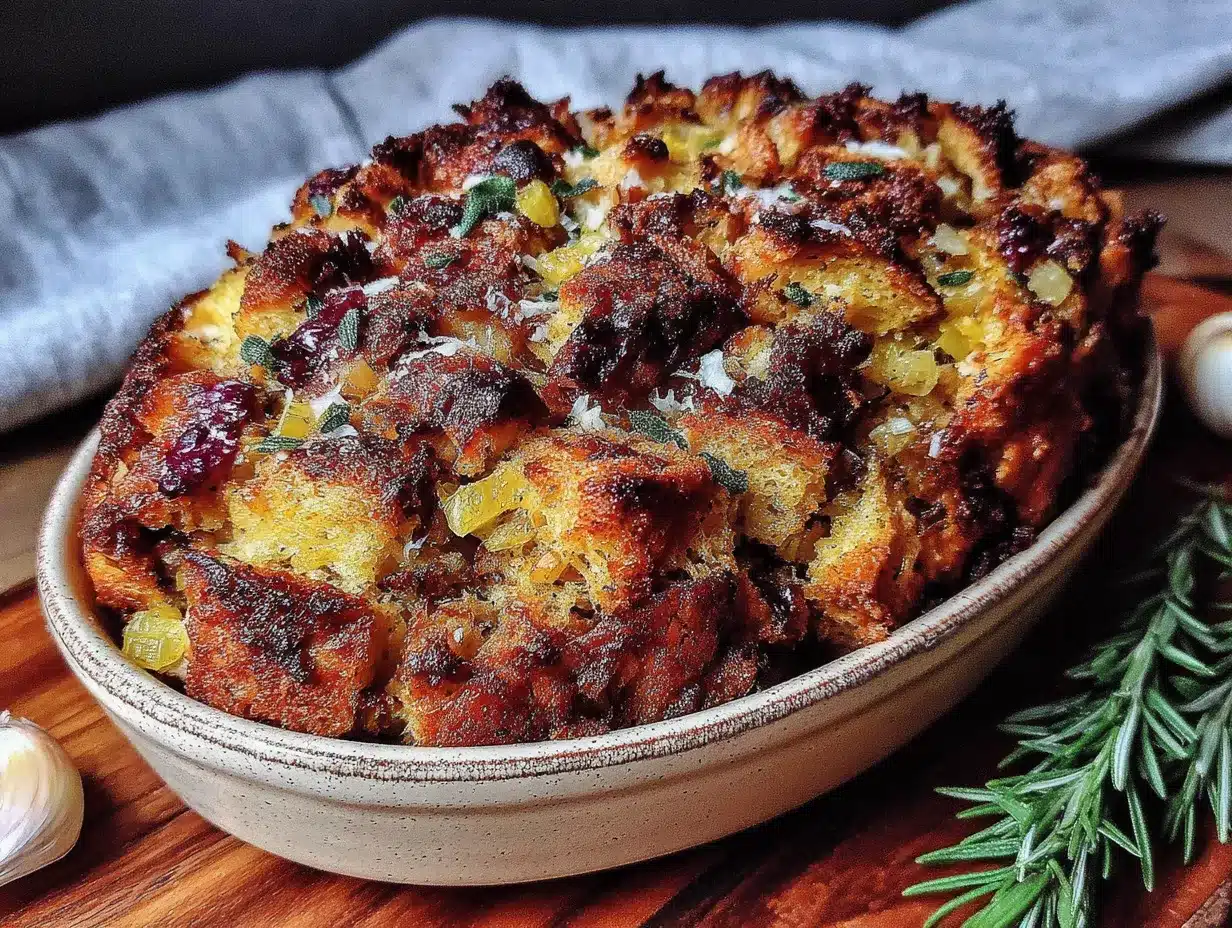
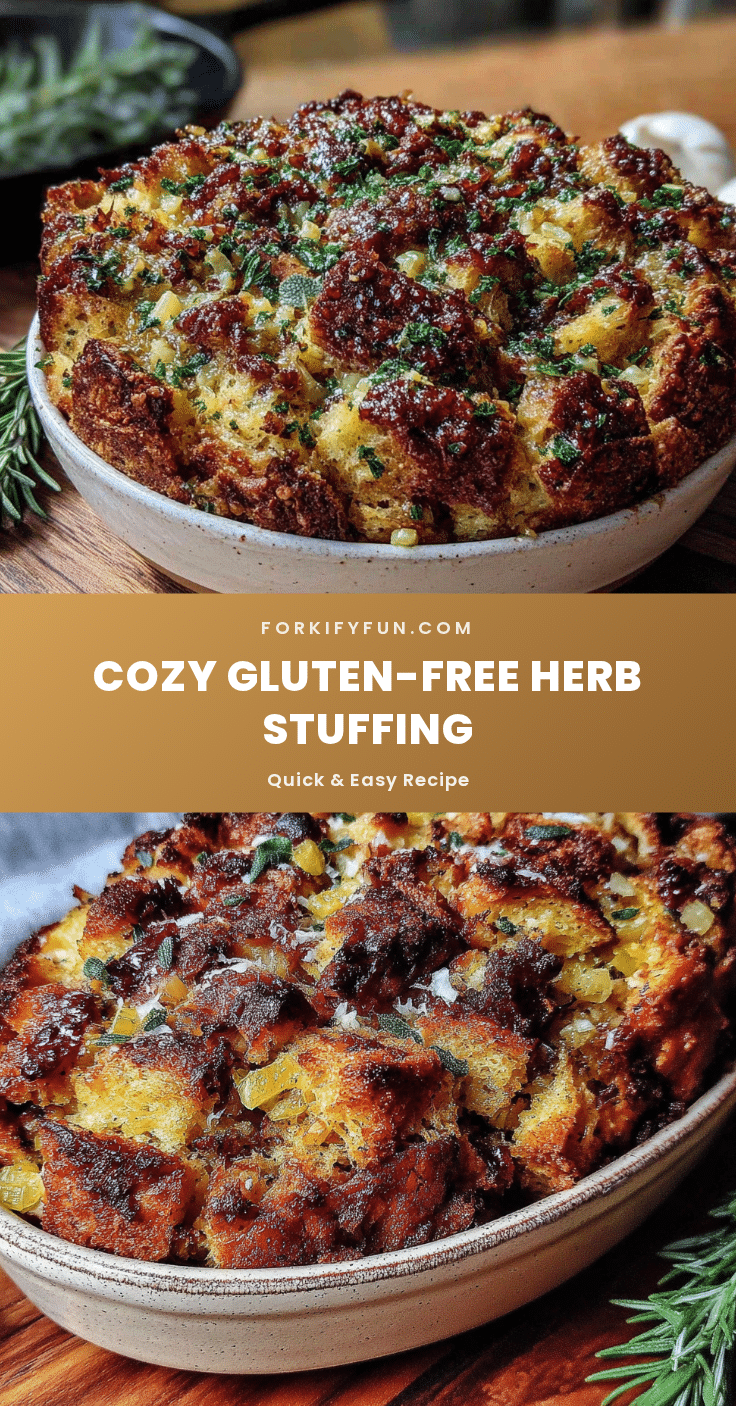
Sensory cue: When the stuffing is done, the top should be a beautiful golden brown, and you should see little crispy bits around the edges. The smell is intoxicating—savory, herby, and deeply comforting. You’ll know it’s ready when you can’t resist sneaking a bite.
Cooking Tips & Techniques
After twelve attempts at recreating that bakery stuffing, I’ve collected a few hard-earned lessons. Here are my best tips for making this cozy gluten-free herb stuffing perfect every time.
Don’t skip the double-toast. I know it seems like an extra step, but toasting the bread cubes twice is what gives this stuffing its structure. The first toast dries them out; the second toast (during baking) crisps the top. If you skip it, you’ll end up with soggy, sad stuffing. Trust me, I learned this one the hard way on attempt number four.
Use low-sodium broth. This gives you control over the salt level. Different gluten-free breads vary wildly in saltiness, and you don’t want your stuffing to taste like a salt lick. Start with less salt in the herb mixture and adjust at the end if needed.
Don’t overmix. When you add the broth and egg mixture, toss gently. Overmixing can break down the bread cubes and turn your stuffing into a paste. You want distinct pieces of bread that are coated but still recognizable.
Let it rest. The five-minute rest after baking is non-negotiable. It allows the stuffing to set, making it easier to serve and giving the flavors time to meld. I once rushed this step and ended up with a crumbly mess on the serving platter. Never again.
My biggest failure: On attempt number seven, I used a gluten-free bread that was too soft and fresh. It literally dissolved into the broth. The result was a gray, mushy blob that my roommate politely called “interesting.” Learn from my mistake—use day-old, sturdy bread. If your bread is fresh, cube it and leave it on the counter uncovered overnight.
Timing strategy: You can toast the bread cubes and cook the aromatics up to two days in advance. Store them separately in the fridge, then combine and bake on the day you’re serving. This is a lifesaver for holiday cooking when oven space is at a premium.
Variations & Adaptations
This cozy gluten-free herb stuffing is incredibly versatile. Here are a few ways to make it your own:
Vegan Version
Swap the butter for olive oil or vegan butter, use a flax egg (1 tablespoon ground flaxseed mixed with 3 tablespoons water, let sit for 5 minutes), and use vegetable broth. Everything else stays the same. I’ve made this for vegan friends and they couldn’t tell the difference.
Sausage & Apple Stuffing
Brown ½ pound of gluten-free sausage (casings removed) in the skillet before cooking the onions and celery. Drain excess fat, then proceed with the recipe. Add 1 diced apple (Granny Smith or Honeycrisp) with the celery for a sweet-savory twist. This is my personal favorite variation for Thanksgiving.
Mushroom & Leek Stuffing
Sauté 8 ounces of sliced cremini mushrooms with the onions and celery. Replace half the onion with 1 cup of thinly sliced leeks (white and light green parts only). The mushrooms add an earthy depth that pairs beautifully with the herbs.
Herb Adjustment
Feel free to play with the herb blend. Add 1 teaspoon of dried marjoram or tarragon for a different flavor profile. In the summer, I use fresh chives and parsley for a brighter taste. Just keep the total herb amount roughly the same.
Dietary note: Always check your broth and any add-ins (like sausage or dried cranberries) for gluten-free certification if you’re cooking for someone with celiac disease. Cross-contamination is a real concern.
Serving & Storage Suggestions
This cozy gluten-free herb stuffing is best served warm, straight from the oven. The contrast between the crispy top and the soft, tender interior is pure magic. Here’s how to serve and store it like a pro.
Serving temperature: Serve it hot, ideally within 10 minutes of coming out of the oven. If you’re making it ahead, reheat it in a 350°F (175°C) oven for 15-20 minutes, covered with foil to prevent drying. Uncover for the last 5 minutes to re-crisp the top.
What to serve with it: This stuffing is a natural partner for roast turkey or chicken, but don’t stop there. It’s amazing alongside roasted pork loin, grilled sausages, or even a simple roast chicken. For a vegetarian meal, serve it with roasted root vegetables and a tangy cranberry sauce. A crisp green salad with a lemony vinaigrette cuts through the richness beautifully.
Storage instructions: Leftover stuffing keeps in the refrigerator for up to 4 days. Store it in an airtight container. The flavors actually deepen overnight, so it might taste even better the next day. I’ve been known to eat it cold, straight from the container, standing in front of the fridge. No regrets.
Freezer instructions: You can freeze baked stuffing for up to 3 months. Let it cool completely, then transfer to a freezer-safe container or zip-top bag. To reheat, thaw overnight in the refrigerator, then bake at 350°F (175°C) for 20-25 minutes, covered, until heated through. Uncover for the last 5 minutes to crisp the top.
Reheating tip: If the stuffing seems dry after reheating, drizzle a tablespoon or two of warm broth over the top before putting it in the oven. This adds moisture without making it soggy.
Nutritional Information & Benefits
Here’s the approximate nutritional breakdown for one serving (about 1 cup) of this cozy gluten-free herb stuffing, made with vegetable broth and olive oil:
| Nutrient | Amount per Serving |
|---|---|
| Calories | 210 |
| Total Fat | 8g |
| Saturated Fat | 1.5g |
| Carbohydrates | 30g |
| Fiber | 3g |
| Protein | 5g |
| Sodium | 480mg |
Health benefits: This stuffing is made with whole food ingredients and is naturally dairy-free if you use olive oil. The herbs—sage, rosemary, and thyme—are rich in antioxidants and have anti-inflammatory properties. Celery provides fiber and vitamin K, while onions and garlic offer prebiotics that support gut health. Compared to traditional stuffing made with white bread, this gluten-free version often has more fiber and nutrients, especially if you choose a whole grain gluten-free bread.
Dietary considerations: This recipe is gluten-free and can easily be made dairy-free and vegan. It’s nut-free if you skip the optional pecans or walnuts. Always check labels on broth and bread to ensure they meet your dietary needs.
Conclusion
This cozy gluten-free herb stuffing is more than just a recipe—it’s a little piece of that bakery memory I’ve been chasing for years. Every time I make it, I’m transported back to that tiny shop in Portland, standing at the counter, watching the baker pull a golden loaf from the oven. And now, I get to share that feeling with you.
I hope you’ll make this stuffing your own. Add your favorite herbs, toss in some dried fruit or nuts, or keep it classic and simple. The beauty of this recipe is that it’s forgiving and adaptable. Whether you’re serving it at a holiday feast or a cozy weeknight dinner, it delivers comfort, flavor, and a little bit of magic.
If you try this recipe, I’d love to hear about it. Leave a comment below and tell me how it turned out—did you add your own twist? Did it remind you of a favorite memory? Share your photos on social media and tag me so I can see your beautiful creation. Happy cooking, friends. Here’s to keeping the flavors we love alive.
Frequently Asked Questions
Can I make this stuffing ahead of time?
Absolutely! You can assemble the stuffing (without baking) up to 24 hours in advance. Cover and refrigerate, then bake as directed, adding about 10 minutes to the baking time since you’re starting from cold.
What’s the best gluten-free bread for stuffing?
I recommend a sturdy white or sourdough-style gluten-free bread. Brands like Schär, Canyon Bakehouse, or Against the Grain work well. Avoid soft, fluffy breads that tend to fall apart. Day-old bread is ideal.
Can I use dried herbs instead of fresh?
Yes, you can. Use about one-third of the amount called for fresh herbs. So, 2 tablespoons fresh sage becomes about 2 teaspoons dried. Add dried herbs earlier in the cooking process to allow them to rehydrate and release their flavor.
Why did my stuffing turn out soggy?
Soggy stuffing usually means the bread wasn’t toasted enough, or too much broth was added. Make sure your bread cubes are thoroughly dried in the oven before combining. Start with less broth and add more as needed—the mixture should be moist but not wet.
Can I cook this stuffing inside a turkey?
I don’t recommend it for food safety reasons. The stuffing inside a turkey takes longer to reach a safe temperature, which can lead to overcooked meat or undercooked stuffing. Bake it separately for the best texture and safety.
Pin This Recipe!
Cozy Gluten-Free Herb Stuffing: The Best Easy Holiday Recipe
This cozy gluten-free herb stuffing is the perfect holiday side dish, with a crispy top, tender interior, and savory herb flavor. It’s quick, easy, and a crowd-pleaser for gluten-free and gluten-loving guests alike.
- Prep Time: 15 minutes
- Cook Time: 30 minutes
- Total Time: 45 minutes
- Yield: 8 servings 1x
- Category: Side Dish
- Cuisine: American
Ingredients
- 1 loaf (about 16 oz) day-old gluten-free bread, cut into ¾-inch cubes
- 3 tablespoons olive oil or melted butter, divided
- 1 large yellow onion, finely diced (about 1½ cups)
- 3 celery stalks, finely diced (about 1 cup)
- 4 cloves garlic, minced
- 2 tablespoons fresh sage, chopped (or 2 teaspoons dried)
- 1 tablespoon fresh rosemary, finely chopped
- 2 teaspoons fresh thyme leaves (or 1 teaspoon dried)
- 1 teaspoon dried parsley
- ½ teaspoon black pepper, freshly ground
- 1 teaspoon fine sea salt
- 2 cups low-sodium vegetable or chicken broth, gluten-free certified
- 1 large egg, lightly beaten (or 1 flax egg for vegan)
- ½ cup dried cranberries (optional)
- ½ cup toasted pecans or walnuts (optional)
- ½ cup sautéed mushrooms (optional)
Instructions
- Preheat your oven to 375°F (190°C).
- Cut the day-old gluten-free bread into ¾-inch cubes. Spread on a large baking sheet in a single layer. Drizzle with 2 tablespoons of olive oil (or melted butter) and toss gently to coat.
- Toast the bread cubes for 10-12 minutes, stirring halfway through, until golden and dry. Remove from oven and let cool slightly. Leave the oven on at 375°F.
- While the bread toasts, heat the remaining 1 tablespoon of olive oil in a large skillet over medium heat. Add the diced onion and celery. Cook for 5-7 minutes, stirring occasionally, until soft and translucent. Add the minced garlic and cook for 1 more minute until fragrant.
- Stir in the fresh sage, rosemary, thyme, dried parsley, salt, and pepper. Cook for 1 minute, stirring constantly.
- Transfer the toasted bread cubes to a large mixing bowl. Add the cooked vegetable-herb mixture and toss gently to combine. If using dried cranberries or nuts, stir them in now.
- In a small bowl or measuring cup, whisk together the beaten egg and 1½ cups of the broth. Pour over the bread mixture and toss gently until all cubes are evenly moistened. If it seems dry, add the remaining ½ cup of broth a little at a time. The mixture should hold together when pressed gently.
- Lightly grease a 9×13-inch baking dish with butter or cooking spray. Spoon the stuffing mixture into the dish and spread into an even layer. Do not pack down firmly.
- Bake for 25-30 minutes, until the top is golden brown and crispy. For a crispier top, broil for 1-2 minutes at the end, watching closely.
- Let the stuffing rest for 5 minutes before serving. Serve warm, garnished with fresh herb sprigs if desired.
Notes
For best texture, use day-old sturdy gluten-free bread and double-toast the cubes. Use low-sodium broth to control saltiness. Do not overmix. Let rest 5 minutes after baking. Can be assembled up to 24 hours in advance (refrigerate unbaked, then add 10 minutes to baking time).
Nutrition
- Serving Size: 1 cup
- Calories: 210
- Sugar: 4
- Sodium: 480
- Fat: 8
- Saturated Fat: 1.5
- Carbohydrates: 30
- Fiber: 3
- Protein: 5
Keywords: gluten-free stuffing, herb stuffing, holiday stuffing, Thanksgiving stuffing, gluten-free side dish, easy stuffing recipe


