The Day of the Dead potluck at my daughter’s school was in two days and I’d completely forgotten. Everyone else would be bringing elaborate sugar skulls, tamales from their abuela’s secret recipe, or those perfect little marzipan fruits that look almost real. I had a bag of flour, some butter that was about to expire, and a vague memory of my neighbor’s mom making Pan de Muerto once. Honestly, I was panicking. I mean, you know that feeling when you’re supposed to bring something meaningful to a cultural celebration and you show up with, like, store-bought cookies? Not happening.
I called my neighbor, Mrs. Garcia, who I’d seen making this bread every year. “It’s not hard,” she said with a laugh, “but you have to treat the dough like a friend, not a project.” So there I was, at 10 PM on a Tuesday, covered in flour, trying to remember if the orange blossom water was supposed to go in with the eggs or after. I got it wrong, by the way—added it too early and the dough looked like a sad, lumpy mess for a minute. But I kept kneading, and something clicked. The dough turned soft and pillowy, and that smell—warm, floral, yeasty—filled my tiny kitchen.
The next morning, I pulled two slightly lopsided loaves from the oven. They weren’t perfect. One had a bone-shaped decoration that looked suspiciously like a deformed finger. But at the potluck, surrounded by all those fancy dishes, it was my simple, slightly wonky Pan de Muerto that people kept coming back to. “It tastes like my grandmother’s,” one mom said, tearing up a little. And that’s the thing—this recipe isn’t about perfection. It’s about the feeling it brings. Maybe you’ve been there, scrambling to make something that feels authentic, worried it won’t measure up. Trust me, this bread will save you. It’s been my go-to ever since, and I keep making it because it reminds me that sometimes the best things come from a little bit of chaos.
Why You’ll Love This Recipe
Let me tell you, after making this Pan de Muerto at least twenty times (and failing spectacularly the first few), I’ve nailed down what makes this version special. It’s not just another bread recipe—it’s the one that makes you look like you spent hours when you actually spent maybe 45 minutes of active work. I’ve tested it with my picky teenage son, my gluten-intolerant neighbor, and even a pastry chef friend who gave it a grudging nod of approval.
- Quick & Easy: The active prep time is about 30 minutes. The dough does its thing while you do yours.
- Simple Ingredients: No trips to a specialty store. Flour, butter, eggs, sugar, yeast—stuff you probably already have.
- Perfect for Day of the Dead: It’s the traditional bread for the ofrenda, but honestly, it’s great for any fall gathering.
- Crowd-Pleaser: Kids love the soft, sweet texture and adults appreciate the subtle orange flavor.
- Unbelievably Delicious: The combination of orange zest, a hint of anise, and that buttery crumb is pure comfort.
What makes this recipe different? It’s the technique of blooming the yeast with a touch of orange juice instead of plain water. That little swap adds a depth of flavor that makes people ask, “What’s in this?” It’s also forgiving—I’ve over-kneaded, under-proofed, and even dropped the dough on the floor (yes, really), and it still came out delicious. This isn’t just good bread—it’s the kind that makes you close your eyes after the first bite. It’s tradition made easy, with the same soul-soothing satisfaction your grandmother would have wanted.
What Ingredients You Will Need
This recipe uses simple, wholesome ingredients to deliver that iconic soft, slightly sweet bread with a hint of floral citrus. Most of these are pantry staples, which makes it perfect for a last-minute celebration.
- For the Dough:
- 4 cups all-purpose flour (plus extra for dusting)
- 1/2 cup granulated sugar
- 1 packet (2 1/4 teaspoons) active dry yeast
- 1/2 cup whole milk, warmed (about 110°F)
- 1/4 cup orange juice, freshly squeezed (adds brightness)
- 1/4 cup unsalted butter, softened (I use Kerrygold for the richness)
- 2 large eggs, room temperature
- 1 tablespoon orange zest (from 1 large orange)
- 1 teaspoon vanilla extract
- 1/2 teaspoon salt
- 1/2 teaspoon ground anise seed (optional, but traditional)
- For the Glaze & Topping:
- 1/4 cup unsalted butter, melted
- 1/4 cup granulated sugar (for coating)
- 1 tablespoon orange zest (for garnish)
I recommend using fresh orange juice here—the bottled stuff just doesn’t have the same zing. For the anise seed, you can skip it if you’re not a fan, but it adds that subtle licorice note that makes Pan de Muerto so distinctive. If you’re looking for a dairy-free option, substitute the milk with unsweetened oat milk and use vegan butter. I’ve tried it with coconut oil too, and while the texture is slightly different, it still works beautifully.
One tip: make sure your eggs are at room temperature. Cold eggs can shock the yeast and make the dough dense. Just set them out on the counter for 30 minutes before you start.
Equipment Needed
You don’t need fancy equipment for this bread, which is part of its charm. Here’s what you’ll need:
- Large mixing bowl (I prefer glass or ceramic—metal can react with the yeast)
- Stand mixer with dough hook (optional, but makes kneading easier)
- Measuring cups and spoons
- Whisk
- Rubber spatula
- Baking sheet (lined with parchment paper)
- Clean kitchen towel (for covering the dough)
- Pastry brush (for the glaze)
- Wire cooling rack
If you don’t have a stand mixer, you can absolutely knead by hand—it takes about 10 minutes of good elbow grease. I actually prefer hand-kneading sometimes because you can feel the dough come together. For the baking sheet, any standard half-sheet pan works. And if you don’t have a pastry brush, just use your fingers to spread the melted butter—works like a charm.
Preparation Method
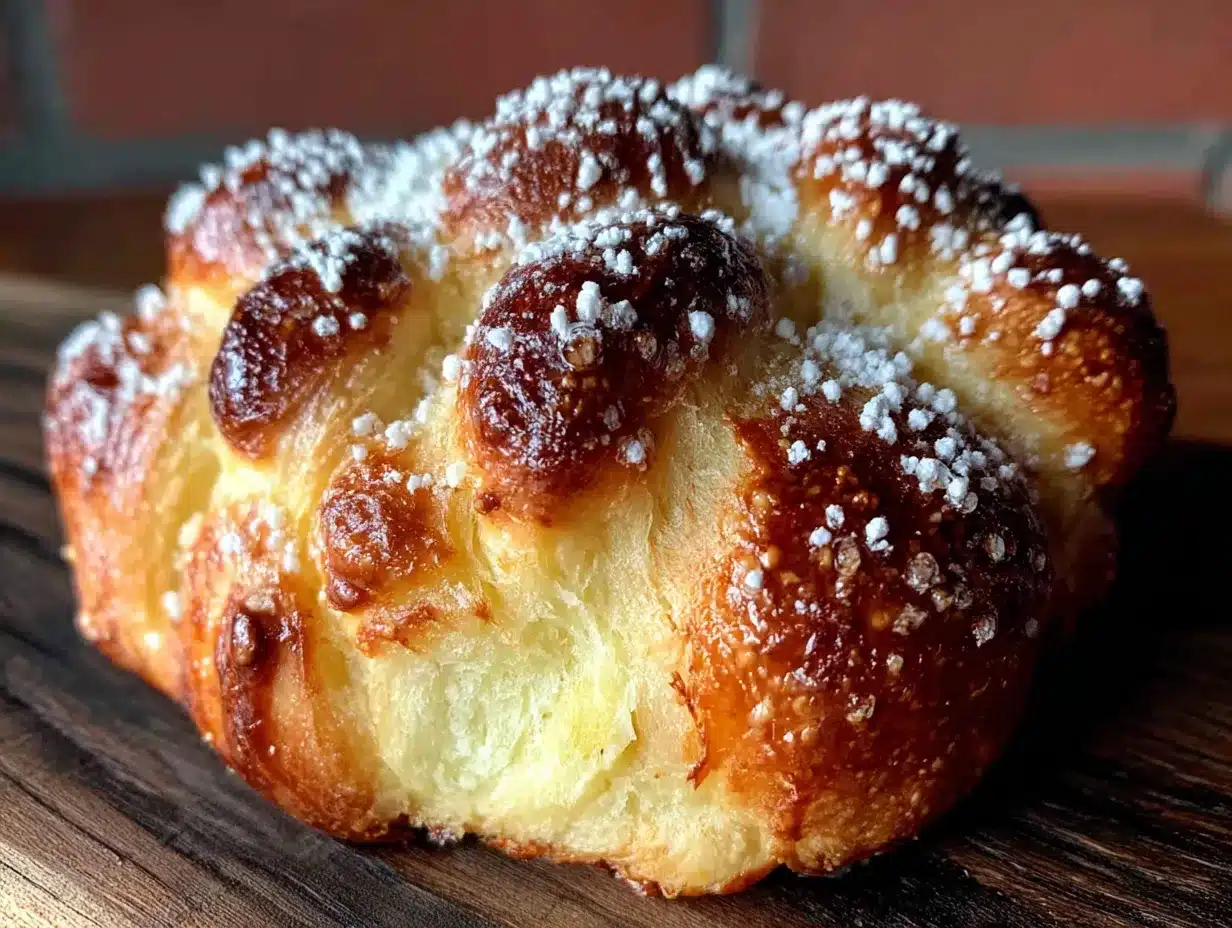
Let’s get to the fun part. This recipe makes two loaves, which is perfect because one goes on the ofrenda and one goes in your belly.
- Bloom the yeast: In a small bowl, combine the warm milk, 1 tablespoon of the sugar, and the active dry yeast. Stir gently and let it sit for 5-10 minutes until it’s frothy and smells like bread. If it doesn’t foam, your yeast might be dead—start over with fresh yeast.
- Mix the wet ingredients: In the bowl of your stand mixer (or a large bowl), whisk together the orange juice, softened butter, eggs, orange zest, vanilla extract, and the bloomed yeast mixture. It will look a little lumpy—that’s okay.
- Add the dry ingredients: In a separate bowl, whisk together the flour, remaining sugar, salt, and ground anise seed (if using). Gradually add the dry mixture to the wet ingredients, mixing on low speed with the dough hook. The dough should come together in a shaggy ball.
- Knead the dough: Increase the speed to medium and knead for 6-8 minutes (or 10 minutes by hand). The dough should be smooth, elastic, and slightly tacky but not sticky. If it’s too sticky, add a tablespoon of flour at a time. If it’s too dry, add a teaspoon of milk. You’re looking for that “windowpane” test—stretch a small piece of dough; if you can see light through it without it tearing, you’re good.
- First rise: Shape the dough into a ball and place it in a lightly oiled bowl, turning to coat. Cover with a clean kitchen towel and let it rise in a warm, draft-free place for 1.5 to 2 hours, or until doubled in size. I usually put mine in the microwave (turned off) with a cup of hot water—it’s the perfect cozy spot.
- Shape the loaves: Punch down the dough to release the air. Divide it into two equal pieces. Set aside about 1/4 of each piece for the bone decorations. Shape the larger pieces into round loaves and place them on the prepared baking sheet, spaced about 4 inches apart.
- Make the decorations: Divide the reserved dough into small pieces. Roll each piece into a rope about 6 inches long. Cut the ropes into smaller pieces—these will be the “bones.” For each loaf, make two long strips that cross over the top like an X. Then add four small rounds or ovals around the edge to represent the bones. (Don’t stress about perfection—my first ones looked like weird little worms, and they still tasted amazing.)
- Second rise: Cover the shaped loaves loosely with the towel and let them rise for another 45 minutes to 1 hour, until puffy and almost doubled.
- Bake: Preheat your oven to 350°F (175°C). Bake the loaves for 20-25 minutes, until the tops are golden brown and the bread sounds hollow when tapped on the bottom. If the tops are browning too fast, tent loosely with foil after 15 minutes.
- Glaze while warm: As soon as the loaves come out of the oven, brush them generously with the melted butter. Sprinkle the granulated sugar and orange zest over the top while the butter is still wet. Let them cool on a wire rack for at least 30 minutes before serving—if you can wait that long.
Sensory cue: When the bread is baking, your kitchen will smell like a warm hug—yeasty, buttery, with that bright orange note cutting through. The crust should be a deep golden brown, and when you tap the bottom, it should sound hollow, like a drum.
Cooking Tips & Techniques
I’ve made every mistake in the book with this bread, so let me save you some trouble.
Don’t over-proof the dough. I once let it rise for three hours because I got distracted by a phone call. The bread came out flat and sour. Stick to the times—the dough should double, not triple. If you poke it gently with a finger, the indentation should spring back slowly. If it stays, it’s over-proofed.
Temperature matters. Your milk should be warm but not hot—about 110°F, like a nice bath. Too hot and you’ll kill the yeast. Too cold and it won’t activate. I use a kitchen thermometer, but if you don’t have one, the milk should feel warm to your wrist but not burn.
Kneading is key. Under-kneaded dough won’t develop enough gluten, and your bread will be dense. Over-kneaded dough will be tough. The windowpane test is your friend—it’s not just fancy baker talk. It actually works.
Multitasking strategy: While the dough is rising for the first time, clean up your kitchen and prep the glaze ingredients. During the second rise, preheat the oven and line your baking sheet. That way, when the dough is ready, you’re not scrambling.
One more thing—if your dough feels sticky after kneading, resist the urge to add too much flour. A slightly tacky dough makes a softer bread. Just oil your hands and work surface lightly.
Variations & Adaptations
This recipe is wonderfully flexible. Here are a few ways to make it your own:
- Chocolate Orange Version: Add 1/4 cup of unsweetened cocoa powder to the flour mixture and increase the sugar to 3/4 cup. The chocolate and orange combination is divine—I made this for a friend’s birthday and she said it was the best bread she’d ever had.
- Gluten-Free Adaptation: Use a gluten-free all-purpose flour blend that contains xanthan gum. You may need to add an extra tablespoon of milk because gluten-free flours absorb more liquid. The texture will be a bit more cake-like, but still delicious.
- Vegan Version: Replace the butter with vegan butter or coconut oil, use flax eggs (1 tablespoon ground flaxseed + 3 tablespoons water per egg), and substitute the milk with oat milk. The bread will be slightly less rich, but it still works beautifully for a plant-based ofrenda.
- Spiced Pan de Muerto: Add 1 teaspoon of cinnamon and 1/2 teaspoon of nutmeg to the flour. This gives it a warm, holiday-spice flavor that’s perfect for fall celebrations.
I personally love the chocolate orange version—it’s become my go-to for when I want something a little extra. Just be careful not to over-bake it, as cocoa powder can make the bread dry faster.
Serving & Storage Suggestions
Pan de Muerto is best served the day it’s made, still slightly warm from the oven. The butter-sugar glaze creates a delicate crust that’s soft and slightly crunchy at the same time—pure magic.
Serving temperature: Room temperature is ideal. If you’ve stored it, pop it in a 300°F oven for 5 minutes to revive that just-baked texture. Serve it alongside a cup of Mexican hot chocolate or a strong coffee—the slight bitterness of the drink balances the sweetness of the bread perfectly.
Presentation: Place the loaf on a beautiful plate or a traditional Day of the Dead platter. You can dust it with a little extra cinnamon sugar or add a few marigold petals (edible ones!) for a festive touch. It’s also lovely torn into pieces and served in a basket.
Storage: Store leftover bread in an airtight container at room temperature for up to 3 days. Do not refrigerate—it will dry out. For longer storage, wrap the cooled loaf tightly in plastic wrap and then foil, and freeze for up to 3 months. Thaw at room temperature and reheat in the oven as described.
Flavor development: Honestly, the flavors get even better on day two. The orange and anise notes mellow and meld together. If you can resist eating it all on day one, you’re in for a treat.
Nutritional Information & Benefits
While Pan de Muerto is a treat, it does offer some nutritional upsides. Here’s an approximate breakdown per serving (1/8 of a loaf):
| Nutrient | Amount |
|---|---|
| Calories | 280 |
| Total Fat | 10g |
| Saturated Fat | 6g |
| Carbohydrates | 42g |
| Fiber | 1g |
| Sugar | 16g |
| Protein | 6g |
The orange zest provides a good dose of vitamin C and antioxidants, while the eggs add high-quality protein. The anise seed, if you use it, has been traditionally used to aid digestion. This bread is not gluten-free, but you can adapt it as mentioned above. It does contain dairy and eggs, so be mindful of allergies.
From a wellness perspective, I see this bread as a celebration food—it’s meant to be enjoyed mindfully, with gratitude, and shared with loved ones. One slice with your morning coffee or as part of a special meal is perfectly balanced.
Conclusion
This Classic Pan de Muerto is more than just a recipe—it’s a tradition that you can bring into your own home, no matter your background. It’s forgiving enough for beginners, delicious enough to impress, and meaningful enough to honor those we’ve lost. I love that it connects me to a culture that celebrates life and death with such beauty and joy.
I encourage you to make it your own—add a little extra orange zest, shape the bones however you like, or experiment with the chocolate version. The most important thing is to enjoy the process and share the results with people you care about. Have you made Pan de Muerto before? I’d love to hear how it turned out—drop a comment below with your variations or questions. And if you loved this recipe, share it with a friend who needs a little bread-shaped happiness in their life. Happy baking, and may your ofrenda be sweet and full of love!
Frequently Asked Questions
Can I make Pan de Muerto without a stand mixer?
Absolutely! You can knead the dough by hand on a lightly floured surface. It takes about 10 minutes of steady kneading. Just make sure to use a rhythmic motion—push, fold, turn—until the dough is smooth and elastic.
Why didn’t my dough rise?
This usually happens for one of three reasons: your yeast was too old or dead, your milk was too hot and killed the yeast, or your kitchen was too cold. Always check the expiration date on your yeast and make sure your milk is between 105-115°F. A warm spot like a turned-off oven with the light on can help with rising.
Can I freeze the unbaked dough?
Yes, you can freeze the dough after the first rise. Punch it down, shape it into a ball, wrap it tightly in plastic wrap, and freeze for up to 1 month. Thaw in the refrigerator overnight, then shape, let rise, and bake as directed.
What if I don’t have orange blossom water?
No problem! This recipe uses fresh orange juice and zest instead, which gives a beautiful orange flavor without needing a specialty ingredient. If you want that floral note, you can add 1 teaspoon of orange blossom water along with the vanilla extract.
How do I know when the bread is fully baked?
The bread should be golden brown on top and sound hollow when you tap the bottom. You can also use an instant-read thermometer—the internal temperature should be around 190°F. If the top is browning too quickly, tent it with foil for the last 5-10 minutes of baking.
Pin This Recipe!
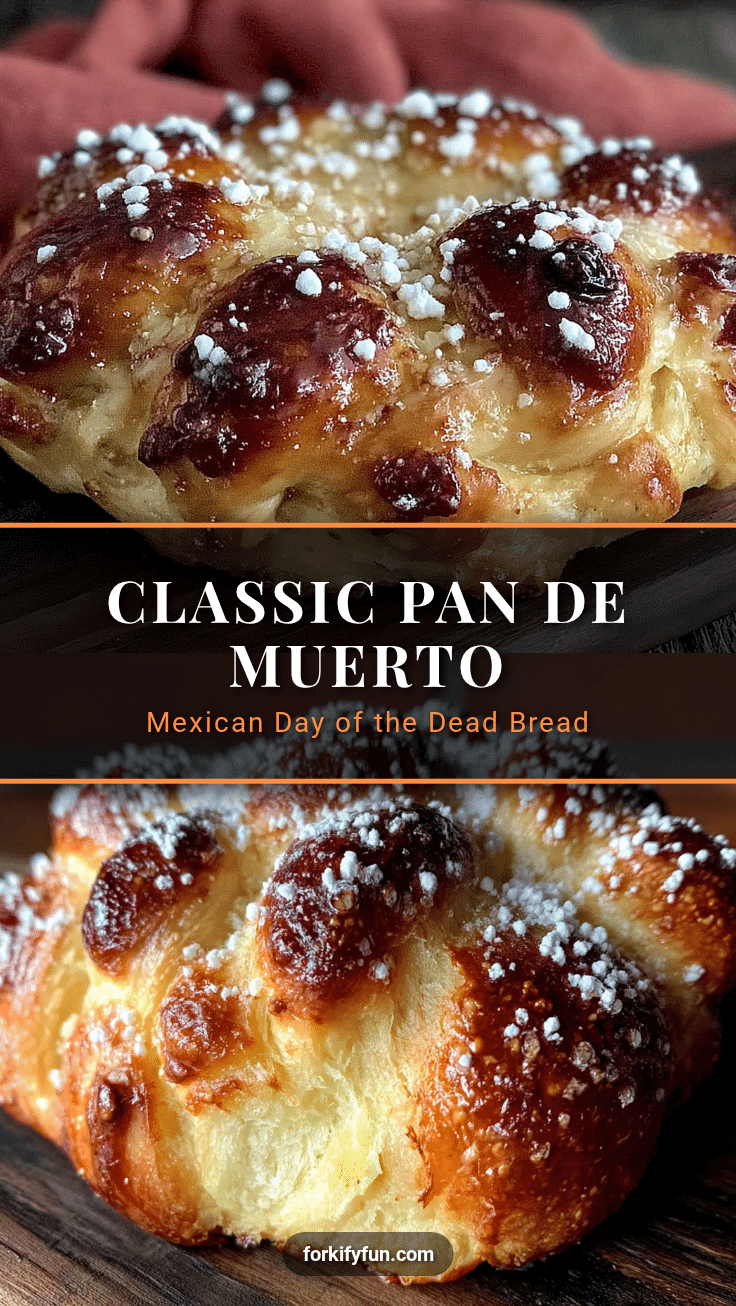
Classic Pan de Muerto – Easy Day of the Dead Bread Recipe

This Classic Pan de Muerto is a forgiving, delicious, and meaningful bread perfect for Day of the Dead celebrations. With simple ingredients and a soft, sweet crumb infused with orange and a hint of anise, it’s a crowd-pleaser that connects you to tradition.
- Prep Time: 30 minutes
- Cook Time: 25 minutes
- Total Time: 3 hours 25 minutes (including rising time)
- Yield: 2 loaves (16 servings) 1x
- Category: Bread
- Cuisine: Mexican
Ingredients
- 4 cups all-purpose flour (plus extra for dusting)
- 1/2 cup granulated sugar
- 1 packet (2 1/4 teaspoons) active dry yeast
- 1/2 cup whole milk, warmed (about 110°F)
- 1/4 cup orange juice, freshly squeezed
- 1/4 cup unsalted butter, softened
- 2 large eggs, room temperature
- 1 tablespoon orange zest
- 1 teaspoon vanilla extract
- 1/2 teaspoon salt
- 1/2 teaspoon ground anise seed (optional)
- 1/4 cup unsalted butter, melted (for glaze)
- 1/4 cup granulated sugar (for coating)
- 1 tablespoon orange zest (for garnish)
Instructions
- Bloom the yeast: In a small bowl, combine the warm milk, 1 tablespoon of the sugar, and the active dry yeast. Stir gently and let it sit for 5-10 minutes until frothy.
- Mix the wet ingredients: In the bowl of a stand mixer (or large bowl), whisk together the orange juice, softened butter, eggs, orange zest, vanilla extract, and the bloomed yeast mixture.
- Add the dry ingredients: In a separate bowl, whisk together the flour, remaining sugar, salt, and ground anise seed (if using). Gradually add the dry mixture to the wet ingredients, mixing on low speed until a shaggy ball forms.
- Knead the dough: Increase speed to medium and knead for 6-8 minutes (or 10 minutes by hand) until smooth, elastic, and slightly tacky. Perform the windowpane test.
- First rise: Shape the dough into a ball and place in a lightly oiled bowl, turning to coat. Cover with a clean kitchen towel and let rise in a warm, draft-free place for 1.5 to 2 hours, until doubled in size.
- Shape the loaves: Punch down the dough. Divide into two equal pieces. Set aside about 1/4 of each piece for decorations. Shape the larger pieces into round loaves and place on a parchment-lined baking sheet, spaced 4 inches apart.
- Make the decorations: Divide reserved dough into small pieces. Roll into ropes about 6 inches long. For each loaf, make two long strips crossing over the top like an X, and add four small rounds or ovals around the edge for bones.
- Second rise: Cover shaped loaves loosely with a towel and let rise for 45 minutes to 1 hour, until puffy and almost doubled.
- Bake: Preheat oven to 350°F (175°C). Bake loaves for 20-25 minutes until golden brown and hollow-sounding when tapped on the bottom. Tent with foil after 15 minutes if browning too fast.
- Glaze while warm: Brush baked loaves generously with melted butter. Sprinkle granulated sugar and orange zest over the top. Cool on a wire rack for at least 30 minutes before serving.
Notes
Use fresh orange juice for best flavor. Ensure eggs are at room temperature to avoid shocking the yeast. If dough feels sticky after kneading, resist adding too much flour—a slightly tacky dough yields softer bread. For a dairy-free version, substitute milk with unsweetened oat milk and use vegan butter. The bread is best served the day it’s made, but flavors improve on day two. Store in an airtight container at room temperature for up to 3 days; do not refrigerate. Freeze for up to 3 months.
Nutrition
- Serving Size: 1/8 of a loaf
- Calories: 280
- Sugar: 16
- Sodium: 150
- Fat: 10
- Saturated Fat: 6
- Carbohydrates: 42
- Fiber: 1
- Protein: 6
Keywords: Pan de Muerto, Day of the Dead bread, Mexican sweet bread, orange bread, traditional bread, ofrenda bread


