My father-in-law swore he hated cream cheese desserts. For forty years, at least. He’d make a face at the mention of cheesecake, wave off a cream cheese brownie like it was an insult to chocolate. “Too heavy,” he’d say. “Too rich. Give me a plain cookie any day.” I believed him, honestly. We all did. It was just a fact of life, like his love for burnt toast and his refusal to wear shorts even in July.
Then, last Christmas, I made a batch of these Classic Cherries in the Snow Cream Cheese Dessert. I wasn’t even trying to prove a point. I just had a block of cream cheese in the fridge that needed using up and a can of cherry pie filling that had been sitting in the pantry since the previous summer. I threw it together in about fifteen minutes, layered it in a pretty glass dish, and set it on the dessert table between a pecan pie and a plate of gingerbread cookies. I didn’t say a word about it.
An hour later, I walked back into the dining room to grab my coffee cup, and there he was. Standing at the table, a little fork in his hand, taking what must have been his third or fourth bite of the creamy, cherry-topped dessert. He had this look on his face—caught, a little embarrassed, but mostly just surprised. “This isn’t bad,” he mumbled, trying to sound casual. It was the highest praise I’d ever gotten from him. That’s the thing about this recipe, you know? It doesn’t try to be fancy. It just quietly wins people over. Maybe you’ve had a similar experience with a dessert that seemed too simple to be good. Let me tell you, this one is different.
Why You’ll Love This Classic Cherries in the Snow Cream Cheese Dessert
This isn’t just another no-bake dessert. It’s the kind of recipe that feels like a secret weapon in your back pocket. I’ve tested dozens of versions over the years, tweaking the sugar ratios, experimenting with different crusts, and even trying a reduced-fat cream cheese (don’t do it—it changes the texture completely). This version is the one I keep coming back to, and here is why it works so well.
- Incredibly Simple Ingredients: You only need five or six basic items. No fancy grocery trips, no obscure extracts. You probably have most of it right now.
- No-Bake and Stress-Free: Perfect for hot summer days when turning on the oven feels like a punishment. It comes together in under twenty minutes of active prep time.
- Make-Ahead Magic: This dessert actually gets better after a few hours in the fridge. You can make it the night before a party and forget about it until serving time.
- Always a Crowd-Pleaser: I’ve brought this to potlucks, family reunions, and casual dinner parties. The dish comes back empty every single time. Kids love the cherry topping, and adults appreciate the light, creamy texture.
- Perfect for Any Occasion: It’s fancy enough for a holiday table but simple enough for a random Tuesday night craving. That versatility is hard to beat.
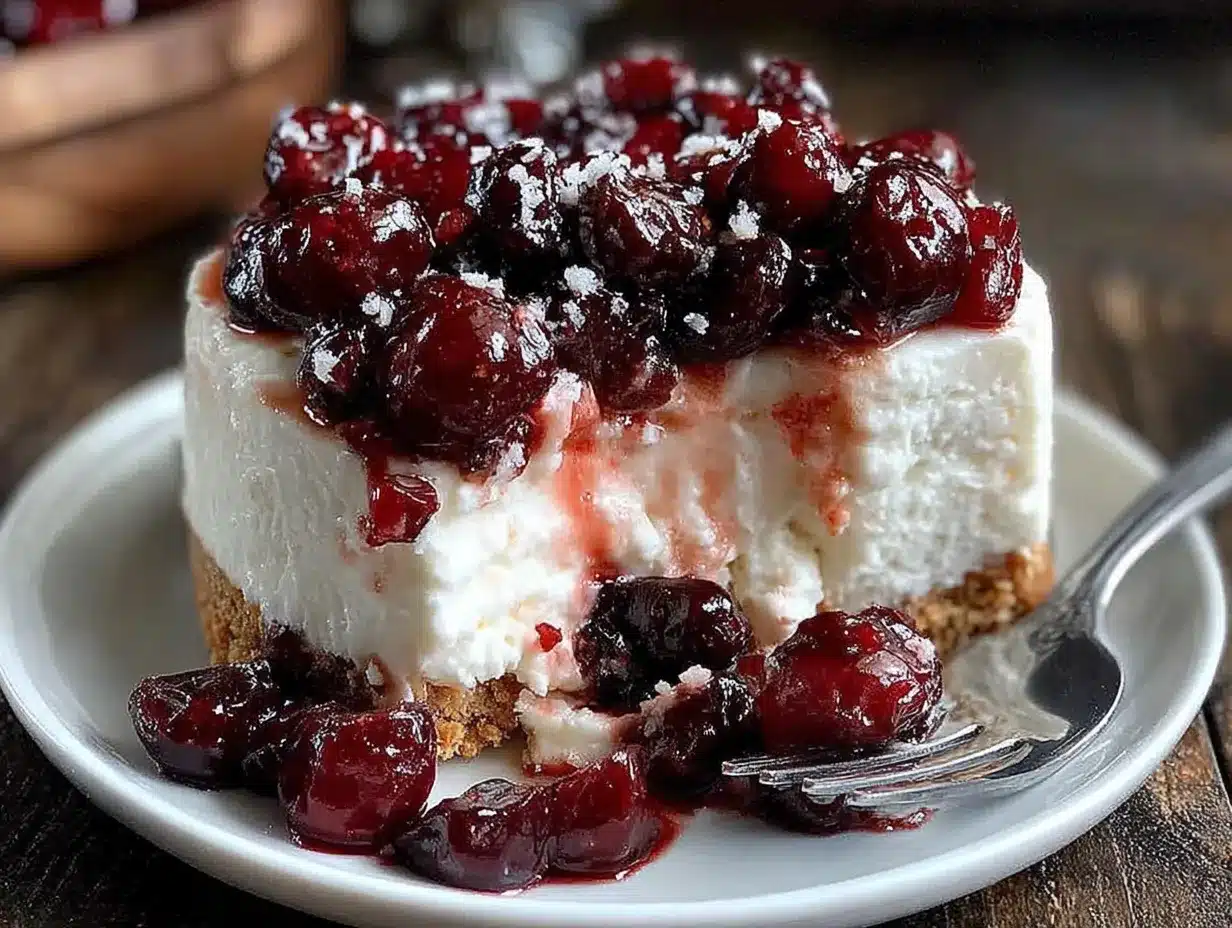
What makes this recipe different from the dozens of other cherry desserts out there? It’s the texture. The cream cheese layer is whipped until it’s impossibly light and fluffy—almost like a cloud—but it still has that satisfying tang that balances the sweet cherry topping. It’s not heavy like cheesecake, and it’s not too sweet like some pudding-based desserts. It hits that perfect middle ground where you can have a generous slice and still want another one. Honestly, it’s the kind of dessert that makes you close your eyes after the first bite. Comfort food, reimagined.
What Ingredients You Will Need
This recipe relies on simple, pantry-friendly ingredients to create something that tastes far more complex than it is. The magic is in the balance of flavors and the way the creamy filling plays off the sweet, tart cherries. Here is what you will need to gather.
For the Crust
- 1 ½ cups graham cracker crumbs (about 12 full sheets, crushed finely—I like using a food processor for even texture)
- ¼ cup granulated sugar (adds just enough sweetness to the base)
- 6 tablespoons unsalted butter, melted (binds the crust together; use salted butter if that’s all you have, just skip adding any extra salt)
For the Cream Cheese Layer
- 16 ounces cream cheese, softened to room temperature (two standard blocks; I recommend Philadelphia brand for the creamiest result—trust me on this one)
- 1 cup powdered sugar (sifted if you want to avoid lumps, though I’ve been lazy and skipped it plenty of times)
- 1 teaspoon vanilla extract (pure vanilla makes a noticeable difference, but imitation works in a pinch)
- 2 cups heavy whipping cream (cold, straight from the fridge—this is non-negotiable for getting that fluffy texture)
For the Topping
- 1 can (21 ounces) cherry pie filling (look for a brand that uses real cherries, not just filling with artificial flavor—I prefer Lucky Leaf or store brand if the cherries look plump)
Ingredient Selection Tips: For the cream cheese, make sure it is truly softened. Cold cream cheese will leave you with lumpy filling, and nobody wants that. Leave it on the counter for at least an hour before you start. If you are in a rush, cut it into small cubes and let it sit for 20 minutes. For the heavy cream, check the label—you want at least 36% milk fat. Anything less won’t whip up properly. In summer, you can swap the cherry pie filling for fresh strawberries macerated with a little sugar, but the cherry version is the classic for a reason.
Substitution Guidance: Need a gluten-free option? Use gluten-free graham crackers or crushed gluten-free vanilla wafers for the crust. For a lower-sugar version, use a sugar substitute like Swerve in the cream cheese layer, though the texture may be slightly less creamy. You can also use a dairy-free cream cheese alternative, but I have to be honest—the texture won’t be quite as rich. It still tastes good, just different.
Equipment Needed
You don’t need a professional kitchen to pull this off. Most of these tools are probably already in your cabinets. Here is what you will need.
- 9×13-inch baking dish or a 10-inch springform pan (I prefer the springform pan for cleaner slices, but a regular dish works perfectly for a more casual presentation)
- Electric hand mixer or stand mixer (you can whip the cream by hand with a whisk, but your arm will thank you for using a mixer—I learned that the hard way)
- Large mixing bowls (at least two—one for the cream cheese mixture and one for the whipped cream)
- Food processor or zip-top bag and rolling pin (for crushing the graham crackers; the bag method is messier but works in a pinch)
- Rubber spatula (for folding the whipped cream into the cream cheese without deflating it)
- Measuring cups and spoons (accuracy matters here, especially for the sugar)
- Plastic wrap or aluminum foil (for covering the dish while it chills)
Budget-Friendly Options: If you don’t have a springform pan, just use a regular 9×13-inch baking dish. The presentation is a little more rustic, but the taste is exactly the same. No food processor? Put the graham crackers in a zip-top bag, seal it tight, and crush them with a rolling pin or even a heavy skillet. It’s oddly satisfying, honestly.
Preparation Method
This recipe comes together in layers, and each step is straightforward. Take your time with the whipping—that’s where the magic happens. Here is how to do it.
Step 1: Make the Crust
In a medium bowl, combine 1 ½ cups graham cracker crumbs and ¼ cup granulated sugar. Pour in 6 tablespoons melted unsalted butter and stir until the mixture looks like wet sand and holds together when you pinch it. Press the mixture firmly into the bottom of your 9×13-inch dish or springform pan. Use the bottom of a flat measuring cup or glass to really pack it down—a loose crust will crumble when you try to serve it. Place the dish in the refrigerator to set while you prepare the filling. (About 10 minutes, or up to an hour if you are multitasking.)
Step 2: Whip the Cream
Pour 2 cups cold heavy whipping cream into a large chilled mixing bowl. Using an electric mixer on medium-high speed, whip the cream until stiff peaks form. This usually takes about 3 to 4 minutes. You will know it’s ready when you lift the beaters and the cream holds its shape without drooping. Be careful not to over-whip—if it starts looking grainy or separates into butter, you have gone too far. Set the whipped cream aside in the refrigerator while you work on the next step.
Step 3: Make the Cream Cheese Base
In another large mixing bowl, beat 16 ounces softened cream cheese with an electric mixer on medium speed until it is smooth and creamy, about 2 minutes. Scrape down the sides of the bowl with a rubber spatula. Add 1 cup powdered sugar and 1 teaspoon vanilla extract, then beat on low speed until combined, then increase to medium and beat for another minute until the mixture is light and fluffy. Make sure there are no lumps of cream cheese—if you see any, keep beating until they disappear.
Step 4: Fold It All Together
Take the whipped cream out of the refrigerator. Add about one-third of it to the cream cheese mixture and fold it in gently with a rubber spatula. The goal is to lighten the cream cheese mixture so the rest of the whipped cream incorporates easily. Once that first addition is mostly combined, add the remaining whipped cream and fold until no white streaks remain. Be gentle here—you want to keep as much air in the mixture as possible. Overmixing will deflate it and leave you with a dense, heavy dessert.
Step 5: Assemble and Chill
Spread the cream cheese mixture evenly over the prepared crust. Smooth the top with your spatula. Spoon the cherry pie filling over the cream cheese layer, spreading it gently to the edges. Cover the dish with plastic wrap or aluminum foil and refrigerate for at least 4 hours, though overnight is better. The longer it chills, the cleaner your slices will be. I have made the mistake of rushing this step, and the result was a beautiful but sloppy mess on the plate. Patience pays off here.
Step 6: Serve
When you are ready to serve, take the dish out of the refrigerator. If you used a springform pan, run a knife around the edge before releasing the sides. Cut into squares or wedges and serve cold. A little extra cherry sauce from the can drizzled over the top never hurts.
Cooking Tips & Techniques
I have made this dessert more times than I can count, and I have definitely made my share of mistakes along the way. Here are the lessons I learned so you don’t have to repeat them.
- Room temperature cream cheese is non-negotiable. The first time I made this, I was impatient and used cold cream cheese straight from the fridge. The filling was lumpy, and no amount of beating could fix it. Let it sit out for at least an hour. If you forget, cut it into small cubes and microwave it in 10-second bursts on low power until it softens.
- Chill your bowl and beaters for the whipped cream. This is a small step that makes a big difference. Cold cream whips faster and holds its shape better. Pop your metal mixing bowl and beaters in the freezer for 10 minutes before you start.
- Don’t skip the folding step. I once tried to speed things up by using the mixer to combine the whipped cream and cream cheese. It deflated the whole mixture, and the dessert ended up dense and flat. Fold by hand, and be gentle. The air bubbles are what make this dessert feel light and luxurious.
- Watch your timing. This is not a last-minute dessert. The chilling time is essential for the layers to set properly. If you try to serve it after only an hour in the fridge, you will end up with a soupy mess. Plan ahead, and your future self will thank you.
- Use good quality cherry pie filling. I tried a generic brand once to save a dollar, and the cherries were mushy and flavorless. The filling is the star of the show here, so don’t skimp on it. Look for cherries that are firm and bright in color.
Variations & Adaptations
One of the best things about this recipe is how easy it is to adapt. Over the years, I have tried several variations, and a few of them have become family favorites in their own right.
- Berry Bliss Version: Swap the cherry pie filling for a mixed berry filling. Use a can of blueberry or strawberry pie filling, or make your own by simmering fresh berries with a little sugar and cornstarch until thickened. The tartness of the berries pairs beautifully with the sweet cream cheese layer.
- Chocolate Cherry Dream: Add ¼ cup cocoa powder to the graham cracker crust for a chocolate base. You can also drizzle melted chocolate over the top before adding the cherry filling. It feels a little more indulgent, perfect for a special occasion.
- Lemon Lover’s Twist: Add 1 tablespoon of lemon zest and 2 tablespoons of fresh lemon juice to the cream cheese mixture. The citrus cuts through the richness and adds a bright, fresh flavor. Top with blueberry pie filling instead of cherry for a lemon-blueberry combination that is absolutely divine.
- Individual Servings: Instead of a large dish, layer the crust, filling, and topping in small mason jars or dessert cups. These are perfect for parties or picnics, and they look adorable. Plus, portion control is built right in.
- Nutty Crust: Replace half of the graham cracker crumbs with finely chopped pecans or almonds. Toast the nuts first for extra flavor. The crunch adds a lovely texture contrast to the creamy filling.
Serving & Storage Suggestions
This dessert is best served cold, straight from the refrigerator. I like to let it sit out for about 5 minutes after slicing—it takes the edge off the chill and lets the flavors open up a little. For presentation, a dollop of fresh whipped cream on top and a single fresh cherry (if you have one) makes it look restaurant-worthy.
Complementary Dishes: This dessert pairs wonderfully with a cup of black coffee or a hot cup of Earl Grey tea. The slight bitterness of the coffee balances the sweetness perfectly. If you are serving it after a heavy meal, keep the portions small—it is rich enough to stand on its own without needing a side dish.
Storage Instructions: Cover the dish tightly with plastic wrap or transfer leftovers to an airtight container. It will keep in the refrigerator for up to 4 days. The crust may soften slightly over time, but the flavor actually improves as the layers meld together. I have never successfully frozen this dessert—the texture of the cream cheese layer changes too much upon thawing—so I recommend eating it fresh.
Reheating: You don’t want to reheat this one. It is meant to be served cold. If your dessert has been in the fridge for a day or two and seems a little firm, just let it sit at room temperature for 10 minutes before serving.
Nutritional Information & Benefits
Let’s be honest—this is a dessert, not a health food. But that doesn’t mean it can’t have a place in a balanced diet. Here is a rough estimate of the nutritional values per serving (based on 12 servings).
| Nutrient | Amount Per Serving |
|---|---|
| Calories | 380 |
| Total Fat | 24g |
| Saturated Fat | 14g |
| Cholesterol | 80mg |
| Sodium | 220mg |
| Total Carbohydrates | 38g |
| Sugars | 28g |
| Protein | 4g |
Health Benefits: Cream cheese provides a small amount of calcium and protein. Cherries are packed with antioxidants, particularly anthocyanins, which have anti-inflammatory properties. So while this is definitely a treat, it is not entirely without redeeming qualities. Dietary Considerations: This recipe contains gluten (from the graham crackers), dairy, and eggs (if you use them in the crust). It can be made gluten-free with appropriate substitutions, but it is not suitable for a vegan or dairy-free diet without significant modifications.
Conclusion
This Classic Cherries in the Snow Cream Cheese Dessert is one of those recipes that proves you don’t need complicated techniques or exotic ingredients to make something truly memorable. It is simple, yes, but it is also deeply satisfying in a way that feels almost nostalgic. Every time I make it, I think of that Christmas, my father-in-law standing at the table with his fork, caught in the act of enjoying something he swore he hated. That moment reminded me that the best recipes aren’t about impressing people—they are about quietly winning them over.
I hope you give this dessert a try. Customize it however you like—swap the cherries, add some chocolate, or make it in little jars for a party. The base recipe is forgiving and flexible, and it rewards you every time. When you make it, I would love to hear how it turned out. Leave a comment below, share your adaptations, or tag me in your photos. Happy cooking, friend. You are going to love this one.
Frequently Asked Questions
Can I use low-fat cream cheese for this recipe?
You can, but I don’t recommend it. Low-fat cream cheese has a higher water content, which can make the filling less stable and a bit runny. The texture also won’t be as rich and creamy. If you are watching calories, consider using a smaller portion instead.
How far in advance can I make this dessert?
You can make it up to two days ahead of time. In fact, it tastes better after a full day in the fridge because the flavors have time to meld. Just keep it covered tightly so it doesn’t absorb any odors from your refrigerator.
Can I use fresh cherries instead of canned pie filling?
Absolutely. Simmer 3 cups of pitted fresh cherries with ½ cup sugar, 2 tablespoons cornstarch, and a splash of lemon juice until thickened. Let it cool completely before spreading it over the cream cheese layer. It takes a little more effort, but the result is fantastic.
Why did my cream cheese layer turn out lumpy?
This usually happens when the cream cheese is not fully softened. Cold cream cheese does not blend smoothly into the other ingredients. Make sure it sits at room temperature for at least an hour before you start. If you still see lumps, try beating it for another minute or two—sometimes they just need a little more time to break down.
Can I freeze leftovers?
I do not recommend freezing this dessert. The cream cheese layer tends to become grainy and watery after thawing, and the crust loses its texture. It is best enjoyed fresh or within a few days of making it. If you have leftovers, just keep them in the fridge.
Pin This Recipe!

Classic Cherries in the Snow Easy Cream Cheese Dessert

A no-bake, creamy dessert with a graham cracker crust, fluffy cream cheese filling, and cherry pie topping. It’s simple to make and always a crowd-pleaser.
- Prep Time: 20 minutes
- Cook Time: 0 minutes
- Total Time: 4 hours 20 minutes (includes chilling)
- Yield: 12 servings 1x
- Category: Dessert
- Cuisine: American
Ingredients
- 1 ½ cups graham cracker crumbs (about 12 full sheets)
- ¼ cup granulated sugar
- 6 tablespoons unsalted butter, melted
- 16 ounces cream cheese, softened to room temperature
- 1 cup powdered sugar
- 1 teaspoon vanilla extract
- 2 cups heavy whipping cream, cold
- 1 can (21 ounces) cherry pie filling
Instructions
- In a medium bowl, combine graham cracker crumbs and granulated sugar. Pour in melted butter and stir until the mixture looks like wet sand. Press firmly into the bottom of a 9×13-inch dish or springform pan. Refrigerate while preparing the filling.
- Pour cold heavy whipping cream into a chilled large mixing bowl. Using an electric mixer on medium-high speed, whip until stiff peaks form, about 3-4 minutes. Set aside in the refrigerator.
- In another large mixing bowl, beat softened cream cheese on medium speed until smooth and creamy, about 2 minutes. Add powdered sugar and vanilla extract, beat on low until combined, then increase to medium and beat for another minute until light and fluffy.
- Add about one-third of the whipped cream to the cream cheese mixture and fold gently with a rubber spatula. Add the remaining whipped cream and fold until no white streaks remain. Be gentle to keep the mixture airy.
- Spread the cream cheese mixture evenly over the prepared crust. Spoon cherry pie filling over the top and spread gently to the edges. Cover with plastic wrap and refrigerate for at least 4 hours, preferably overnight.
- To serve, cut into squares or wedges. Serve cold. Optionally, drizzle extra cherry sauce from the can on top.
Notes
Ensure cream cheese is fully softened to avoid lumps. Chill the bowl and beaters for the whipped cream for best results. The dessert needs at least 4 hours to set; overnight is better. For a gluten-free version, use gluten-free graham crackers. For a lower-sugar option, use a sugar substitute in the cream cheese layer.
Nutrition
- Serving Size: 1 slice (1/12 of rec
- Calories: 380
- Sugar: 28
- Sodium: 220
- Fat: 24
- Saturated Fat: 14
- Carbohydrates: 38
- Protein: 4
Keywords: cherries in the snow, cream cheese dessert, no-bake dessert, cherry dessert, easy dessert


