The neighborhood Halloween party was in six hours and I’d completely forgotten. I mean, completely. I’d RSVP’d yes — enthusiastically, even — and then gotten so buried in work and life that the date snuck up on me like a ghost in the dark. Everyone else would be bringing elaborate, Pinterest-worthy creations: graveyard cakes with crushed Oreo dirt, meringue ghosts, those little hot dog mummies wrapped in crescent dough. And me? I had a half-stick of butter, some cocoa powder I bought on a whim, and a sugar cookie recipe I’d memorized years ago.
I stood in my kitchen, staring into the pantry like it owed me something. Honestly, I almost just grabbed a bag of chips and called it a day. But then I saw the jar of black gel icing leftover from last Christmas, and something clicked. What if I made chocolate sugar cookies and drew spider webs on top? It was a gamble — I mean, I’m no artist. But the clock was ticking, and desperate times call for desperate cookie hacks. Maybe you’ve been there, staring down a deadline with nothing but flour and hope.
So I mixed up a batch of these chocolate spider web sugar cookies, praying they’d look at least halfway decent. And let me tell you — they didn’t just look good. They vanished. People were grabbing two and three at a time, asking if I’d taken a class or found some secret recipe online. Nope. Just a panicked baker with a steady hand and a tube of icing. I’ve made them every Halloween since, and every single time, someone asks for the recipe. So here it is — the cookie that turned my kitchen panic into a party legend.
Why You’ll Love This Recipe
These chocolate spider web sugar cookies aren’t just another Halloween dessert — they’re the kind of thing that makes people stop mid-conversation and ask, “Wait, you made these?” I’ve tested this recipe at four separate gatherings now, and the result is always the same: empty plates and requests for the recipe. Here’s what makes them stand out.
- Quick & Easy : From start to finish, you’re looking at about 45 minutes. The dough comes together in one bowl, and there’s no chilling time required. For a last-minute party panic, this is your hero.
- Simple Ingredients : Butter, sugar, eggs, flour, cocoa powder — all pantry staples. You probably have everything except maybe the black gel icing, and that’s easy to find at any grocery store around October.
- Perfect for Halloween Gatherings : Whether it’s a potluck, a classroom party, or a spooky dinner with friends, these cookies fit right in. They’re festive without being over-the-top, and they travel beautifully.
- Crowd-Pleaser : Kids love the spider web design, and adults appreciate that they’re not loaded with artificial colors or flavors. I’ve watched grown men eat four in a row without blinking.
- Unbelievably Delicious : The chocolate cookie base is soft, rich, and just sweet enough. The vanilla icing on top adds a creamy contrast that makes each bite feel special.
What really sets this recipe apart is the technique. Instead of a complicated royal icing situation, I use a simple powdered sugar glaze that dries matte and holds the web design perfectly. It’s forgiving, it’s fast, and it looks like you spent hours on it. I’ve tried the piping bag method, the toothpick swirl method, and even the plastic baggie hack — this version wins every time. It’s the kind of cookie that makes you feel like a baking rockstar, even if you’re just a regular person trying to impress a crowd.
What Ingredients You Will Need
This recipe uses simple, wholesome ingredients to deliver bold chocolate flavor and a soft, tender crumb. Most of these are pantry staples, which means you can whip up a batch without a special trip to the store. Here’s what you’ll need and why each one matters.
For the Chocolate Sugar Cookies
- 1 cup (226g) unsalted butter, softened — I prefer Land O’Lakes for consistent results. The butter creates that tender, melt-in-your-mouth texture.
- 1 cup (200g) granulated sugar — Regular white sugar works best here. It gives the cookies a nice crisp edge while keeping the centers soft.
- 1 large egg, room temperature — Cold eggs can seize the dough. Let yours sit out for 15 minutes before starting.
- 1 teaspoon vanilla extract — Pure vanilla, not imitation. It makes a real difference in the depth of flavor.
- 1 ¾ cups (220g) all-purpose flour — Spoon and level your flour for the best texture. Packed flour leads to dense cookies.
- ½ cup (45g) unsweetened cocoa powder — I use Hershey’s Special Dark for a richer color and flavor. Regular cocoa works too, but the dark version makes the webs pop.
- ½ teaspoon baking powder — This gives the cookies a slight lift without making them puffy.
- ¼ teaspoon salt — Just enough to balance the sweetness and enhance the chocolate.
For the Spider Web Icing

- 1 cup (120g) powdered sugar — Sift it first to avoid lumps in your glaze.
- 2-3 tablespoons milk — Whole milk gives the creamiest texture, but any milk works. Add it slowly — you want a thick but pourable consistency.
- ½ teaspoon vanilla extract — Optional, but it adds a lovely warmth to the icing.
- Black gel icing — One tube is plenty. Wilton’s brand is my go-to; it writes smoothly and doesn’t bleed into the white icing.
Ingredient Tips and Substitutions
For a dairy-free version, swap the butter for a plant-based stick butter (I like Country Crock Plant Butter) and use oat milk in the icing. The texture will be slightly less tender, but still delicious. If you’re gluten-free, use a 1:1 gluten-free baking flour blend — just add an extra tablespoon of milk to the dough since gluten-free flours absorb more moisture. And if you can’t find black gel icing, you can make your own by mixing ½ cup powdered sugar with 1 tablespoon milk and 1 teaspoon black cocoa powder. It won’t be as dark, but it’ll still look great.
Equipment Needed
You don’t need a professional bakery setup for these cookies, but a few key tools make the process much smoother. Here’s what I use and what you can substitute if needed.
- Electric hand mixer or stand mixer — Creaming the butter and sugar by hand is possible, but it takes forever. A mixer saves your arm and gives you a fluffier dough.
- Large mixing bowl — Any bowl works, but a wide one makes mixing easier.
- Baking sheets — I use two Nordic Ware half-sheet pans. They heat evenly and don’t warp.
- Parchment paper — Non-negotiable. It prevents sticking and makes cleanup a dream. Silicone baking mats also work well.
- Cookie scoop — A 1.5-tablespoon scoop gives you uniform cookies that bake evenly. No scoop? Use a spoon and roll the dough into balls.
- Wire cooling rack — Essential for letting the icing set properly. If you don’t have one, cool the cookies on the baking sheet, then transfer to a plate.
- Small piping bag or zip-top bag — For the white icing drizzle. A zip-top bag with a tiny corner snipped off works perfectly.
- Toothpick or skewer — This is the secret tool for creating the spider web pattern. A toothpick is easier to control, but a skewer works for larger cookies.
I picked up my cookie scoop at a kitchen supply store for about eight dollars, and it’s been worth every penny. If you’re just starting out, don’t stress about fancy equipment — a spoon, a bowl, and a bit of patience are all you truly need.
Preparation Method
These chocolate spider web sugar cookies come together in about 45 minutes, including baking and decorating. Here’s how to make them, step by step.
- Preheat your oven to 350°F (175°C) and line two baking sheets with parchment paper. I always do this first so the oven is ready when I am.
- Cream the butter and sugar. In a large mixing bowl, beat the softened butter and granulated sugar together until light and fluffy — about 3 minutes with a hand mixer on medium speed. The mixture should look pale and slightly increased in volume. Scrape down the sides of the bowl halfway through.
- Add the egg and vanilla. Crack the egg into the bowl and add the vanilla extract. Beat on medium speed until fully incorporated, about 30 seconds. The mixture might look slightly curdled — that’s totally normal and won’t affect the final cookies.
- Combine the dry ingredients. In a separate bowl, whisk together the flour, cocoa powder, baking powder, and salt. I use a fork for this because it’s faster than sifting and breaks up any cocoa clumps.
- Mix the dough. Gradually add the dry ingredients to the wet mixture, mixing on low speed. Stop as soon as the flour disappears — overmixing makes tough cookies. The dough will be soft but not sticky. If it feels too sticky to handle, add a tablespoon of flour and mix gently.
- Scoop and shape. Use your cookie scoop to portion the dough into 1.5-tablespoon balls. Roll each ball between your palms until smooth, then place them on the prepared baking sheets about 2 inches apart. I fit 12 cookies per sheet.
- Bake. Bake for 9-11 minutes, rotating the pans halfway through. The cookies should look set around the edges but still soft in the center — they’ll continue baking on the hot pan. Don’t overbake, or they’ll lose that tender texture. Let them cool on the baking sheet for 5 minutes, then transfer to a wire rack to cool completely.
- Make the white icing. While the cookies cool, whisk together the powdered sugar, 2 tablespoons of milk, and vanilla extract in a small bowl. The icing should be thick but pourable — add the third tablespoon of milk if needed. It should fall off the whisk in a smooth ribbon.
- Drizzle the base layer. Once the cookies are completely cool, spoon a small amount of white icing onto the center of each cookie. Use the back of the spoon to spread it gently toward the edges, leaving a small border of chocolate visible. Don’t worry about perfection — the web design will cover any uneven spots.
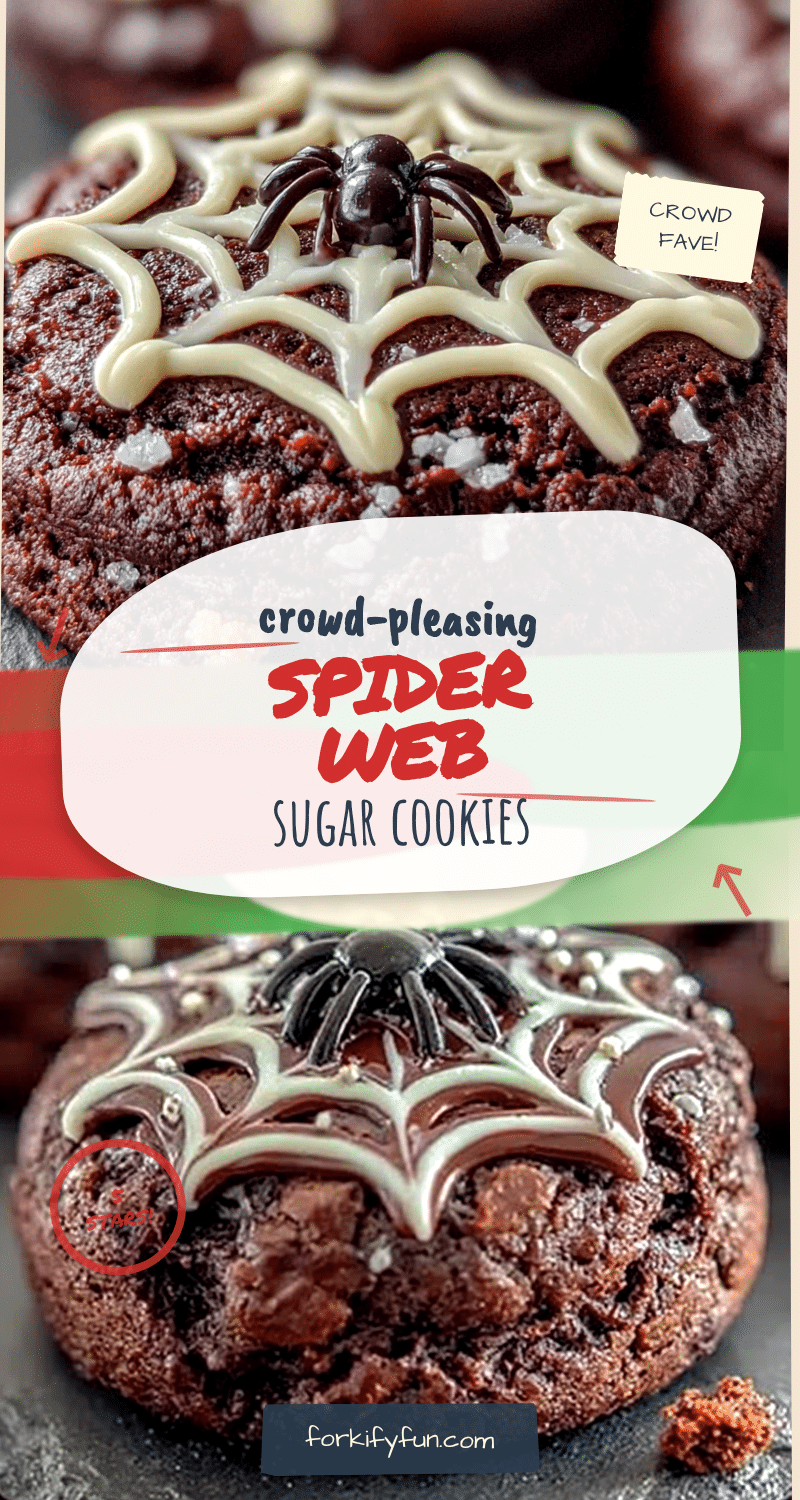
- Create the spider webs. Let the white icing sit for 2-3 minutes — it should still be wet but slightly tacky. Using your black gel icing, pipe a small circle in the center of the white icing. Then pipe 3-4 concentric circles around it, spaced about ½ inch apart. Working quickly, drag a toothpick from the center circle outward through all the rings, like spokes on a wheel. Repeat this 6-8 times around the cookie, spacing the spokes evenly. The toothpick will pull the black icing through the white, creating a beautiful web pattern.
- Let the icing set. Allow the cookies to sit at room temperature for about 20 minutes, or until the icing is firm to the touch. If you’re in a hurry, pop them in the fridge for 10 minutes.
A quick note on the web technique: if the white icing has set too much before you add the black rings, the toothpick won’t drag cleanly. Work in batches of 3-4 cookies at a time, keeping the rest of the iced cookies waiting. This way, the white icing is always at the right consistency.
Cooking Tips & Techniques
I’ve made these chocolate spider web sugar cookies about a dozen times now, and I’ve learned a few things the hard way. Let me save you the trouble.
Don’t skip the parchment paper. I once tried baking these directly on a greased pan, and the bottoms browned too quickly while the centers stayed underdone. Parchment paper creates a buffer that helps the cookies bake evenly. Plus, cleanup takes about three seconds.
Room temperature ingredients matter. I know, I know — it’s tempting to use cold butter straight from the fridge. But cold butter doesn’t cream properly with the sugar, which means your cookies won’t spread evenly. Leave the butter out for at least 30 minutes before starting. If you’re in a rush, cut it into small cubes and microwave for 5-second intervals until softened but not melted.
The toothpick trick is everything. The first time I made these, I tried piping the web design freehand with the black icing. It looked like a toddler’s art project. The toothpick method — dragging through concentric circles — creates perfect, symmetrical webs every time. Just make sure your toothpick is clean between cookies. I keep a paper towel nearby and wipe it after each one.
Watch the bake time. Every oven runs differently. My old oven would bake these in exactly 9 minutes, but my current one needs 11. Start checking at 9 minutes — the cookies should look puffed and slightly cracked on top. If they’re still shiny, give them another minute. And remember, they’ll firm up as they cool, so don’t wait until they look fully done in the oven.
Multitask like a pro. While the first batch bakes, scoop the second batch onto the other pan. By the time the first batch comes out, the second is ready to go in. This cuts your total active time in half. I also make the white icing while the cookies cool, so everything is ready at once.
One mistake I’ll never make again: I once tried to speed up the icing process by piping the white glaze while the cookies were still warm. The glaze melted into a puddle and soaked into the cookie, leaving a sticky mess. Always, always let the cookies cool completely — at least 20 minutes on the rack.
Variations & Adaptations
One of the best things about this recipe is how flexible it is. Here are some variations I’ve tried and loved.
Gluten-Free Version : I made these for a friend with celiac disease using King Arthur’s Measure-for-Measure gluten-free flour. The dough was slightly drier, so I added an extra tablespoon of milk. The cookies came out a bit more crumbly but still delicious. Just handle them gently when decorating.
Vegan Adaptation : Swap the butter for plant-based butter, use a flax egg (1 tablespoon ground flaxseed mixed with 3 tablespoons water), and use oat milk in the icing. The texture is slightly less tender, but the flavor is still rich and chocolatey. I tested this version for a vegan potluck and got zero complaints.
Spider Variation : Instead of just webs, add a tiny spider on top. Pipe a small black circle with the gel icing, then add eight tiny legs extending outward. It’s a cute touch that kids absolutely love. I did this for my nephew’s Halloween party, and the spiders were the first to disappear.
Color Twist : Swap the white icing for pastel colors — orange, purple, or green. I tried a batch with neon green icing and black webs, and they looked like something from a haunted house. Just use gel food coloring to tint the white icing before piping.
Peppermint Chocolate : Add ½ teaspoon peppermint extract to the cookie dough along with the vanilla. The minty-chocolate combo is surprisingly perfect for Halloween. I made these for a fall bake sale, and they sold out in 20 minutes.
No-Icing Option : If you’re short on time, skip the white icing altogether. Just bake the chocolate cookies, let them cool, and pipe the black webs directly onto the cookie surface. They won’t look as dramatic, but they’ll still be delicious and festive.
Serving & Storage Suggestions
These chocolate spider web sugar cookies are best served at room temperature, ideally within 24 hours of decorating. The icing stays matte and the cookie stays soft — it’s the perfect texture combination. For a Halloween party, arrange them on a platter lined with orange or black napkins. I like to scatter a few candy corn pieces around for extra color.
If you’re serving them at a gathering, here’s what I’ve learned: these cookies are sturdy enough to stack, but the icing can smudge if they rub against each other. I place a small square of parchment paper between layers when transporting them. They travel beautifully in a cookie tin or a disposable aluminum pan with a lid.
Storage : Keep the cookies in an airtight container at room temperature for up to 5 days. The icing will stay firm, and the cookies will remain soft. Don’t refrigerate them — the cold dries out the cookies and makes the icing crack.
Freezing : You can freeze the undecorated cookies for up to 3 months. Bake and cool them completely, then place them in a single layer in a freezer-safe bag. When you’re ready to decorate, thaw them at room temperature for about an hour, then proceed with the icing. I’ve done this for two Halloweens now, and it works perfectly — just don’t thaw them in the microwave, or they’ll get soggy.
Reheating : These cookies don’t really need reheating, but if you want that just-baked warmth, pop one in the microwave for 8-10 seconds. The icing will soften slightly, but the cookie will taste fresh from the oven.
Flavor Development : Here’s a little secret — these cookies actually taste better the next day. The cocoa flavor deepens overnight, and the texture settles into a perfect chewy-soft balance. I often make the dough a day ahead and bake them fresh the morning of the party. If you’re planning ahead, this is the way to go.
Nutritional Information & Benefits
Let’s be honest — these are a treat, not a health food. But they’re made with real ingredients, and that counts for something. Here’s the approximate nutritional breakdown per cookie (based on 24 cookies):
- Calories : 145
- Total Fat : 7g
- Saturated Fat : 4g
- Carbohydrates : 20g
- Sugar : 12g
- Protein : 2g
- Fiber : 1g
The cocoa powder in these cookies is actually a decent source of antioxidants — specifically flavonoids, which are linked to heart health. The butter provides vitamin A, and the eggs add a small amount of protein. Are they going to replace your morning smoothie? No. But as far as Halloween treats go, these are on the lighter side compared to a lot of store-bought options.
Dietary Considerations : This recipe contains dairy, eggs, and gluten. For allergen-free versions, see the variations section above. The cookies are naturally nut-free if you use standard ingredients, but always check labels if you’re serving someone with severe allergies.
My personal take? I’d rather eat two of these homemade cookies than a handful of artificially colored, preservative-laden candy. At least I know exactly what went into them — butter, sugar, cocoa, and a whole lot of love. And honestly, that makes them feel a little bit better, even if the nutrition label says otherwise.
Conclusion
These chocolate spider web sugar cookies have become my go-to Halloween contribution for a reason. They look impressive, they taste incredible, and they come together in under an hour — even when you’ve completely forgotten about the party until the last minute. I’ve made them for potlucks, classroom parties, and spooky dinner gatherings, and they’ve never let me down.
The best part? You can make them your own. Change the colors, add a spider, skip the icing entirely — the base cookie is so good that it works no matter what you do. I’d love to hear how yours turn out. Did you try a fun variation? Did the spider web design come out perfectly on the first try? Drop a comment below and let me know — I read every single one, and I’m always looking for new ideas to test in my kitchen.
So go ahead, grab that tube of black gel icing and give these a shot. Your Halloween party guests will thank you. And if you’re anything like me, you’ll end up making them every single year — panic or no panic.
Frequently Asked Questions
Can I make the dough ahead of time?
Absolutely. You can prepare the dough up to 2 days in advance and keep it wrapped tightly in the refrigerator. Let it sit at room temperature for about 15 minutes before scooping and baking — it’ll be easier to handle.
Why did my spider web design turn into a blob?
This usually happens when the white icing is too thin or too wet when you add the black rings. Let the white icing sit for 2-3 minutes after spreading — it should be tacky but not dry. Also, make sure you’re using a light hand with the toothpick. Gentle drags create clean lines.
Can I use a different type of icing?
Sure. Royal icing works beautifully if you want a harder, shinier finish. Just mix 1 cup powdered sugar with 1 tablespoon meringue powder and 2 tablespoons water. The web technique works the same way — pipe concentric circles and drag through with a toothpick.
How do I prevent the cookies from spreading too much?
If your cookies are turning into flat puddles, your butter might have been too soft or your dough too warm. Chill the scooped dough balls in the fridge for 15 minutes before baking. Also, make sure your baking powder isn’t expired — old leavener can cause excessive spreading.
Can I freeze the decorated cookies?
I don’t recommend it. The icing can crack and become sticky when thawed. Instead, freeze the undecorated cookies and add the icing after they’ve thawed at room temperature. The texture stays perfect, and the design will look fresh.
Pin This Recipe!
Chocolate Spider Web Sugar Cookies

These chocolate spider web sugar cookies are a quick and easy Halloween treat that looks impressive but comes together in under an hour. With a soft, rich chocolate cookie base and a simple vanilla glaze spider web design, they’re perfect for last-minute parties and always a crowd-pleaser.
- Prep Time: 15 minutes
- Cook Time: 10 minutes
- Total Time: 45 minutes
- Yield: 24 cookies 1x
- Category: Dessert
- Cuisine: American
Ingredients
- 1 cup (226g) unsalted butter, softened
- 1 cup (200g) granulated sugar
- 1 large egg, room temperature
- 1 teaspoon vanilla extract
- 1 ¾ cups (220g) all-purpose flour
- ½ cup (45g) unsweetened cocoa powder
- ½ teaspoon baking powder
- ¼ teaspoon salt
- 1 cup (120g) powdered sugar
- 2–3 tablespoons milk
- ½ teaspoon vanilla extract (optional)
- Black gel icing
Instructions
- Preheat your oven to 350°F (175°C) and line two baking sheets with parchment paper.
- In a large mixing bowl, beat the softened butter and granulated sugar together until light and fluffy — about 3 minutes with a hand mixer on medium speed.
- Add the egg and vanilla extract. Beat on medium speed until fully incorporated, about 30 seconds.
- In a separate bowl, whisk together the flour, cocoa powder, baking powder, and salt.
- Gradually add the dry ingredients to the wet mixture, mixing on low speed until just combined. The dough will be soft but not sticky.
- Use a cookie scoop to portion the dough into 1.5-tablespoon balls. Roll each ball between your palms until smooth, then place them on the prepared baking sheets about 2 inches apart.
- Bake for 9-11 minutes, rotating the pans halfway through. The cookies should look set around the edges but still soft in the center. Let them cool on the baking sheet for 5 minutes, then transfer to a wire rack to cool completely.
- While the cookies cool, whisk together the powdered sugar, 2 tablespoons of milk, and vanilla extract in a small bowl. The icing should be thick but pourable — add the third tablespoon of milk if needed.
- Once the cookies are completely cool, spoon a small amount of white icing onto the center of each cookie. Use the back of the spoon to spread it gently toward the edges, leaving a small border of chocolate visible.
- Let the white icing sit for 2-3 minutes. Using your black gel icing, pipe a small circle in the center of the white icing. Then pipe 3-4 concentric circles around it, spaced about ½ inch apart. Working quickly, drag a toothpick from the center circle outward through all the rings, like spokes on a wheel. Repeat this 6-8 times around the cookie.
- Allow the cookies to sit at room temperature for about 20 minutes, or until the icing is firm to the touch.
Notes
For best results, work in batches of 3-4 cookies at a time when adding the spider web design to ensure the white icing is still tacky. If the white icing sets too much, the toothpick won’t drag cleanly. You can freeze undecorated cookies for up to 3 months.
Nutrition
- Serving Size: 1 cookie
- Calories: 145
- Sugar: 12
- Sodium: 75
- Fat: 7
- Saturated Fat: 4
- Carbohydrates: 20
- Fiber: 1
- Protein: 2
Keywords: Halloween cookies, spider web cookies, chocolate sugar cookies, easy Halloween recipe, last-minute Halloween treat