My neighbor, Mrs. Gable, watched me struggling with a wobbly pumpkin pie one Thanksgiving. The crust had slid right off the edge of the plate, and the filling was weeping. She didn’t say anything at first. Then she shuffled back to her apartment and returned with a square glass dish, still warm, wrapped in a checkered tea towel. “Try these,” she said, her voice a little gruff. “No fuss. No rolling pin needed.” Inside were these perfect little bars—creamy, spiced, with a dark, crunchy base that tasted like Christmas. She’d learned the trick from her mother-in-law, who’d learned it from a neighbor in her building back in the 50s. It wasn’t a formal lesson. It was just how things were shared. I’ve made them every fall since, and honestly, I think I like them more than pie. They’re easier, they don’t crack, and that gingersnap crust? Let me tell you, it’s a game-changer. Maybe you’ve been there, wrestling with pastry dough that just won’t cooperate. This recipe is the solution you didn’t know you needed.
These Budget-Friendly Pumpkin Cheesecake Bars with Gingersnap Crust have become my go-to for family dinners, potlucks, and even just a quiet Tuesday night treat. They’re the kind of dessert that feels fancy but is secretly one of the simplest things you can make. The first time I served them, my husband asked if I’d bought them from a bakery. I just smiled. The secret is out now, and I’m so happy to share it with you.
Why You’ll Love This Recipe
I’ve tested this recipe about a dozen times to get it just right. Here’s why it works so well for a family on a budget:
- Easy on the Wallet: A single can of pumpkin puree and a block of cream cheese go a long way. No expensive specialty ingredients here.
- No-Fuss Crust: Forget rolling out pastry. The gingersnap crust is just crushed cookies and butter. It takes five minutes to press into the pan.
- Perfect for Picky Eaters: The creamy cheesecake layer mellows out the pumpkin flavor. Even my kids, who claim to “hate” pumpkin pie, devour these bars.
- Make-Ahead Magic: These bars actually taste better the next day. You can make them a day or two ahead for a party, saving you stress on the big day.
- Freezes Like a Dream: Wrap individual bars and freeze them for up to three months. It’s a lifesaver for unexpected guests or a quick dessert craving.
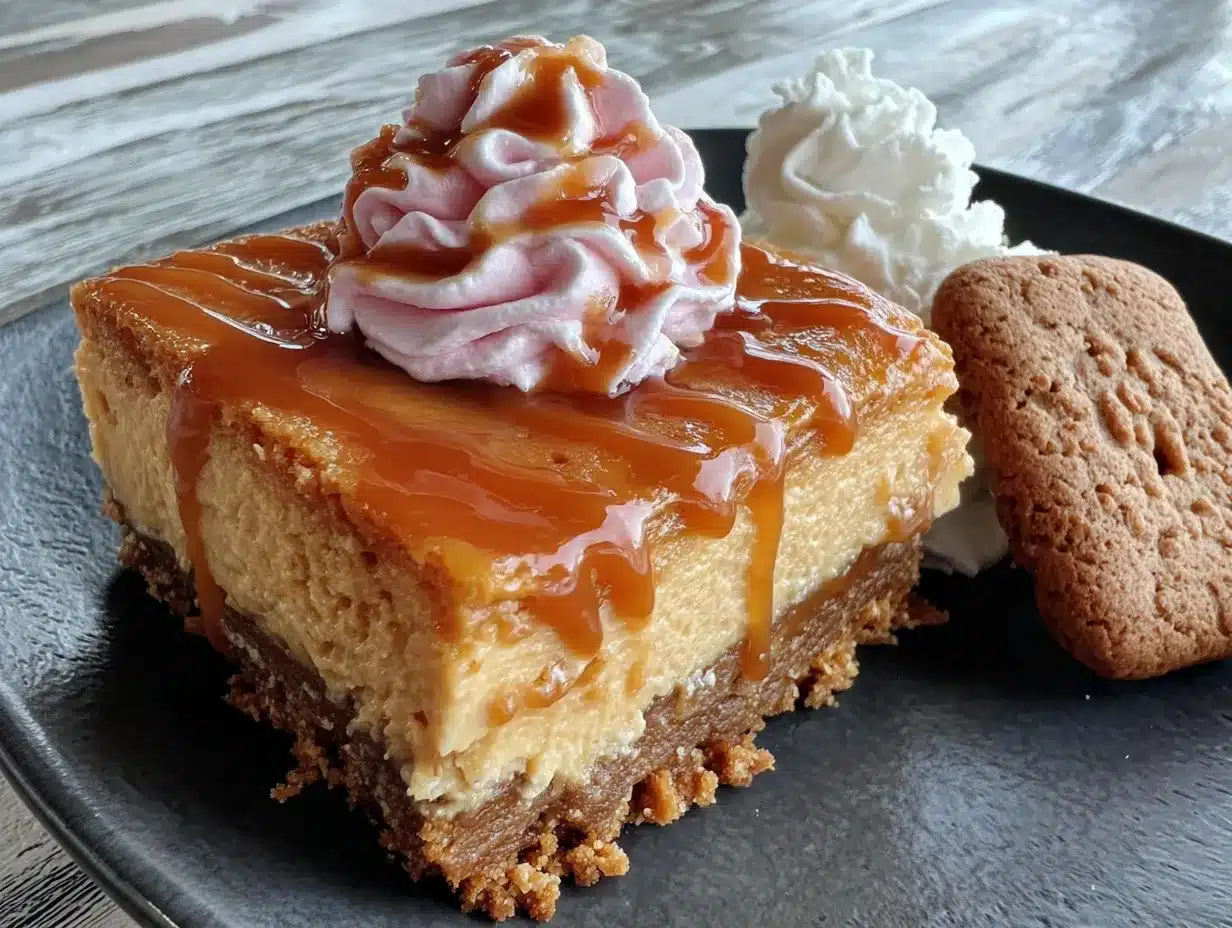
What makes this recipe different from the rest is the balance. The spicy, crunchy gingersnap crust is the perfect counterpoint to the silky, smooth pumpkin cheesecake filling. It’s not too sweet, not too heavy—just right. Honestly, it’s the kind of dessert that makes you close your eyes after the first bite. It’s comfort food reimagined: faster, cheaper, but with the same soul-soothing satisfaction.
What Ingredients You Will Need
This recipe uses simple, everyday ingredients to create something truly special. Most of these are probably in your pantry or fridge right now.
For the Gingersnap Crust
- 1 ½ cups gingersnap cookie crumbs (about 6 ounces or 170g, from one 14-ounce box, crushed finely)
- ¼ cup packed brown sugar (50g, light or dark works fine)
- 5 tablespoons unsalted butter (70g, melted)
- Pinch of salt (optional, but I like it to balance the sweetness)
For the Pumpkin Cheesecake Filling
- 16 ounces cream cheese (two 8-ounce blocks, softened to room temperature. I use Philadelphia because it gives the creamiest texture.)
- 1 cup granulated sugar (200g)
- 1 cup canned pumpkin puree (not pumpkin pie filling. Libby’s is my go-to brand.)
- 3 large eggs (room temperature)
- 1 teaspoon vanilla extract
- 1 ½ teaspoons pumpkin pie spice (or 1 teaspoon cinnamon, ½ teaspoon ginger, ¼ teaspoon nutmeg, and ¼ teaspoon cloves)
- 1 tablespoon all-purpose flour (this helps prevent cracking)
For the crust, I really recommend using store-bought gingersnaps. They’re cheap and consistent. If you’re feeling ambitious, you can make your own, but honestly, the boxed ones work perfectly. For the cream cheese, make sure it’s fully softened. Cold cream cheese will give you a lumpy batter, and nobody wants that.
If you need a substitute, you can use graham crackers with a teaspoon of ground ginger and cinnamon for the crust. It won’t be quite as punchy, but it’ll still be delicious. For a dairy-free version, use a plant-based cream cheese block (not the spreadable kind) and vegan butter.
Equipment Needed
You don’t need a fancy kitchen to make these bars. Here’s what you’ll need:
- 9×9-inch square baking pan (An 8×8 also works, but your bars will be slightly thicker and need a few extra minutes of baking.)
- Parchment paper (for easy lifting—trust me on this)
- Mixing bowls (one medium, one large)
- Hand mixer or stand mixer (a whisk and some elbow grease also work, but a mixer makes it much easier)
- Food processor or zip-top bag and rolling pin (for crushing the cookies)
- Measuring cups and spoons
- Spatula
I’ve used a cheap hand mixer for years, and it works perfectly. No need for a fancy stand mixer. If you don’t have a food processor, put the cookies in a zip-top bag, seal it, and go at it with a rolling pin. It’s a great way to release some frustration!
Line your pan with parchment paper, leaving some overhang on two sides. This creates “handles” that let you lift the entire block of bars out cleanly. It’s a little trick I learned after trying to dig out the first corner with a spatula and ending up with a messy pile. Don’t skip this step.
Preparation Method
Let’s get baking. This recipe comes together in about 45 minutes of active time, plus chilling. Plan ahead for the cooling and setting time.
Step 1: Preheat and Prep (5 minutes)
Preheat your oven to 350°F (175°C). Line your 9×9-inch pan with parchment paper, leaving overhang on two opposite sides. Set it aside.
Step 2: Make the Gingersnap Crust (10 minutes)
Place the gingersnap cookies in a food processor and pulse until you have fine crumbs. You should have about 1 ½ cups. If you’re using the bag method, crush them until no large pieces remain. In a medium bowl, combine the crumbs, brown sugar, and a pinch of salt. Pour in the melted butter and stir with a fork until the mixture looks like wet sand and holds together when you squeeze it.
Press the mixture firmly into the bottom of your prepared pan. Use the bottom of a measuring cup or a flat-bottomed glass to get it even and compact. Bake the crust for 8 minutes. It will smell amazing. Set it aside to cool slightly while you make the filling.
Step 3: Make the Pumpkin Cheesecake Filling (15 minutes)
In a large mixing bowl, beat the softened cream cheese with a hand mixer on medium speed until it’s smooth and creamy, about 2 minutes. Scrape down the sides of the bowl. Add the sugar and beat until combined, another minute or so.
Add the pumpkin puree, vanilla extract, and pumpkin pie spice. Beat on low speed until just combined. Don’t overmix here—you don’t want to incorporate too much air, which can cause cracks later.
Add the eggs, one at a time, beating on low speed after each addition just until the yolk disappears. Finally, sprinkle the flour over the batter and mix on low until it’s incorporated. The batter will be smooth, thick, and a beautiful orange color.
Step 4: Assemble and Bake (45-55 minutes)
Pour the filling over the pre-baked crust. Use a spatula to spread it evenly to the edges. Tap the pan gently on the counter a few times to release any air bubbles.
Place the pan in the preheated oven. Bake for 40 to 50 minutes. The edges should look set and slightly puffed, but the center will still have a slight jiggle when you gently shake the pan. This is the sweet spot. Overbaking will cause cracks. If you’re nervous, start checking at 35 minutes.
Turn off the oven and crack the door open. Let the cheesecake bars sit in the cooling oven for 15 minutes. This gentle cooling helps prevent the top from cracking. Then, remove the pan from the oven and place it on a wire rack to cool completely to room temperature. This will take about 1 to 2 hours.
Step 5: Chill and Serve (4 hours or overnight)
Once the bars are at room temperature, cover the pan with plastic wrap and refrigerate for at least 4 hours, but overnight is best. This is the hardest part—the waiting. But I promise, it’s worth it. The bars need this time to fully set and for the flavors to meld.
When you’re ready to serve, use the parchment paper handles to lift the block out of the pan. Place it on a cutting board. Use a sharp knife to slice into 16 squares. For clean cuts, wipe the knife clean between each slice.
Cooking Tips & Techniques
I’ve made this recipe enough times to have a few mishaps. Here’s what I’ve learned so you don’t have to make the same mistakes.
Room Temperature Ingredients Are Non-Negotiable. Cold cream cheese and cold eggs will give you a lumpy, curdled-looking batter. I learned this the hard way when I was in a hurry. The bars still tasted okay, but the texture was grainy. Take the cream cheese and eggs out of the fridge an hour before you start baking.
Don’t Overmix the Batter. Once you add the eggs, beat on low speed and stop as soon as they’re incorporated. Overmixing incorporates too much air, which expands in the oven and then collapses, leaving you with cracks. A few tiny cracks are fine—they add character. But a giant canyon in the middle? That’s avoidable.
Use a Water Bath (Optional but Helpful). If you’re really worried about cracking, place your 9×9 pan inside a larger roasting pan. Pour hot water into the larger pan until it comes about halfway up the sides of the 9×9 pan. The steam creates a humid environment that prevents the cheesecake from drying out and cracking. I don’t always do this because it’s a bit fussy, but it works like a charm.
Patience with Chilling. I know you’ll want to dig in as soon as they’re cool, but the bars need that fridge time to set. If you cut them too soon, they’ll be a gooey mess. Give them the full four hours minimum. Your future self will thank you.
Variations & Adaptations
This recipe is wonderfully flexible. Here are some ways to make it your own.
Gluten-Free Version
Use gluten-free gingersnap cookies for the crust. Most brands are naturally gluten-free, but double-check the label. The filling is naturally gluten-free as long as you use a gluten-free flour blend (or just omit the flour—it’ll be slightly more delicate but still delicious).
Dairy-Free Version
Use a block of dairy-free cream cheese (I like the one from Miyoko’s Kitchen) and vegan butter for the crust. The texture will be slightly less firm, but the flavor is still fantastic.
Pumpkin Spice Latte Twist
Add 1 tablespoon of instant espresso powder dissolved in 1 tablespoon of hot water to the filling along with the pumpkin. It deepens the spice flavor and adds a subtle coffee note that’s absolutely divine.
No-Bake Option
For a no-bake version, skip the eggs and flour. Beat the cream cheese and sugar, then fold in the pumpkin and spices. Fold in 1 cup of thawed whipped topping. Pour into the pre-baked crust and chill for at least 6 hours. It’s lighter and fluffier, and perfect for hot days when you don’t want to turn on the oven.
Personally, I love the classic version best, but on busy weeks, I’ve made the no-bake version and nobody complained. It’s a little less rich, but still hits that pumpkin cheesecake craving.
Serving & Storage Suggestions
These bars are wonderful served cold, straight from the fridge. The texture is firm and creamy, like a classic cheesecake. If you prefer a softer texture, let them sit at room temperature for about 15 minutes before serving.
For presentation, I like to dust the top with a little extra cinnamon or a light sprinkle of powdered sugar. A dollop of whipped cream and a small gingersnap cookie on the side makes them look extra special. They pair beautifully with a hot cup of coffee or a glass of cold milk.
These bars are also fantastic for a fall dessert table alongside a warm apple crisp or a slice of pumpkin bread.
Storage: Keep the bars in an airtight container in the refrigerator for up to 5 days. They actually taste better on day two or three, as the flavors continue to meld.
Freezing: These freeze beautifully. Wrap individual bars tightly in plastic wrap, then place them in a freezer-safe bag or container. They’ll keep for up to 3 months. To thaw, transfer a bar to the refrigerator overnight. I often keep a stash in the freezer for when a dessert craving strikes unexpectedly.
Reheating: I wouldn’t recommend reheating these. They’re meant to be served cold. If you want a warm dessert, try a different recipe. But honestly, they’re perfect just as they are.
Nutritional Information & Benefits
Here’s the estimated nutritional breakdown for one bar (based on 16 servings):
- Calories: 245
- Fat: 14g
- Saturated Fat: 8g
- Cholesterol: 70mg
- Sodium: 210mg
- Carbohydrates: 27g
- Fiber: 1g
- Sugar: 19g
- Protein: 5g
While these are definitely a treat, there are a few nutritional bright spots. Pumpkin is packed with vitamin A, which is great for eye health and immune function. It also provides fiber and antioxidants. The cream cheese adds a good amount of calcium and protein. The gingersnaps contain ginger, which can aid digestion—a nice bonus after a heavy meal.
This recipe is vegetarian and can easily be made gluten-free or dairy-free with the substitutions mentioned above. It contains dairy, eggs, and gluten (unless modified).
I love that I can serve these to my family and feel good about it. It’s not health food, but it’s made with real ingredients, and that counts for something.
Frequently Asked Questions
Can I use fresh pumpkin instead of canned?
Yes, you can. Roast a sugar pumpkin until tender, then puree it until smooth. You’ll need about 1 cup of puree. Be sure to drain off any excess liquid by pressing it through a fine-mesh sieve or cheesecloth. Canned pumpkin is more consistent in texture, which is why I usually recommend it.
Why did my cheesecake crack?
Cracks happen for a few reasons: overmixing the batter, overbaking, or sudden temperature changes. Make sure your ingredients are at room temperature, mix on low speed, and don’t overbake. The gentle cooling in the oven with the door cracked open also helps prevent cracks. And remember, a little crack never hurt anyone—you can always cover it with whipped cream!
Can I use a different crust?
Absolutely. Graham crackers with added cinnamon and ginger work well. You can also use vanilla wafers, shortbread cookies, or even crushed pretzels for a salty-sweet twist. Just keep the butter-to-crumb ratio the same.
How do I get clean slices?
Use a sharp, thin-bladed knife. Wipe the blade clean with a damp paper towel between each cut. For the cleanest slices, chill the bars for at least 4 hours, or overnight. You can even pop them in the freezer for 20 minutes before cutting.
Can I make these in a different pan size?
Yes. For a 9×13-inch pan, double the recipe. The baking time will be similar, but start checking at 35 minutes. For an 8×8-inch pan, the bars will be thicker and need about 5 to 10 extra minutes of baking time. For mini muffin tins, use a small cookie scoop, press the crust, fill, and bake for about 15-18 minutes.
Conclusion
These Budget-Friendly Pumpkin Cheesecake Bars with Gingersnap Crust have earned a permanent spot in my fall baking rotation. They’re proof that you don’t need expensive ingredients or complicated techniques to create something truly memorable. They’re the dessert you bring to a family gathering and watch disappear in minutes. They’re the treat you make on a quiet Sunday afternoon, just because.
I hope you’ll give them a try and make them your own. Maybe you’ll add a little extra spice, or top them with a drizzle of caramel. That’s the beauty of a good recipe—it’s a starting point, not a rulebook.
I’d love to hear how they turn out for you. Drop a comment below and let me know if your family loved them as much as mine does. And if you have a variation that works brilliantly, please share it! Happy baking, friends.
Pin This Recipe!
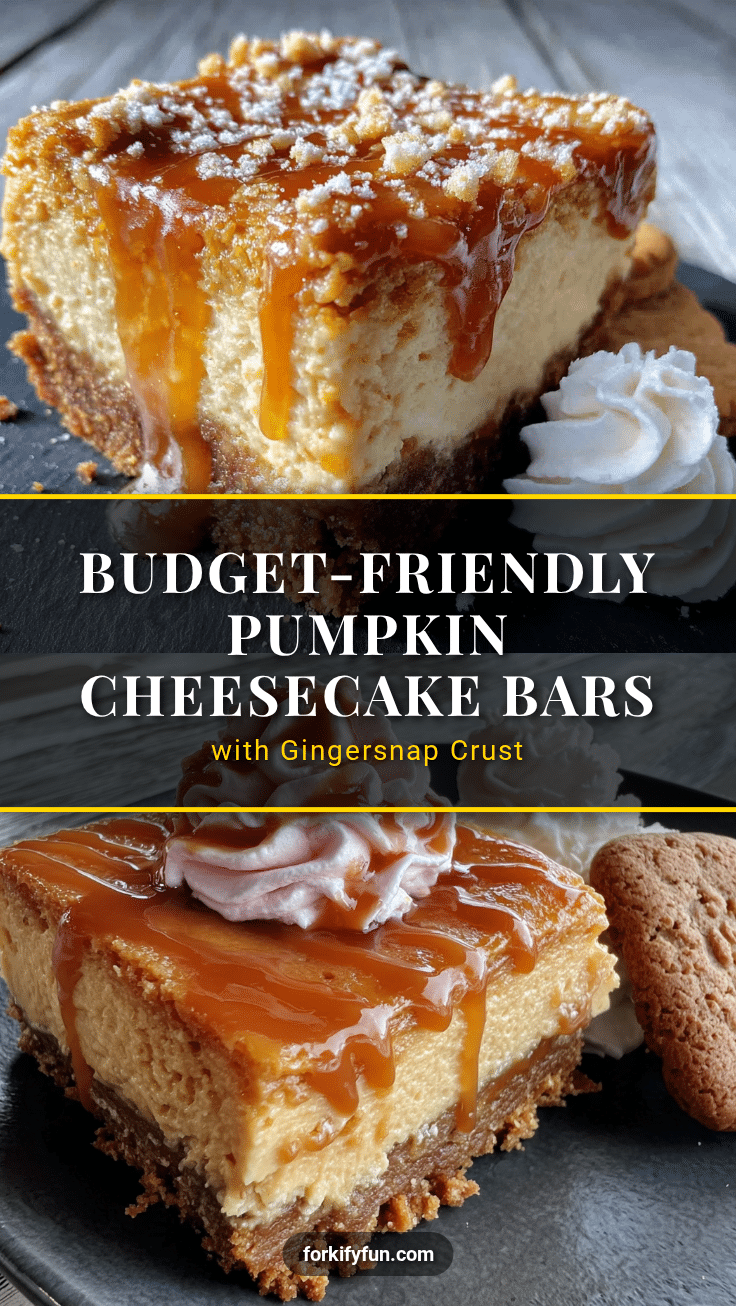
Budget-Friendly Pumpkin Cheesecake Bars with Gingersnap Crust
These creamy, spiced pumpkin cheesecake bars feature a crunchy gingersnap crust and are a no-fuss, budget-friendly alternative to pumpkin pie. Perfect for fall gatherings, they’re easy to make and taste even better the next day.
- Prep Time: 15 minutes
- Cook Time: 50 minutes
- Total Time: 5 hours 5 minutes (includes chilling)
- Yield: 16 servings 1x
- Category: Dessert
- Cuisine: American
Ingredients
- 1 ½ cups gingersnap cookie crumbs (about 6 ounces or 170g, from one 14-ounce box, crushed finely)
- ¼ cup packed brown sugar (50g, light or dark works fine)
- 5 tablespoons unsalted butter (70g, melted)
- Pinch of salt (optional)
- 16 ounces cream cheese (two 8-ounce blocks, softened to room temperature)
- 1 cup granulated sugar (200g)
- 1 cup canned pumpkin puree (not pumpkin pie filling)
- 3 large eggs (room temperature)
- 1 teaspoon vanilla extract
- 1 ½ teaspoons pumpkin pie spice (or 1 teaspoon cinnamon, ½ teaspoon ginger, ¼ teaspoon nutmeg, and ¼ teaspoon cloves)
- 1 tablespoon all-purpose flour
Instructions
- Preheat your oven to 350°F (175°C). Line a 9×9-inch baking pan with parchment paper, leaving overhang on two opposite sides.
- Make the crust: In a food processor or zip-top bag, crush gingersnap cookies into fine crumbs. In a medium bowl, combine crumbs, brown sugar, and a pinch of salt. Pour in melted butter and stir until the mixture resembles wet sand. Press firmly into the bottom of the prepared pan. Bake for 8 minutes. Set aside to cool slightly.
- Make the filling: In a large bowl, beat softened cream cheese with a hand mixer on medium speed until smooth, about 2 minutes. Add sugar and beat until combined. Add pumpkin puree, vanilla extract, and pumpkin pie spice; beat on low until just combined. Add eggs one at a time, beating on low after each addition. Sprinkle flour over batter and mix on low until incorporated.
- Pour filling over pre-baked crust and spread evenly. Tap the pan gently on the counter to release air bubbles. Bake for 40 to 50 minutes, until edges are set and center jiggles slightly. Turn off oven, crack the door, and let bars cool in the oven for 15 minutes. Then remove and cool completely on a wire rack (1-2 hours).
- Cover pan with plastic wrap and refrigerate for at least 4 hours, preferably overnight. When ready to serve, use parchment handles to lift bars out. Slice into 16 squares with a sharp knife, wiping blade clean between cuts.
Notes
For best results, use room temperature cream cheese and eggs. Avoid overmixing to prevent cracks. For a water bath, place the 9×9 pan inside a larger roasting pan and add hot water halfway up the sides. Bars can be frozen for up to 3 months. For clean slices, chill thoroughly and wipe knife between cuts.
Nutrition
- Serving Size: 1 bar
- Calories: 245
- Sugar: 19
- Sodium: 210
- Fat: 14
- Saturated Fat: 8
- Carbohydrates: 27
- Fiber: 1
- Protein: 5
Keywords: pumpkin cheesecake bars, gingersnap crust, budget-friendly dessert, fall dessert, easy cheesecake bars


