My husband looked at me with this expression I can’t quite describe — half disbelief, half pure satisfaction — after grabbing a third one from the container on the counter. “These aren’t just snacks,” he said, chewing thoughtfully. “These are, like, emergency food.” And honestly? He wasn’t wrong. I’d thrown them together in a panic that morning, staring down a week of back-to-back meetings, school runs, and that weird 3 p.m. slump that hits you like a wall. I needed something I could grab with one hand while holding a coffee mug in the other. Something that didn’t require turning on the oven (because let’s face it, who has the energy for that in the middle of the week?). These no-bake peanut butter energy balls became that thing — the little lifesaver hiding in the back of the fridge. And now, every time I make a batch, I watch that same look appear on someone’s face. It’s the look that says, wait, this is actually good for me? That’s the moment that keeps me coming back to this recipe. Not the convenience (though that helps), but the quiet joy of watching something so simple make someone’s day a little better.
Why You’ll Love This Recipe
I’ve tested a lot of energy ball recipes over the years. Some turned out too dry. Others fell apart before you could even get them out of the bowl. A few were so sweet they felt more like dessert than a snack you’d feel good about eating at 10 a.m. This version is different. It’s the one I keep coming back to — and the one friends keep asking me to make.
- No baking required. Seriously. No oven, no stove, no waiting. Just a bowl, a spoon, and about ten minutes of your time.
- Simple, wholesome ingredients. You probably already have most of these in your pantry. No weird health food store finds, no expensive superfood powders.
- Perfect for busy mornings. Grab one (or two) on your way out the door and you’re set until lunch.
- Kid-approved and adult-approved. My niece calls them “cookie dough balls” and I don’t correct her.
- Actually satisfying. The combination of protein, healthy fats, and natural sweetness keeps you full without that heavy, sluggish feeling.
What makes this recipe stand out from the dozens of others out there? It’s the texture. These energy balls are soft, chewy, and just the right amount of sticky — without being a mess to handle. I spent weeks tweaking the ratios of oats to peanut butter to honey until I landed on that perfect balance. Not too crumbly, not too greasy. Just right. And they hold together beautifully in the fridge for over a week (if they last that long, which they rarely do in my house).
What Ingredients You Will Need
This recipe relies on a handful of pantry staples that come together to create something truly satisfying. Each ingredient plays an important role — not just in flavor, but in texture and staying power.
- Rolled oats (1 cup / 90g) — Not quick oats, not steel-cut. Rolled oats give you that perfect chewy texture that holds everything together. I prefer old-fashioned oats for this reason.
- Creamy peanut butter (½ cup / 128g) — Natural peanut butter works, but make sure it’s well-stirred. I’ve found that standard creamy peanut butter (like Jif or Skippy) gives the most consistent results. The slight sweetness and stable texture help the balls hold their shape better.
- Honey (⅓ cup / 112g) — Local honey is my go-to, but any liquid honey works. It binds everything together and adds just the right amount of sweetness without being overpowering.
- Ground flaxseed (2 tablespoons / 14g) — This is my secret ingredient. It adds fiber, omega-3s, and helps absorb excess moisture so the balls aren’t too sticky. You can find it in most grocery stores near the baking aisle or in the natural foods section.
- Mini chocolate chips (¼ cup / 45g) — Because everything is better with chocolate. I use semi-sweet, but dark chocolate or milk chocolate work too. If you’re watching sugar, sugar-free chocolate chips are a great swap.
- Vanilla extract (1 teaspoon) — Pure vanilla makes a difference here. It rounds out the flavors and makes the whole thing taste more like a treat than a health food.
- Pinch of salt (¼ teaspoon) — Only if your peanut butter is unsalted. Salt balances the sweetness and brings out the peanut butter flavor.
That’s it. Seven ingredients, most of which you probably already have sitting in your kitchen. No chia seeds, no protein powder, no coconut oil. Just simple, honest food that comes together in minutes.
Equipment Needed
You don’t need much for this recipe, which is part of its charm. Here’s what you’ll want to have on hand:
- Large mixing bowl — Any medium-to-large bowl works. I use a standard ceramic mixing bowl.
- Measuring cups and spoons — For accuracy. Eyeballing works in a pinch, but measuring gives you consistent results every time.
- Rubber spatula or wooden spoon — For mixing everything together. A sturdy spoon helps when the mixture gets thick.
- Cookie scoop or tablespoon — For portioning evenly. A 1.5-tablespoon cookie scoop is my favorite tool here. It makes perfectly uniform balls without any fuss.
- Parchment paper or wax paper — For lining the tray or plate where the balls will chill. This prevents sticking and makes cleanup easier.
- Baking sheet or large plate — To hold the balls while they set in the fridge.
- Airtight container — For storage. A glass container with a tight-fitting lid works perfectly.
If you don’t have a cookie scoop, don’t worry. A regular tablespoon works just fine. The balls might be slightly different sizes, but they’ll taste exactly the same. I’ve made this recipe with nothing but a bowl and my hands more times than I can count.
Preparation Method
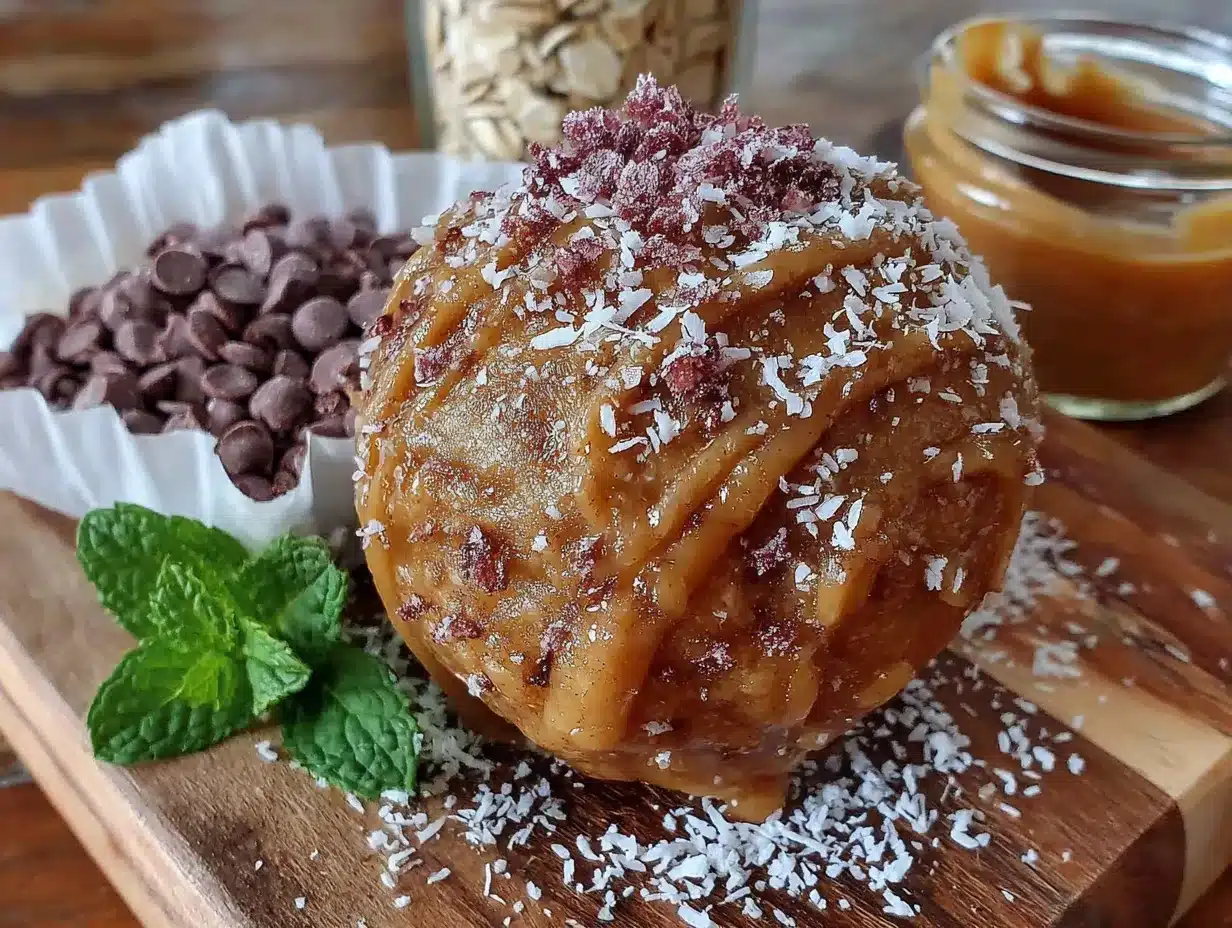
- Combine the dry ingredients. In your large mixing bowl, add the rolled oats, ground flaxseed, and salt (if using). Stir them together with your spatula or spoon until evenly distributed. This takes about 30 seconds.
- Add the wet ingredients. Spoon in the peanut butter, drizzle in the honey, and add the vanilla extract. Don’t add the chocolate chips yet — we’ll fold those in later to keep them from getting crushed.
- Mix until fully combined. Start stirring everything together. At first, it’ll look like the peanut butter and honey are just sitting on top of the oats. Keep going. The mixture will slowly come together as the oats absorb the moisture. I usually stir for about 2-3 minutes, scraping the bottom and sides of the bowl to make sure nothing is hiding. The final texture should be thick, slightly sticky, and hold together when you press it between your fingers. If it seems too dry, add another tablespoon of honey. If it’s too wet, add another tablespoon of oats.
- Fold in the chocolate chips. Sprinkle them over the mixture and gently fold them in with your spatula. Try not to overmix at this stage — you want the chocolate chips to stay intact, not get smashed into the dough.
- Chill the mixture (optional but recommended). Pop the bowl in the fridge for 15-20 minutes. This step isn’t strictly necessary, but it makes the next step much easier. The mixture firms up slightly, which means less sticky fingers and cleaner balls.
- Portion and roll. Scoop out about 1.5 tablespoons of the mixture (a cookie scoop is perfect here). Roll it between your palms gently but firmly until it forms a smooth ball. Don’t squeeze too hard or the balls will be dense. Just a gentle, even pressure. Place each ball on your parchment-lined tray or plate.
- Repeat until all mixture is used. This recipe makes about 16-18 balls, depending on how big you roll them. I usually get exactly 16 when I use my 1.5-tablespoon scoop.
- Chill to set. Place the tray in the refrigerator for at least 30 minutes. This allows the balls to firm up and hold their shape. If you’re in a hurry, 15 minutes in the freezer works too.
One thing I learned the hard way: don’t skip the chilling step if you want clean, round balls. The first time I made these, I was impatient and tried to roll them immediately. The mixture was too soft, my hands were a mess, and the balls came out lopsided. A quick chill in the fridge makes everything so much easier.
Cooking Tips & Techniques
After making these energy balls more times than I can count (and yes, a few spectacular failures along the way), here are the tips that actually make a difference:
Use room temperature peanut butter. Cold peanut butter straight from the fridge is stiff and hard to mix. Let it sit on the counter for 15-20 minutes before you start. If you forget, microwave it for 10 seconds — just enough to soften it, not heat it.
Don’t overmix. I know it’s tempting to keep stirring until everything looks perfectly uniform, but overmixing can make the texture dense and heavy. Stop as soon as everything is combined and the mixture holds together when pressed.
Wet your hands slightly. If the mixture is sticking to your palms while rolling, dampen your hands with a little water. Not soaking wet — just a light mist. This trick works like magic and keeps the balls from falling apart.
Taste and adjust. Before you roll all the balls, taste a small piece of the mixture. Need more honey? Add it. Want more salt? Sprinkle some in. This is your chance to customize before it’s too late.
Make them ahead. These energy balls actually taste better after sitting in the fridge overnight. The flavors meld together, the oats soften slightly, and the texture becomes perfectly chewy. I always make a double batch on Sunday for the week ahead.
Watch out for sticky fingers. If you’re making a double batch, keep a small bowl of water nearby to dip your hands in between rolling. It keeps the process smooth and prevents the mixture from building up on your palms.
Variations & Adaptations
One of the best things about this recipe is how flexible it is. Here are some variations I’ve tried and loved:
Chocolate Peanut Butter Dream. Swap the mini chocolate chips for dark chocolate chunks and add a tablespoon of cocoa powder to the dry ingredients. You get a richer, more decadent ball that tastes like a healthier version of a peanut butter cup.
Crunchy Almond Joy. Replace the peanut butter with almond butter, swap the chocolate chips for dark chocolate chunks, and add ¼ cup of unsweetened shredded coconut and 2 tablespoons of chopped almonds. The texture is incredible — crunchy, chewy, and satisfying.
Vegan Version. Use maple syrup instead of honey and a plant-based chocolate chip. The maple syrup adds a slightly different sweetness — more caramel-like — but it works beautifully. Just note that the balls might be slightly softer, so chill them a bit longer before rolling.
Nut-Free Option. Swap the peanut butter for sunflower seed butter (sunbutter). The flavor changes noticeably, but it’s still delicious. Sunbutter can react with baking soda in baked goods (turning green), but since this is no-bake, you’re safe. Add an extra tablespoon of honey to balance the slightly savory notes of sunbutter.
Protein-Packed. Add a scoop of your favorite vanilla or chocolate protein powder. You’ll need to increase the honey by about a tablespoon to compensate for the dryness protein powder adds. I’ve done this with both whey and plant-based protein powders, and both work well.
Seasonal Twist. In the fall, I add ½ teaspoon of pumpkin pie spice and swap the chocolate chips for dried cranberries. In the summer, I use white chocolate chips and add a pinch of sea salt on top. It keeps things interesting.
Serving & Storage Suggestions
These energy balls are best served cold, straight from the fridge. The texture is firm but chewy, and the chocolate chips stay snappy. If you leave them out at room temperature for more than an hour, they’ll soften significantly — still delicious, but messier to eat.
I like to pack them in lunchboxes, take them on road trips, or keep a small container on my desk for afternoon snacking. They pair beautifully with a hot cup of coffee or a cold glass of milk. For a more substantial snack, I’ll have two balls with an apple or a handful of baby carrots.
Storage instructions: Place the energy balls in an airtight container, layered between sheets of parchment paper if stacking. They’ll keep in the refrigerator for up to 10 days. In the freezer, they last for up to 3 months. To freeze, arrange them in a single layer on a baking sheet until solid (about 1 hour), then transfer to a freezer-safe bag or container. This prevents them from sticking together.
Reheating: No reheating needed! If frozen, let them thaw in the fridge overnight or at room temperature for about 20 minutes. They’re perfectly edible straight from the freezer too — just a little harder.
One thing I’ve noticed: the flavors actually deepen after a day or two in the fridge. The oats absorb more moisture, the peanut butter flavor becomes more pronounced, and the overall texture improves. So don’t worry if they seem a little loose on day one — they’ll tighten up beautifully.
Nutritional Information & Benefits
These energy balls are packed with good-for-you ingredients that actually work together to keep you full and focused. Here’s the approximate nutritional breakdown per ball (based on 16 servings):
| Nutrient | Amount per ball |
|---|---|
| Calories | 145 |
| Protein | 5g |
| Fat | 8g |
| Carbohydrates | 16g |
| Fiber | 2g |
| Sugar | 9g |
The rolled oats provide steady-release energy and plenty of fiber to keep your digestion happy. Peanut butter delivers protein and healthy monounsaturated fats that support heart health and keep you satisfied. Ground flaxseed adds omega-3 fatty acids and even more fiber — a small addition with big benefits. Honey offers natural sweetness along with antioxidants and antimicrobial properties. And yes, even the chocolate chips bring something to the table: dark chocolate is rich in flavonoids that support brain health and mood.
Dietary considerations: This recipe is naturally vegetarian and can easily be made vegan (use maple syrup). It’s gluten-free if you use certified gluten-free oats. For nut-free, swap the peanut butter for sunflower seed butter. The main allergens to note are peanuts (obviously) and oats (which can be cross-contaminated with gluten).
I love that I can feel good about eating these — and feeding them to my family. They’re not just empty calories. They’re fuel that actually tastes like a treat.
Conclusion
These no-bake peanut butter energy balls have become a staple in my kitchen for good reason. They’re fast, forgiving, and endlessly adaptable. Whether you need a quick breakfast on a chaotic morning, a post-workout snack that actually satisfies, or something to keep the kids happy between meals, this recipe delivers every single time.
I honestly love how simple they are. No fancy equipment, no obscure ingredients, no complicated techniques. Just a bowl, a spoon, and ten minutes of your time. And the result? Little balls of energy that taste like a treat but fuel you like a meal.
I’d love to hear how yours turn out. Did you try a variation? Add something unexpected? Leave a comment below and let me know — your tweaks might just inspire someone else’s next batch. And if you’re looking for more quick, wholesome snacks, you might enjoy these crispy cinnamon sugar apple chips or these moist double chocolate zucchini muffins for another grab-and-go option that feels like a treat. Happy rolling!
Frequently Asked Questions
Can I use quick oats instead of rolled oats?
You can, but the texture will be different. Quick oats are more finely processed, so they absorb moisture faster and create a softer, almost paste-like consistency. Rolled oats give you that satisfying chewy texture that makes these energy balls so enjoyable. If quick oats are all you have, go for it — just know the result will be a bit more delicate.
How long do these energy balls last at room temperature?
They’re fine at room temperature for about 4-6 hours, but I don’t recommend leaving them out longer than that. The peanut butter can become oily, and the texture softens significantly. If you’re taking them on a picnic or to work, pack them in a cooler bag or keep them in the fridge until you’re ready to go.
Can I make these without honey?
Absolutely. Maple syrup is the best substitute — it has a similar consistency and sweetness level. Agave nectar works too, though it’s thinner so you might need a bit less. For a sugar-free option, try a few drops of liquid stevia plus a tablespoon of water or milk to help bind everything together.
Why are my energy balls falling apart?
This usually happens for one of three reasons: the mixture is too dry, you didn’t chill it long enough, or you’re using natural peanut butter that’s too runny. Try adding an extra tablespoon of honey or peanut butter to help bind things together. If you’re using natural peanut butter, make sure you stir it really well before measuring — the oil separation can throw off the texture.
Can I double this recipe?
Yes, and I actually recommend it. These disappear fast, and having a double batch in the fridge means you’re set for two weeks. Just make sure you have a large enough bowl to mix everything comfortably. I use my biggest mixing bowl when doubling, and I mix in two batches to make sure everything is evenly combined.
Pin This Recipe!
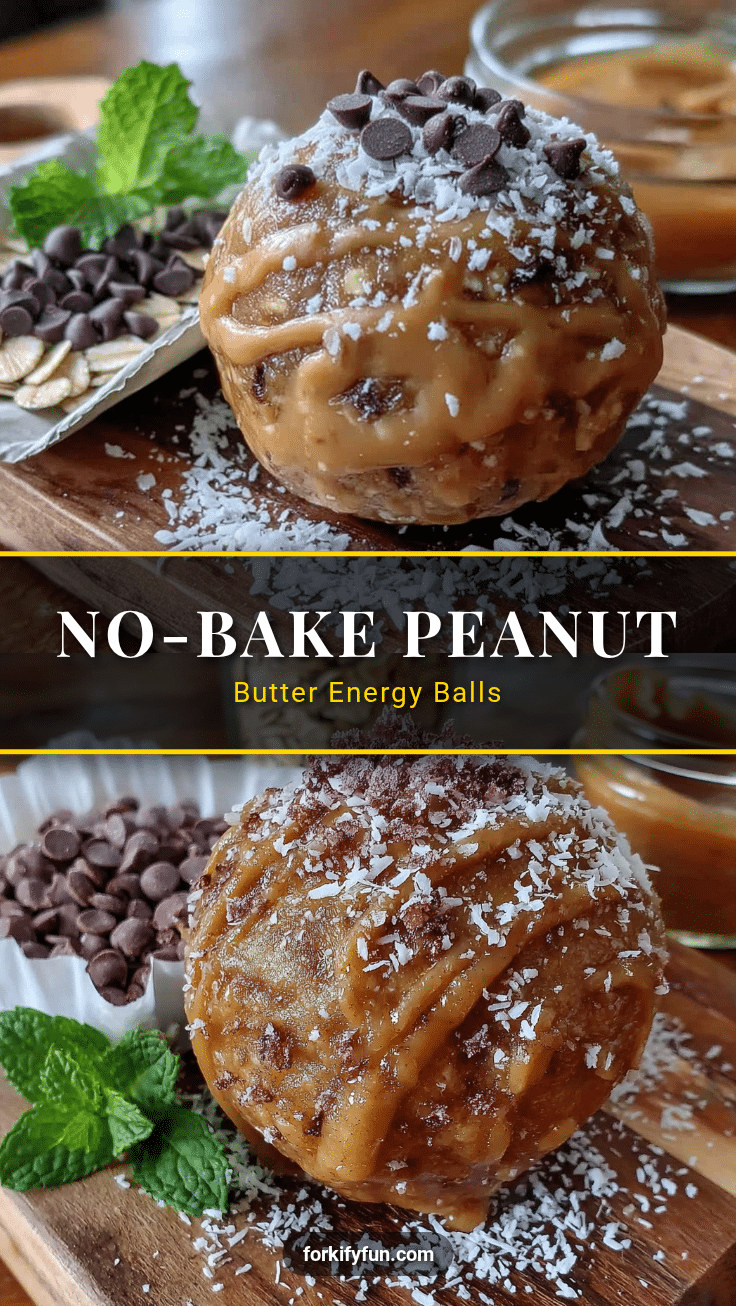
Best No-Bake Peanut Butter Energy Balls Recipe (Easy & Quick)

These no-bake peanut butter energy balls are soft, chewy, and perfectly sweetened with honey and chocolate chips. Made with simple pantry staples, they come together in just 10 minutes and make the perfect grab-and-go snack for busy mornings or afternoon slumps.
- Prep Time: 10 minutes
- Cook Time: 0 minutes
- Total Time: 40 minutes (includes chilling)
- Yield: 16 servings 1x
- Category: Snack
- Cuisine: American
Ingredients
- 1 cup (90g) rolled oats
- ½ cup (128g) creamy peanut butter
- ⅓ cup (112g) honey
- 2 tablespoons (14g) ground flaxseed
- ¼ cup (45g) mini chocolate chips
- 1 teaspoon vanilla extract
- ¼ teaspoon salt (if peanut butter is unsalted)
Instructions
- Combine the dry ingredients: In a large mixing bowl, add the rolled oats, ground flaxseed, and salt (if using). Stir together until evenly distributed.
- Add the wet ingredients: Spoon in the peanut butter, drizzle in the honey, and add the vanilla extract. Do not add the chocolate chips yet.
- Mix until fully combined: Stir for about 2-3 minutes, scraping the bottom and sides of the bowl. The mixture should be thick, slightly sticky, and hold together when pressed. If too dry, add another tablespoon of honey; if too wet, add another tablespoon of oats.
- Fold in the chocolate chips: Sprinkle them over the mixture and gently fold them in with a spatula. Avoid overmixing.
- Chill the mixture (optional but recommended): Refrigerate the bowl for 15-20 minutes to make rolling easier.
- Portion and roll: Scoop out about 1.5 tablespoons of the mixture and roll it between your palms into a smooth ball. Place each ball on a parchment-lined tray or plate.
- Repeat until all mixture is used: This recipe makes about 16-18 balls.
- Chill to set: Refrigerate the tray for at least 30 minutes to firm up the balls. For a quicker option, freeze for 15 minutes.
Notes
For best texture, use room temperature peanut butter. If mixture is too sticky to roll, dampen your hands slightly with water. These energy balls taste even better after sitting in the fridge overnight. Store in an airtight container in the refrigerator for up to 10 days or freeze for up to 3 months.
Nutrition
- Serving Size: 1 ball
- Calories: 145
- Sugar: 9
- Sodium: 60
- Fat: 8
- Saturated Fat: 2
- Carbohydrates: 16
- Fiber: 2
- Protein: 5
Keywords: no-bake energy balls, peanut butter energy balls, healthy snack, gluten-free snack, easy energy balls, no-bake snack, kid-friendly snack


