The woman at the next stall watched me picking through pumpkins last October, frowning at each one like it had personally offended me. She didn’t say anything at first. Then she reached over and turned one of them around, showing me the flat side I’d been ignoring.
“That one,” she said, tapping it with a chipped fingernail. “Better for seeds.”
I laughed and admitted I was more interested in what was inside than what I was carving. She grinned—a gap-toothed thing that crinkled her whole face—and told me she’d been saving pumpkin seeds from every squash she’d cooked since September. She kept them in a jar on her counter, tossing in a new handful whenever she made soup or roasted a vegetable. By Halloween, she said, she had enough to fill a baking sheet.
“But you gotta do something interesting with them,” she added, shaking her head. “Salt alone is boring.”
She told me about the chili lime salt her grandmother used to make, how they’d grind dried chiles with salt and lime zest in a mortar until the kitchen smelled like a Mexican market. I scribbled notes on a napkin while she talked, trying to keep up with her hands flying through the air. Honestly, I got half of it wrong the first time I tried it.
But that’s the thing about a recipe that comes through a conversation—you make it your own along the way. This is my version of her grandmother’s idea, and it’s become the snack I look forward to all autumn long. Maybe you’ve been there, standing over a baking sheet, eating them straight off the pan before they’ve even cooled. No judgment here.
These roasted pumpkin seeds with chili lime salt are everything a fall snack should be—crunchy, tangy, a little spicy, and impossible to stop eating. Let me show you how to make them.
Why You’ll Love This Recipe
I’ve tested this recipe more times than I’d care to admit, and here’s what I’ve learned: not all roasted pumpkin seeds are created equal. Most recipes leave them either too chewy or burnt on the edges. These come out perfectly crisp every single time, and the chili lime salt makes them completely addictive.
Here’s what makes this version stand out:
- Quick & Easy : From pumpkin to snack in under 30 minutes. That’s faster than a trip to the store for a bag of chips.
- Simple Ingredients : You probably have salt and lime in your kitchen right now. The dried chiles are easy to find and last forever in your pantry.
- Perfect for Fall : Whether you’re carving jack-o’-lanterns, hosting a harvest party, or just want something to crunch on while the leaves change, these fit the season perfectly.
- Crowd-Pleaser : I brought a bowl to a potluck last month and watched three people ask for the recipe before the main course was served.
- Unbelievably Delicious : The combination of smoky heat from the chiles, bright acidity from the lime, and that deep toasty flavor from roasting—it’s next-level.
This isn’t just another pumpkin seed recipe. The trick is in how we prepare the seeds before roasting and how we layer the seasoning. No soggy seeds, no bland results, no wasted pumpkins. Just the best fall snack you’ll make all season.
What Ingredients You Will Need
This recipe uses simple, pantry-friendly ingredients, but each one plays a specific role in creating that perfect crunch and bold flavor. Here’s what you’ll need and why each ingredient matters.
For the Pumpkin Seeds
- Fresh pumpkin seeds – About 1 ½ cups, scooped straight from a medium pumpkin (about 3-4 pounds). The fresher, the better. Look for pumpkins labeled “sugar pumpkins” or “pie pumpkins” for the best-tasting seeds, though any carving pumpkin will work fine.
- Water – For rinsing the seeds clean. You’ll need enough to cover them in a bowl.
- Salt – 1 tablespoon for the soaking water. This helps the seeds absorb seasoning from the inside out.
- Olive oil or melted butter – 1 ½ tablespoons. Olive oil gives a cleaner flavor; butter adds richness. I use olive oil most of the time, but butter is lovely for a more indulgent version.
For the Chili Lime Salt
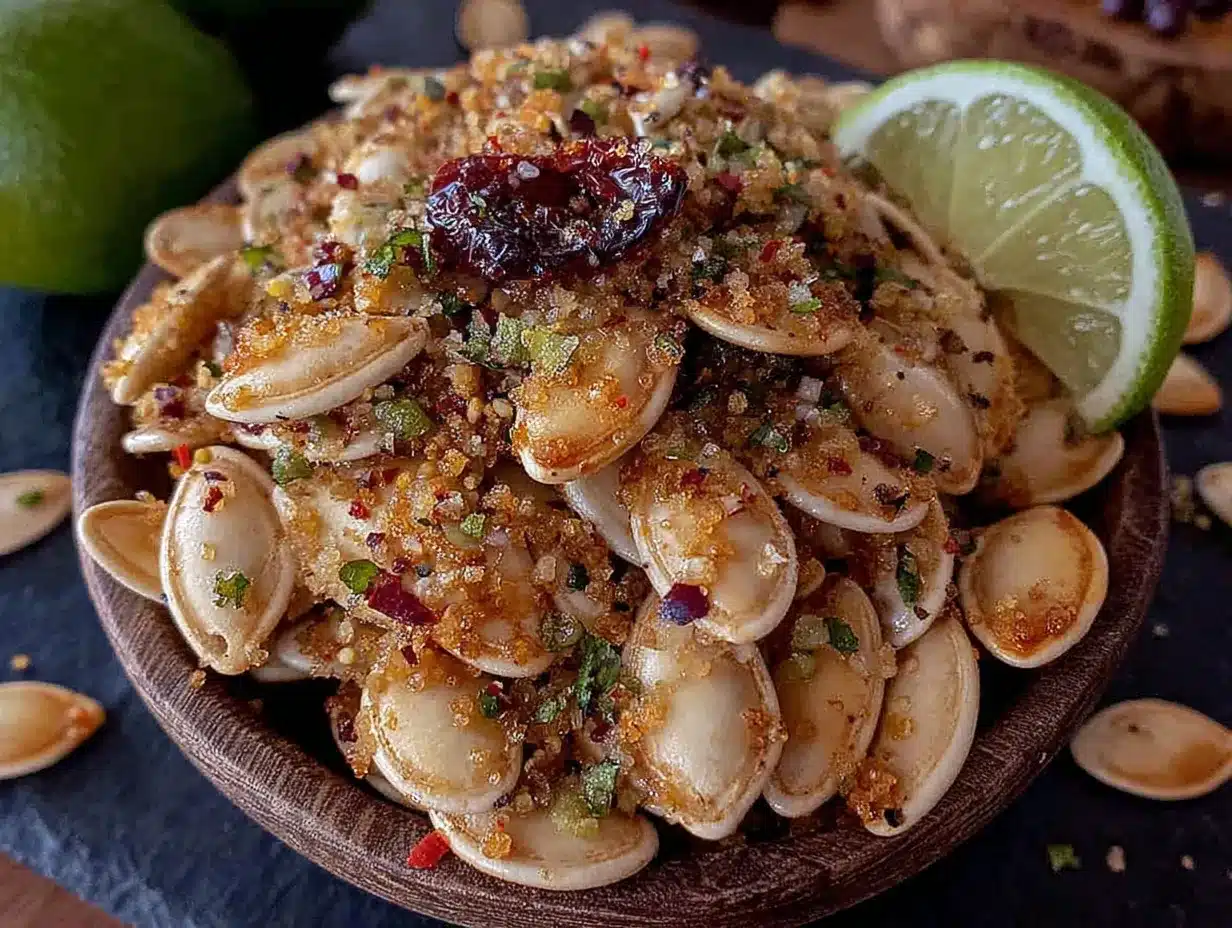
- Dried chiles – 2 to 3 small dried chiles (like árbol or guajillo). Remove the stems and seeds before grinding. I prefer árbol for heat, guajillo for smokiness. You can also use 1 teaspoon of store-bought chili powder in a pinch.
- Lime zest – From 1 medium lime. Make sure to zest before juicing. Use a microplane for the finest texture.
- Flaky sea salt – 1 ½ teaspoons. Maldon or any flaky salt works beautifully. Avoid fine table salt here—it dissolves too quickly and doesn’t give that satisfying crunch.
- Lime juice – 1 tablespoon, for tossing with the roasted seeds. Adds brightness and helps the seasoning stick.
Optional Add-Ins
- Cayenne pepper – ¼ teaspoon if you want extra heat. I add this when I’m making them just for myself.
- Garlic powder – ½ teaspoon for a savory twist. My neighbor (the one from the market) swears by this addition.
- Smoked paprika – ½ teaspoon for deeper smokiness. Pairs beautifully with the guajillo chiles.
For the best results, I recommend using fresh, high-quality dried chiles from a Latin market or the international aisle of your grocery store. The brand I reach for most often is Los Chileros—their árbol chiles have consistent heat and a clean, smoky flavor. If you’re using pre-ground chili powder, McCormick or Penzey’s are reliable options, though the flavor won’t be quite as bright.
One note on pumpkins: if you’re buying a pumpkin just for the seeds, look for one that feels heavy for its size. Heavier pumpkins tend to have more seeds, and they’re usually plumper. I learned this the hard way after carving a decorative pumpkin that gave me exactly twelve seeds. Twelve!
Equipment Needed
You don’t need much for this recipe, which is part of its charm. Here’s what you’ll need:
- Baking sheet – A standard half-sheet pan works perfectly. Line it with parchment paper for easier cleanup.
- Large bowl – For rinsing and soaking the seeds.
- Colander – For draining the rinsed seeds.
- Clean kitchen towel or paper towels – For drying the seeds thoroughly. This step matters more than you think.
- Mortar and pestle or spice grinder – For grinding the dried chiles and salt. A mortar gives you more control over texture; a spice grinder is faster. I’ve used both, and honestly, the mortar is more satisfying. There’s something meditative about grinding your own spices.
- Microplane or fine grater – For zesting the lime. A regular box grater works too, but a microplane gives you finer zest that distributes more evenly.
- Small bowl – For mixing the chili lime salt.
- Spatula or wooden spoon – For stirring the seeds halfway through roasting.
If you don’t have a mortar and pestle or spice grinder, you can place the dried chiles in a sealed plastic bag and crush them with a rolling pin. It’s not as precise, but it gets the job done. I’ve done this more times than I’d like to admit.
One tip: invest in a good microplane if you don’t have one. They’re inexpensive (around $10-15) and make zesting citrus so much easier. Plus, you’ll use it for garlic, ginger, and hard cheeses too.
Preparation Method
Let’s get roasting. Follow these steps carefully, and you’ll have perfectly crunchy, flavorful pumpkin seeds every time.
Step 1: Extract and Clean the Seeds
Cut your pumpkin open and scoop out the seeds and stringy pulp into a large bowl. Don’t worry about getting every bit of pulp off—you’ll take care of that in the next step. Fill the bowl with cool water and use your hands to separate the seeds from the pulp. The pulp will float to the top, making it easy to skim off. Drain the seeds in a colander and give them a good rinse.
This should take about 5 minutes. Don’t rush it—seeds that still have pulp attached will roast unevenly and can burn.
Step 2: Soak the Seeds
Transfer the cleaned seeds back to the bowl and cover them with water. Add 1 tablespoon of salt and stir to dissolve. Let them soak for 10 minutes. This step is crucial—it helps the seeds absorb salt and ensures they roast evenly. I skipped this step the first time I made these, and the seeds came out chewy in the center. Never again.
Step 3: Dry Thoroughly
Drain the seeds and spread them out on a clean kitchen towel or layers of paper towels. Pat them dry as thoroughly as you can. Any excess moisture will turn to steam in the oven, which prevents the seeds from getting crispy. Let them sit for 5 minutes while you preheat the oven.
This is the step people skip, and it’s the number one reason for soggy seeds. Take the extra few minutes—your patience will be rewarded.
Step 4: Preheat the Oven
Preheat your oven to 350°F (175°C). Position the rack in the center of the oven for even heat distribution.
Step 5: Make the Chili Lime Salt
While the oven heats, make your seasoning. If using whole dried chiles, remove the stems and seeds, then tear them into small pieces. Place the chile pieces in a mortar or spice grinder along with the flaky sea salt. Grind until the chiles are broken down into small flakes and the salt is tinted red. You want a coarse texture—not a powder. Add the lime zest and gently work it in with your fingers or the pestle until evenly distributed.
The smell at this point is incredible. Smoky, citrusy, and just a little bit dangerous.
Step 6: Toss with Oil and Seasoning
Place the dried seeds in a bowl and drizzle with 1 ½ tablespoons of olive oil. Toss to coat evenly. Add half of the chili lime salt and toss again. Reserve the remaining salt for finishing.
Step 7: Roast the Seeds
Spread the seeds in a single layer on your prepared baking sheet. Don’t overcrowd them—they need space to crisp up. Roast for 10 minutes, then remove the pan from the oven and stir the seeds with a spatula. Return to the oven and roast for another 10-15 minutes, stirring once more halfway through.
You’ll know they’re done when they’re golden brown and you can hear them start to pop. The kitchen will smell like toasted nuts and warm chiles.
Step 8: Finish with Lime and Remaining Salt
Remove the seeds from the oven and let them cool on the baking sheet for 2 minutes. Drizzle with 1 tablespoon of fresh lime juice and toss gently. Sprinkle the remaining chili lime salt over the top and toss one last time. The lime juice will sizzle and steam as it hits the hot seeds—that’s a good sign.
Step 9: Cool Completely
Let the seeds cool completely on the baking sheet, about 15-20 minutes. They’ll continue to crisp up as they cool. Don’t rush this step—warm seeds can be soft, and you want that perfect crunch.
And there you have it. Perfectly roasted pumpkin seeds with a kick of chili and a bright finish of lime.
Cooking Tips & Techniques
After making these seeds more times than I can count (and ruining plenty of batches along the way), here are the lessons I’ve learned:
Don’t skip the soak. I know it seems like an extra step, but soaking the seeds in salted water does two things: it helps them absorb seasoning from the inside, and it ensures they roast evenly. Seeds that go straight into the oven tend to have chewy centers and burnt edges. Trust me on this one.
Dry them like you mean it. Wet seeds steam instead of roast. Use a kitchen towel and pat them until they feel dry to the touch. If you have time, let them air-dry for an hour on the counter after patting. The drier they go in, the crunchier they come out.
Watch the oven like a hawk. Pumpkin seeds go from perfectly golden to burnt in about 90 seconds. Set a timer and check them at the 20-minute mark. Every oven runs a little differently, so trust your eyes and nose more than the clock.
Grind your own chiles if you can. Pre-ground chili powder works in a pinch, but freshly ground dried chiles have a brightness and complexity that store-bought just can’t match. It takes an extra 2 minutes and makes a huge difference.
Double the batch. I’m not kidding. These disappear fast. I made a single batch for a movie night last week and they were gone before the opening credits finished. Make enough to share—or don’t. I won’t tell anyone.
One mistake I made: I once used too much lime juice while the seeds were still hot, and they turned soggy. The trick is to drizzle lightly and toss gently. You want the seeds coated, not drenched.
Variations & Adaptations
This recipe is endlessly adaptable. Here are a few ways to make it your own:
Spicy Honey Version: Skip the lime juice and drizzle the hot seeds with 1 tablespoon of honey mixed with ½ teaspoon of cayenne. The sweet-heat combo is incredible. I made this for a Thanksgiving appetizer and my cousin asked for the recipe before she’d even finished her plate.
Smoky Chipotle Variation: Replace the dried árbol chiles with 1 teaspoon of chipotle powder (or grind your own dried chipotles). The smokiness is deeper and earthier, with a slower-building heat. Pair it with a squeeze of orange instead of lime for a different citrus note.
Garlic and Herb Twist: Add ½ teaspoon of garlic powder and 1 teaspoon of dried rosemary or thyme to the chili lime salt. This version is fantastic on salads or soups as a crunchy topping.
Dairy-Free Option: Use olive oil instead of butter (the recipe already calls for olive oil as the default, so you’re good). The seeds will still be perfectly crisp and flavorful.
Air Fryer Method: Cook the seasoned seeds in an air fryer at 350°F (175°C) for 8-10 minutes, shaking the basket halfway through. They come out even crispier than oven-roasted seeds. I tried this on a whim and now it’s my preferred method when I’m not making a big batch.
Less Spicy Version: Use only 1 dried chile or replace it with ½ teaspoon of smoked paprika. You’ll still get that warm, smoky flavor without the heat. Great for kids or anyone with a sensitive palate.
Feel free to experiment with different citrus too. Lemon zest works beautifully, and grapefruit zest adds an unexpected floral note that pairs surprisingly well with the chiles.
Serving & Storage Suggestions
These roasted pumpkin seeds are best served at room temperature, straight from the baking sheet or piled into a bowl. They’re perfect for snacking on their own, but here are a few other ways I love to use them:
- Salad topper: Sprinkle over a bed of arugula, shaved Parmesan, and roasted butternut squash for a fall salad that’s got crunch in every bite.
- Soup garnish: Add a handful to creamy pumpkin soup or black bean soup. The texture contrast is wonderful.
- Trail mix addition: Toss them with dried cranberries, dark chocolate chips, and toasted coconut for a sweet-and-spicy snack mix.
- Gift jar filler: Layer them in a mason jar with a ribbon and a tag. They make thoughtful homemade gifts for the holidays.
As for beverages, these seeds pair beautifully with a cold beer (something light and crisp like a pilsner) or a tart margarita. For a non-alcoholic option, try them with sparkling water and a squeeze of lime.
Storage: Once completely cool, transfer the seeds to an airtight container. They’ll stay fresh and crunchy at room temperature for up to 2 weeks. If you live in a humid climate (I feel your pain), store them in the refrigerator instead—they’ll last even longer and stay crisp.
Reheating: If your seeds lose their crunch after a few days, spread them on a baking sheet and pop them in a 300°F (150°C) oven for 5 minutes. Let them cool completely before storing again. This trick has saved many a batch in my kitchen.
One note: the flavor actually improves after a day or two. The chili and lime mellow and meld together, creating a more rounded taste. So don’t worry if you can’t finish them all in one sitting—they’ll be even better tomorrow.
Nutritional Information & Benefits
Pumpkin seeds are more than just a tasty snack—they’re packed with nutrients. Here’s a rough estimate for a ¼-cup serving of these roasted seeds:
- Calories: 180
- Protein: 8g
- Fat: 15g (mostly healthy unsaturated fats)
- Carbohydrates: 4g
- Fiber: 2g
- Magnesium: 40% of the daily value
- Zinc: 20% of the daily value
Pumpkin seeds are one of the best natural sources of magnesium, which supports muscle function, sleep quality, and bone health. They’re also rich in zinc, which is important for immune function—especially handy during cold and flu season.
The chili and lime add minimal calories but bring a boost of vitamin C from the lime and capsaicin from the chiles, which may help with metabolism and inflammation.
Dietary considerations: This recipe is naturally gluten-free, dairy-free (when using olive oil), and vegetarian. It’s also low in sugar and high in protein, making it a satisfying snack that won’t spike your blood sugar.
Potential allergens: Pumpkin seeds themselves are not common allergens, but if you’re making a batch for a group, be aware that some people with seed allergies may react. Always check with your guests if you’re unsure.
I personally love that I can feel good about snacking on these. They’re not “health food” in a restrictive sense—they’re just real food that happens to be good for you. And that’s the best kind of snack, if you ask me.
Conclusion
These roasted pumpkin seeds with chili lime salt have become my official fall snack. They’re crunchy, tangy, a little spicy, and deeply satisfying in a way that store-bought snacks just can’t match. Every time I make them, I think of that woman at the market and her grandmother’s recipe, and I smile.
What I love most about this recipe is how adaptable it is. You can make it as spicy or as mild as you like, swap in different citrus, or add herbs and spices to suit your mood. The basic technique stays the same, and it works every time.
I hope you’ll try these seeds the next time you carve a pumpkin or buy one just for roasting. And when you do, I’d love to hear how they turned out. Leave a comment below and let me know if you made any changes—did you add extra heat? Try a different citrus? Make a double batch that disappeared in one sitting?
Share this recipe with someone who loves fall as much as you do. Because honestly, the best recipes are the ones we pass along.
Happy roasting, friends. Your kitchen is about to smell amazing.
Frequently Asked Questions
Can I use store-bought pumpkin seeds instead of fresh?
Absolutely. If you don’t have a pumpkin to carve, buy raw, unsalted pumpkin seeds (often labeled “pepitas”) from the grocery store. Skip the soaking step and proceed directly to tossing with oil and seasoning. Roast for 10-12 minutes instead of 20-25, since store-bought seeds are smaller and dry.
Why did my pumpkin seeds turn out chewy instead of crunchy?
Chewy seeds usually mean one of three things: they weren’t dried thoroughly before roasting, they were overcrowded on the baking sheet, or they weren’t roasted long enough. Make sure to pat them completely dry and spread them in a single layer with space between each seed. If they’re still chewy after 25 minutes, give them another 5 minutes and check again.
Can I make this recipe without a mortar and pestle or spice grinder?
Yes! Place the dried chiles in a sealed plastic bag and crush them with a rolling pin or the bottom of a heavy pan. You won’t get as fine a texture, but the flavor will still be great. Alternatively, use 1 teaspoon of store-bought chili powder instead of whole dried chiles.
How long do these roasted pumpkin seeds stay fresh?
Stored in an airtight container at room temperature, they’ll stay crunchy for up to 2 weeks. In the refrigerator, they’ll last even longer—about a month. If they lose their crunch, re-crisp them in a 300°F (150°C) oven for 5 minutes and let them cool completely before storing.
Can I freeze roasted pumpkin seeds?
Yes, you can freeze them for up to 3 months. Let them cool completely, then transfer to a freezer-safe bag or container. Thaw at room temperature for about 15 minutes before serving. If they seem soft after thawing, spread them on a baking sheet and warm them in a 300°F (150°C) oven for 5 minutes to restore the crunch.
Pin This Recipe!
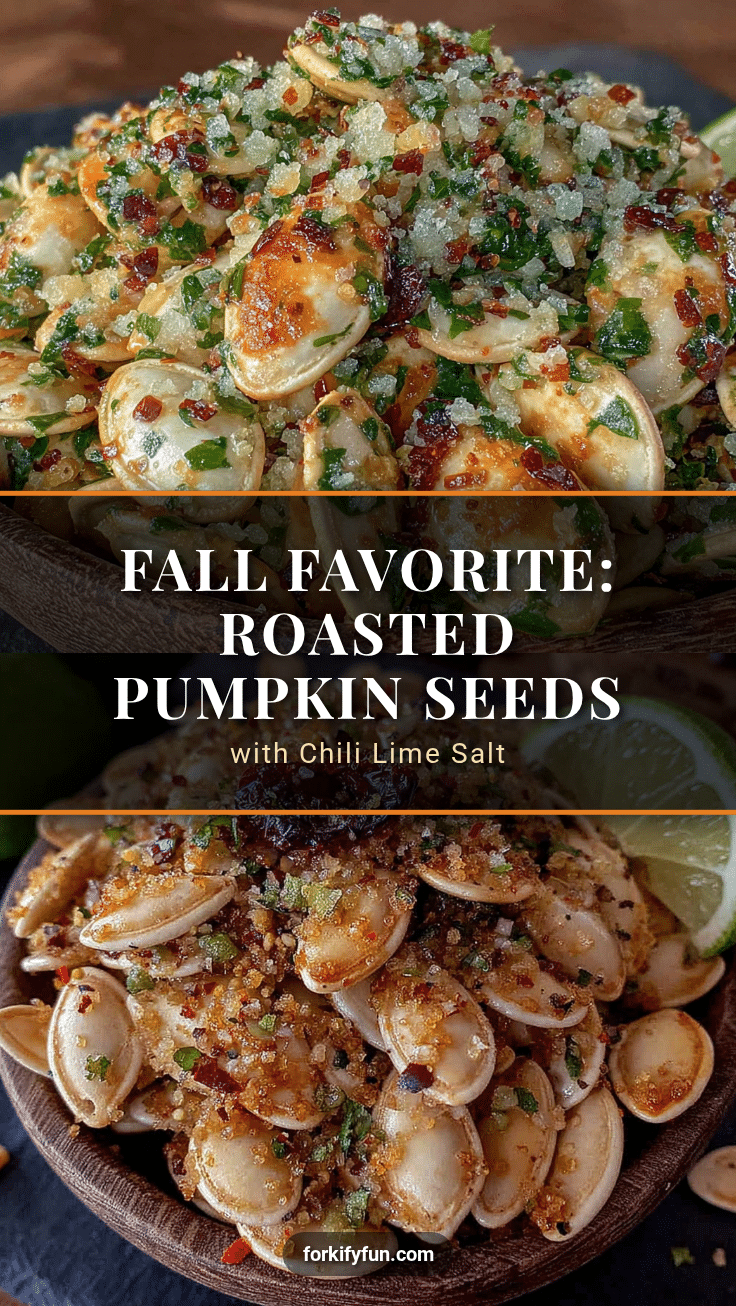
Best Easy Roasted Pumpkin Seeds with Chili Lime Salt

These roasted pumpkin seeds with chili lime salt are everything a fall snack should be—crunchy, tangy, a little spicy, and impossible to stop eating. Perfectly crisp every time, with a homemade chili lime salt that makes them completely addictive.
- Prep Time: 15 minutes
- Cook Time: 20-25 minutes
- Total Time: 35-40 minutes
- Yield: 4 servings 1x
- Category: Snack
- Cuisine: Mexican-inspired
Ingredients
- 1 ½ cups fresh pumpkin seeds (from a 3–4 pound pumpkin)
- Water (for rinsing and soaking)
- 1 tablespoon salt (for soaking water)
- 1 ½ tablespoons olive oil or melted butter
- 2–3 small dried chiles (like árbol or guajillo), stems and seeds removed
- Zest of 1 medium lime
- 1 ½ teaspoons flaky sea salt (like Maldon)
- 1 tablespoon fresh lime juice
- ¼ teaspoon cayenne pepper (optional, for extra heat)
- ½ teaspoon garlic powder (optional, for savory twist)
- ½ teaspoon smoked paprika (optional, for deeper smokiness)
Instructions
- Cut the pumpkin open and scoop out seeds and pulp into a large bowl. Fill with cool water and separate seeds from pulp using your hands. The pulp will float; skim it off. Drain seeds in a colander and rinse well.
- Transfer cleaned seeds back to the bowl, cover with water, and add 1 tablespoon salt. Stir to dissolve and let soak for 10 minutes.
- Drain seeds and spread on a clean kitchen towel or paper towels. Pat dry thoroughly. Let sit for 5 minutes while preheating the oven.
- Preheat oven to 350°F (175°C). Position rack in the center.
- Make the chili lime salt: If using whole dried chiles, remove stems and seeds, then tear into small pieces. Place chile pieces in a mortar or spice grinder with flaky sea salt. Grind until chiles are broken into small flakes and salt is tinted red (coarse texture, not powder). Add lime zest and gently work in with fingers or pestle until evenly distributed.
- Place dried seeds in a bowl, drizzle with 1 ½ tablespoons olive oil, and toss to coat. Add half of the chili lime salt and toss again. Reserve remaining salt for finishing.
- Spread seeds in a single layer on a parchment-lined baking sheet. Roast for 10 minutes, then stir. Return to oven and roast for another 10-15 minutes, stirring once more halfway through, until golden brown and seeds start to pop.
- Remove from oven and let cool on baking sheet for 2 minutes. Drizzle with 1 tablespoon fresh lime juice and toss gently. Sprinkle remaining chili lime salt over top and toss one last time.
- Let seeds cool completely on baking sheet, about 15-20 minutes, until fully crisp.
Notes
Don’t skip the soak—it ensures even roasting and seasoning from the inside. Dry seeds thoroughly to avoid sogginess. Watch the oven closely; seeds go from golden to burnt quickly. Grind your own chiles for best flavor. Double the batch as they disappear fast. For air fryer: cook at 350°F for 8-10 minutes, shaking halfway. Store in airtight container at room temperature for up to 2 weeks, or refrigerate for up to a month. Re-crisp in a 300°F oven for 5 minutes if needed.
Nutrition
- Serving Size: 1/4 cup
- Calories: 180
- Sodium: 350
- Fat: 15
- Saturated Fat: 2
- Carbohydrates: 4
- Fiber: 2
- Protein: 8
Keywords: roasted pumpkin seeds, chili lime, fall snack, pumpkin seeds recipe, easy snack, gluten-free, vegetarian


