This was supposed to be a sophisticated chocolate mousse for a dinner party. I had the good dark chocolate, the farm-fresh eggs, the expensive vanilla bean. And then my three-year-old woke up from his nap early, the phone rang, and I grabbed salted butter instead of unsalted. By the time I realized what happened, the chocolate had seized into a grainy, hopeless mess on the stove. I was already running late, the kitchen looked like a chocolate bomb went off, and I honestly just wanted to cry into the sink.
But you know that feeling when you are too tired to start over? So I just kept going. I crumbled some chocolate sandwich cookies I had stashed in the pantry, threw the seized chocolate into a bowl with some cream cheese and powdered sugar, and started layering it in little clear cups. My daughter came in and asked if we could stick some candy pumpkins on top. I grabbed a bag of gummy worms from the Halloween candy stash and shoved a few in sideways. What came out was nothing like the plan — and so much better.
The best easy graveyard dirt pudding cups are born from kitchen chaos, I swear. That desperate, messy, who-cares-just-make-it-work energy is exactly what this recipe needs. No tempering chocolate, no fussy custard, no stress. Just creamy chocolate pudding, crushed cookies that actually look like dirt, and a handful of spooky decorations that make everyone smile. I have been making these for Halloween parties, classroom treats, and movie nights ever since — and honestly, they taste like the happy accident they are.
Why You’ll Love This Recipe
Let me tell you, I have tested this recipe about a dozen times to get it just right. The first few batches were too soupy, then too thick, then the cookies got soggy overnight. But after all that trial and error, I landed on a version that works every single time. And it is so simple that my eight-year-old can almost make it herself now.
- Quick & Easy : Comes together in under 20 minutes, perfect for last-minute Halloween party prep or a fun after-school activity with the kids.
- Simple Ingredients : No fancy grocery trips needed. Chocolate pudding mix, cream cheese, milk, and chocolate sandwich cookies are all pantry staples in my house come October.
- Perfect for Halloween : Great for spooky movie nights, classroom parties, potlucks, or just making a Tuesday in October feel special.
- Crowd-Pleaser : Kids go absolutely wild for these, and adults always sneak one when they think no one is looking. The creamy texture and crunchy topping are irresistible.
- Unbelievably Delicious : The combination of rich chocolate pudding, tangy cream cheese, and crumbly cookie “dirt” is next-level comfort food. It tastes like a fancy dessert but feels like a childhood memory.
What makes this recipe different from every other dirt pudding cup out there? The cream cheese. Trust me on this one. Most recipes just use pudding mix and milk, which gives you a thin, flat flavor. By blending in softened cream cheese, you get this luscious, almost cheesecake-like texture that makes people close their eyes after the first bite. It is comfort food reimagined — richer, creamier, but still ridiculously easy to throw together. Perfect for impressing guests without any stress, or turning a simple weeknight into something memorable.
What Ingredients You Will Need
This recipe uses simple, wholesome ingredients to deliver bold flavor and satisfying texture without the fuss. Most of these are probably already in your kitchen, which is exactly how I like my desserts to be.
For the Pudding Base
- 1 package (3.9 oz) instant chocolate pudding mix (I prefer Jell-O brand for consistent results, but any brand works)
- 2 cups cold whole milk (2% works too, but whole milk gives the creamiest texture)
- 8 oz cream cheese, softened to room temperature (Philadelphia is my go-to — it blends so smoothly)
- 1/4 cup powdered sugar (adds just the right sweetness without being grainy)
- 1 teaspoon vanilla extract (pure vanilla, not imitation, if you have it)
For the “Dirt” Topping
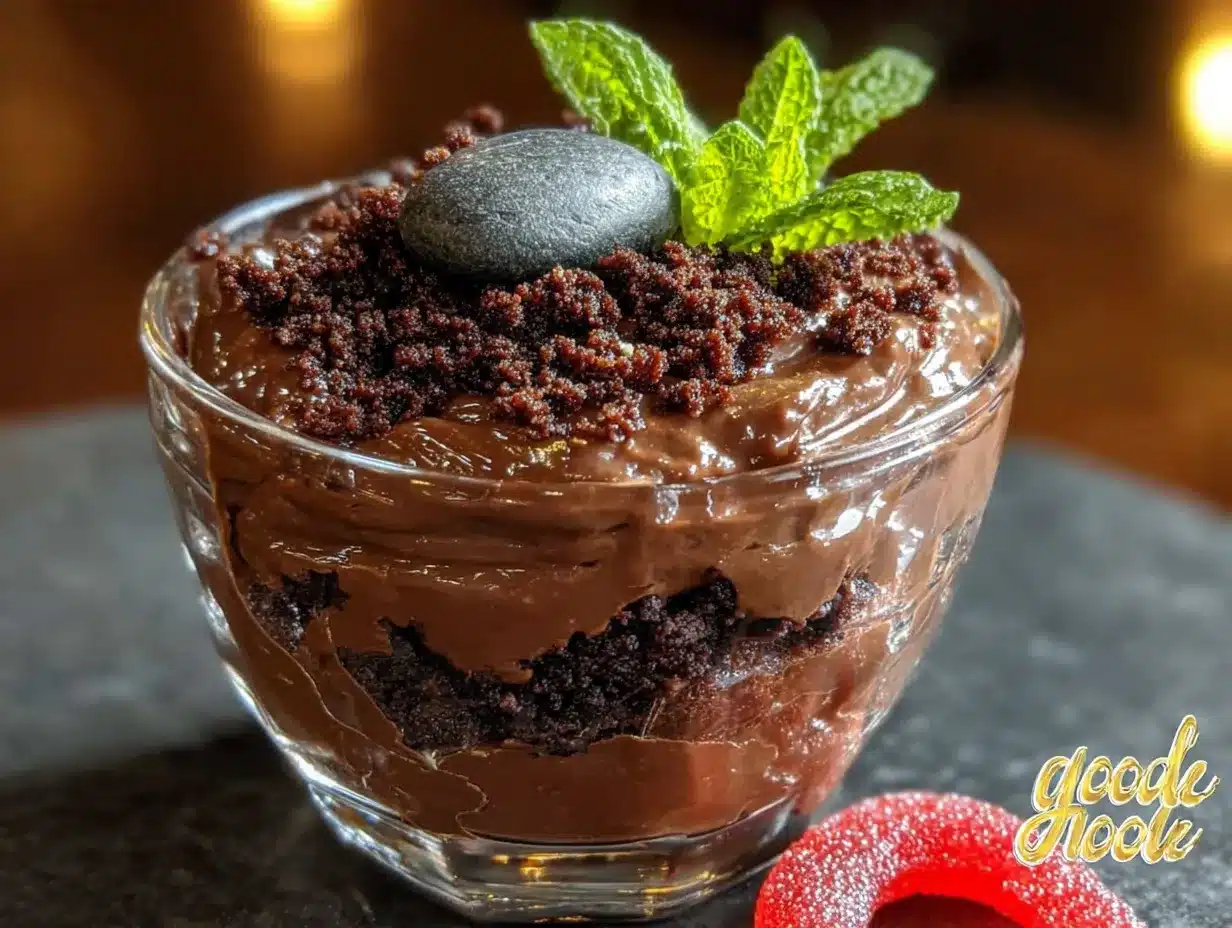
- 1 package (14.3 oz) chocolate sandwich cookies, like Oreos (you will use about 20 cookies, cream filling included)
- 2 tablespoons unsalted butter, melted (helps the crumbs clump together like real dirt)
For Decoration
- Gummy worms (the classic sour kind work great)
- Candy pumpkins or candy corn (for that graveyard feel)
- Small tombstone cookies or Milano cookies (write “RIP” on them with icing for extra spookiness)
- Green shredded coconut (optional, for “grass” — just mix shredded coconut with green food coloring)
A few ingredient selection tips: Look for full-fat cream cheese for the best texture — low-fat versions can make the pudding watery. If you want a dairy-free option, use plant-based cream cheese and almond milk, though the texture will be slightly less rich. For the cookies, I have tried generic brands and they work fine, but Oreos really do give the best dirt-like crumb. And if you are making these for a classroom with nut allergies, just double-check your pudding mix label — most are nut-free, but it is always good to verify.
Equipment Needed
You do not need anything fancy for these easy graveyard dirt pudding cups. Here is what you will need:
- 6 to 8 small clear cups or glasses (I use 8-ounce plastic cups for parties, but small mason jars or wine glasses work beautifully too)
- Large mixing bowl (for the pudding and cream cheese mixture)
- Medium mixing bowl (for crushing cookies)
- Electric hand mixer or stand mixer (you can whisk by hand, but the cream cheese blends much smoother with a mixer)
- Rolling pin or food processor (for crushing cookies into fine crumbs — a zip-top bag and a rolling pin works in a pinch)
- Spatula (for scraping every last bit of that creamy goodness)
- Measuring cups and spoons
I have made these with just a whisk and a zip-top bag when I was visiting my sister’s house and forgot my mixer. It took a little more elbow grease, but the results were still fantastic. If you are using a food processor for the cookies, just pulse them in short bursts — you want crumbs, not dust. And here is a tip I learned the hard way: do not use glass cups if you are serving these to kids at a party. Plastic cups are safer and easier for little hands to hold.
Preparation Method
Follow these steps carefully, and you will have the best easy graveyard dirt pudding cups ready in no time.
- Make the cookie dirt. Place 20 chocolate sandwich cookies (cream filling included) in a zip-top bag. Seal it tight, then crush them with a rolling pin until you get a mix of fine crumbs and small pebbly bits. You want it to look like real garden dirt — not too powdery, not too chunky. Alternatively, pulse them in a food processor 5-6 times. Transfer to a medium bowl, drizzle in the melted butter, and toss with a fork until evenly moistened. Set aside.
- Beat the cream cheese. In a large mixing bowl, beat the softened cream cheese with an electric hand mixer on medium speed until smooth and fluffy, about 2 minutes. Scrape down the sides of the bowl with a spatula. Add the powdered sugar and vanilla extract, then beat for another minute until well combined. The mixture should be light and airy with no lumps.
- Prepare the pudding. In a separate bowl, whisk together the instant chocolate pudding mix and cold milk for about 2 minutes until it starts to thicken. It will be quite thin at first, then suddenly it will get thick and glossy. That is your cue to stop.
- Combine everything. Pour the pudding into the cream cheese mixture. Beat on low speed until just combined — do not overmix or the pudding can get watery. The final mixture should be thick, creamy, and a beautiful dark chocolate color. Give it a taste (I always do) and adjust sweetness if needed.
- Layer the cups. Spoon about 2 tablespoons of the cookie crumbs into the bottom of each cup. Gently press them down with the back of a spoon to create a firm base. Then spoon or pipe the chocolate pudding mixture on top, filling each cup about three-quarters full. Leave some room for the top layer of dirt.
- Top with dirt. Sprinkle the remaining cookie crumbs over the pudding layer. You want a nice thick layer that completely covers the chocolate — this is your “dirt.” Gently press the crumbs down so they stick to the pudding.
- Add the spooky decorations. This is the fun part! Push gummy worms into the dirt so they look like they are crawling out. Place candy pumpkins on top. Stick a tombstone cookie in each cup. If you are using green coconut grass, sprinkle it around the edges. Get creative — I have had kids add little plastic spiders and skeleton rings to theirs.
- Chill before serving. Refrigerate the cups for at least 2 hours before serving. This allows the pudding to set completely and the cookie crumbs to soften slightly, creating that perfect dirt-like texture. If you are making them a day ahead, wait to add the gummy worms until just before serving — they can get weirdly hard in the fridge overnight.
A few sensory cues to watch for: When you are crushing the cookies, you should hear a satisfying crunch, not a muffled thud. The pudding mixture should be thick enough that it holds its shape when you spoon it — if it looks runny, let it sit for a few more minutes. And when you push a gummy worm into the dirt, it should stay put without falling over. That is how you know the texture is right.
Cooking Tips & Techniques
After making these easy graveyard dirt pudding cups about twenty times, I have picked up a few tricks that make a real difference.
Softening cream cheese the right way. I used to microwave cream cheese and end up with half-melted, lumpy disaster. Now I just leave it on the counter for 30 minutes before I start. If you are in a hurry, cut it into small cubes and let it sit for 10 minutes — it softens much faster that way. Cold cream cheese will give you lumpy pudding, and nobody wants that.
The cookie crumb texture trick. Here is something I learned after my first batch turned into soggy mush: do not crush the cookies too fine. You want some small pebbly bits mixed in with the fine crumbs. The larger pieces stay crunchier longer, while the fine crumbs create that realistic dirt look. I actually leave a few cookies slightly chunky on purpose now.
Layering like a pro. If you want those clean, Instagram-worthy layers, use a piping bag for the pudding. Just snip off the tip and pipe it into the cups — it keeps the sides clean so you can see the distinct layers through the cup. No piping bag? A zip-top bag with a corner snipped off works just as well.
The soggy cookie problem. I ruined my first batch by making them the night before a party. The cookie crumbs turned into a sad, wet paste. Now I know to add the top layer of dirt and decorations right before serving. You can prep the pudding and the crumbs separately, then assemble everything an hour or two before guests arrive. The bottom cookie layer can sit overnight, but the top layer needs to stay crunchy.
Multitasking strategy. While the cream cheese is softening on the counter, crush the cookies and melt the butter. While the pudding is setting after mixing, beat the cream cheese mixture. This recipe moves fast, so having everything prepped and measured ahead of time makes the process so much smoother. I have definitely forgotten to soften the cream cheese and paid the price with lumpy pudding — learn from my mistakes!
Variations & Adaptations
One of the best things about these easy graveyard dirt pudding cups is how adaptable they are. Here are some variations I have tried and loved.
Dairy-Free Version. Use dairy-free cream cheese (Kite Hill is my favorite), oat milk or almond milk for the pudding, and dairy-free chocolate sandwich cookies. The texture is slightly less rich, but still creamy and delicious. My friend who is lactose-intolerant said these were the best Halloween dessert she has had in years.
Peanut Butter Cup Version. Swirl in 1/4 cup of creamy peanut butter into the pudding mixture before layering. Use peanut butter sandwich cookies instead of regular chocolate ones. Top with mini peanut butter cups instead of candy pumpkins. This version disappears fastest at parties, I swear.
Mint Chocolate Version. Add 1/2 teaspoon of peppermint extract to the pudding mixture. Crush chocolate mint cookies (like Mint Oreos) for the dirt. Top with a small sprig of fresh mint and a chocolate mint candy. It tastes like a Thin Mint in pudding form, and it is so refreshing.
Pumpkin Spice Version. For a fall twist, replace the chocolate pudding with vanilla or butterscotch pudding. Add 1/2 cup of pumpkin puree and 1 teaspoon of pumpkin pie spice to the cream cheese mixture. Use ginger snap cookies for the dirt. Top with candy corn and little pumpkin candies. This one is perfect for Thanksgiving too.
Individual Serving Size. If you are serving a crowd, use shot glasses or small 4-ounce cups for mini versions. They are perfect for parties where people want to graze. I made 24 of these for a school Halloween party and they were gone in ten minutes.
Serving & Storage Suggestions
These easy graveyard dirt pudding cups are best served cold, straight from the fridge. The contrast between the chilled, creamy pudding and the slightly crunchy cookie dirt is what makes them so satisfying. I like to take them out about 10 minutes before serving so they are not ice-cold, but that is a personal preference.
Presentation ideas: Arrange the cups on a large tray or platter. Scatter extra candy pumpkins and gummy worms around the base for a spooky graveyard scene. If you are serving them at a party, label each cup with a tiny tombstone that says something funny like “Here Lies My Diet” or “RIP Boring Desserts.” I did this for a Halloween party last year and people took pictures of them all night.
What to serve with them: These are rich enough to stand alone, but they pair beautifully with a cup of hot apple cider or a warm pumpkin spice latte. For a full Halloween spread, serve them alongside caramel apples, popcorn balls, and pumpkin-shaped sugar cookies. The salty-sweet combo works perfectly.
Storage instructions: Store the assembled cups in the refrigerator, covered tightly with plastic wrap or lids, for up to 3 days. The cookie crumbs will soften over time, so they are best within 24 hours of assembly. If you are making them ahead, store the pudding mixture and cookie crumbs separately in the fridge, then layer and decorate the day you plan to serve them.
Freezing: I do not recommend freezing these cups. The pudding gets icy and the texture becomes grainy when thawed. Stick to refrigeration for the best results.
Flavor development: Honestly, these taste even better after sitting in the fridge for a few hours. The flavors meld together and the cookie crumbs on the bottom layer soften into a almost-cake-like texture. I have made them the night before a party and they were perfect the next day.
Nutritional Information & Benefits
Let me be real with you — these easy graveyard dirt pudding cups are a treat, not a health food. But they are made with simple ingredients you can feel good about serving to your family. Here is the estimated nutritional breakdown for one cup (based on 8 servings):
| Nutrient | Amount Per Serving |
|---|---|
| Calories | 385 |
| Total Fat | 22g |
| Saturated Fat | 12g |
| Cholesterol | 45mg |
| Sodium | 410mg |
| Total Carbohydrates | 44g |
| Dietary Fiber | 2g |
| Sugars | 32g |
| Protein | 6g |
Now, here is the good news: cream cheese actually contains a decent amount of protein and calcium, and the milk adds more calcium and vitamin D. The cookies provide a little iron from the cocoa. If you want to make these a bit lighter, you can use low-fat cream cheese and skim milk, though the texture will be less rich. For a lower-sugar option, use sugar-free pudding mix and reduce the powdered sugar to 2 tablespoons.
These are not gluten-free unless you use certified gluten-free sandwich cookies, so keep that in mind for guests with celiac disease. They also contain dairy and soy (from the cookies), so they are not suitable for those with allergies to those ingredients. But for a fun Halloween treat that brings joy without a ton of weird additives, these are a solid choice.
Conclusion
These easy graveyard dirt pudding cups are proof that the best recipes often come from the messiest moments in the kitchen. What started as a ruined chocolate mousse turned into a Halloween tradition that my kids look forward to every single year. They are simple enough for a weeknight, impressive enough for a party, and customizable enough to fit any dietary need or flavor preference.
I love how these cups bring people together. There is something about digging into a cup of chocolate “dirt” and finding a gummy worm that makes everyone — kids and adults alike — grin like they are six years old again. That is the magic of this recipe. It is not fancy or complicated. It is just fun, delicious, and made with love.
I would love to hear how your graveyard dirt pudding cups turn out! Did you add any fun decorations? Did your kids help make them? Drop a comment below and share your spooky creations. And if you loved this recipe, please share it with a friend who needs a last-minute Halloween dessert idea. Happy haunting, and happy eating!
Frequently Asked Questions
Can I make graveyard dirt pudding cups ahead of time?
Yes! You can assemble them up to 24 hours in advance. Just wait to add the top layer of cookie crumbs and the gummy worms until right before serving. The bottom cookie layer can sit overnight and will soften into a delicious cake-like texture.
Can I use homemade chocolate pudding instead of instant mix?
Absolutely. Homemade pudding works great, just make sure it is completely cooled before mixing it with the cream cheese. Warm pudding will melt the cream cheese and give you a thin, runny mixture. Let it chill in the fridge for at least an hour before using.
How do I keep the gummy worms from getting hard in the fridge?
Gummy worms can get tough and chewy when refrigerated overnight. The best solution is to add them just before serving. If you need to prep ahead, store the gummy worms separately and let your kids or guests add them as a fun activity right before dessert time.
Can I make these in a large dish instead of individual cups?
Definitely. Use a 9×13 inch baking dish or a large trifle bowl. Layer the cookie crumbs, pudding, and more crumbs just like you would in individual cups. This is perfect for a party where people can scoop their own serving. Just double the recipe for a large dish.
What can I use instead of cream cheese?
If you do not have cream cheese, you can use mascarpone cheese for an even richer texture. For a lighter option, Greek yogurt works in a pinch — just use plain, full-fat yogurt and drain any excess liquid first. The texture will be tangier and less creamy, but still delicious.
Pin This Recipe!
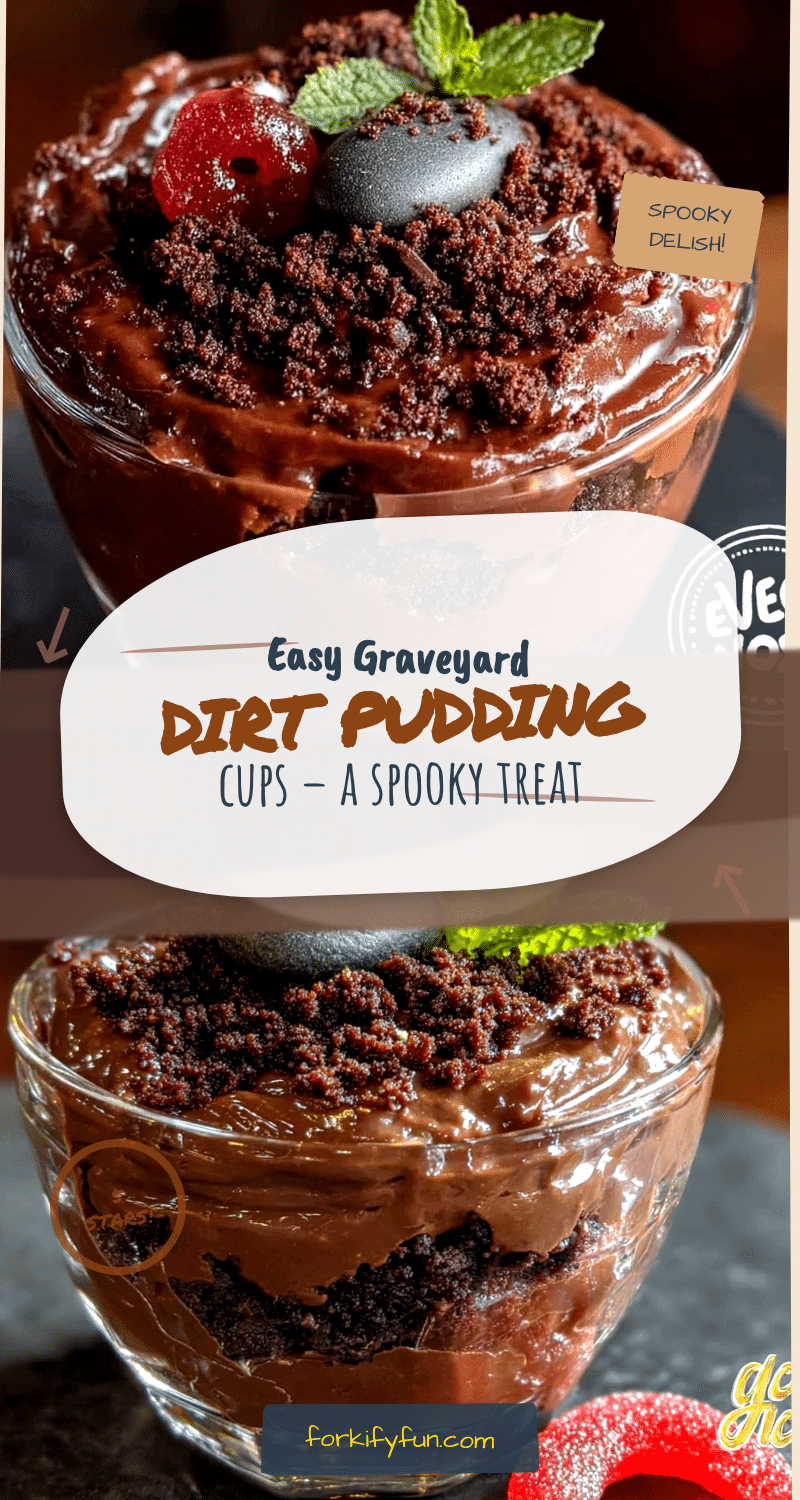
Best Easy Graveyard Dirt Pudding Cups Recipe

These easy graveyard dirt pudding cups are a fun and delicious Halloween treat made with creamy chocolate pudding, crushed chocolate sandwich cookies, and spooky decorations. Perfect for parties, classroom treats, or a festive family dessert.
- Prep Time: 20 minutes
- Cook Time: 0 minutes
- Total Time: 2 hours 20 minutes (includes chilling time)
- Yield: 8 servings 1x
- Category: Dessert
- Cuisine: American
Ingredients
- 1 package (3.9 oz) instant chocolate pudding mix
- 2 cups cold whole milk
- 8 oz cream cheese, softened to room temperature
- 1/4 cup powdered sugar
- 1 teaspoon vanilla extract
- 1 package (14.3 oz) chocolate sandwich cookies (about 20 cookies)
- 2 tablespoons unsalted butter, melted
- Gummy worms (for decoration)
- Candy pumpkins or candy corn (for decoration)
- Small tombstone cookies or Milano cookies (optional, for decoration)
- Green shredded coconut (optional, for decoration)
Instructions
- Make the cookie dirt: Place 20 chocolate sandwich cookies (cream filling included) in a zip-top bag. Seal tight and crush with a rolling pin until you get a mix of fine crumbs and small pebbly bits. Alternatively, pulse in a food processor 5-6 times. Transfer to a medium bowl, drizzle in melted butter, and toss with a fork until evenly moistened. Set aside.
- Beat the cream cheese: In a large mixing bowl, beat softened cream cheese with an electric hand mixer on medium speed until smooth and fluffy, about 2 minutes. Scrape down sides. Add powdered sugar and vanilla extract, beat for another minute until well combined and no lumps remain.
- Prepare the pudding: In a separate bowl, whisk together instant chocolate pudding mix and cold milk for about 2 minutes until it starts to thicken and becomes glossy.
- Combine everything: Pour the pudding into the cream cheese mixture. Beat on low speed until just combined. Do not overmix. The final mixture should be thick, creamy, and dark chocolate color.
- Layer the cups: Spoon about 2 tablespoons of cookie crumbs into the bottom of each cup. Gently press down with the back of a spoon. Then spoon or pipe the chocolate pudding mixture on top, filling each cup about three-quarters full.
- Top with dirt: Sprinkle remaining cookie crumbs over the pudding layer, covering completely. Gently press crumbs down so they stick.
- Add spooky decorations: Push gummy worms into the dirt so they look like they are crawling out. Place candy pumpkins on top. Stick a tombstone cookie in each cup. Add green coconut grass around edges if desired.
- Chill before serving: Refrigerate cups for at least 2 hours before serving. If making a day ahead, wait to add gummy worms until just before serving.
Notes
For best results, use full-fat cream cheese and whole milk. Do not crush cookies too fine; leave some pebbly bits for texture. Add top layer of cookie crumbs and decorations just before serving to keep them crunchy. Gummy worms can get hard if refrigerated overnight, so add them last minute. Store assembled cups in the refrigerator for up to 3 days, but best within 24 hours.
Nutrition
- Serving Size: 1 cup
- Calories: 385
- Sugar: 32
- Sodium: 410
- Fat: 22
- Saturated Fat: 12
- Carbohydrates: 44
- Fiber: 2
- Protein: 6
Keywords: graveyard dirt pudding cups, Halloween dessert, chocolate pudding cups, easy Halloween treat, dirt pudding, spooky dessert, no-bake dessert