My husband claimed to hate pumpkin seeds for thirty-seven years. Thirty-seven years. He’d say it with such conviction too—”They’re like eating cardboard,” he’d announce every October while I carved pumpkins, as if I’d asked. I stopped asking. I just carved my pumpkins, scooped the guts into a bowl, and roasted the seeds for myself. It became our little seasonal ritual. He’d carve, I’d roast, and we’d coexist peacefully with our respective pumpkin opinions.
Then two autumns ago, I made this batch of crispy cinnamon sugar pumpkin seeds just for me. I was testing a new method—boiling them first, then tossing them in butter and cinnamon sugar before roasting. I pulled the tray out of the oven, let them cool, and went to answer the phone. When I came back, my husband was standing at the counter, caught red-handed, a guilty crunch echoing in the kitchen. “These are… different,” he said, trying to play it cool. Different. That’s his version of a standing ovation.
Honestly, I get it now. Most pumpkin seeds are dry, bland, and frankly not worth the effort of cracking open. But these? These are something else entirely. The cinnamon sugar coating caramelizes into this delicate crunch, and the seeds themselves get perfectly crispy without that weird chewy texture. Maybe you’ve been there—trying to like a seasonal snack because it feels like you should, but secretly wondering what all the fuss is about. I was that person too. But this version? It changed my mind. And more importantly, it changed his.
Why You’ll Love This Recipe
Let me tell you why these crispy cinnamon sugar pumpkin seeds have become my most-requested fall snack. I’ve tested this recipe at least a dozen times across different ovens and pumpkin varieties, and I can say with confidence—this is the version that works every single time.
- Quick & Easy: From pumpkin to snack in under 45 minutes. Most of that time is hands-off roasting.
- Simple Ingredients: You probably have everything already—pumpkin seeds, butter, sugar, cinnamon, and salt. No fancy grocery trips.
- Perfect for Fall: Halloween parties, Thanksgiving snacking, cozy movie nights, or just because it’s October and you want something that tastes like autumn.
- Crowd-Pleaser: Even the pumpkin seed skeptics (like my husband) can’t stop eating these. Kids love them too.
- Unbelievably Delicious: The combination of buttery richness, warm cinnamon, and that satisfying crunch is next-level comfort food.
What makes this recipe different from the rest? It’s the boiling step. Most recipes skip this, but boiling the seeds first changes everything—it helps the coating stick better and gives you that perfectly crispy texture without any chewiness. Plus, the cinnamon sugar ratio is spot on: sweet enough to feel like a treat, but not so sweet that you forget you’re eating something that’s actually pretty good for you.
This isn’t just another pumpkin seed recipe. It’s the one that makes you close your eyes after the first bite. It’s comfort food reimagined—healthier, faster, but with the same soul-soothing satisfaction. Perfect for impressing guests without stress, or turning a simple fall afternoon into something memorable.
What Ingredients You Will Need
This recipe uses simple, wholesome ingredients to deliver bold flavor and satisfying texture without the fuss. Most of these are pantry staples, especially during pumpkin season.
- Fresh pumpkin seeds – 1 cup (about 120g), rinsed and patted dry. You can use seeds from any pumpkin variety. (Sugar pumpkins tend to have smaller, more tender seeds.)
- Unsalted butter – 2 tablespoons, melted. (I prefer Kerrygold for its rich flavor, but any good unsalted butter works. Use vegan butter if needed.)
- Granulated sugar – 2 tablespoons. (Adds sweetness and helps create that crispy coating.)
- Ground cinnamon – 1 teaspoon. (Use Ceylon cinnamon for a milder, sweeter flavor or Cassia for more warmth.)
- Salt – ¼ teaspoon. (Don’t skip this—it balances the sweetness and makes the flavor pop. I use fine sea salt.)
- Vanilla extract – ½ teaspoon. (Optional but recommended—adds depth and warmth that complements the cinnamon beautifully.)
For the boiling step, you’ll also need:
- Water – 2 cups
- Salt – 1 tablespoon (for the boiling water—this seasons the seeds from the inside out)
A few ingredient notes from my experience: If you’re using seeds from a freshly carved pumpkin, make sure to rinse them really well. Pumpkin guts are sticky, and any leftover stringy bits will burn in the oven. I like to put the seeds in a colander and run cold water over them while rubbing them between my fingers. It takes a minute or two, but it’s worth it.
For the sugar, I’ve tried brown sugar and coconut sugar too. Brown sugar gives a slightly deeper flavor, but it can clump more. Coconut sugar works but the color gets darker and it’s harder to see when the seeds are done. Plain white granulated sugar gives the cleanest, crispiest result. Trust me on this one—I learned the hard way.
If you’re watching your sugar intake, you can reduce the sugar to 1 tablespoon, but honestly, the full amount is what makes these addictive. They’re still a pretty healthy snack compared to most fall treats.
Equipment Needed
You don’t need much for this recipe, which is part of why I love it. Here’s what you’ll need:
- Medium saucepan – For boiling the seeds. Any pot works, just make sure it’s big enough for the seeds to move around freely.
- Colander – For rinsing the seeds and draining them after boiling.
- Kitchen towel or paper towels – For patting the seeds dry. A clean dish towel works better than paper towels for this—less lint.
- Mixing bowl – Medium size, for tossing the seeds with the coating.
- Baking sheet – Rimmed, preferably. The rim helps keep the seeds from rolling off. I use a half-sheet pan.
- Parchment paper or silicone baking mat – Highly recommended. Makes cleanup so much easier and prevents sticking.
- Spatula – For stirring the seeds halfway through roasting.
- Measuring spoons – For accuracy, especially with the cinnamon and sugar.
If you don’t have parchment paper, you can grease the baking sheet lightly with butter or cooking spray. Just watch them closely—they can stick more easily. A silicone baking mat is my favorite option; I’ve been using the same one for years and it still works perfectly.
Preparation Method
Let me walk you through this step by step. I’ve made these so many times that I’ve got the process down to a science.
- Preheat your oven to 350°F (175°C). Line a baking sheet with parchment paper or a silicone mat. Getting the oven hot before you start is key—you want it ready when the seeds are prepped.
- Rinse the pumpkin seeds thoroughly. Put them in a colander and run cold water over them, rubbing them between your fingers to remove any pumpkin pulp. This takes about 2-3 minutes. You’ll know they’re clean when the water runs clear and the seeds feel smooth, not slippery.
- Boil the seeds. In a medium saucepan, bring 2 cups of water and 1 tablespoon of salt to a boil. Add the rinsed seeds and boil for 10 minutes. Don’t skip this step—I know it seems like extra work, but it’s what makes the seeds crispy instead of chewy. The boiling softens the outer shell just enough that they roast evenly.
- Drain and dry. Pour the boiled seeds into the colander and let them drain well. Then spread them on a clean kitchen towel or paper towels and pat them very dry. This is important—excess moisture will steam the seeds instead of roasting them. Let them sit for 5 minutes to air dry a bit more.
- Make the coating. In a medium bowl, whisk together the melted butter, granulated sugar, ground cinnamon, salt, and vanilla extract until smooth. The mixture should look like a thin paste.
- Toss the seeds. Add the dried seeds to the bowl and stir until every seed is coated. Use a spatula to scrape the sides. You want all that buttery cinnamon goodness distributed evenly.
- Spread on baking sheet. Pour the coated seeds onto the prepared baking sheet and spread them in a single layer. Try not to overlap them too much—crowding leads to uneven roasting. I use the back of a spoon to spread them out.
- Roast for 20-25 minutes. Place the baking sheet on the middle rack. At the 10-minute mark, take them out and stir with a spatula. This helps them roast evenly. Watch them closely in the last 5 minutes—they can go from golden to burnt quickly. They’re done when they’re golden brown and smell incredibly fragrant.
- Cool completely. Let the seeds cool on the baking sheet for at least 15 minutes. They’ll continue to crisp up as they cool. Don’t rush this step—warm seeds are soft seeds. Patience pays off here.
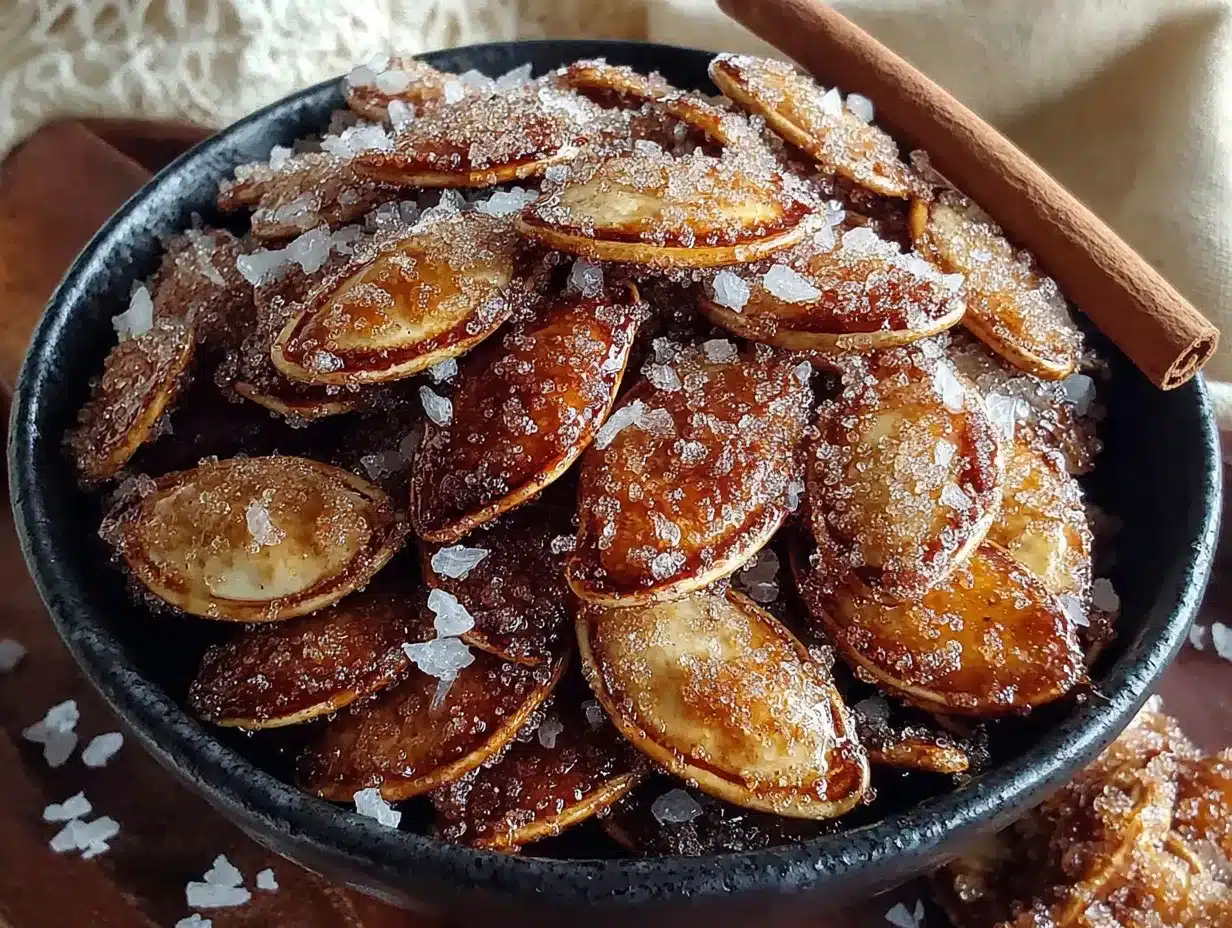
- Break apart and enjoy. Once cooled, break apart any clusters that formed. They should be crispy, crunchy, and perfectly coated in cinnamon sugar.
A sensory cue to watch for: when they’re done, the kitchen will smell like a cinnamon-scented autumn candle. The seeds will look slightly darker and you’ll hear a faint crackling sound as they cool—that’s the sugar crystalizing into that perfect crunch.
Cooking Tips & Techniques
After making these more times than I can count, here are the things I wish someone had told me:
Don’t skip the boil. I know it adds an extra step, but trust me—this is the secret to crispy seeds. The first few times I made pumpkin seeds, I just rinsed and roasted them. They were always a little chewy, especially around the edges. Boiling for 10 minutes changes the texture completely. It hydrates the seeds so they steam from the inside while roasting, giving you that perfect crunch.
Dry them really well. This is where I messed up more than once. If the seeds are still wet when you add the coating, the butter and sugar won’t stick properly. Pat them dry, then let them sit for a few minutes. I’ve learned to be patient here—it makes a noticeable difference.
Watch the oven like a hawk. Every oven runs differently. My old oven would burn these in 18 minutes; my current one takes the full 25. Start checking at 15 minutes. Look for golden-brown color and that amazing cinnamon smell. If you see any dark spots, pull them out immediately.
Let them cool completely. I know it’s tempting to dig in right away, but warm seeds are soft seeds. They need that cooling time to develop the crunch. I once served them warm to guests and they were disappointed—they thought I’d made a mistake. The next batch I let cool fully and they were a hit. Lesson learned.
Storage matters. These stay crispy for about a week in an airtight container. But honestly, they never last that long in my house. If they do start to soften, you can pop them back in a 300°F oven for 5 minutes to re-crisp them.
Variations & Adaptations
One of the best things about this recipe is how easy it is to adapt. Here are some variations I’ve tried and loved:
Spiced Pumpkin Seeds: Add ¼ teaspoon each of nutmeg, ginger, and allspice to the cinnamon sugar mixture. This gives you a pumpkin pie spice flavor that’s perfect for Thanksgiving snacking.
Maple Cinnamon Seeds: Replace the granulated sugar with 2 tablespoons of maple syrup. Reduce the butter to 1 tablespoon since the syrup adds moisture. These are slightly chewier but incredibly flavorful.
Savory-Sweet Combo: Add a pinch of cayenne pepper or chili powder to the cinnamon sugar. The heat balances the sweetness beautifully. My neighbor tried this version and now makes it every year.
Vegan Version: Use coconut oil instead of butter. The flavor changes slightly—more tropical—but it still works wonderfully. Just make sure your sugar is vegan-friendly.
Extra Crunchy: After boiling, let the seeds dry in a 200°F oven for 15 minutes before coating and roasting. This extra drying step gives you the crunchiest possible result.
I personally love the maple cinnamon version for cozy fall mornings. There’s something about that combination that just feels right when the leaves are changing and the air gets crisp.
Serving & Storage Suggestions
These crispy cinnamon sugar pumpkin seeds are incredibly versatile. Here’s how I like to serve and store them:
Serving temperature: Room temperature is best. The crunch is most pronounced when they’ve cooled completely. I serve them in a big bowl for snacking, or in small cups for parties.
Presentation ideas: Sprinkle them over yogurt or oatmeal for a crunchy breakfast topping. They’re amazing on vanilla ice cream too—the warm cinnamon and cold ice cream combination is hard to beat. For a fun Halloween party snack, serve them in mini pumpkin-shaped bowls.
Complementary dishes: These pair wonderfully with hot apple cider, pumpkin spice lattes, or even a glass of cold milk. They’re also great alongside other fall snacks like caramel apples or roasted chestnuts.
Storage instructions: Store in an airtight container at room temperature for up to 1 week. Do not refrigerate—the moisture will make them soft. If you live in a humid climate, add a silica gel packet to the container to absorb excess moisture.
Freezer instructions: You can freeze these for up to 3 months. Place them in a freezer-safe bag, squeeze out as much air as possible, and seal. To re-crisp, spread them on a baking sheet and bake at 300°F for 5-7 minutes. They won’t be quite as crunchy as fresh, but they’re still delicious.
Flavor development: These actually taste even better the next day. The cinnamon flavor seems to deepen overnight. Just make sure they’re stored properly to maintain that crunch.
Nutritional Information & Benefits
While these are a treat, they also pack some surprising nutritional benefits. Here’s the estimated breakdown per serving (about ¼ cup):
- Calories: 180
- Protein: 7g
- Fat: 12g (mostly healthy unsaturated fats)
- Carbohydrates: 14g
- Fiber: 3g
- Sugar: 9g
- Iron: 15% of daily value
- Magnesium: 20% of daily value
- Zinc: 15% of daily value
Pumpkin seeds are a great source of magnesium, which supports muscle function and sleep quality. They also contain zinc, which is important for immune health—especially relevant during cold and flu season. The fiber content helps with digestion and keeps you feeling full longer.
From a dietary perspective, these are naturally gluten-free and can be made vegan with a simple substitution. They’re lower in sugar than most fall treats, and the protein and fiber make them more satisfying than typical snacks. I like to think of them as a healthier alternative to candy corn or caramel popcorn—still indulgent, but with actual nutritional value.
Just be mindful of portion sizes if you’re watching your calorie intake. It’s easy to eat a whole batch without realizing it—trust me, I’ve done it.
Conclusion
These crispy cinnamon sugar pumpkin seeds are proof that sometimes the simplest recipes are the ones that surprise you most. They turned a thirty-seven-year pumpkin seed hater into a convert. They’ve become the snack I look forward to every fall, the one that makes carving pumpkins feel complete.
What I love most about this recipe is how forgiving it is. You can adjust the sweetness, add different spices, or make it your own in a dozen different ways. It’s a canvas for your fall creativity. And honestly? It’s just really, really good.
I’d love to hear how these turn out for you. Did you try a variation? Did you convert a pumpkin seed skeptic in your life? Drop a comment below and let me know. And if you share a photo on Pinterest, tag me—I love seeing your creations. Happy fall snacking, friends. You’ve got this.
Frequently Asked Questions
Can I use store-bought pumpkin seeds instead of fresh?
Absolutely. If you’re using raw, shelled pumpkin seeds (pepitas), skip the boiling step since they’re already processed. Just toss them with the coating and roast for 12-15 minutes. If you’re using raw, unshelled seeds from a bag, boil them for 5 minutes instead of 10 since they’re already somewhat dried.
Why are my pumpkin seeds chewy instead of crispy?
This usually happens for one of three reasons: you skipped the boiling step, you didn’t dry them well enough before roasting, or you didn’t let them cool completely. The boiling is crucial—it softens the outer shell so they roast evenly. Make sure to pat them very dry and give them that full cooling time on the baking sheet.
Can I make these in an air fryer?
Yes! Air fryer pumpkin seeds are actually amazing. Preheat your air fryer to 300°F (150°C). Cook the coated seeds for 10-12 minutes, shaking the basket halfway through. Check them at 8 minutes since air fryers can vary. They’ll be ready sooner than oven-roasted seeds.
How do I prevent the sugar from burning?
Sugar can burn quickly, especially in the last few minutes of roasting. Keep a close eye on the seeds after the 15-minute mark. If they start looking dark around the edges, pull them out immediately. Using parchment paper helps too—it provides a barrier between the seeds and the hot pan. Also, make sure your oven temperature is accurate; an oven thermometer is a cheap investment that pays off.
Can I double this recipe?
Definitely. Just make sure to use a larger baking sheet or split the seeds between two sheets. Crowding the pan will cause them to steam instead of roast, leading to uneven results. If using two sheets, rotate them halfway through the cooking time for even browning.
Pin This Recipe!
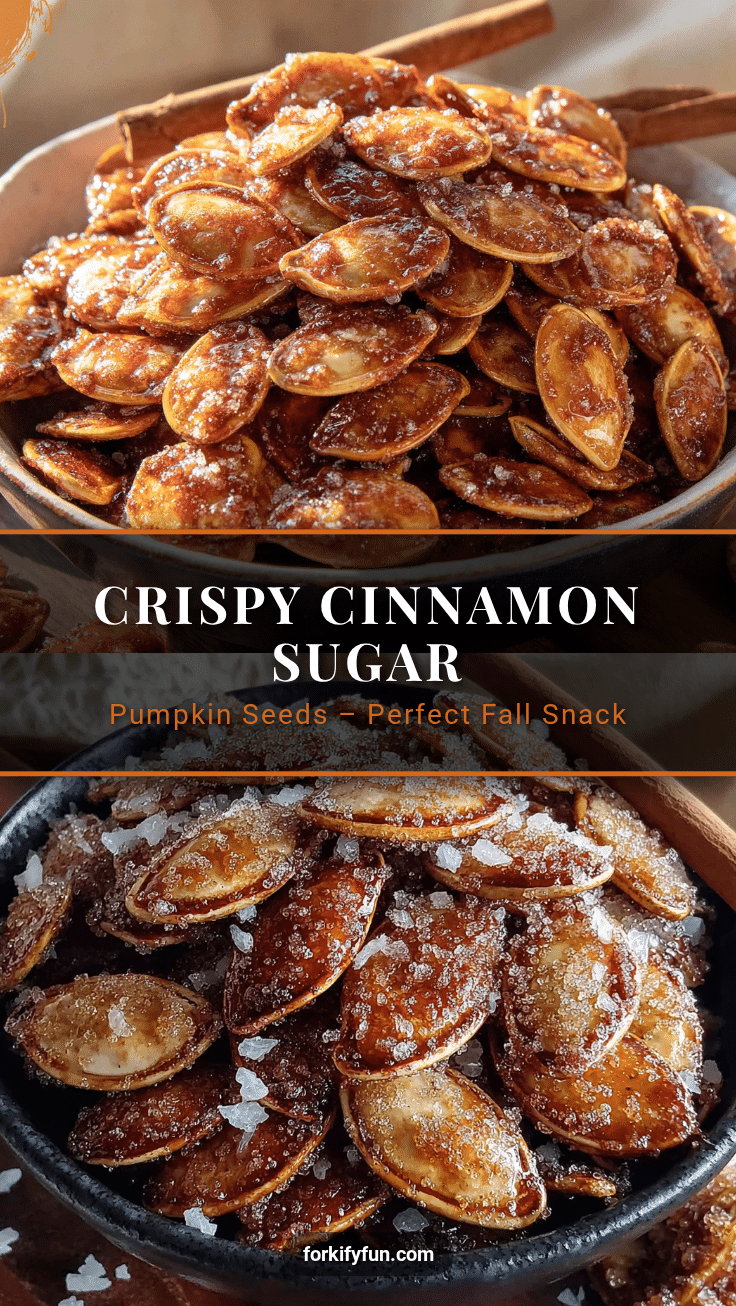
Best Easy Crispy Cinnamon Sugar Pumpkin Seeds

These crispy cinnamon sugar pumpkin seeds are a game-changer—boiled first for perfect crunch, then tossed in butter and cinnamon sugar before roasting. Even pumpkin seed skeptics will be converted.
- Prep Time: 15 minutes
- Cook Time: 25 minutes
- Total Time: 40 minutes
- Yield: 4 servings 1x
- Category: Snack
- Cuisine: American
Ingredients
- 1 cup fresh pumpkin seeds (about 120g), rinsed and patted dry
- 2 tablespoons unsalted butter, melted
- 2 tablespoons granulated sugar
- 1 teaspoon ground cinnamon
- ¼ teaspoon salt (fine sea salt)
- ½ teaspoon vanilla extract (optional)
- 2 cups water (for boiling)
- 1 tablespoon salt (for boiling water)
Instructions
- Preheat your oven to 350°F (175°C). Line a baking sheet with parchment paper or a silicone mat.
- Rinse the pumpkin seeds thoroughly in a colander under cold water, rubbing them between your fingers to remove any pumpkin pulp. Continue until the water runs clear and the seeds feel smooth.
- In a medium saucepan, bring 2 cups of water and 1 tablespoon of salt to a boil. Add the rinsed seeds and boil for 10 minutes.
- Drain the boiled seeds in a colander, then spread them on a clean kitchen towel or paper towels and pat them very dry. Let them sit for 5 minutes to air dry further.
- In a medium bowl, whisk together the melted butter, granulated sugar, ground cinnamon, salt, and vanilla extract (if using) until smooth.
- Add the dried seeds to the bowl and stir until every seed is evenly coated.
- Pour the coated seeds onto the prepared baking sheet and spread them in a single layer, avoiding overlap as much as possible.
- Roast for 20-25 minutes, stirring at the 10-minute mark. Watch closely in the last 5 minutes to prevent burning. Seeds are done when golden brown and fragrant.
- Let the seeds cool completely on the baking sheet for at least 15 minutes—they will continue to crisp up.
- Break apart any clusters and enjoy.
Notes
Boiling the seeds first is the secret to crispy texture. Dry seeds thoroughly before coating to ensure the coating sticks. Watch the oven closely in the last 5 minutes to prevent burning. Let seeds cool completely for maximum crunch. Store in an airtight container at room temperature for up to 1 week. For extra crunch, dry seeds in a 200°F oven for 15 minutes before coating.
Nutrition
- Serving Size: ¼ cup
- Calories: 180
- Sugar: 9
- Sodium: 150
- Fat: 12
- Saturated Fat: 4
- Carbohydrates: 14
- Fiber: 3
- Protein: 7
Keywords: pumpkin seeds, cinnamon sugar, fall snack, Halloween, Thanksgiving, crispy, easy