This was supposed to be a batch of classic sugar cookies. I had the butter softening on the counter, the sprinkles ready to go, and a very specific vision of perfectly round, chewy cookies cooling on a rack. But somewhere between answering a text and helping my kid find a missing shoe, the butter got away from me. It sat in the pan a little too long, turning that gorgeous golden-brown color that fills your kitchen with this nutty, almost caramel-like smell. Honestly, I panicked for a second. Browned butter is great for some things, but not for a classic sugar cookie, right?
I stood there staring at the pan, the butter now speckled with tiny brown bits, feeling that familiar frustration of a plan gone sideways. I was already running late, and starting over wasn’t an option. So I did what any reasonable person would do when a recipe goes off the rails—I improvised. I grabbed a bag of marshmallows and a box of crispy rice cereal, and I just went for it. What came out of that pan was nothing like the plan. It was better. Way better.
The first bite stopped me mid-chew. The brown butter had transformed everything, adding this deep, almost butterscotch flavor that regular butter just can’t touch. And the texture? It was chewy, buttery, and perfectly crunchy, with those little pops of color from the sprinkles. I mean, I’ve made a lot of Rice Krispie treats in my life—who hasn’t? But these were different. These were the kind of treats that make you close your eyes and forget about the mess in the kitchen. Maybe you’ve been there, staring at a failed plan and wondering what to do next. Trust me, this happy accident is one you’ll want to repeat on purpose.
Why You’ll Love These Brown Butter Sugar Cookie Rice Krispie Treats
Let me tell you why these treats have become my go-to for everything from birthday parties to lazy Sunday afternoons. I’ve tested this recipe more times than I can count, tweaking the butter temperature and marshmallow ratio until it was absolutely perfect. Here’s what makes them stand out:
- Quick & Easy: From start to finish, you’re looking at about 20 minutes of active time. Perfect for those moments when you need a dessert fast.
- Simple Ingredients: You probably already have everything in your pantry. No fancy extracts or specialty flours needed.
- Perfect for Any Occasion: Birthday parties, bake sales, holiday cookie exchanges, or just a Tuesday night craving—these treats fit right in.
- Crowd-Pleaser: I’ve yet to meet someone who doesn’t go back for seconds. Kids love the sprinkles, adults love the brown butter depth.
- Unbelievably Delicious: The brown butter adds a nutty richness that makes these taste way more complicated than they are.
What really sets this recipe apart is the brown butter technique. Most Rice Krispie treats use melted butter, but browning it first unlocks a whole new level of flavor. It’s not just another version—it’s the version that makes people ask for the recipe every single time. And honestly, it’s comfort food reimagined. It’s nostalgic but elevated, simple but special. Perfect for impressing guests without any stress.
What Ingredients You Will Need
This recipe uses simple, wholesome ingredients to deliver that incredible brown butter flavor and satisfying crunch. Most of these are pantry staples, which makes these treats dangerously easy to whip up anytime.
- Unsalted butter (1 cup / 2 sticks) — I always use unsalted to control the salt level. Land O’Lakes or Kerrygold work beautifully here. The browning process is where the magic happens.
- Marshmallows (1 standard 10-ounce bag) — Regular-sized marshmallows melt more evenly than the mini ones in my experience. If you’re feeling fancy, you can use vanilla bean marshmallows for extra flavor.
- Crispy rice cereal (6 cups) — I recommend the classic Kellogg’s Rice Krispies for that perfect snap. Generic brands work too, but they can get a little soggy faster.
- Sugar cookie mix (1/2 cup dry mix) — Yes, you read that right. Adding a bit of dry sugar cookie mix gives these treats that authentic sugar cookie flavor without making a separate batch of cookies. I use Betty Crocker, but any brand works.
- Sprinkles (1/2 cup) — Rainbow jimmies are my go-to. They hold their color better than nonpareils and don’t bleed into the marshmallow mixture. For holidays, swap in seasonal colors!
- Vanilla extract (1 teaspoon) — Pure vanilla extract makes a difference here. The brown butter and vanilla together are a flavor dream team.
- Flaky sea salt (optional, but highly recommended) — Just a pinch on top balances the sweetness and makes the brown butter flavor pop.
One thing I’ve learned the hard way: don’t skip the sugar cookie mix. I tried making these without it once, thinking the brown butter would be enough. It was good, but it wasn’t that “sugar cookie” magic. That dry mix is the secret weapon that makes these treats taste like you spent way more time than you actually did.
Equipment Needed
You don’t need a fancy kitchen to pull these off. Here’s what you’ll need:
- Large pot or Dutch oven (at least 5-quart) — You need room to stir everything without spilling. I use my trusty Le Creuset, but any heavy-bottomed pot works.
- Wooden spoon or silicone spatula — A wooden spoon is great for stirring the marshmallows without scratching your pot.
- 9×13-inch baking dish — Glass or metal both work. If you want thicker treats, use an 8×8-inch dish instead.
- Parchment paper — Absolute lifesaver for lifting the treats out cleanly. Don’t skip this!
- Cooling rack — Helps the treats set evenly. If you don’t have one, just let them cool in the pan.
- Sharp knife — A chef’s knife works best for clean cuts. Spray it with cooking spray to prevent sticking.
If you don’t have a heavy-bottomed pot, just watch your butter closely as it browns. Lighter pans can cause hot spots that burn the butter faster. I learned this the hard way when I ruined my first batch—the butter went from golden to burnt in about 10 seconds.
Preparation Method
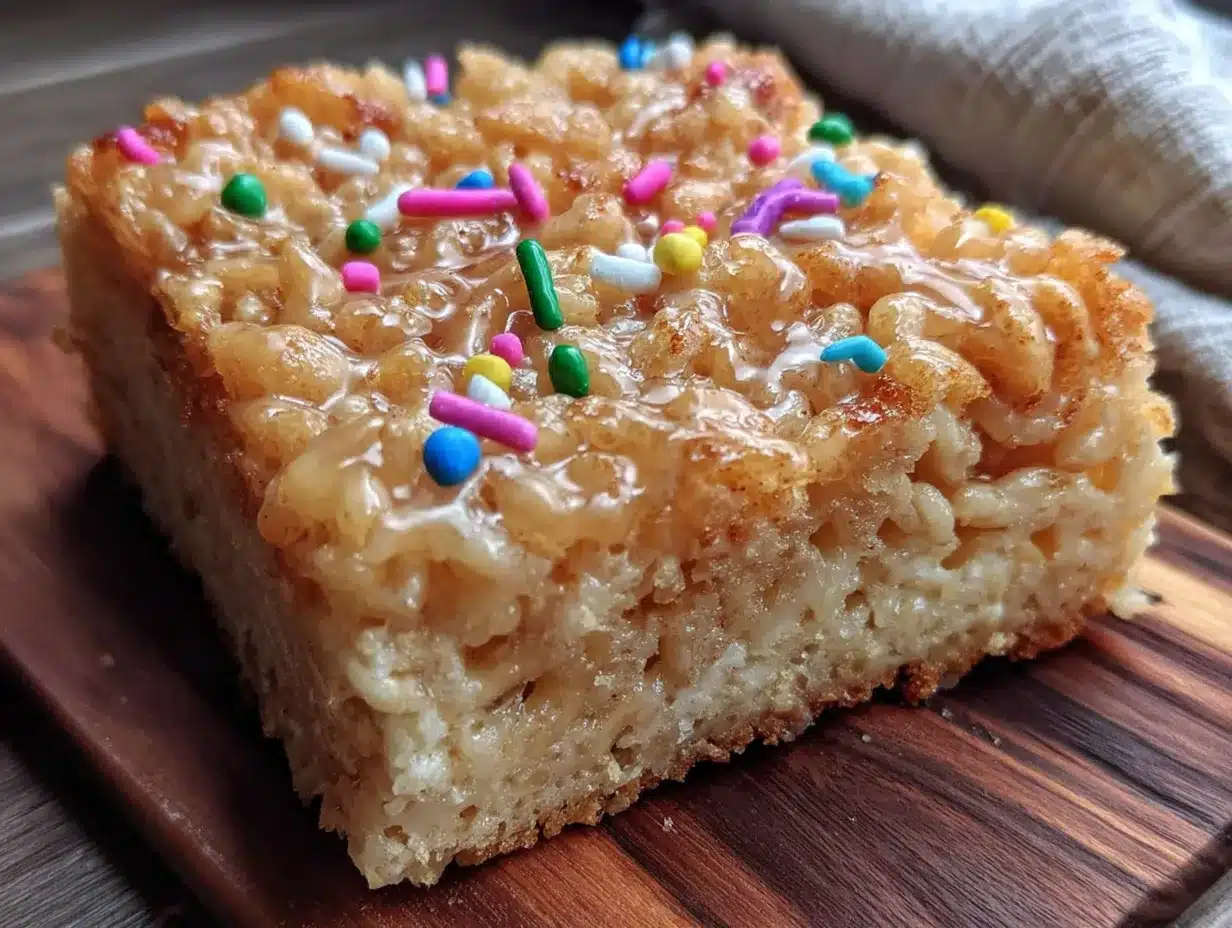
- Prep your pan. Line a 9×13-inch baking dish with parchment paper, leaving some overhang on the sides. This makes lifting the treats out so much easier. Lightly spray the parchment with cooking spray to prevent sticking.
- Brown the butter. Place your 1 cup of unsalted butter in a large pot over medium heat. Let it melt completely, then continue cooking. Swirl the pan occasionally. You’ll see the butter foam up, then the foam will subside, and tiny brown specks will start forming at the bottom. This takes about 5-7 minutes. Watch closely—it can go from perfect to burnt in seconds. The butter should smell nutty and look golden-brown with those specks.
- Add the marshmallows. Once the butter is browned, immediately add the entire bag of marshmallows. Reduce the heat to low. Stir constantly until the marshmallows are completely melted and smooth. This takes about 3-4 minutes. Don’t walk away here—burnt marshmallow is not recoverable.
- Mix in the sugar cookie dry mix. Sprinkle in the 1/2 cup of dry sugar cookie mix and 1 teaspoon of vanilla extract. Stir until everything is fully combined and smooth. The mixture will look a little thicker than regular marshmallow mixture, which is exactly what we want.
- Fold in the cereal and sprinkles. Remove the pot from the heat. Add the 6 cups of crispy rice cereal and 1/2 cup of sprinkles. Gently fold everything together using a silicone spatula. Be careful not to crush the cereal too much. You want some texture, not mush.
- Press into the pan. Transfer the mixture to your prepared pan. Using a piece of parchment paper or a spatula lightly sprayed with cooking spray, press the mixture evenly into the pan. Don’t press too hard—you want them chewy, not dense. I like to leave the top a little bumpy for texture.
- Add finishing touches. While the mixture is still warm, sprinkle a pinch of flaky sea salt on top if you’re using it. Add a few extra sprinkles on top for looks. Let the treats cool completely at room temperature—about 1 hour. Don’t rush this by putting them in the fridge, or they’ll get hard.
- Cut and serve. Once cooled, lift the treats out using the parchment overhang. Use a sharp knife sprayed with cooking spray to cut into squares. I usually go for 12 large squares or 24 smaller ones.
Cooking Tips & Techniques
After making these treats more times than I can count, here are the things I wish someone had told me:
Watch the butter like a hawk. The first time I tried browning butter, I got distracted scrolling through my phone. Big mistake. The butter went from perfectly golden to acrid black smoke in seconds. Stay at the stove, swirl the pan, and trust your nose. When it smells nutty and looks like melted caramel, you’re there.
Low and slow for the marshmallows. I know it’s tempting to crank up the heat to hurry things along, but melted marshmallows burn easily. Keep the heat on low once you add them. If you see any browning in the marshmallow mixture, you’ve gone too far. Start over—burnt marshmallow has a bitter taste that ruins everything.
Don’t overmix the cereal. I used to stir and stir until everything was perfectly coated, but that just crushed the cereal into sad little bits. Now I fold gently, just until the cereal is mostly coated. A few dry spots are fine—they’ll get pressed into the pan and absorb moisture as they cool.
Let them cool completely. I know the smell is intoxicating and you want to dig in immediately. But warm Rice Krispie treats are a sticky, gooey mess. Give them a full hour at room temperature. The texture transforms from sticky to perfectly chewy. Trust the process.
Spray your knife. Cutting these treats without spraying your knife is a recipe for frustration. A quick spritz of cooking spray between cuts makes all the difference. I learned this after ruining an entire batch by trying to cut them with a dry knife—they just squished and stuck.
Variations & Adaptations
One of the best things about this recipe is how easily it adapts. Here are some variations I’ve tried and loved:
Chocolate Chip Cookie Version: Add 1/2 cup of mini chocolate chips along with the cereal. The warm marshmallow mixture will melt them slightly, creating little pockets of chocolate throughout. I made this for a Super Bowl party and it disappeared in minutes.
Holiday Sprinkle Swap: Use seasonal sprinkles for different occasions. Red and green for Christmas, pastels for Easter, orange and black for Halloween. The base recipe stays the same, but the look changes completely.
Gluten-Free Option: Use a gluten-free crispy rice cereal (like Nature’s Path) and a gluten-free sugar cookie mix. The texture is slightly different—a bit more delicate—but the flavor is just as good.
Peppermint Twist: Add 1/2 teaspoon of peppermint extract along with the vanilla, and swap the rainbow sprinkles for crushed candy canes. This is my go-to for Christmas cookie exchanges.
Vegan Adaptation: Use vegan butter (like Miyoko’s) and vegan marshmallows (like Dandies). The brown butter flavor isn’t quite as deep, but it’s still delicious. I tested this for a friend’s vegan birthday party and nobody guessed the difference.
Serving & Storage Suggestions
These treats are best served at room temperature. The texture is perfectly chewy and the brown butter flavor really shines when they’re not cold. I like to arrange them on a platter with a few extra sprinkles scattered around for visual appeal.
For storage, place the treats in an airtight container at room temperature. They’ll stay fresh for up to 5 days. Honestly, they rarely last that long in my house. If you stack them, put a piece of parchment paper between layers to prevent sticking.
You can freeze these treats for up to 3 months. Wrap each square individually in plastic wrap, then place them in a freezer-safe bag. To thaw, just let them sit at room temperature for about 30 minutes. The texture remains surprisingly good—I’ve done this for holiday prep many times.
One thing I’ve noticed: the flavors actually develop overnight. The brown butter flavor gets deeper and the sugar cookie taste becomes more pronounced. So if you can resist eating them all on day one, day two is even better.
Nutritional Information & Benefits
Let’s be real—these are treats, not health food. But knowing what’s in them helps you enjoy them mindfully. Per square (based on 12 servings):
- Calories: 280
- Fat: 16g
- Carbohydrates: 34g
- Sugar: 20g
- Protein: 2g
- Sodium: 180mg
The brown butter adds a small amount of vitamin A and healthy fats. The crispy rice cereal provides some iron and B vitamins. And the sprinkles? Well, they bring joy, which is its own kind of nutrition.
If you’re watching your sugar intake, you can reduce the sprinkles or use a sugar-free sugar cookie mix. But honestly, part of the magic here is the indulgence. I’d rather have one perfect treat than a whole batch of mediocre ones.
These treats are vegetarian and can be made gluten-free and vegan with the substitutions mentioned above. They contain dairy and gluten in their standard form.
Conclusion
These Brown Butter Sugar Cookie Rice Krispie Treats are proof that some of the best recipes come from happy accidents. What started as a distracted moment in the kitchen turned into a dessert that I now make on purpose, over and over again. The nutty brown butter, the sweet sugar cookie flavor, the pop of color from the sprinkles—it all comes together in a way that feels both nostalgic and new.
I’d love for you to try these and make them your own. Maybe you’ll add chocolate chips, or swap in seasonal sprinkles, or double the batch for a party. Whatever you do, let me know how they turn out! Drop a comment below or tag me in your photos. There’s nothing better than seeing someone else fall in love with a recipe the same way I did.
Happy cooking, and remember—sometimes the best things happen when you least expect them.
Frequently Asked Questions
Can I use pre-browned butter from the store?
I wouldn’t recommend it. Browned butter loses its magic when it sits around. The fresh, nutty aroma that develops during the browning process fades quickly. It’s worth the extra 5 minutes to do it yourself.
Why did my treats turn out hard?
You probably pressed the mixture too firmly into the pan. Rice Krispie treats need a gentle touch—press just enough to even them out, but not so hard that the cereal compresses. Also, make sure you’re not overcooking the marshmallows, which can make the final texture tough.
Can I use mini marshmallows instead of regular?
You can, but regular marshmallows melt more evenly. If you use mini ones, reduce the heat a bit and stir constantly. They melt faster and can burn more easily. Use about 10 cups of mini marshmallows to replace the standard bag.
How do I get clean cuts without everything sticking?
Spray your knife with cooking spray before each cut. Wipe the blade clean between cuts and re-spray. For extra clean lines, let the treats cool completely—at least 1 hour at room temperature. Patience is key here.
Can I make these ahead of time for a party?
Absolutely! These treats actually taste better the next day. Make them up to 2 days ahead and store them in an airtight container at room temperature. Just wait to add any extra sprinkles on top until right before serving so they stay bright and colorful.
Pin This Recipe!
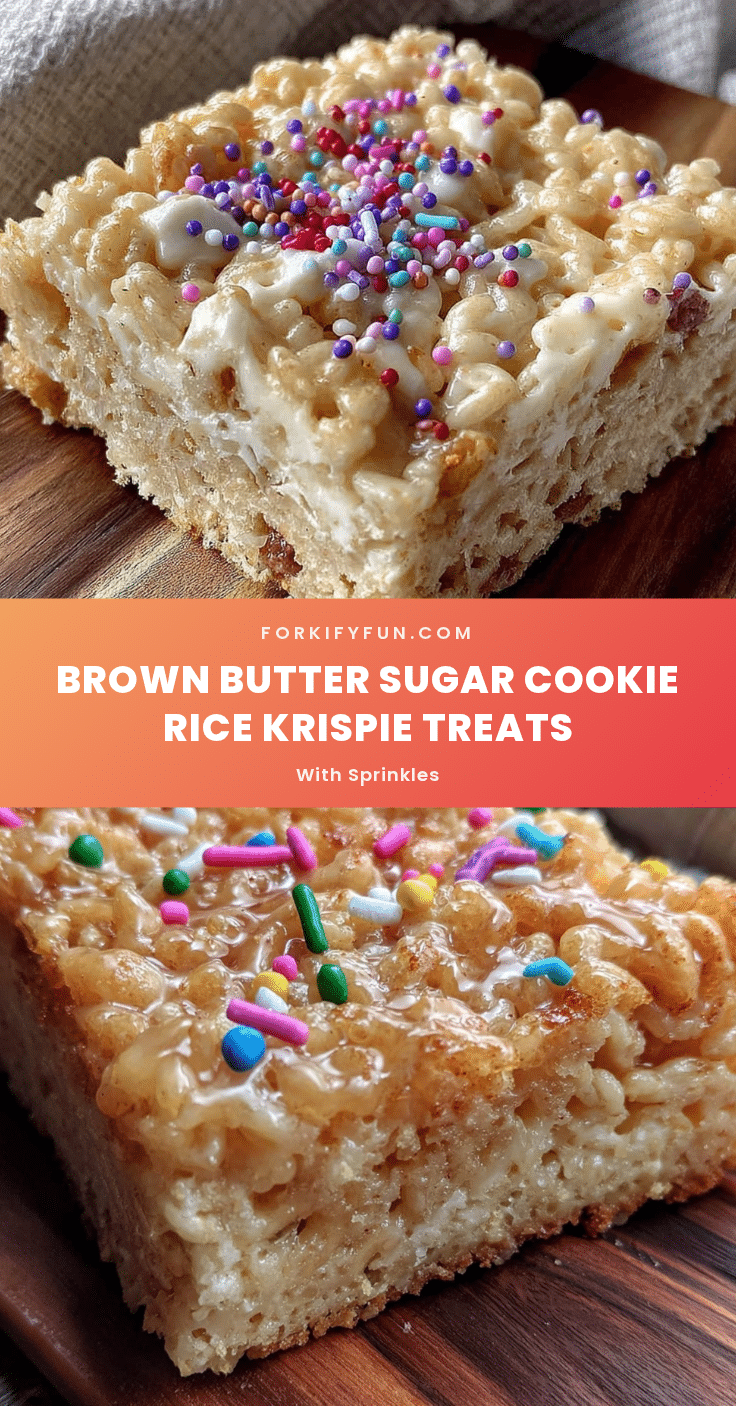
Best Brown Butter Sugar Cookie Rice Krispie Treats
These Brown Butter Sugar Cookie Rice Krispie Treats are a happy accident turned into a must-make dessert. Nutty brown butter, sweet sugar cookie flavor, and colorful sprinkles come together in a chewy, buttery, and perfectly crunchy treat that’s quick and easy to make.
- Prep Time: 10 minutes
- Cook Time: 10 minutes
- Total Time: 20 minutes (plus 1 hour cooling)
- Yield: 12 servings 1x
- Category: Dessert
- Cuisine: American
Ingredients
- 1 cup (2 sticks) unsalted butter
- 1 standard 10-ounce bag marshmallows
- 6 cups crispy rice cereal (e.g., Kellogg’s Rice Krispies)
- 1/2 cup dry sugar cookie mix (e.g., Betty Crocker)
- 1/2 cup rainbow jimmies sprinkles
- 1 teaspoon pure vanilla extract
- Flaky sea salt (optional, for topping)
Instructions
- Prep your pan. Line a 9×13-inch baking dish with parchment paper, leaving some overhang on the sides. Lightly spray the parchment with cooking spray to prevent sticking.
- Brown the butter. Place 1 cup of unsalted butter in a large pot over medium heat. Let it melt completely, then continue cooking, swirling the pan occasionally. The butter will foam, then the foam will subside, and tiny brown specks will form at the bottom. This takes about 5-7 minutes. Watch closely—the butter should smell nutty and look golden-brown.
- Add the marshmallows. Once the butter is browned, immediately add the entire bag of marshmallows. Reduce the heat to low. Stir constantly until the marshmallows are completely melted and smooth, about 3-4 minutes.
- Mix in the sugar cookie dry mix. Sprinkle in 1/2 cup of dry sugar cookie mix and 1 teaspoon of vanilla extract. Stir until fully combined and smooth.
- Fold in the cereal and sprinkles. Remove the pot from the heat. Add 6 cups of crispy rice cereal and 1/2 cup of sprinkles. Gently fold everything together using a silicone spatula, being careful not to crush the cereal too much.
- Press into the pan. Transfer the mixture to the prepared pan. Using a piece of parchment paper or a spatula lightly sprayed with cooking spray, press the mixture evenly into the pan. Don’t press too hard—you want them chewy, not dense.
- Add finishing touches. While the mixture is still warm, sprinkle a pinch of flaky sea salt on top if using. Add a few extra sprinkles on top for looks. Let the treats cool completely at room temperature—about 1 hour.
- Cut and serve. Once cooled, lift the treats out using the parchment overhang. Use a sharp knife sprayed with cooking spray to cut into squares. I usually go for 12 large squares or 24 smaller ones.
Notes
Watch the butter closely while browning—it can go from perfect to burnt in seconds. Don’t overmix the cereal to keep it crunchy. Let treats cool completely at room temperature for best texture. Spray knife with cooking spray for clean cuts. Flavors develop overnight, so day two is even better.
Nutrition
- Serving Size: 1 square (based on 1
- Calories: 280
- Sugar: 20
- Sodium: 180
- Fat: 16
- Saturated Fat: 10
- Carbohydrates: 34
- Protein: 2
Keywords: brown butter, sugar cookie, rice krispie treats, easy dessert, no-bake, sprinkles, party treat


