The neighborhood cookie swap was in three hours and I’d completely forgotten. I mean, completely. I was standing in my kitchen staring at an empty counter where my “famous” chocolate chip cookies were supposed to be cooling. Everyone else would be bringing their elaborate, multi-day preparations—the ones with imported vanilla and hand-chopped chocolate and butter that cost more than my weekly coffee budget. And me? I had a kitchen full of ingredients for absolutely nothing, a rapidly ticking clock, and a two-year-old who had just discovered that flour makes an excellent cloud when thrown in the air.
Let me tell you, panic doesn’t even begin to cover it. I rummaged through my pantry hoping for a miracle, and that’s when I spotted the can of sweetened condensed milk leftover from some forgotten baking project. Then I looked outside at the foot of fresh snow blanketing my yard. And honestly? A lightbulb went off so bright I’m surprised the neighbors didn’t see it.
I grabbed a bowl, scooped up some pristine snow from the back deck (the part the dog hadn’t visited yet—priorities), stirred in that sweetened condensed milk and a splash of vanilla, and within five minutes I had a bowl of the creamiest, dreamiest snow ice cream you could imagine. I threw it in a cute little mason jar, tied a ribbon around it, and walked into that cookie swap looking like I’d planned it all along. The best part? People went absolutely nuts for it. They asked for the recipe, they took pictures, they called it “genius.” I just smiled and nodded, letting them think I was some kind of culinary mastermind instead of a mom who forgot a cookie swap.
And that, my friends, is how this quick 3-ingredient snow ice cream became my secret weapon. Maybe you’ve been there—staring down a deadline with nothing prepared, feeling that familiar knot of panic in your stomach. This recipe is for those moments. It’s for the times when you need something magical with almost no effort. It’s the kind of recipe that makes you look like a hero when really, you just got lucky with the weather and a can of condensed milk.
Why You’ll Love This Recipe
Let me be real with you for a second. I’ve tested a lot of snow ice cream recipes over the years—some with eggs, some with cream, some that require actual cooking before you even get to the snow part. This one? It’s the winner by a landslide, and here’s why you’ll feel the same way.
- Quick & Easy: We’re talking five minutes from start to finish. No cooking, no chilling, no complicated steps. If you can stir, you can make this.
- Simple Ingredients: You need exactly three things: fresh snow, sweetened condensed milk, and vanilla extract. That’s it. No grocery store runs required.
- Perfect for Snow Days: When the kids are bouncing off the walls and you need an activity that ends with a treat, this is your answer. It turns a snow day into a memory.
- Crowd-Pleaser: I’ve served this to kids, adults, and even my picky mother-in-law. Everyone loves it. There’s something about homemade ice cream made from snow that brings out the kid in everyone.
- Unbelievably Delicious: The texture is silky and creamy—nothing like the icy, crunchy mess you might expect. The sweetened condensed milk creates this rich, almost custard-like consistency that’s honestly better than some store-bought ice creams I’ve had.
What makes this recipe different from all the other snow ice cream recipes out there? It’s the ratio. I’ve spent years tweaking the perfect balance of snow to sweetened condensed milk. Too much snow and you get icy slush. Too little and it’s overly sweet soup. This version hits that sweet spot where it’s creamy, scoopable, and perfectly sweet without being cloying. It’s not just another version—it’s the version I keep coming back to, winter after winter.
This recipe isn’t just good—it’s the kind that makes you close your eyes after the first bite. It’s pure winter magic in a bowl, and you can make it right now with things you already have. Honestly, what’s not to love?
What Ingredients You Will Need
This recipe uses the simplest ingredients you can imagine to deliver a dessert that tastes anything but simple. The magic happens when clean, fresh snow meets the rich sweetness of condensed milk, with vanilla tying it all together. Here’s what you’ll need:
For the Snow Ice Cream Base
- 8 cups fresh, clean snow (packed lightly into the measuring cup) — This is the star of the show. The snow needs to be freshly fallen and collected from a clean surface. I prefer to wait until at least an inch or two has fallen, then collect the top layer. Avoid snow that’s been sitting for days or has any discoloration. Pro tip: if you live in an area with frequent snowfall, keep a clean bowl or storage container outside specifically for collecting snow. It makes the process so much faster!
- 1 can (14 ounces) sweetened condensed milk — This is your sweetener, your creamer, and your texture-maker all in one. I’ve tested this with both Eagle Brand and store-brand versions, and honestly, they both work great. The key is using full-fat sweetened condensed milk, not evaporated milk or any low-fat version. The fat content is what gives the ice cream that luxurious, creamy texture. If you’re dairy-free, there are coconut-based sweetened condensed milk options that work beautifully here.
- 1 teaspoon vanilla extract — Pure vanilla extract makes a noticeable difference in flavor. Imitation vanilla will work in a pinch, but if you have the real stuff, this is the time to use it. I personally love Nielsen-Massey vanilla, but any good-quality pure vanilla extract will do. You can also experiment with other extracts—almond, peppermint, or even coconut would be delicious.
Optional Add-Ins (Not Required, But Fun)
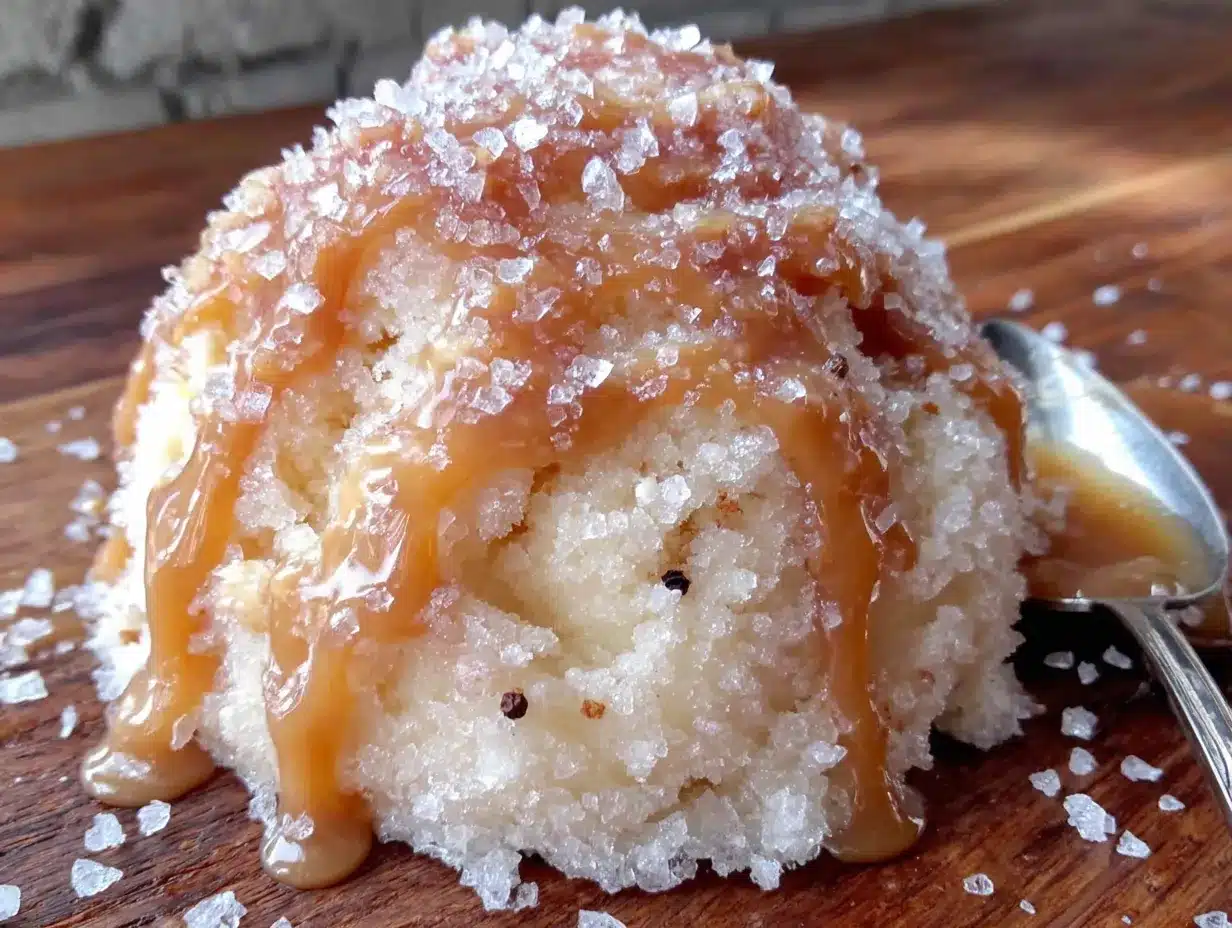
- Pinch of salt — Just a tiny pinch enhances all the flavors and balances the sweetness. I add this about half the time, depending on my mood.
- Mix-ins of your choice — Think chocolate chips, sprinkles, crushed cookies, or fresh berries. Add these after the base is mixed, folding them in gently.
The beauty of this recipe is its flexibility. If you don’t have sweetened condensed milk on hand (though honestly, you should always keep a can in your pantry for emergencies like this), you can substitute with a mixture of 1 cup heavy cream and 1/2 cup sugar, whisked together until the sugar dissolves. It won’t be quite as thick and creamy, but it’ll still be delicious. For a dairy-free version, use coconut cream mixed with maple syrup or honey.
One note about the snow: not all snow is created equal. Light, fluffy, powdery snow works best because it incorporates more easily into the condensed milk. Wet, heavy snow can make the ice cream icy and dense. If all you have is wet snow, use a little less of it and expect a slightly different texture. I learned this the hard way during a particularly slushy winter—let’s just say I ended up with snow milk instead of snow ice cream!
Equipment Needed
One of the best things about this recipe is how little equipment you need. Here’s what you’ll want to have on hand:
- Large mixing bowl — Any bowl will work, but a wider, shallower bowl makes it easier to mix the snow evenly. I use my grandmother’s old ceramic mixing bowl, but a metal or glass bowl works just as well.
- Measuring cups — You’ll need these to measure your snow. I recommend packing the snow lightly into the cup, not pressing it down.
- Measuring spoons — For the vanilla extract. Eyeballing it works in a pinch, but measuring ensures consistent results.
- Rubber spatula or wooden spoon — For mixing. A rubber spatula is my preference because it scrapes the sides of the bowl clean and incorporates everything evenly without over-mixing.
- Serving bowls or cups — Mason jars are cute and practical, but any bowl will do. I like to chill my serving bowls in the freezer for a few minutes before scooping—it keeps the ice cream from melting too quickly.
- Ice cream scoop or large spoon — For serving. A cookie scoop works great for kid-sized portions.
If you don’t have a large mixing bowl, you can use a pot or even a clean plastic container. The key is having enough room to stir without snow flying everywhere. Trust me, I’ve learned this lesson the messy way—a too-small bowl leads to snow on your counter, your floor, and possibly your dog.
One budget-friendly tip: you don’t need any fancy equipment for this recipe. No ice cream maker, no special attachments, nothing. Just basic kitchen tools you already own. That’s part of the beauty of this recipe—it’s accessible to anyone, anytime.
Preparation Method
Making this snow ice cream is almost laughably simple, but there are a few tricks to getting it just right. Follow these steps, and you’ll have perfect, creamy snow ice cream every time.
- Collect your snow. Wait for a fresh snowfall—ideally within the first few hours after it stops. Head outside with your clean bowl and gently scoop up the top layer of snow, avoiding any snow that’s touching the ground or surfaces. You want about 8 cups, lightly packed. If you’re collecting from a deck or patio table, that’s even better. I like to collect from my back deck because it’s elevated and cleaner. One time I collected from the front yard and found a pine needle in my ice cream—not the end of the world, but not ideal!
- Bring the snow inside immediately. Snow starts melting the second it hits a warm environment, so work quickly. Place your bowl of snow in the freezer while you prepare the other ingredients. This buys you a few extra minutes and keeps the snow from turning into a puddle before you even start.
- Mix the sweetened condensed milk and vanilla. In a separate small bowl, stir together the entire can of sweetened condensed milk and 1 teaspoon of vanilla extract. Mix until fully combined. If you’re adding a pinch of salt, stir that in now too. This step ensures the flavor is evenly distributed before you add the snow.
- Combine the mixtures. Take your snow out of the freezer. Pour the sweetened condensed milk mixture over the snow, starting with about three-quarters of it. You can always add more, but you can’t take it away. Using your rubber spatula or wooden spoon, gently fold the milk mixture into the snow. Don’t stir vigorously—you want to incorporate it without melting the snow too much. Think of it like folding egg whites into a batter: gentle, sweeping motions.
- Check the consistency. The mixture should look like soft-serve ice cream—creamy, scoopable, and slightly fluffy. If it’s too dry and crumbly, add a little more of the sweetened condensed milk mixture. If it’s too soupy, add a bit more snow. The perfect texture is somewhere between soft-serve and regular ice cream. It should hold its shape when you scoop it but still be soft enough to eat immediately.
- Serve immediately. This is crucial—snow ice cream is best eaten right away. Scoop it into chilled bowls or cups and serve immediately. If you wait too long, it will melt into a sweet soup. That’s not the worst thing in the world (it’s delicious as a drinkable treat too), but for the full ice cream experience, eat it right away.
- Optional: add mix-ins. If you’re adding chocolate chips, sprinkles, or other goodies, fold them in gently after the base is mixed. Or you can sprinkle them on top for a prettier presentation. My kids love when I add rainbow sprinkles—it makes them feel like they’re eating something from an ice cream shop.
A few notes from my many batches of snow ice cream: If the snow is too powdery and dry, it can be tricky to incorporate. In that case, let it sit at room temperature for about 30 seconds to soften slightly before mixing. If the snow is too wet and heavy, use a little less sweetened condensed milk to compensate. And if you accidentally add too much sweetened condensed milk? Don’t panic. Just scoop up a bit more snow and fold it in. This recipe is incredibly forgiving.
The first time I made this, I was so excited that I dumped the entire can of sweetened condensed milk into the snow without thinking. The result was a sweet, sticky mess that was more like snow syrup than ice cream. I learned my lesson, and now I always add it gradually. Learn from my mistake!
Cooking Tips & Techniques
After making this recipe dozens of times across multiple winters, I’ve picked up some tricks that make the process smoother and the results more consistent. Here are my best tips:
Collect snow the right way. The quality of your snow matters more than you’d think. Fresh, powdery snow that fell within the last few hours is ideal. Snow that’s been sitting for days has started to melt and refreeze, creating a denser, icier texture. Also, avoid collecting snow from areas near roads, driveways, or anywhere that might have been treated with salt or chemicals. I once collected snow from my front walkway without thinking, and let me tell you, salty ice cream is not a thing I ever want to experience again.
Work fast, but not frantically. Snow starts melting the moment it comes inside, so you need to be efficient. Have all your ingredients measured and ready before you bring the snow in. I like to mix the sweetened condensed milk and vanilla in a small bowl and have my spatula ready before I even step outside. This way, the snow spends minimal time at room temperature before it’s transformed into ice cream.
Don’t overmix. This is the most common mistake I see people make. They stir and stir, trying to get the mixture perfectly smooth, and end up with a bowl of sweet liquid. The goal is to fold the ingredients together just until combined. A few streaks of white snow are totally fine—they’ll disappear as you eat. Overmixing melts the snow and ruins the texture.
Use a chilled bowl for serving. If you have a few minutes, pop your serving bowls in the freezer while you prepare the ice cream. This keeps the ice cream from melting too quickly and gives you more time to enjoy it. It’s a small step that makes a big difference.
Adjust for altitude and temperature. If you live in a very cold climate (like I do in Minnesota), the snow will be drier and fluffier, and you might need slightly less sweetened condensed milk. In milder climates where the snow is wetter, you might need a bit more. Trust your instincts and adjust as you go. The first batch of the season is always a test batch for me—I adjust from there.
Make it ahead (sort of). While snow ice cream is best eaten immediately, you can prep the sweetened condensed milk mixture ahead of time and store it in the fridge. Then, when the snow falls, you’re ready to go in minutes. I keep a can of sweetened condensed milk in my pantry all winter long, just in case of a surprise snow day.
Variations & Adaptations
One of the best things about this recipe is how easily it adapts to different tastes, diets, and occasions. Here are some of my favorite variations:
Chocolate Snow Ice Cream: Add 2 tablespoons of unsweetened cocoa powder to the sweetened condensed milk mixture before combining with the snow. Whisk it well to remove any lumps, then proceed as usual. The result is a rich, chocolatey ice cream that tastes like a frozen hot chocolate. My kids beg for this version every time it snows.
Vegan Snow Ice Cream: Swap the sweetened condensed milk for a can of full-fat coconut cream mixed with 1/3 cup maple syrup or agave nectar. The coconut cream provides the same rich, creamy texture, and the maple syrup adds a lovely depth of flavor. Use a high-quality vanilla extract (or vanilla bean paste) for the best results. This version is dairy-free and absolutely delicious—I’ve served it to non-vegans who couldn’t tell the difference.
Peppermint Snow Ice Cream: Add 1/2 teaspoon of peppermint extract along with the vanilla extract. Fold in some crushed candy canes or peppermint candies at the end for a festive holiday treat. This is my go-to for Christmas snow days—it feels so special and seasonal.
Fruit Swirl Snow Ice Cream: After mixing the base, gently swirl in 1/4 cup of your favorite fruit puree or jam. Raspberry, strawberry, or blueberry work beautifully. Don’t stir it in completely—leave streaks of fruit for a marbled effect. This adds a fresh, fruity note that balances the sweetness perfectly.
Brown Sugar Cinnamon Snow Ice Cream: Replace the vanilla extract with 1 teaspoon of cinnamon and use 2 tablespoons of brown sugar mixed into the sweetened condensed milk. The brown sugar adds a warm, caramel-like flavor that pairs perfectly with the cold snow. This version tastes like a snickerdoodle cookie in ice cream form.
Coffee Snow Ice Cream: Dissolve 1 teaspoon of instant coffee granules in 1 tablespoon of warm water, then mix it into the sweetened condensed milk along with the vanilla. The coffee flavor adds a sophisticated twist that adults will love. I make this version for myself on snow days when the kids are napping—it’s my little treat.
Feel free to experiment with your own combinations. This recipe is incredibly forgiving, so don’t be afraid to get creative. The worst that can happen is you end up with a slightly unusual flavor that’s still perfectly edible. Some of my best discoveries have come from happy accidents!
Serving & Storage Suggestions
Snow ice cream is best enjoyed immediately, but here are my tips for serving and storing it:
Serving Temperature: Serve this ice cream right after making it, while it’s still cold and creamy. The texture is at its peak within the first 10 minutes. If you need to hold it for a short time, keep it in the freezer, but know that it will become icier the longer it sits.
Presentation Ideas: For a fun presentation, serve the ice cream in chilled mason jars or small glass bowls. Top with a sprinkle of cinnamon, a few chocolate shavings, or a fresh berry. A drizzle of chocolate or caramel sauce over the top makes it look extra special. For kids, serve in a waffle cone or a small cup with a colorful straw—it makes the experience feel like a trip to an ice cream parlor.
Complementary Dishes: This snow ice cream pairs beautifully with warm desserts like brownies, apple crisp, or chocolate chip cookies. The contrast between warm and cold is absolutely divine. It also works well alongside a cup of hot coffee or hot chocolate—the ultimate winter treat combo.
Storage: I’m going to be honest with you: snow ice cream does not store well. Because it’s made from snow, it melts and refreezes into a solid, icy block if you try to freeze it for later. The texture becomes grainy and unpleasant. Your best bet is to make only as much as you’ll eat in one sitting. If you do have leftovers (unlikely, but possible), you can store them in an airtight container in the freezer for up to 24 hours, but expect the texture to be much icier. I’ve found that letting it soften at room temperature for 5-10 minutes before eating helps a little.
How Flavors Develop: Unlike traditional ice cream, snow ice cream doesn’t benefit from resting. The flavors are at their brightest and most balanced immediately after making. This is one recipe where fresh is truly best.
One more tip: if you’re serving this at a party or gathering, set up a “snow ice cream bar” with different toppings and mix-ins. Let guests customize their own bowls. It’s interactive, fun, and ensures everyone gets exactly what they want.
Nutritional Information & Benefits
Let’s be real—this is a treat, not a health food. But that doesn’t mean it can’t fit into a balanced lifestyle. Here’s what you need to know:
Estimated Nutritional Values (per 1/2 cup serving):
- Calories: 180
- Total Fat: 5g
- Saturated Fat: 3g
- Cholesterol: 20mg
- Sodium: 65mg
- Total Carbohydrates: 31g
- Sugars: 29g
- Protein: 4g
- Calcium: 120mg (12% DV)
Health Benefits of Key Ingredients: The sweetened condensed milk provides a good amount of calcium, which is essential for strong bones and teeth. It also contains some protein, which helps keep you full and satisfied. The snow itself is, well, just water—but hydration is always a good thing!
Dietary Considerations: This recipe is vegetarian-friendly. For a gluten-free option, just make sure your vanilla extract and any mix-ins are certified gluten-free (most are). The vegan variation I mentioned earlier is completely plant-based. If you’re watching your sugar intake, you can reduce the amount of sweetened condensed milk or use a sugar-free alternative, though the texture will be slightly different.
Potential Allergens: This recipe contains dairy (sweetened condensed milk). It is nut-free, egg-free, and soy-free as written. Always check labels on your specific ingredients if you have allergies.
My Personal Perspective: I believe in enjoying treats in moderation. This snow ice cream is a special occasion dessert—a celebration of a snow day, a fun activity with kids, or a nostalgic treat on a winter evening. It’s not something you’d eat every day, and that’s okay. Part of what makes it so wonderful is the rarity of it. You can only make it when it snows, and that makes each batch feel like a little gift from winter.
Conclusion
This quick 3-ingredient snow ice cream has become a winter tradition in my house, and I hope it becomes one in yours too. It’s the kind of recipe that turns an ordinary snow day into something special—a moment of pure, simple joy that costs almost nothing and takes almost no time.
What I love most about this recipe is how it brings people together. I’ve made it with my kids on snow days, served it to neighbors who stopped by to shovel, and brought it to winter gatherings where it always steals the show. There’s something magical about eating ice cream made from actual snow—it connects you to the season in a way that store-bought ice cream never could.
I encourage you to make this recipe your own. Experiment with different extracts, try the variations I suggested, or come up with your own signature version. The beauty of a three-ingredient recipe is that it’s a blank canvas for your creativity. And if you forget a cookie swap or need a last-minute dessert? Well, now you have a secret weapon.
I’d love to hear how your snow ice cream turns out! Did you try a fun variation? Did your kids go crazy for it? Drop a comment below and let me know—I read every single one and I love hearing about your kitchen adventures. And if you have a snow day coming up, you know what to do. Grab a bowl, head outside, and make some magic.
Happy snow day, friends! Stay warm, stay cozy, and keep eating ice cream—even in the middle of winter.
Frequently Asked Questions
Can I use any type of snow for this recipe?
For the best results, use fresh, clean snow that has fallen within the last few hours. Avoid snow that has been sitting for days, snow from areas near roads or driveways, and snow that has any discoloration. The top layer of a fresh snowfall is ideal—it’s light, fluffy, and clean.
What if I don’t have sweetened condensed milk?
You can substitute with 1 cup of heavy cream mixed with 1/2 cup of sugar, whisked until the sugar dissolves. The texture won’t be quite as thick and creamy, but it will still work. For a dairy-free option, use full-fat coconut cream mixed with maple syrup or honey.
Can I make this recipe without vanilla extract?
Absolutely! The vanilla adds flavor, but you can leave it out or substitute with other extracts like almond, peppermint, or coconut. You can also use vanilla bean paste or the seeds from a vanilla bean for a more intense vanilla flavor.
How long does snow ice cream last in the freezer?
Snow ice cream is best eaten immediately after making. If you freeze leftovers, the texture will become icy and grainy. You can store it in an airtight container in the freezer for up to 24 hours, but let it soften at room temperature for 5-10 minutes before eating to improve the texture.
Is it safe to eat snow?
Generally, yes—fresh snow is safe to eat in small amounts. However, avoid snow that has been contaminated by animals, chemicals, or pollutants. Collect snow from elevated surfaces like decks or tables rather than from the ground. If you have any concerns about the quality of your snow, it’s best to skip this recipe and try one of the variations that uses crushed ice or frozen fruit instead.
Pin This Recipe!
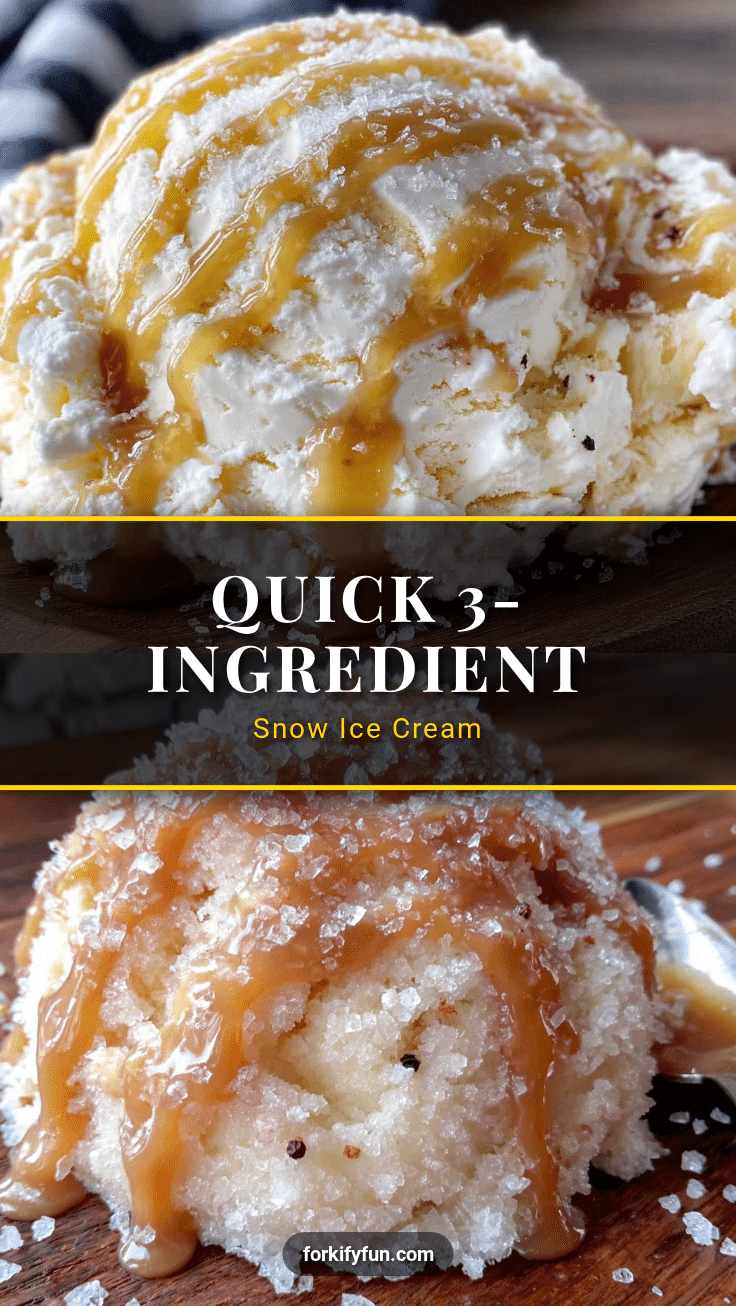
Best 3-Ingredient Snow Ice Cream Recipe

This quick and easy snow ice cream recipe uses just three ingredients—fresh snow, sweetened condensed milk, and vanilla extract—to create a creamy, dreamy treat in five minutes. Perfect for snow days, last-minute desserts, or a fun activity with kids.
- Prep Time: 5 minutes
- Cook Time: 0 minutes
- Total Time: 5 minutes
- Yield: 4 servings 1x
- Category: Dessert
- Cuisine: American
Ingredients
- 8 cups fresh, clean snow (lightly packed)
- 1 can (14 ounces) sweetened condensed milk
- 1 teaspoon vanilla extract
- Pinch of salt (optional)
- Mix-ins of your choice: chocolate chips, sprinkles, crushed cookies, or fresh berries (optional)
Instructions
- Collect your snow: Wait for a fresh snowfall and gently scoop up the top layer of clean snow from an elevated surface like a deck or patio table. You need about 8 cups, lightly packed.
- Bring the snow inside immediately and place the bowl in the freezer while you prepare the other ingredients.
- In a separate small bowl, stir together the entire can of sweetened condensed milk and 1 teaspoon of vanilla extract until fully combined. If using, add a pinch of salt.
- Take the snow out of the freezer. Pour about three-quarters of the sweetened condensed milk mixture over the snow.
- Gently fold the milk mixture into the snow using a rubber spatula or wooden spoon. Do not overmix; a few streaks of white snow are fine.
- Check the consistency: It should look like soft-serve ice cream—creamy, scoopable, and slightly fluffy. If too dry, add more milk mixture; if too soupy, add more snow.
- Serve immediately in chilled bowls or cups. If desired, fold in optional mix-ins or sprinkle them on top.
- Enjoy right away for the best texture.
Notes
Use fresh, clean snow from a clean surface. Work quickly to prevent melting. Do not overmix. For best results, serve immediately. Leftovers can be stored in an airtight container in the freezer for up to 24 hours, but texture will become icy.
Nutrition
- Serving Size: 1/2 cup
- Calories: 180
- Sugar: 29
- Sodium: 65
- Fat: 5
- Saturated Fat: 3
- Carbohydrates: 31
- Protein: 4
Keywords: snow ice cream, 3-ingredient ice cream, easy snow day treat, homemade ice cream, winter dessert


