“Hey, do you think a red, white, and blue cake is too much?” my neighbor texted me one afternoon just days before the big summer barbecue. Honestly, I was skeptical. Patriotic desserts always felt a bit… over the top to me. But you know how it goes—sometimes you just want to throw caution to the wind and make something fun that actually turns out amazing. So, I went for it.
The first time I baked this Perfect Red White and Blue Layer Cake with Cream Cheese Frosting, I was juggling a million things—kids running around, last-minute grocery stops, and the oven acting up. Yet, that cake came together like a charm. The cream cheese frosting brought this tangy, smooth balance against the subtly sweet layers, and the vibrant colors made it impossible to resist. It was a surprise hit, with people sneaking slices long after the main event was over.
What stuck with me wasn’t just the festive look but how this cake turned a chaotic afternoon into a moment of calm and joy. It’s funny how something as simple as a layered cake can feel like a little celebration on its own. That’s why this recipe has become my go-to for any summer gathering or holiday where I want a crowd-pleaser that’s more than just pretty—it’s genuinely delicious and easy enough to whip up even when life’s a bit hectic.
So, if you’re wondering whether a red, white, and blue cake with cream cheese frosting can be your next showstopper, let me assure you: this one really sticks with you. It’s the kind of dessert that makes you smile quietly and want to bake it again, no matter the occasion.
Why You’ll Love This Recipe
After testing this recipe multiple times (yes, multiple times in a week!), I can honestly say it hits all the right notes. Here’s why this Perfect Red White and Blue Layer Cake with Cream Cheese Frosting is worth your time:
- Quick & Easy: It comes together in under 90 minutes, making it perfect for busy summer afternoons or last-minute dessert plans.
- Simple Ingredients: Nothing fancy or obscure—just pantry staples and a couple of basic fresh ingredients you probably already have.
- Perfect for Patriotic Celebrations: Whether it’s the 4th of July, Memorial Day, or just a summer barbecue, this cake adds that festive pop of color and flavor.
- Crowd-Pleaser: Kids, adults, neighbors—everyone loves it. The cream cheese frosting is tangy but smooth, complementing the sweet layers beautifully.
- Unbelievably Delicious: The texture is soft, moist, and tender, with a rich but balanced sweetness that keeps you coming back for more.
What makes this cake different is the way the cream cheese frosting is whipped until silky smooth, not too heavy, and just the right amount of tangy. Plus, the layers aren’t just colored—they’re flavored with a touch of vanilla that ties everything together nicely. If you’ve ever tried the easy one-bowl red velvet cake with silky cream cheese frosting, you’ll find this recipe just as comforting but with that extra festive flair.
Honestly, this cake isn’t just a dessert; it’s a little moment of happiness on a plate. It’s the kind of treat that makes you pause and appreciate the simple joy of good food shared with good company.
What Ingredients You Will Need
This recipe uses simple, wholesome ingredients to deliver bold flavor and satisfying texture without the fuss. You can find most of these in your pantry or local grocery store, and they’re easy to swap if needed.
- For the Cake Layers:
- All-purpose flour (2 ½ cups / 320g) – sifted for a light texture
- Baking powder (2 ½ tsp) – helps the cake rise nicely
- Baking soda (½ tsp) – balances the acidity
- Salt (½ tsp) – enhances the flavors
- Granulated sugar (2 cups / 400g) – for sweetness
- Unsalted butter (1 cup / 227g), softened – I prefer Kerrygold for richness
- Large eggs (4), room temperature – they bind and add moisture
- Buttermilk (1 cup / 240ml) – tenderizes the crumb; use dairy-free milk with 1 tbsp vinegar if needed
- Pure vanilla extract (2 tsp) – adds depth to the flavor
- Red gel food coloring (2 tsp) – gives that vibrant color without thinning the batter
- Blue gel food coloring (2 tsp) – same as above, for the blue layers
- For the Cream Cheese Frosting:
- Cream cheese (16 oz / 450g), softened – Philadelphia brand works great for smoothness
- Unsalted butter (½ cup / 113g), softened – brings creaminess
- Powdered sugar (4 cups / 480g), sifted – for that silky finish
- Pure vanilla extract (1 tsp) – elevates the flavor
- Pinch of salt – balances the sweetness
For a seasonal twist, you can swap out the food coloring with natural alternatives like beet juice for red or butterfly pea flower tea for blue, though they may affect texture slightly. If you’re gluten-free, almond flour works well but expect a denser crumb. And for a dairy-free frosting, coconut cream can replace cream cheese, though it changes the flavor profile.
Equipment Needed
- Three 8-inch (20 cm) round cake pans – I’ve found non-stick pans make release easier, but greasing and lining pans works well too
- Electric mixer (stand or handheld) – essential for creaming butter and whipping frosting smoothly
- Mixing bowls – several sizes for dry and wet ingredients
- Measuring cups and spoons – precise measurement is key for consistent results
- Rubber spatula – perfect for folding batter and scraping bowls
- Cooling racks – to let the cakes cool evenly and prevent sogginess
- Offset spatula or butter knife – for spreading frosting neatly between layers
- Toothpicks or cake tester – to check doneness
If you don’t have three pans, you can bake layers one or two at a time, but keep an eye on the baking time as it might vary slightly. For frosting, a stand mixer with a paddle attachment makes the process faster, but a handheld mixer works just fine. I’ve also used an angled spatula from a budget-friendly brand that holds up well and helps with smooth frosting application.
Preparation Method
- Preheat your oven to 350°F (175°C). Grease your three 8-inch cake pans, then line the bottoms with parchment paper circles to prevent sticking. This usually takes about 10 minutes.
- Mix Dry Ingredients: In a medium bowl, sift together the flour, baking powder, baking soda, and salt. Set aside. This ensures no lumps and a light crumb.
- Cream Butter and Sugar: In a large bowl, use your mixer to beat the softened butter and granulated sugar on medium speed until pale and fluffy, about 3-4 minutes. This step is crucial for a tender cake.
- Add Eggs and Vanilla: Beat in eggs one at a time, making sure each is fully incorporated before adding the next. Then stir in the vanilla extract.
- Alternate Adding Dry Ingredients and Buttermilk: With the mixer on low speed, add the flour mixture in three parts, alternating with the buttermilk in two parts, starting and ending with the flour. Mix just until combined to avoid a dense cake.
- Divide and Color the Batter: Evenly divide the batter into three bowls. Leave one bowl plain for the white layer. Add 2 teaspoons of red gel food coloring to one bowl and 2 teaspoons of blue gel food coloring to the other, mixing gently but thoroughly. The batter should be vibrant but smooth, not streaky.
- Pour Batter into Pans: Pour each colored batter into the prepared cake pans, smoothing the tops with a spatula. Tap the pans gently on the counter to release any air bubbles.
- Bake: Place pans in the preheated oven and bake for 25-30 minutes, or until a toothpick inserted in the center comes out clean. Rotate pans halfway through baking for even cooking.
- Cool: Let the cakes cool in the pans for 10 minutes, then turn them out onto cooling racks to cool completely. This prevents soggy bottoms and helps the frosting stick better.
- Prepare the Cream Cheese Frosting: While the cakes cool, beat the softened cream cheese and butter together on medium speed until creamy and smooth. Gradually add the powdered sugar, beating on low until combined, then increase speed to medium and beat until fluffy. Stir in vanilla extract and a pinch of salt.
- Assemble the Cake: Place the blue layer on your cake stand or plate. Spread a generous layer of cream cheese frosting on top. Repeat with the white layer, then the red layer. Cover the top and sides of the cake with the remaining frosting, smoothing with an offset spatula.
- Chill and Serve: Refrigerate the cake for at least one hour to let the frosting set and flavors meld. Bring to room temperature before slicing for the best texture and taste.
Pro tip: If you notice the frosting is too soft to spread, a quick chill in the fridge for 15 minutes firms it up nicely. Also, don’t skip sifting the powdered sugar—it makes the frosting silky smooth and easier to work with.
Cooking Tips & Techniques
One trick I learned the hard way is to always use gel food coloring instead of liquid. Liquid colorings can thin your batter, messing with the texture. The gels give that sharp, vibrant red and blue without affecting consistency.
Another tip: cream your butter and sugar long enough. Sometimes I get impatient, but that fluffy texture is the secret to a light cake crumb. Trust me, it’s worth the extra minute or two.
Don’t overmix once you add the flour. I once beat mine too much, and the cake came out dense and chewy. Mixing until just combined keeps the crumb tender and soft.
When assembling, a crumb coat (a thin layer of frosting) helps seal in crumbs before the final frosting layer. It’s a little extra step but saves you from a crumb-speckled finish.
Lastly, multitask by making the frosting while the cakes cool. This way, you’re not waiting around, and everything comes together smoothly for assembly.
Variations & Adaptations
- Flavor Variations: Add a teaspoon of almond extract to the batter for a subtle nutty twist or swap vanilla for lemon zest for a fresh zing.
- Dietary Adaptations: Use gluten-free all-purpose flour to make it gluten-free, and swap butter and cream cheese with plant-based alternatives for a dairy-free cake.
- Color Alternatives: For a natural approach, use beet juice powder for red and spirulina powder for blue. The colors will be softer but still festive.
- Cooking Method: If you’re short on time, bake the layers in 9×13-inch pans and slice them into strips to layer—less baking time, more assembly fun.
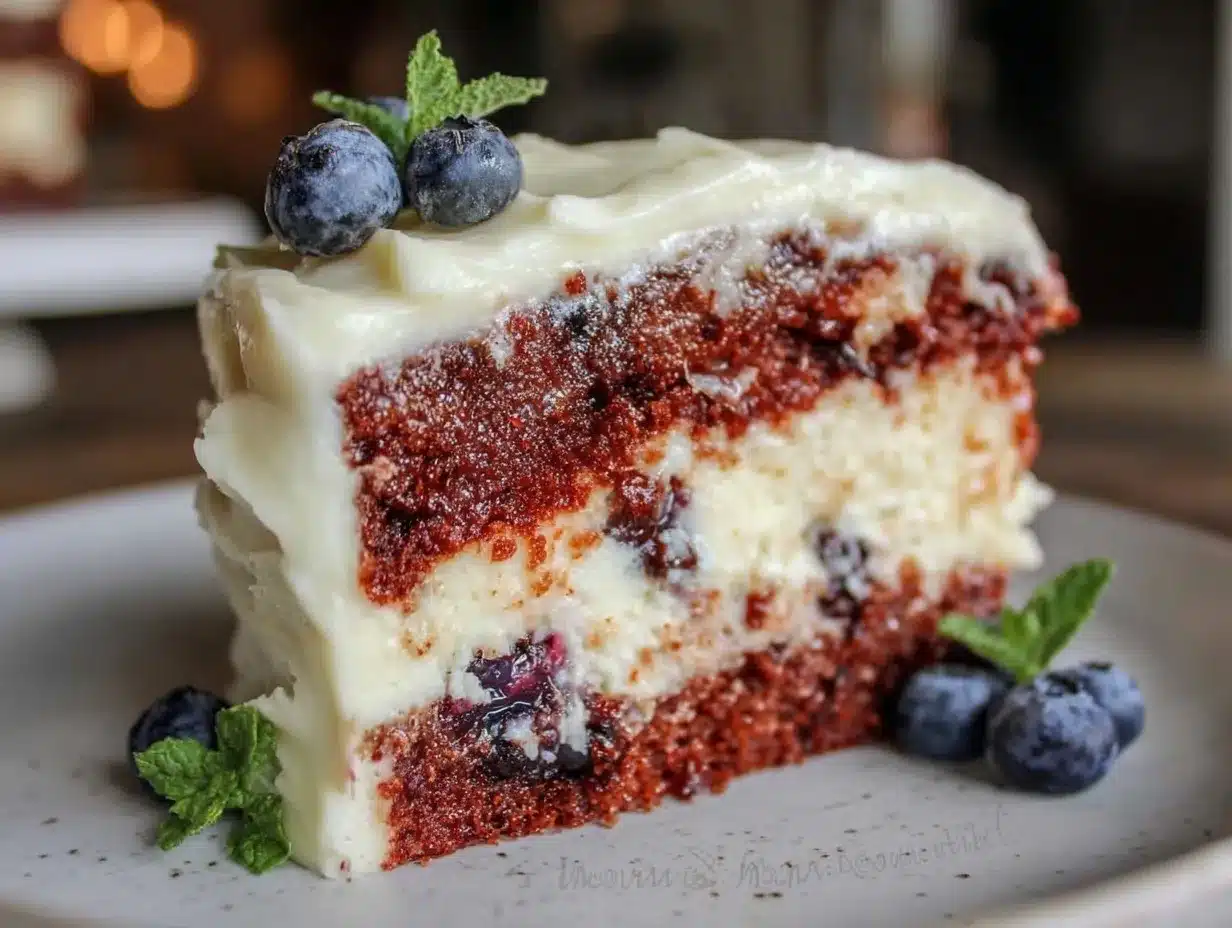
- Personal Touch: I once folded fresh blueberries into the blue batter for bursts of juicy surprises—totally worth trying if you want a little extra texture.
Serving & Storage Suggestions
This cake is best served at room temperature, so take it out of the fridge about 30 minutes before slicing. It pairs wonderfully with a simple cup of iced tea or a sparkling berry lemonade for a cool summer vibe.
Leftovers keep well in the fridge, wrapped tightly with plastic wrap or in an airtight container, for up to 4 days. The flavors actually deepen after a day, making it even better.
If you want to freeze it, slice the cake first and wrap individual pieces in plastic wrap and foil. Freeze for up to 2 months. Thaw overnight in the fridge and bring to room temperature before serving.
When reheating, avoid the microwave—it can dry out the cream cheese frosting. Instead, let slices sit at room temperature or warm gently in a low oven (about 300°F / 150°C) for 10 minutes, loosely covered with foil.
Nutritional Information & Benefits
Each slice of this cake has approximately 350-400 calories depending on portion size. It contains moderate amounts of protein and calcium from the cream cheese and butter.
The buttermilk adds a nice dose of probiotics, which can be good for digestion, and the real vanilla extract has antioxidant properties. Using real ingredients instead of artificial flavors and processed mixes means you’re getting a home-cooked treat with fewer additives.
If you’re watching sugar intake, you can reduce powdered sugar in the frosting slightly or swap in a sugar substitute like erythritol with minimal impact on taste.
Keep in mind, this cake contains gluten, dairy, and eggs, so it’s not suitable for those with allergies to these ingredients. However, the recipe’s adaptability lets you swap ingredients to fit different dietary needs.
Conclusion
This Perfect Red White and Blue Layer Cake with Cream Cheese Frosting isn’t just a pretty face—it’s a dessert that brings people together, whether you’re celebrating a holiday or just craving something sweet and special. The balance of flavors and that light, creamy frosting make it a standout.
Feel free to play around with the colors, flavors, or even the frosting to make it truly your own. I love how this cake brings a sense of joy and pride to any table, reminding me that sometimes the simplest recipes become the most memorable.
Give it a try, and don’t hesitate to share your tweaks or stories—I’m always eager to hear how this cake fits into your celebrations. After all, good food is best when shared.
FAQs
- Can I make this cake in advance?
Yes! Bake the layers a day ahead and store them wrapped tightly in plastic wrap. Assemble and frost the next day for best freshness. - What if I don’t have gel food coloring?
You can use liquid food coloring, but use less to avoid thinning the batter. Expect slightly less vibrant colors. - How do I prevent my cream cheese frosting from being runny?
Make sure the cream cheese and butter are softened but not melted. Beat them well and chill the frosting for 15-30 minutes if needed before frosting. - Can I substitute the cream cheese frosting with buttercream?
Yes, but the tangy flavor and texture will differ. Cream cheese frosting adds a nice balance to the sweetness of the cake. - Is this cake suitable for large gatherings?
Absolutely! You can double the recipe and bake in multiple pans or sheet cakes for bigger crowds.
Pin This Recipe!

Perfect Red White and Blue Layer Cake Recipe with Cream Cheese Frosting
A festive and easy-to-make patriotic layer cake featuring vibrant red, white, and blue layers with a tangy, silky cream cheese frosting. Perfect for summer gatherings and holidays.
- Prep Time: 20 minutes
- Cook Time: 30 minutes
- Total Time: 1 hour 50 minutes
- Yield: 12 servings 1x
- Category: Dessert
- Cuisine: American
Ingredients
- 2 ½ cups (320g) all-purpose flour, sifted
- 2 ½ tsp baking powder
- ½ tsp baking soda
- ½ tsp salt
- 2 cups (400g) granulated sugar
- 1 cup (227g) unsalted butter, softened
- 4 large eggs, room temperature
- 1 cup (240ml) buttermilk (or dairy-free milk with 1 tbsp vinegar)
- 2 tsp pure vanilla extract
- 2 tsp red gel food coloring
- 2 tsp blue gel food coloring
- 16 oz (450g) cream cheese, softened
- ½ cup (113g) unsalted butter, softened
- 4 cups (480g) powdered sugar, sifted
- 1 tsp pure vanilla extract
- Pinch of salt
Instructions
- Preheat oven to 350°F (175°C). Grease three 8-inch cake pans and line bottoms with parchment paper.
- In a medium bowl, sift together flour, baking powder, baking soda, and salt. Set aside.
- In a large bowl, beat softened butter and granulated sugar on medium speed until pale and fluffy, about 3-4 minutes.
- Beat in eggs one at a time, fully incorporating each before adding the next. Stir in vanilla extract.
- With mixer on low, add flour mixture in three parts alternating with buttermilk in two parts, starting and ending with flour. Mix until just combined.
- Divide batter evenly into three bowls. Leave one plain for white layer. Add red gel food coloring to one bowl and blue gel food coloring to the other; mix gently until smooth.
- Pour each colored batter into prepared pans, smooth tops, and tap pans to release air bubbles.
- Bake for 25-30 minutes or until a toothpick inserted in the center comes out clean. Rotate pans halfway through baking.
- Cool cakes in pans for 10 minutes, then turn out onto cooling racks to cool completely.
- For frosting, beat cream cheese and softened butter on medium speed until smooth. Gradually add powdered sugar on low speed until combined, then beat on medium until fluffy. Stir in vanilla extract and salt.
- Assemble cake by placing blue layer on plate, spreading frosting on top, then white layer with frosting, then red layer. Cover top and sides with remaining frosting, smoothing with offset spatula.
- Refrigerate cake for at least 1 hour to set frosting. Bring to room temperature before slicing.
Notes
Use gel food coloring for vibrant colors without thinning batter. Cream butter and sugar thoroughly for a tender crumb. Avoid overmixing after adding flour to keep cake soft. Chill frosting if too soft to spread. A crumb coat helps prevent crumbs in final frosting layer. Can substitute natural colorings or adapt for gluten-free and dairy-free diets.
Nutrition
- Serving Size: 1 slice (1/12 of cak
- Calories: 375
- Sugar: 38
- Sodium: 280
- Fat: 18
- Saturated Fat: 10
- Carbohydrates: 52
- Fiber: 1
- Protein: 5
Keywords: red white and blue cake, patriotic cake, cream cheese frosting, layered cake, summer dessert, 4th of July cake, easy cake recipe


