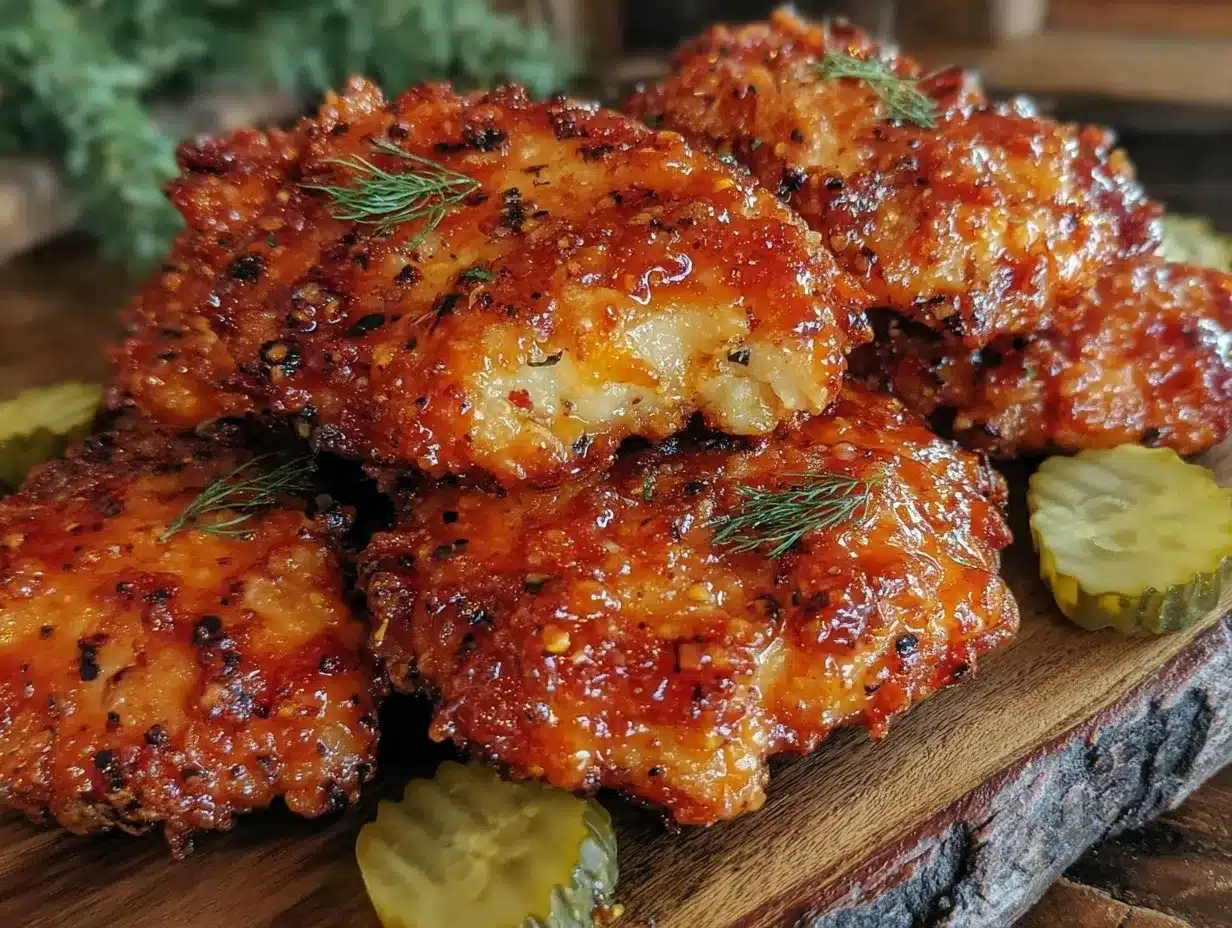
“You sure you want these extra spicy?” my friend asked with a raised eyebrow as I wiped my hands on the kitchen towel. Honestly, I had no idea what I’d just gotten myself into with this homemade batch of Nashville hot chicken tenders. It all started on a random weeknight when I was craving something crispy and fiery but didn’t want to go through the hassle of a full-on fried chicken dinner. I figured, why not try making crispy Nashville hot chicken tenders with a side of tangy dill pickles? I was skeptical at first — after all, fried chicken is a bit of an art, and the Nashville hot spice profile can be intimidating. But as soon as that first tender came out of the oil, coated in that vibrant, spicy-red glaze, I knew this was a keeper.
The sizzle from the hot oil, the smell of smoky cayenne mingling with garlic and paprika, and the crunch when I bit into that tender — honestly, it was a game-changer. The tangy dill pickles weren’t just a side; they were the perfect foil, cutting through the heat with their bright, briny snap. I made these tenders three nights in a row that week (and yes, my family started to question my sanity), but it was impossible to stop. It’s funny how a simple craving led to this accidental obsession, and now every time I pull this recipe out, it feels like a little celebration in my kitchen. If you’re the kind of person who loves crispy, spicy, and a little tang to balance things out, you’re going to find something special here.
What stuck with me most was how approachable this recipe is. It’s not just about heat or crunch — it’s about that perfect balance you won’t find in your average chicken tender. Let’s just say, once you try these crispy Nashville hot chicken tenders with tangy dill pickles, you might just find yourself making them your go-to comfort food too.
Why You’ll Love This Recipe
This crispy Nashville hot chicken tenders recipe is one I trust to deliver serious flavor without turning my evening into a kitchen marathon. After numerous tests and tweaks, it’s become my ultimate spicy chicken fix, and here’s why you’ll love it too:
- Quick & Easy: You can have these chicken tenders ready in about 35 minutes, making them perfect for busy weeknights or unexpected guests.
- Simple Ingredients: No need for exotic spices or hard-to-find products. Everything you need is probably sitting in your pantry already.
- Perfect for Casual Gatherings: These tenders steal the show at game days, potlucks, or laid-back dinners with friends and family.
- Crowd-Pleaser: The crispy coating combined with the spicy glaze and tangy dill pickles always gets rave reviews—kids and adults alike can’t get enough.
- Unbelievably Delicious: The texture is spot-on — crunchy on the outside, juicy and tender inside, with a fiery kick that makes you want another bite.
What sets this recipe apart is the way the spice blend is layered. Instead of dumping cayenne powder straight on, the spicy oil glaze is carefully balanced with smoked paprika and a touch of brown sugar to round out the heat with a subtle sweetness. Also, the tenders are double-dredged and fried just right, so you get that golden crust without a greasy finish. And the tangy dill pickles? They add that refreshing crunch that cuts through the spice perfectly — trust me, they’re not just an afterthought.
This isn’t your average chicken tender recipe. It’s the kind that makes you close your eyes after the first bite and smile a little. Whether you’re impressing friends or just treating yourself, these tenders bring together comfort food with a bold Southern twist.
What Ingredients You Will Need
This recipe uses simple, wholesome ingredients to deliver bold flavor and satisfying texture without the fuss. Most are pantry staples, so you won’t need to make a special grocery run. Here’s what you’ll need:
For the Chicken Tenders and Batter
- Chicken tenders: 1.5 pounds (680 g) of fresh, skinless chicken tenders (look for plump tenders for juiciness)
- Buttermilk: 1 cup (240 ml) — helps tenderize and adds flavor (can substitute with regular milk + 1 tbsp lemon juice)
- All-purpose flour: 1.5 cups (180 g) — for the crispy coating
- Cornstarch: 0.5 cup (60 g) — adds extra crunch to the crust
- Salt and black pepper: to taste
- Garlic powder: 1 tsp (adds savory depth)
- Onion powder: 1 tsp
- Smoked paprika: 1 tsp — smoky undertone that’s key to Nashville flavor
For the Nashville Hot Oil Glaze
- Vegetable oil or peanut oil: 0.5 cup (120 ml), warmed
- Cayenne pepper: 2 tbsp (adjust down if you prefer less heat)
- Brown sugar: 1 tsp — balances the heat
- Smoked paprika: 1 tsp
- Garlic powder: 0.5 tsp
- Salt: 0.5 tsp
- Hot sauce: 1 tbsp (optional, for an extra kick)
For the Tangy Dill Pickles
- Dill pickles: 1 cup, sliced thin (homemade or store-bought work well)
- Pickle juice: 2 tbsp — to drizzle over or marinate slice briefly
Tip: I usually reach for King Arthur flour for the coating—it gives a reliably crispy result. For a gluten-free twist, try swapping the all-purpose flour with a gluten-free blend and almond flour.
Equipment Needed
- Deep-frying pan or heavy-bottomed skillet: At least 10 inches in diameter, for frying the tenders evenly.
- Thermometer: A candy or deep-fry thermometer helps keep the oil temperature steady at around 350°F (175°C).
- Mixing bowls: One for the buttermilk marinade, one for dry coating.
- Wire rack: Essential for draining excess oil and keeping the tenders crispy after frying.
- Tongs or slotted spoon: For safely turning and removing tenders from hot oil.
If you don’t have a deep-fry thermometer, keep an eye on the oil carefully and test with a small piece of bread or batter to check for the right temperature. I’ve used a heavy Dutch oven instead of a frying pan, which works great for maintaining consistent heat. For a lighter version, an air fryer can work too, though you’ll miss some of that authentic deep-fried crunch.
Preparation Method
- Marinate the chicken: In a large bowl, combine the chicken tenders and buttermilk. Add a pinch of salt and black pepper. Toss to coat evenly. Cover and refrigerate for at least 30 minutes or up to 4 hours. This tenderizes the chicken and adds moisture.
- Prepare the dry coating: In another bowl, whisk together the all-purpose flour, cornstarch, garlic powder, onion powder, smoked paprika, salt, and pepper. This mix creates the perfect crispy crust.
- Drain and coat the chicken: Remove tenders from the buttermilk, letting excess drip off, then dredge each piece thoroughly in the flour mixture. For extra crunch, double dredge by dipping back into the buttermilk briefly and then into the flour again.
- Heat the oil: Pour vegetable oil into your skillet to a depth of about 2 inches (5 cm). Heat to 350°F (175°C), using a thermometer for accuracy. This temperature crisps the coating without burning.
- Fry the tenders: Carefully add tenders in batches, avoiding overcrowding. Fry for 3-4 minutes per side, flipping once, until golden brown and cooked through (internal temperature 165°F or 74°C). Remove and drain on a wire rack.
- Make the Nashville hot oil glaze: In a small saucepan, warm the 0.5 cup oil over low heat. Stir in cayenne pepper, brown sugar, smoked paprika, garlic powder, salt, and hot sauce (if using). Mix well until fragrant and smooth — about 2 minutes. Keep warm.
- Coat the tenders: Brush or drizzle the hot oil glaze generously over the fried chicken tenders. The heat from the oil helps the spices soak into the crust, giving that signature Nashville kick.
- Prepare the pickles: Slice your dill pickles thinly and drizzle with a splash of pickle juice for extra tang. Serve alongside the tenders to balance the heat.
Pro tip: Keep the oil temperature steady by adjusting the heat as you fry, and never leave it unattended — hot oil can be tricky! If the crust feels soggy after coating, a quick return to the hot oil for 30 seconds helps crisp it back up.
Cooking Tips & Techniques
Getting that perfect crispy Nashville hot chicken tender is all about technique and timing, you know? Here are some tips I’ve picked up the hard way:
- Buttermilk marinade is key: It tenderizes the chicken and helps the flour coating stick better. I’ve skipped it before and the tenders just didn’t have the same juicy inside.
- Double dredging adds crunch: A single coat can work, but double dredging makes the crust thicker and crunchier without being heavy. Just don’t let the batter get too wet or it won’t crisp right.
- Oil temperature matters: Frying at 350°F (175°C) ensures the crust crisps quickly and seals in moisture. If the oil is too cool, the chicken absorbs oil and gets greasy; too hot, the coating burns while the inside stays raw.
- Use a wire rack to drain: Paper towels make the bottom soggy. A rack lets excess oil drip off and keeps the tenders crisp.
- Coat with hot oil glaze immediately: The glaze soaks into the crust best when warm. If it cools too much, the spicy oil won’t stick as well.
- Adjust the spice level: The cayenne pepper amount can be tweaked. Start with less if you’re sensitive, then add more next time. The brown sugar helps soften the heat, so don’t skip it.
One time I tried skipping the resting step after frying and the tenders lost their crispiness fast — lesson learned! Also, multitasking by prepping the glaze while the chicken marinates saves so much time. It’s these little kitchen hacks that make this recipe feel effortless and fun.
Variations & Adaptations
Feel like switching things up? This recipe is super flexible and plays well with different tastes and dietary needs:
- Gluten-Free Version: Swap the all-purpose flour and cornstarch for a gluten-free flour blend and arrowroot powder. The tenders still come out crispy and flavorful.
- Milder Heat: Cut the cayenne in half and add more smoked paprika for warmth without the burn. Kids love this version.
- Oven-Baked Option: For a lighter twist, bake the coated tenders at 425°F (220°C) on a wire rack for 20-25 minutes, flipping halfway. Finish with the hot oil glaze for flavor.
- Spicy Honey Glaze: Mix honey into the hot oil glaze for a sweet-heat combo that’s irresistible.
- Personal Favorite: I once tossed these tenders in a creamy buffalo sauce after glazing for a tangy twist that was a crowd hit at a backyard barbecue.
Serving & Storage Suggestions
These crispy Nashville hot chicken tenders are best served immediately while the crunch is alive and the spice is fresh. I like to plate them with a generous heap of tangy dill pickles on the side, plus a cool ranch or blue cheese dip if I’m feeling fancy.
They pair wonderfully with classic Southern sides like coleslaw, baked beans, or even a creamy mac and cheese. If you want a complete meal, try pairing them with a fresh salad or some crispy fries for that perfect balance of textures.
To store leftovers, place tenders in an airtight container and refrigerate for up to 3 days. Reheat in a 375°F (190°C) oven on a wire rack for about 10 minutes to crisp back up. Microwave reheating usually makes them soggy, so avoid that if possible.
Interestingly, the flavors tend to mellow and meld a bit overnight, so if you like a slightly less fiery bite, leftovers can be a nice change. Just don’t forget those tangy pickles—they keep the whole experience bright and fresh.
Nutritional Information & Benefits
Each serving of these crispy Nashville hot chicken tenders packs around 350-400 calories, depending on portion size and frying oil used. They offer a good source of protein, thanks to the chicken breast tenders.
The buttermilk adds calcium and probiotics, while the spices like cayenne and smoked paprika bring antioxidants and anti-inflammatory compounds to the table. The tangy dill pickles provide probiotics as well and are low in calories, making them a smart, flavorful side.
If you’re watching carbs, the batter can be adapted with almond or coconut flour. For anyone sensitive to gluten or dairy, the recipe’s substitutions make it accessible without losing that signature crunch and flavor. Just be mindful of the sodium content, especially from the pickles and seasoning.
Conclusion
Honestly, these crispy Nashville hot chicken tenders with tangy dill pickles have become my go-to when I want something that feels indulgent but doesn’t take forever to prepare. The way the crunchy, spicy tenders play off the bright, acidic pickles is just the kind of food that sticks with you.
I encourage you to make this recipe your own—adjust the heat, try different dips, or even bake them for a lighter twist. For me, it’s the perfect mix of comfort and bold flavor, and I’m sure you’ll find it just as addictive once you give it a try.
Feel free to share how you spice it up or swap ingredients in the comments—there’s always room for more kitchen creativity. Here’s to many crispy, fiery bites ahead!
FAQs
Can I make these chicken tenders ahead of time?
You can marinate the chicken in buttermilk up to 4 hours ahead and keep it refrigerated. Fried tenders are best fresh but can be reheated in the oven within 1-2 days.
What’s the best way to adjust spice levels?
Start by reducing the cayenne pepper in the hot oil glaze. You can always add more after tasting, or serve with a cooling dip to balance the heat.
Can I bake instead of frying?
Yes! Bake coated tenders at 425°F (220°C) on a wire rack for 20-25 minutes, flipping halfway, then brush with the hot oil glaze for flavor.
What can I use instead of buttermilk?
Mix 1 cup (240 ml) of milk with 1 tbsp lemon juice or vinegar and let it sit for 5 minutes. This homemade buttermilk substitute works well for tenderizing.
How do I keep the tenders crispy after frying?
Drain on a wire rack instead of paper towels to avoid sogginess, and serve immediately. Reheat in the oven on a rack for best crunch if needed.
For those who appreciate a crispy, flavorful chicken fix, this recipe stands out much like the crispy baked parmesan chicken cutlets I recently perfected — both deliver satisfying crunch and bold flavor without fuss. And if you’re a fan of spicy chicken, you might enjoy the crispy air fryer chicken tenders with honey mustard sauce for a lighter alternative that’s still packed with flavor.
Pin This Recipe!
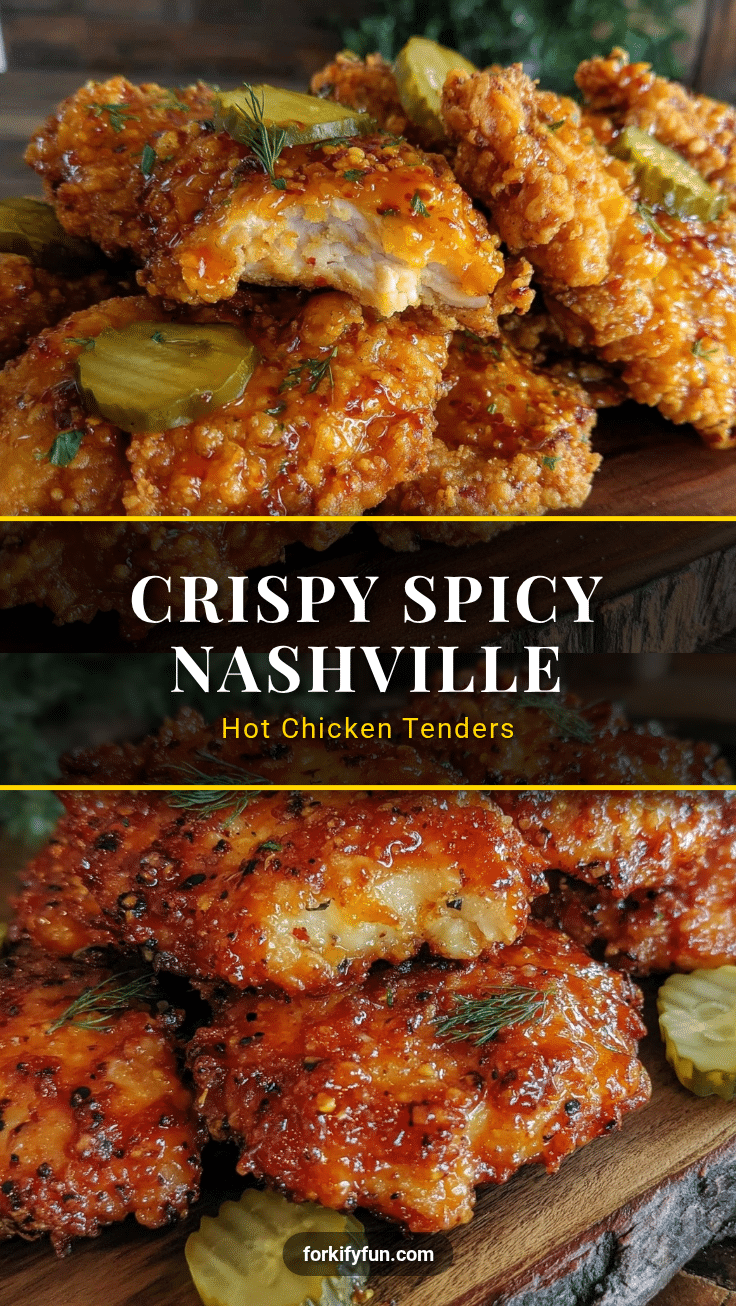
Crispy Nashville Hot Chicken Tenders Recipe with Tangy Dill Pickles
A quick and easy recipe for crispy, spicy Nashville hot chicken tenders paired with tangy dill pickles, delivering a perfect balance of heat, crunch, and tang.
- Prep Time: 10 minutes
- Cook Time: 25 minutes
- Total Time: 35 minutes
- Yield: 4 servings 1x
- Category: Main Course
- Cuisine: Southern, American
Ingredients
- 1.5 pounds fresh, skinless chicken tenders
- 1 cup buttermilk (can substitute with 1 cup milk + 1 tbsp lemon juice)
- 1.5 cups all-purpose flour
- 0.5 cup cornstarch
- Salt and black pepper to taste
- 1 tsp garlic powder
- 1 tsp onion powder
- 1 tsp smoked paprika
- 0.5 cup vegetable oil or peanut oil, warmed
- 2 tbsp cayenne pepper (adjust to taste)
- 1 tsp brown sugar
- 1 tsp smoked paprika
- 0.5 tsp garlic powder
- 0.5 tsp salt
- 1 tbsp hot sauce (optional)
- 1 cup dill pickles, sliced thin
- 2 tbsp pickle juice
Instructions
- Marinate the chicken: In a large bowl, combine chicken tenders and buttermilk. Add a pinch of salt and black pepper. Toss to coat evenly. Cover and refrigerate for at least 30 minutes or up to 4 hours.
- Prepare the dry coating: In another bowl, whisk together all-purpose flour, cornstarch, garlic powder, onion powder, smoked paprika, salt, and pepper.
- Drain and coat the chicken: Remove tenders from buttermilk, letting excess drip off. Dredge each piece thoroughly in the flour mixture. For extra crunch, double dredge by dipping back into buttermilk briefly and then into the flour again.
- Heat the oil: Pour vegetable oil into a skillet to a depth of about 2 inches. Heat to 350°F (175°C) using a thermometer.
- Fry the tenders: Add tenders in batches, avoiding overcrowding. Fry for 3-4 minutes per side until golden brown and cooked through (internal temperature 165°F or 74°C). Remove and drain on a wire rack.
- Make the Nashville hot oil glaze: In a small saucepan, warm 0.5 cup oil over low heat. Stir in cayenne pepper, brown sugar, smoked paprika, garlic powder, salt, and hot sauce if using. Mix until fragrant and smooth, about 2 minutes. Keep warm.
- Coat the tenders: Brush or drizzle the hot oil glaze generously over the fried chicken tenders.
- Prepare the pickles: Slice dill pickles thinly and drizzle with pickle juice. Serve alongside the tenders.
Notes
Keep oil temperature steady at 350°F to ensure crispy coating without greasiness. Double dredging adds extra crunch. Use a wire rack to drain excess oil and keep tenders crispy. Brush hot oil glaze immediately after frying for best flavor absorption. For gluten-free, substitute flours accordingly. Oven-baking option available at 425°F for 20-25 minutes with flipping halfway.
Nutrition
- Serving Size: Approximately 4-5 ch
- Calories: 375
- Sugar: 3
- Sodium: 700
- Fat: 22
- Saturated Fat: 3.5
- Carbohydrates: 20
- Fiber: 1
- Protein: 28
Keywords: Nashville hot chicken, chicken tenders, crispy chicken, spicy chicken, dill pickles, fried chicken, Southern cuisine


