Introduction
“Are you sure we want to eat fries cooked over a campfire?” my friend asked, squinting at the flickering flames while I balanced a hefty cast iron skillet filled with sizzling goodness. Honestly, I wasn’t convinced myself until the first bite melted all doubt away. This recipe for crispy campfire cast iron chili cheese fries came about one late summer evening when our camping plans hit a snag—no grill, no fryer, just a roaring fire and a craving for something indulgent.
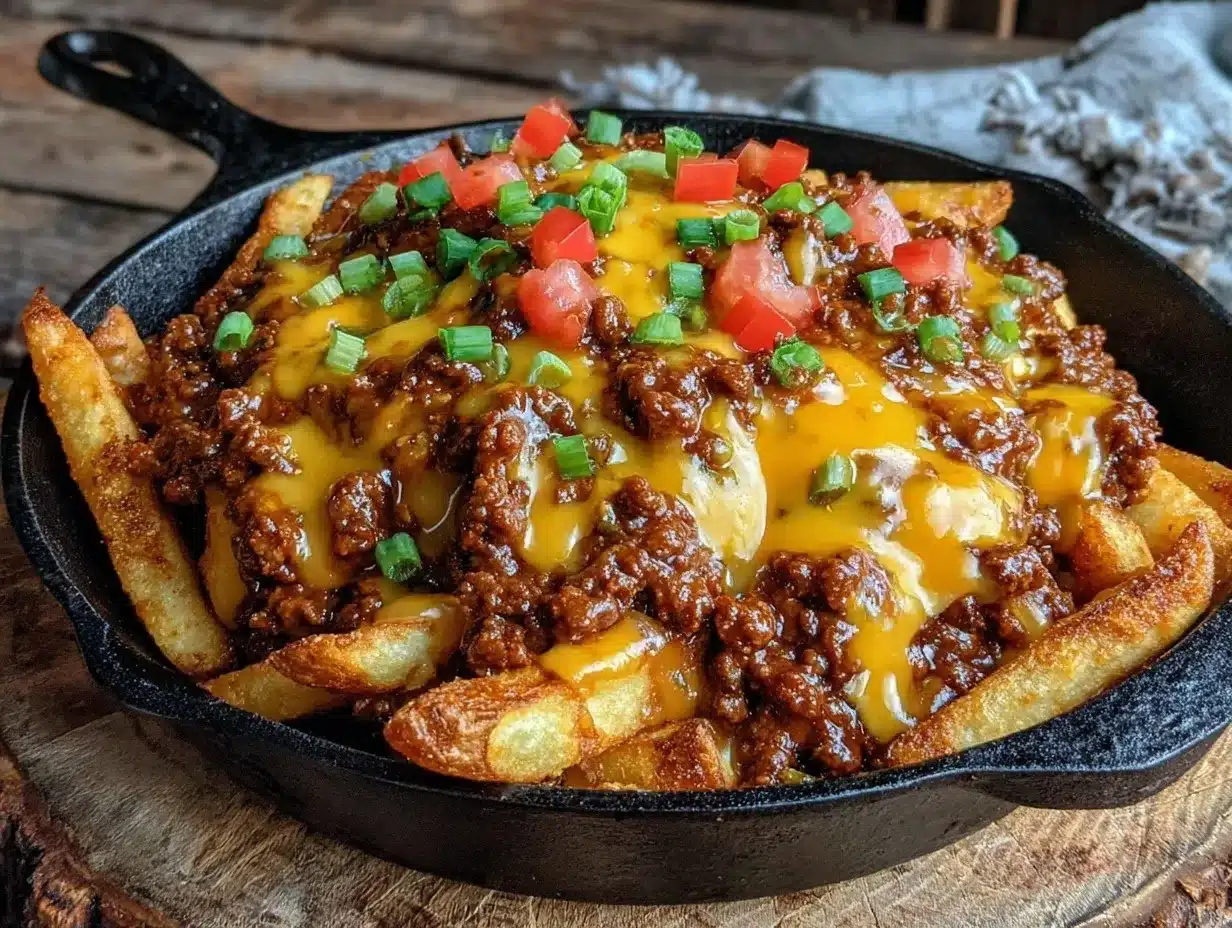
We tossed together some frozen fries, homemade chili, and plenty of melty cheese right in the cast iron, letting the fire do its magic. The crispy edges, smoky aroma, and gooey cheese were unlike anything you’d get from an oven or deep fryer. It wasn’t just a meal; it was a moment—messy, satisfying, and perfect for sharing under the stars. If you’re ever stuck without fancy kitchen tools but still want to impress your crew, these chili cheese fries are your go-to. The secret? That cast iron skillet and a little patience over the campfire.
Now, this recipe has become a staple not just for camping but also for cozy nights at home when I crave something crispy, spicy, and downright comforting. The way the cheese blankets the chili and fries, all crisped up with a hint of smokiness, makes it impossible to stop at just one serving. Let’s just say these fries have been tested over and over—sometimes multiple times a week—and they never disappoint. You might even find yourself making these for your next backyard hangout or casual game night.
There’s something about this recipe that feels like a little reward after a long day—simple, crunchy, and full of flavor. It’s not fancy, but it’s honest and satisfying in a way that sticks with you. And if you’re looking for a fun way to switch up your usual snack game, this might just become your new obsession.
Why You’ll Love This Recipe
After countless experiments balancing campfire heat and perfect crispiness, this recipe has earned its place in my rotation. Whether you’re a seasoned camper or just craving that smoky comfort food vibe at home, these chili cheese fries deliver on every level.
- Quick & Easy: Ready in under 30 minutes, these fries are perfect for those last-minute cravings or when you’re short on time but want big flavor.
- Simple Ingredients: No need for exotic spices or hard-to-find items. Most of the ingredients are pantry staples or easy to grab at any grocery store.
- Perfect for Gatherings: Ideal for casual get-togethers, camping trips, or game nights. Everyone loves the combination of crispy fries, hearty chili, and gooey cheese.
- Crowd-Pleaser: Kids and adults alike rave about the crispy edges and melty cheese. It’s one of those dishes that vanishes fast and gets requests to make it again.
- Unbelievably Delicious: The smoky flavor from the cast iron and campfire, combined with the chili’s spice and cheese’s richness, creates a comforting taste that feels both rustic and indulgent.
What really sets this recipe apart is the cooking method—using a cast iron skillet over a campfire. The direct heat crisps the fries beautifully while the chili bubbles and melds with the cheese in a way that’s hard to replicate indoors. Plus, I usually blend in a little smoked paprika and chipotle powder into the chili, which gives it a gentle smoky kick that pairs perfectly with the outdoor vibe.
This isn’t just another chili cheese fries recipe; it’s the best version I’ve found for texture, flavor, and that nostalgic campfire feel. Honestly, it’s the kind of dish that makes you pause, savor, and maybe even close your eyes after the first bite because it’s just that satisfying.
What Ingredients You Will Need
This recipe uses simple, wholesome ingredients to deliver bold flavor and satisfying texture without the fuss. Most items are pantry staples, and you can customize based on what you have on hand.
- Frozen French Fries (about 4 cups or 600g) – I prefer thick-cut for the best crispy-chewy balance.
- Ground Beef (1 lb / 450g) – Use lean or regular depending on your preference. For a twist, ground turkey works well too.
- Yellow Onion (1 medium, finely chopped) – Adds sweetness and depth to the chili.
- Garlic (2 cloves, minced) – For that essential savory punch.
- Canned Diced Tomatoes (14 oz / 400g) – Opt for fire-roasted if you want extra smokiness.
- Kidney Beans (1 cup / 175g, drained and rinsed) – Classic chili component, but you can skip if you prefer beanless chili.
- Chili Powder (1 tbsp) – I like McCormick brand for consistent flavor.
- Smoked Paprika (1 tsp) – Adds a subtle smoky layer.
- Ground Cumin (1 tsp) – Earthy warmth that rounds out the chili.
- Chipotle Powder (optional, ½ tsp) – For a gentle heat kick.
- Salt and Black Pepper (to taste)
- Shredded Cheddar Cheese (2 cups / 200g) – Sharp cheddar melts beautifully; you can mix with Monterey Jack for creaminess.
- Green Onions (2 stalks, sliced) – For garnish and fresh bite.
- Jalapeños (optional, sliced) – Adds heat if you like it spicy.
- Cooking Oil (2 tbsp) – Vegetable or canola oil for frying the fries in the skillet.
If you prefer a vegetarian version, swap the ground beef for a meatless crumble or extra beans. Using fresh tomatoes instead of canned is great in season. For dairy-free cheese, try a sharp vegan cheddar alternative—just remember melting qualities vary.
Equipment Needed
- Cast Iron Skillet (10-12 inch / 25-30 cm) – The heart of this recipe. It holds heat evenly and crisps the fries beautifully. If you don’t have cast iron, a heavy stainless steel skillet can work, but you’ll miss some of that smoky flavor.
- Campfire or Outdoor Grill – Perfect for authentic smoky flavor. If you’re cooking indoors, a stovetop or oven method works too.
- Wooden Spoon or Heat-Resistant Spatula – For stirring the chili and flipping fries without scratching your skillet.
- Knife and Cutting Board – For prepping onions, garlic, and jalapeños.
- Measuring Spoons and Cups – To keep your seasoning balanced.
Personally, I like a well-seasoned cast iron that’s been around the block—it really adds a rustic touch and even heat distribution. If you’re new to cast iron, just remember to avoid soap when cleaning and dry it immediately to prevent rust. For budget-friendly options, Lodge makes reliable, affordable cast iron skillets that will last a lifetime.
Preparation Method
- Prepare the Chili: Heat 1 tablespoon of oil in the cast iron skillet over medium heat. Add the chopped onion and sauté for about 3-4 minutes until translucent and fragrant.
- Add the minced garlic and cook for another 30 seconds, careful not to burn it.
- Increase the heat to medium-high and add the ground beef. Break it up with your spoon and cook until browned and no longer pink, about 6-8 minutes. Drain excess fat if needed.
- Stir in the canned diced tomatoes, kidney beans, chili powder, smoked paprika, cumin, chipotle powder (if using), salt, and pepper. Reduce heat to low and let simmer uncovered for 10-15 minutes, stirring occasionally. The chili should thicken and develop aroma.
- Cook the Fries: While the chili simmers, heat the remaining 1 tablespoon of oil in a separate cast iron skillet (or the same if you have time) over medium-high heat. Add frozen fries in a single layer. Don’t overcrowd the pan; cook in batches if necessary.
- Let the fries cook undisturbed for about 4 minutes to get crispy edges, then flip and cook the other side for another 4 minutes. They should be golden and crisp but tender inside.
- Assemble: Lower heat to medium-low. Spoon the chili evenly over the fries, then sprinkle shredded cheddar cheese generously on top.
- Cover the skillet with a lid or foil to help the cheese melt, about 3-5 minutes. Check occasionally to avoid burning.
- Garnish and Serve: Once the cheese is melted and gooey, remove from heat. Sprinkle sliced green onions and jalapeños over the top for a fresh, spicy finish.
If you notice the chili is too watery, let it simmer a bit longer before adding to the fries. For extra crispiness, you can broil the assembled dish for 1-2 minutes indoors if your skillet is oven-safe. The aroma alone will get everyone’s attention.
Cooking Tips & Techniques
Getting crispy fries over a campfire skillet can be a little tricky, but these tips help keep things on track. First, make sure the oil is hot before adding the fries—if you drop a small fry and it sizzles immediately, you’re good to go. Don’t stir the fries too much; let them form that beautiful golden crust by leaving them undisturbed for a few minutes on each side.
When cooking chili in the same skillet, drain excess fat from the ground beef to avoid greasy chili. Simmering the chili uncovered helps thicken it, which prevents the fries from getting soggy once layered. Also, covering the skillet while melting cheese traps steam and melts it evenly without drying out the fries.
Multi-task by prepping your toppings while the chili simmers—this keeps the cooking flow smooth and fast. And if you’re cooking over an actual campfire, position the skillet on stable coals rather than direct flames to avoid hotspots and burning.
One lesson I learned the hard way: overcrowding the skillet with fries leads to steaming instead of crisping. Patience pays off here. Also, don’t forget to season the fries lightly before cooking—they soak up a little salt better when hot.
Variations & Adaptations
This recipe is flexible enough to suit different tastes and dietary needs. Here are a few ways to make it your own:
- Vegetarian Version: Swap ground beef for crumbled tempeh, lentils, or a plant-based meat substitute in the chili. Use dairy-free cheese for a vegan-friendly dish.
- Spice Level: Adjust the chili powder and chipotle powder to your heat preference. Add diced fresh chilies or hot sauce for more kick.
- Cheese Options: Try pepper jack for a spicy twist or a blend of mozzarella and cheddar for extra gooeyness. If you want a smoky flavor, smoked gouda works wonders.
- Cooking Methods: If you don’t have a campfire, cook the fries in the oven at 425°F (220°C) for about 25-30 minutes until crispy, then layer chili and cheese and broil briefly to melt.
- Extra Toppings: Add sliced black olives, diced tomatoes, or avocado chunks for freshness. A dollop of sour cream or Greek yogurt adds creamy tang.
I once swapped frozen fries for homemade seasoned sweet potato fries and topped them with spicy black bean chili—an unexpected but delicious combo that everyone loved. Feel free to experiment with whatever you have on hand!
Serving & Storage Suggestions
Serve these chili cheese fries hot and fresh straight from the skillet. The cheese is at its gooey best right after melting, and the fries are crispest then. For presentation, a sprinkle of bright green onions and jalapeños adds color and texture contrast.
Pair this dish with a crisp salad or crunchy pickles to balance the richness, or serve alongside honey garlic chicken and vegetables for a full meal. A cold beer or soda complements the smoky, spicy flavors nicely.
Leftovers can be stored in an airtight container in the refrigerator for up to 2 days. Reheat in a skillet over medium heat to restore crispiness or under a broiler for a couple of minutes. Microwave reheating tends to make fries soggy, so avoid if possible.
Flavors often deepen after a day, especially the chili, so leftovers might even taste better the next day. Just make sure to add fresh garnishes when serving again.
Nutritional Information & Benefits
Estimated per serving (based on 4 servings):
| Calories | 550-600 |
|---|---|
| Protein | 30g |
| Carbohydrates | 45g |
| Fat | 28g |
| Fiber | 6g |
This recipe packs a good protein punch thanks to the ground beef and beans. The kidney beans add fiber and essential nutrients like iron and folate. Using a good quality cheddar cheese contributes calcium and vitamin A, though obviously, this is a comfort dish best enjoyed in moderation.
For gluten-free options, check your frozen fries and seasoning blends for hidden gluten. The recipe is naturally gluten-free if you select appropriate ingredients. To keep it lower-carb, swap fries for baked cauliflower florets or roasted zucchini slices.
From a personal wellness standpoint, this recipe hits that balance between indulgence and nourishment. The homemade chili is hearty and filling, and cooking it yourself means you control the salt and spice levels. Plus, sharing this dish around the fire or the table always feels like a treat worth savoring.
Conclusion
Crispy campfire cast iron chili cheese fries have become one of my favorite meals when I want something satisfying, crunchy, and full of flavor with minimal fuss. Whether you’re camping, hanging out in the backyard, or just craving a cozy snack, this recipe hits all the right notes.
Feel free to tweak the chili spices, cheese blend, or toppings to match your personal taste—this dish is as flexible as it is delicious. For me, it’s the perfect combination of smoky crispiness, hearty chili, and gooey cheese that keeps me coming back for more.
Give it a try and let me know how it turns out! I can’t wait to hear what creative spins you put on it, and if you’re curious about other cozy, cheesy dishes, you might enjoy the creamy chicken alfredo baked ziti or the crispy baked parmesan chicken cutlets recipes too.
Here’s to comfort food made simple and memorable, one crispy bite at a time.
FAQs
Can I make these chili cheese fries indoors without a campfire?
Yes! Cook the fries in the oven at 425°F (220°C) for 25-30 minutes until crispy, then layer with chili and cheese and broil for a few minutes to melt the cheese.
What’s the best way to keep fries crispy when reheating leftovers?
Reheat in a hot skillet over medium heat or under a broiler for a few minutes. Avoid microwaving as it makes fries soggy.
Can I prepare the chili ahead of time?
Absolutely! The chili tastes even better after sitting overnight. Just reheat before assembling with the fries and cheese.
What if I don’t eat beef? Are there good alternatives for the chili?
Try ground turkey, chicken, or plant-based crumbles. You can also make a vegetarian chili with beans and vegetables.
Is this recipe suitable for kids?
Yes, just adjust the spice levels by reducing or omitting chipotle and jalapeños. Kids usually love the cheesy fries with mild chili.
Pin This Recipe!
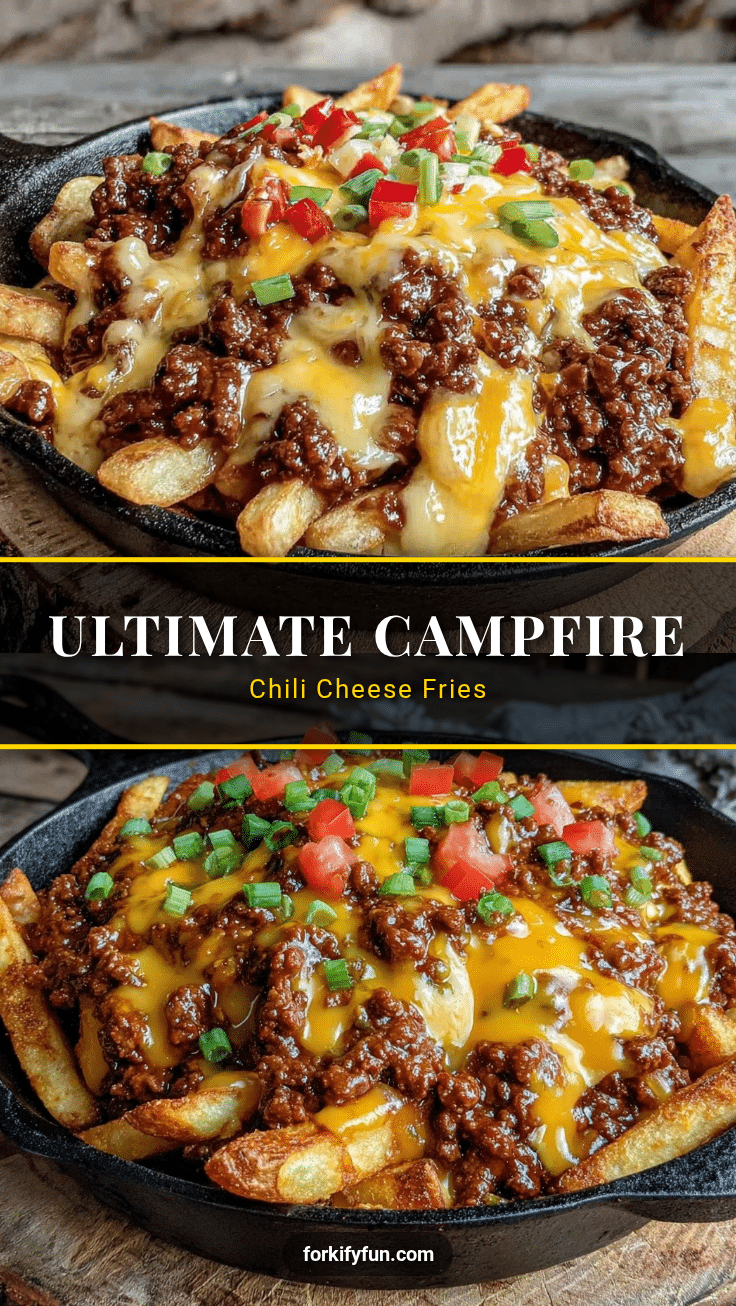
Crispy Campfire Cast Iron Chili Cheese Fries

A delicious and indulgent recipe for crispy fries topped with homemade chili and melted cheddar cheese, cooked in a cast iron skillet over a campfire or stovetop. Perfect for camping, game nights, or cozy nights at home.
- Prep Time: 10 minutes
- Cook Time: 20 minutes
- Total Time: 30 minutes
- Yield: 4 servings 1x
- Category: Snack
- Cuisine: American
Ingredients
- 4 cups (about 600g) frozen French fries, thick-cut preferred
- 1 lb (450g) ground beef (or ground turkey for a twist)
- 1 medium yellow onion, finely chopped
- 2 cloves garlic, minced
- 14 oz (400g) canned diced tomatoes (fire-roasted optional)
- 1 cup (175g) kidney beans, drained and rinsed (optional)
- 1 tbsp chili powder
- 1 tsp smoked paprika
- 1 tsp ground cumin
- ½ tsp chipotle powder (optional)
- Salt and black pepper to taste
- 2 cups (200g) shredded cheddar cheese
- 2 stalks green onions, sliced
- Jalapeños, sliced (optional)
- 2 tbsp cooking oil (vegetable or canola)
Instructions
- Prepare the chili: Heat 1 tablespoon of oil in the cast iron skillet over medium heat. Add the chopped onion and sauté for 3-4 minutes until translucent and fragrant.
- Add the minced garlic and cook for another 30 seconds, careful not to burn it.
- Increase heat to medium-high and add ground beef. Break it up and cook until browned and no longer pink, about 6-8 minutes. Drain excess fat if needed.
- Stir in diced tomatoes, kidney beans, chili powder, smoked paprika, cumin, chipotle powder (if using), salt, and pepper. Reduce heat to low and simmer uncovered for 10-15 minutes, stirring occasionally until thickened.
- Cook the fries: Heat remaining 1 tablespoon oil in a separate or same cast iron skillet over medium-high heat. Add frozen fries in a single layer without overcrowding.
- Cook fries undisturbed for about 4 minutes until crispy edges form, then flip and cook another 4 minutes until golden and crisp but tender inside.
- Lower heat to medium-low. Spoon chili evenly over fries, then sprinkle shredded cheddar cheese generously on top.
- Cover skillet with lid or foil and let cheese melt for 3-5 minutes, checking occasionally to avoid burning.
- Garnish with sliced green onions and jalapeños. Serve hot.
Notes
Avoid overcrowding the skillet when cooking fries to ensure crispiness. Drain excess fat from ground beef to prevent greasy chili. Cover skillet while melting cheese to trap steam and melt evenly. For extra crispiness, broil assembled dish for 1-2 minutes if skillet is oven-safe. Reheat leftovers in skillet or under broiler to maintain crispiness; avoid microwave.
Nutrition
- Serving Size: 1 serving (about 1/4
- Calories: 575
- Sugar: 6
- Sodium: 700
- Fat: 28
- Saturated Fat: 12
- Carbohydrates: 45
- Fiber: 6
- Protein: 30
Keywords: chili cheese fries, campfire recipe, cast iron skillet, camping food, comfort food, crispy fries, homemade chili, cheesy fries


