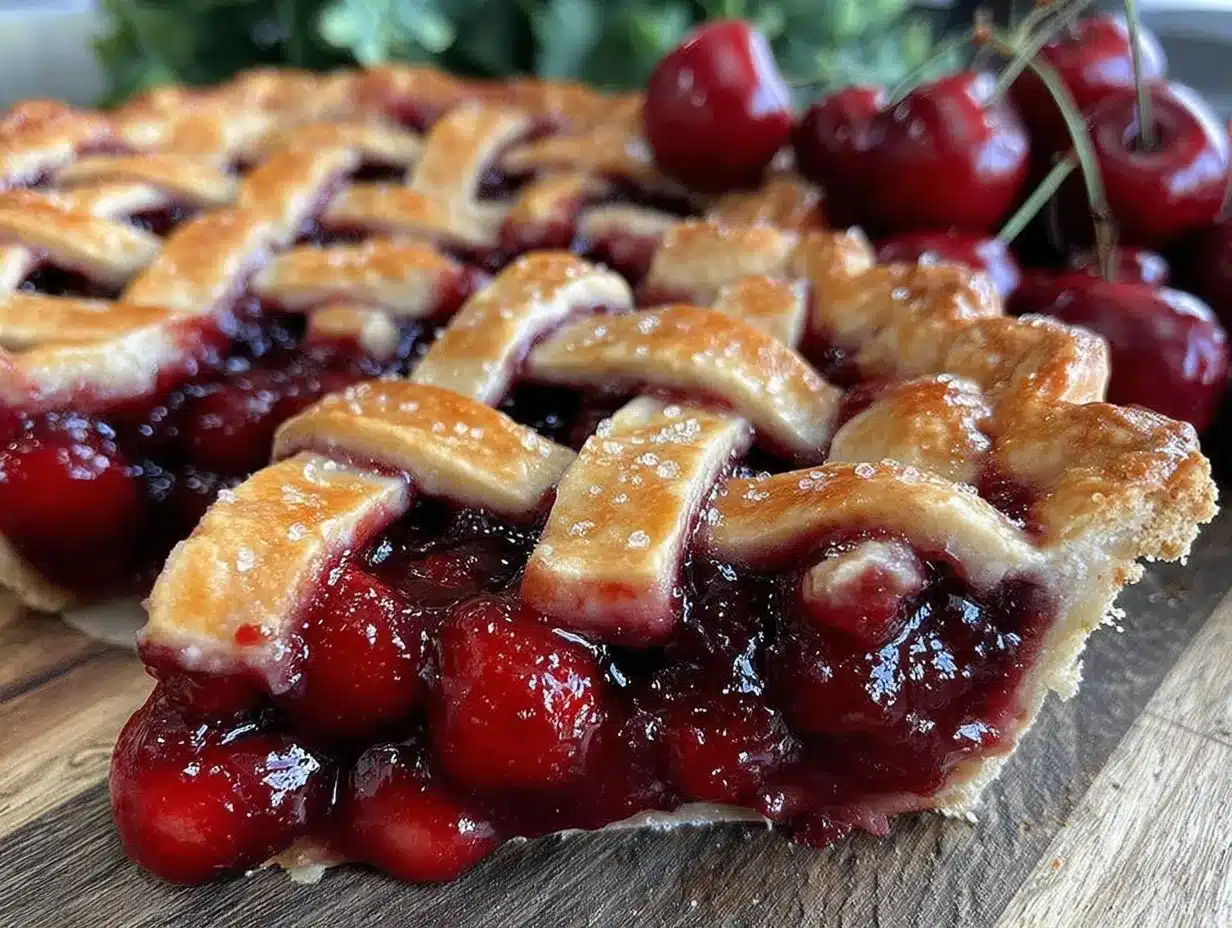
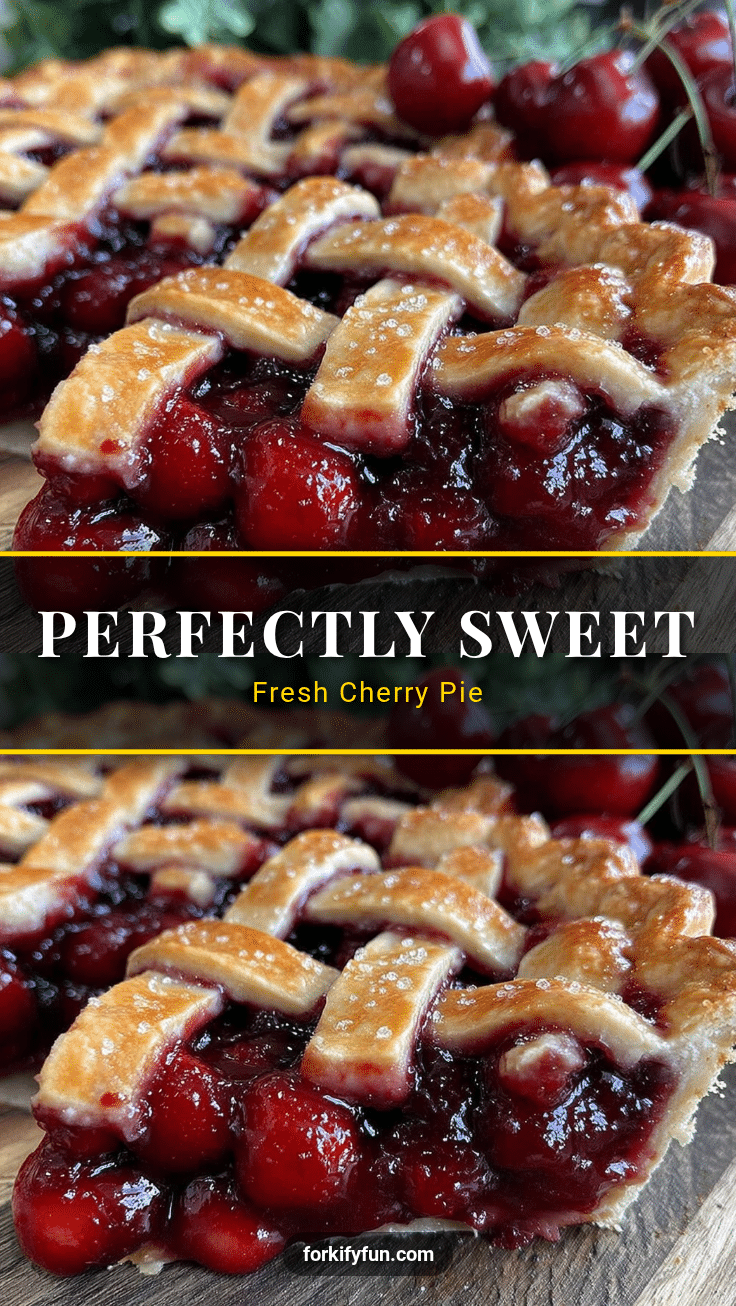
Let me tell you, the scent of fresh cherries mingling with buttery, flaky crust wafting from my oven is enough to make anyone’s mouth water. The first time I baked this perfect fresh cherry pie with flaky lattice crust, I was instantly hooked—the kind of moment where you pause, take a deep breath, and just smile because you know you’re onto something truly special. It wasn’t just the pie itself but the memories it stirred up from when I was knee-high to a grasshopper, watching my grandma weave those delicate lattice strips like a seasoned artist.
Years ago, I stumbled upon this recipe on a rainy weekend, trying to recreate that nostalgic cherry pie flavor from my childhood. Honestly, I wish I’d discovered it sooner! My family couldn’t stop sneaking pieces off the cooling rack (and I can’t really blame them). You know what? This recipe is dangerously easy and delivers pure, nostalgic comfort—perfect for potlucks, a sweet treat for your kids, or just to brighten up your Pinterest cookie board with something a little different.
After testing it multiple times in the name of research, of course, it’s become a staple for family gatherings and gifting. This fresh cherry pie feels like a warm hug, and I promise you’re going to want to bookmark this one for the next time cherries are in season.
Why You’ll Love This Recipe
Honestly, this perfect fresh cherry pie with flaky lattice crust isn’t just any pie—it’s my go-to recipe after countless kitchen trials. Whether you’re a beginner or a seasoned baker, it’s designed to be approachable and foolproof. Here’s why you’ll love it:
- Quick & Easy: Comes together in under 90 minutes, perfect for busy weeknights or last-minute dessert cravings.
- Simple Ingredients: No fancy grocery trips needed; chances are you already have most of these staples waiting in your pantry.
- Perfect for Summer Gatherings: Great for picnics, potlucks, or a sunny Sunday family dinner.
- Crowd-Pleaser: Kids and adults alike rave about the balance of tart and sweet cherries with buttery crust.
- Unbelievably Delicious: The texture combo of juicy cherry filling and ultra-flaky lattice crust is next-level comfort food.
What makes this cherry pie different from the rest? The secret lies in the lattice crust technique and the fresh cherry filling that’s gently thickened without turning gummy. Plus, a tiny splash of almond extract adds a subtle twist that makes each bite unforgettable. This pie isn’t just good—it’s the kind that makes you close your eyes after the first bite, savoring that perfect mix of tart, sweet, and buttery goodness. It’s comfort food with soul, ready to impress guests without the stress.
What Ingredients You Will Need
This recipe uses simple, wholesome ingredients to deliver bold flavor and satisfying texture without the fuss. Most are pantry staples, and fresh cherries are the star of the show, bringing that natural sweetness and vibrant color.
- For the Pie Crust:
- 2 ½ cups (315 g) all-purpose flour (I recommend King Arthur for best texture)
- 1 tsp salt
- 1 tbsp granulated sugar (adds a touch of sweetness to crust)
- 1 cup (227 g) unsalted butter, cold and cubed (for flakiness)
- 6-8 tbsp ice-cold water (helps bind the dough without melting butter)
- For the Cherry Filling:
- 5 cups (about 750 g) fresh pitted cherries (sweet or tart, or a mix—fresh is best!)
- 1 cup (200 g) granulated sugar (adjust based on cherry sweetness)
- 2 tbsp cornstarch (for perfect thickening without clumps)
- 1 tbsp fresh lemon juice (brightens flavors)
- ½ tsp almond extract (optional but highly recommended for depth)
- Pinch of salt
- For Finishing:
- 1 egg, beaten (for egg wash and golden crust)
- 1 tbsp coarse sugar (like turbinado, for sprinkling on top)
If you can’t find fresh cherries, frozen works in a pinch—just thaw and drain excess liquid before using. For a gluten-free crust, swap the flour with a blend like Bob’s Red Mill 1-to-1 GF flour. And if dairy-free is your jam, swap butter with chilled coconut oil or a plant-based butter alternative—you’ll still get that flaky crust magic.
Equipment Needed
- 9-inch (23 cm) pie dish (glass or ceramic recommended for even baking)
- Mixing bowls (various sizes for dough and filling)
- Rolling pin (a must for that perfect lattice crust)
- Pastry cutter or food processor (optional, but speeds up dough making)
- Parchment paper (helps rolling dough without sticking)
- Sharp knife or pizza cutter (to slice lattice strips)
- Basting brush (for applying egg wash)
- Cooling rack (to cool pie evenly and avoid sogginess)
Don’t worry if you don’t have a pastry cutter; two butter knives or even your fingers can do the trick. I’ve also rolled dough right on a clean countertop with a sprinkle of flour, and it works just fine. For budget-friendly options, silicon rolling mats are great and easy to clean. Keeping your butter cold is key, so try chilling your mixing bowls a bit if your kitchen’s warm.
Preparation Method
- Make the Pie Dough: In a large bowl, whisk together 2 ½ cups (315 g) flour, 1 tsp salt, and 1 tbsp sugar. Add 1 cup (227 g) cold, cubed butter. Use a pastry cutter or your fingertips to cut butter into flour until mixture resembles coarse crumbs with pea-sized bits. Slowly add 6-8 tbsp ice-cold water, one tablespoon at a time, mixing gently until dough just comes together. Avoid overworking—dough should be shaggy but cohesive. Tip: If dough feels too dry, add a splash more water.
- Chill the Dough: Divide dough into two equal disks, wrap in plastic wrap, and refrigerate for at least 1 hour. This rest helps gluten relax and butter firm up, ensuring that flaky crust.
- Prepare the Cherry Filling: In a medium bowl, combine 5 cups (750 g) pitted fresh cherries, 1 cup (200 g) sugar, 2 tbsp cornstarch, 1 tbsp lemon juice, ½ tsp almond extract, and a pinch of salt. Toss gently until cherries are evenly coated. Let sit while you roll out the crust—this lets the cornstarch absorb some cherry juices for thickening.
- Roll Out Bottom Crust: On a lightly floured surface or parchment paper, roll one dough disk into a 12-inch (30 cm) circle. Carefully transfer to a 9-inch (23 cm) pie dish, letting edges hang over. Press gently to fit and chill in fridge for 15 minutes while you prepare the lattice.
- Assemble the Pie: Pour cherry filling evenly into crust. Roll out second dough disk into a similar 12-inch circle. Using a sharp knife or pizza cutter, cut into ½-inch (1.3 cm) strips. Lay half the strips horizontally over filling, then weave the remaining strips vertically, folding edges under and crimping to seal.
- Finish & Bake: Brush lattice and edges with beaten egg for that golden glow. Sprinkle 1 tbsp coarse sugar on top for sparkle and crunch. Place pie on a baking sheet to catch drips. Bake at 400°F (205°C) for 20 minutes, then reduce heat to 350°F (175°C) and bake for 35-40 minutes more, until crust is deep golden and filling bubbles. Watch closely during last 15 minutes—if edges brown too fast, cover with foil.
- Cool Before Serving: Let the pie cool for at least 2 hours on a wire rack. This wait is tough, but it helps the filling set so slices hold together perfectly.
Cooking Tips & Techniques
When making this perfect fresh cherry pie, timing and technique are your best friends. For example, keeping your butter and water ice-cold while making dough makes all the difference in flakiness. I’ve learned the hard way that warm butter turns crust tough—don’t skip chilling!
Another tip: roll dough between sheets of parchment paper to avoid sticking and make transfer easier—honestly, it’s a game-changer. When weaving the lattice, keep your strips uniform in width for a pretty, professional look. If your dough cracks, gently patch with extra dough bits or a little water—no one needs perfect edges all the time.
Watch your oven closely, especially the first time. Every oven’s a little different. If the crust edges brown too fast, tent with foil to keep from burning while the filling finishes cooking. Also, letting the pie cool fully is key—cutting too soon can cause a juicy mess.
Lastly, don’t rush the lattice weaving. It’s a fun little puzzle that really makes your pie stand out. The end result? A beautiful, flaky crust that’s as delicious as it looks.
Variations & Adaptations
This cherry pie recipe is wonderfully flexible. Here are some ways to make it your own:
- Dietary: Use almond or oat flour for a gluten-free crust option. Swap butter with a plant-based spread to make it dairy-free.
- Seasonal: In fall, swap fresh cherries for sliced apples or pears with cinnamon and nutmeg for a cozy twist. Or mix in fresh blueberries for a summer berry medley.
- Flavor: Try adding a splash of vanilla or a pinch of cinnamon to the cherry filling for extra warmth. For a boozy kick, stir in a tablespoon of brandy or kirsch (cherry brandy).
One personal variation I adore is adding finely chopped dark chocolate beneath the lattice before baking—trust me, it’s a surprise your guests will rave about. You could also bake mini pies using muffin tins for individual servings, perfect for parties or gifting.
Serving & Storage Suggestions
This fresh cherry pie is best served slightly warm or at room temperature. A scoop of vanilla ice cream or a dollop of freshly whipped cream takes it to the next level. It pairs beautifully with a hot cup of coffee or a glass of sparkling lemonade on a sunny day.
To store, cover the pie loosely with foil or plastic wrap. It keeps well at room temp for up to 2 days, but refrigeration extends freshness for up to 4 days. When refrigerating, bring slices to room temperature or warm gently in the oven at 300°F (150°C) for 10-15 minutes to regain that flaky texture.
Leftover pie can be frozen; wrap tightly in plastic and foil. Thaw overnight in the fridge before reheating. Over time, the flavors deepen and meld, making leftovers even more delicious.
Nutritional Information & Benefits
This perfect fresh cherry pie offers an indulgent but somewhat wholesome treat. Each slice (1/8 of pie) contains approximately 320 calories, with 15 g fat, 45 g carbohydrates, and 3 g protein. Cherries provide antioxidants, vitamin C, and fiber, supporting heart health and digestion.
Using real butter and fresh ingredients means no weird preservatives. You can adjust sugar to taste or use natural sweeteners for a lighter version. This recipe is naturally free from nuts and soy but contains gluten and dairy unless adapted.
From a wellness perspective, it’s a reminder that enjoying homemade treats made with love and quality ingredients can be part of a balanced lifestyle—no guilt, just pure enjoyment.
Conclusion
If you’re searching for the perfect fresh cherry pie recipe with a flaky lattice crust, this one’s worth every minute you spend. It’s approachable, reliably delicious, and gives you that nostalgic comfort pie you remember from childhood, with a little extra charm. Feel free to customize it with your favorite seasonal fruits or flavors to make it truly yours.
Personally, this recipe reminds me of family gatherings, laughter, and the joy of sharing something homemade. I hope it becomes a favorite in your kitchen too. Don’t forget to leave a comment below sharing how your pie turned out or any fun twists you tried—I love hearing from you!
Happy baking, and may your pie crust always be flaky and your cherries perfectly sweet!
FAQs
Can I use frozen cherries for this cherry pie?
Yes! If using frozen cherries, thaw and drain them well to avoid excess liquid. You might want to add a bit more cornstarch to help thicken the filling.
How do I prevent the crust from getting soggy?
Chilling the dough before baking, using a hot oven start, and allowing the pie to cool fully before slicing all help keep your crust flaky and crisp.
What if my lattice strips break during weaving?
Don’t worry! You can patch cracks gently with extra dough pieces or a bit of water. It won’t affect taste, and it adds character.
Can I make the pie crust ahead of time?
Absolutely. You can prepare the dough up to 2 days in advance, wrapped tightly and refrigerated. Just let it sit at room temp for 10 minutes before rolling.
How do I store leftover cherry pie?
Store leftovers covered at room temperature for 1-2 days or in the fridge for up to 4 days. Reheat gently to refresh the crust before serving.
Pin This Recipe!
Perfect Fresh Cherry Pie Recipe Easy Flaky Lattice Crust Guide
A nostalgic and foolproof fresh cherry pie with a flaky lattice crust, perfect for family gatherings and summer treats. This recipe balances tart and sweet cherries with a buttery crust and a subtle almond twist.
- Prep Time: 20 minutes
- Cook Time: 55-60 minutes
- Total Time: 2 hours 20 minutes
- Yield: 8 servings 1x
- Category: Dessert
- Cuisine: American
Ingredients
- 2 ½ cups (315 g) all-purpose flour
- 1 tsp salt
- 1 tbsp granulated sugar
- 1 cup (227 g) unsalted butter, cold and cubed
- 6–8 tbsp ice-cold water
- 5 cups (about 750 g) fresh pitted cherries
- 1 cup (200 g) granulated sugar
- 2 tbsp cornstarch
- 1 tbsp fresh lemon juice
- ½ tsp almond extract (optional)
- Pinch of salt
- 1 egg, beaten
- 1 tbsp coarse sugar (like turbinado)
Instructions
- Make the Pie Dough: In a large bowl, whisk together flour, salt, and sugar. Add cold, cubed butter and cut into flour until mixture resembles coarse crumbs with pea-sized bits. Slowly add ice-cold water, one tablespoon at a time, mixing gently until dough just comes together. Avoid overworking.
- Chill the Dough: Divide dough into two equal disks, wrap in plastic wrap, and refrigerate for at least 1 hour.
- Prepare the Cherry Filling: In a medium bowl, combine pitted cherries, sugar, cornstarch, lemon juice, almond extract, and a pinch of salt. Toss gently and let sit while rolling out crust.
- Roll Out Bottom Crust: Roll one dough disk into a 12-inch circle on a floured surface or parchment paper. Transfer to a 9-inch pie dish, letting edges hang over. Chill in fridge for 15 minutes.
- Assemble the Pie: Pour cherry filling evenly into crust. Roll out second dough disk into a 12-inch circle. Cut into ½-inch strips. Lay half strips horizontally over filling, then weave remaining strips vertically. Fold edges under and crimp to seal.
- Finish & Bake: Brush lattice and edges with beaten egg. Sprinkle coarse sugar on top. Place pie on baking sheet. Bake at 400°F for 20 minutes, then reduce heat to 350°F and bake for 35-40 minutes until crust is golden and filling bubbles. Cover edges with foil if browning too fast.
- Cool Before Serving: Let pie cool for at least 2 hours on a wire rack to set filling.
Notes
Keep butter and water ice-cold for flakiness. Chill dough before baking to prevent soggy crust. Roll dough between parchment sheets to avoid sticking. Patch lattice cracks gently with dough or water. Watch oven closely and tent edges with foil if browning too fast. Let pie cool fully before slicing to set filling.
Nutrition
- Serving Size: 1 slice (1/8 of pie)
- Calories: 320
- Fat: 15
- Carbohydrates: 45
- Protein: 3
Keywords: cherry pie, fresh cherry pie, lattice crust, flaky pie crust, summer dessert, homemade pie, easy cherry pie


