Carrie wasn’t trying to impress anyone. I’d stopped by her house to grab a Tupperware I’d left at a barbecue the weekend before, and the smell of sweet, creamy chocolate hit me before I even got through the screen door. It was a Tuesday afternoon, nothing special, and there she was, standing in her kitchen in sweatpants, casually dropping spoonfuls of something onto a sheet of wax paper. She looked up, shrugged, and said, “Oh, these are just avalanche cookies. My kids inhale them.”
That’s the thing about the best recipes, isn’t it? They never come from a fancy cooking class or a chef’s show. They come from a friend’s messy kitchen counter, a half-empty bag of white chocolate chips, and someone who genuinely doesn’t realize they’ve made something extraordinary. Honestly, I stood there watching her for a solid five minutes, and she kept talking about her garden like what she was doing was no big deal. Meanwhile, my brain was short-circuiting trying to figure out how I’d never thought of this combination before.
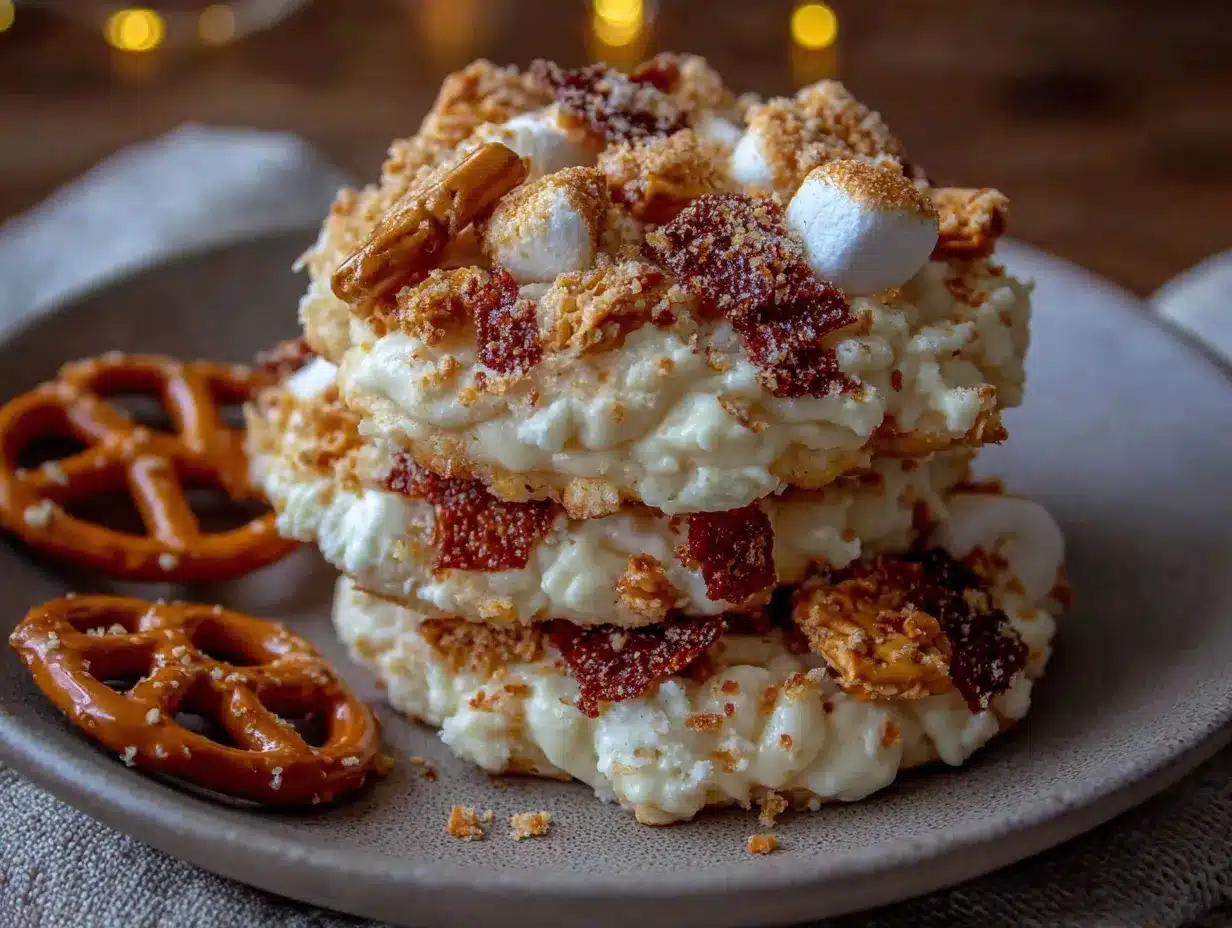
These no-bake white chocolate avalanche cookies are the kind of recipe that makes you look like a hero with almost zero effort. I mean, we’ve all been there—you need a dessert for a potluck, a last-minute gathering, or just a Tuesday night sugar craving, and you don’t want to turn on the oven. These cookies save the day every single time. The combination of creamy white chocolate, crunchy rice cereal, and soft, chewy marshmallows? It’s a texture party, and everyone’s invited. I’ve been making them ever since that afternoon at Carrie’s, and let me tell you, they’ve never let me down.
Why You’ll Love This Recipe
Let me be real with you—I’ve tested a lot of no-bake cookie recipes over the years. Some turn out too sticky, some are too hard, and some just don’t have that wow factor. These avalanche cookies are different. They hit that sweet spot between crunchy, chewy, and creamy, and they come together in about 15 minutes of active work. Here’s why you’ll fall for them too:
- Quick & Easy: From start to finish, you’re looking at about 20 minutes of prep time, plus a short chill in the fridge. Perfect for those moments when you need a dessert now.
- Simple Ingredients: You probably already have most of these in your pantry. No weird specialty items, no expensive extracts—just good, honest ingredients.
- Perfect for Hosting: If you’re having people over, these cookies are a lifesaver. They look impressive piled on a platter, but you made them in your sweatpants while the coffee brewed.
- Crowd-Pleaser: I’ve brought these to holiday parties, game nights, and casual get-togethers, and they disappear faster than anything else on the table. Kids love them, adults sneak extras—it’s a universal win.
- Unbelievably Delicious: The texture is what gets people. That first bite where the white chocolate melts against the crunch of the cereal and the soft marshmallow? It’s next-level comfort food, I promise you.
What makes this version different from the avalanche cookies you might have tried before is the technique. I’ve learned through trial and error that letting the white chocolate mixture cool just slightly before adding the marshmallows makes a huge difference. You get a better distribution without the marshmallows melting into a puddle. Also, I use a specific ratio of cereal to marshmallows that I’ve tweaked over dozens of batches. Trust me, this is the one.
This recipe isn’t just good—it’s the kind that makes you close your eyes after the first bite. It’s comfort food reimagined: faster, simpler, but with the same soul-soothing satisfaction. Perfect for impressing guests without stress, or turning a simple Tuesday into something memorable.
What Ingredients You Will Need
This recipe uses simple, wholesome ingredients to deliver that signature avalanche cookie texture—crunchy, creamy, and chewy all at once. Most of these are pantry staples, which is part of the magic. Here’s what you’ll need:
For the Cookie Base
- White chocolate chips (12 ounces or 340g) – I recommend Ghirardelli or Guittard for the best melt and flavor. Avoid white melting wafers if you can; they don’t have the same creamy richness.
- Unsalted butter (2 tablespoons or 28g) – This helps the white chocolate melt smoothly and adds a bit of richness.
- Rice cereal (3 cups or 85g) – Classic crispy rice cereal works best. Don’t use puffed rice or a generic brand that gets soggy quickly.
- Mini marshmallows (1 ½ cups or about 85g) – Miniature ones distribute better. If you only have large marshmallows, give them a rough chop with kitchen shears.
- Vanilla extract (1 teaspoon) – Pure vanilla makes a difference here. The white chocolate is sweet, so the vanilla balances it beautifully.
- Salt (a pinch) – Don’t skip this! It cuts the sweetness and makes the flavors pop. I use fine sea salt.
Optional Mix-Ins for Extra Flair
- Chopped nuts (½ cup or 60g) – Toasted almonds or pecans add a lovely crunch. I sometimes add these when I’m making a batch for a fancier gathering.
- Dried cranberries (¼ cup or 40g) – A tart pop that plays beautifully with the sweet white chocolate. Great for holiday platters.
- Coconut flakes (¼ cup or 20g) – Toasted coconut adds a chewy texture and tropical vibe. Try it once—you might never go back.
A quick note on ingredient selection: Look for white chocolate chips that list cocoa butter as an ingredient, not just palm oil. It makes a real difference in how smoothly the mixture melts and how it sets. Also, if you’re making these for a crowd with dietary restrictions, you can use dairy-free white chocolate and vegan butter—just be aware the texture might be slightly softer. I’ve tested it, and it still works, but the classic version is definitely the gold standard.
Equipment Needed
You don’t need a fancy kitchen for these cookies, which is part of the charm. Here’s what I use:
- Large microwave-safe bowl – For melting the white chocolate and butter. Glass or ceramic works best.
- Rubber spatula – For folding everything together without crushing the cereal. A silicone one is my go-to.
- Baking sheet – Lined with parchment paper or wax paper. I prefer parchment because it’s sturdier.
- Cookie scoop or two spoons – For portioning the cookies evenly. A medium scoop (about 1.5 tablespoons) gives you the perfect size.
- Measuring cups and spoons – For accuracy. Eyeballing it with no-bake cookies can lead to texture issues.
- Parchment paper or wax paper – For lining the baking sheet. Don’t skip this—the cookies will stick otherwise.
If you don’t have a microwave, you can melt the white chocolate and butter in a double boiler on the stovetop. Just be patient and keep the heat low. I once rushed it and scorched the chocolate—lesson learned! Also, if you’re on a budget, a basic baking sheet from the grocery store works fine. You don’t need anything fancy.
Preparation Method
Alright, let’s get to the fun part. Follow these steps, and you’ll have a batch of avalanche cookies in no time. I’ve included all the little details I’ve learned from making these dozens of times.
- Prep your workspace. Line a large baking sheet with parchment paper or wax paper. Set it aside. Make sure you have enough room in your fridge or freezer for the baking sheet to sit flat.
- Melt the white chocolate and butter. Place the white chocolate chips and butter in a large microwave-safe bowl. Microwave in 30-second intervals, stirring well after each interval. It usually takes about 1 ½ to 2 minutes total. The key is to stop when the mixture is mostly melted but still has a few lumps—the residual heat will finish the job as you stir. Don’t overheat it, or the white chocolate will seize up and turn grainy. I’ve done that, and it’s heartbreaking.
- Add vanilla and salt. Stir in the vanilla extract and a pinch of salt. The mixture should be smooth, glossy, and smell amazing. Give it a good stir to make sure everything is incorporated.
- Let it cool slightly. This is the step most people skip, and it makes a difference. Let the melted white chocolate sit for 2-3 minutes. If you add the marshmallows while it’s still piping hot, they’ll start melting into gooey blobs. You want them to stay intact for that perfect chewy texture.
- Fold in the cereal and marshmallows. Add the rice cereal and mini marshmallows to the bowl. Using a rubber spatula, gently fold everything together until the cereal and marshmallows are evenly coated with the white chocolate mixture. Be gentle—you don’t want to crush the cereal into dust. It should look like a glorious, messy pile of coated goodness.
- Scoop the cookies. Working quickly before the mixture sets, use a cookie scoop or two spoons to drop rounded tablespoons of the mixture onto the prepared baking sheet. Leave a little space between each cookie—they don’t spread, but you want them to chill evenly. If the mixture starts getting too stiff as it cools, you can pop the bowl back in the microwave for 10-15 seconds to soften it.
- Chill to set. Place the baking sheet in the refrigerator for at least 30 minutes, or until the cookies are firm to the touch. If you’re in a hurry, you can pop them in the freezer for 15 minutes. They should hold their shape and peel easily off the parchment paper.
- Serve and enjoy. Once set, transfer the cookies to a serving platter. They’re best enjoyed cold or at room temperature. Store any leftovers (if there are any!) in an airtight container in the fridge.
A quick sensory check: When you fold the mixture, it should look like a snowy, crunchy landscape—white chocolate coating every nook and cranny. The smell is incredible, like a vanilla-scented hug. And when you bite into a finished cookie, you should hear a slight crunch from the cereal, followed by the soft give of the marshmallow, all wrapped in that creamy white chocolate. That’s the avalanche experience.
Cooking Tips & Techniques
Over the years, I’ve learned a few tricks that make these cookies turn out perfect every time. Here’s what I wish someone had told me when I first started making them:
- Don’t overheat the white chocolate. White chocolate is more delicate than dark or milk chocolate. It can seize up and turn into a grainy, clumpy mess if you get it too hot. Low and slow is the way to go. If it does seize, you can try adding a teaspoon of vegetable oil or coconut oil and stirring vigorously—sometimes it saves it.
- Work quickly once the mixture is ready. The white chocolate mixture starts setting as soon as it cools, so have your baking sheet lined and your scoop ready before you start melting. I learned this the hard way when I had to scrape a half-set mess off my spatula.
- Use fresh marshmallows. Stale marshmallows get hard and chewy in a bad way. If your bag has been open for weeks, grab a fresh one. It makes a noticeable difference in the final texture.
- Toast the cereal for extra flavor. If you have an extra 5 minutes, spread the rice cereal on a baking sheet and toast it in a 350°F oven for 3-4 minutes. It adds a nutty depth that takes these cookies to another level. Just let it cool completely before using.
- Press a few extra marshmallows on top. Before the cookies set, press a couple of mini marshmallows onto the top of each one. It makes them look more rustic and appealing, and gives you that perfect marshmallow bite.
- Don’t skip the salt. I know it sounds weird in a sweet cookie, but that tiny pinch of salt balances the sweetness and makes the white chocolate taste more like itself. Trust me on this one.
Variations & Adaptations
One of the best things about this recipe is how easy it is to change up. Here are some of my favorite variations:
- Chocolate Avalanche Cookies: Swap the white chocolate for semi-sweet or milk chocolate chips. Use the same method, and you’ll get a classic chocolate version that’s just as addictive. I sometimes make a batch of both for parties, and people fight over them.
- Peanut Butter Avalanche Cookies: Add ¼ cup of creamy peanut butter to the white chocolate mixture when you melt it. Stir until smooth, then proceed with the recipe. The peanut butter adds a savory richness that pairs beautifully with the sweet white chocolate. My neighbor swears by this version.
- Holiday Sprinkle Avalanche Cookies: After scooping the cookies, sprinkle colorful holiday sprinkles or nonpareils on top before they set. Red and green for Christmas, pastels for Easter, orange and black for Halloween—it’s an easy way to make them festive.
- Gluten-Free Version: This recipe is naturally gluten-free if you use certified gluten-free rice cereal. Most major brands are gluten-free, but double-check the label if you’re serving someone with celiac disease.
- Vegan Version: Use dairy-free white chocolate chips and vegan butter. I’ve tested this with a few brands, and it works, though the texture is slightly softer. Still delicious, though!
- Trail Mix Avalanche Cookies: Fold in ½ cup of your favorite trail mix—think dried cherries, almonds, and dark chocolate chunks. It turns these cookies into a hearty, snackable treat that’s perfect for road trips or hiking.
Serving & Storage Suggestions
These cookies are incredibly versatile when it comes to serving. Here’s how I like to present and store them:
Serving: I usually serve them cold straight from the fridge, but they’re also fantastic at room temperature. For a party, I arrange them on a large platter or cake stand, sometimes with a dusting of powdered sugar or a drizzle of melted dark chocolate on top. They pair beautifully with a cup of coffee, a glass of cold milk, or even a scoop of vanilla ice cream for an indulgent dessert. If you’re hosting a gathering, these cookies are a great addition to a dessert table alongside classic chocolate chip cookies and fudgy brownie bites.
Storage: Store the cookies in an airtight container in the refrigerator for up to 1 week. They actually get better after a day or two as the flavors meld together. You can also freeze them for up to 3 months—just layer them between sheets of parchment paper in a freezer-safe container. To thaw, let them sit in the fridge overnight or at room temperature for about 30 minutes.
Reheating: These are best enjoyed cold or at room temperature, so no reheating needed. If you want a slightly softer texture, let them sit out for 10-15 minutes before serving. Just don’t leave them out too long in warm weather, or the white chocolate can soften too much.
Flavor development: I’ve noticed that the cookies taste even better the next day. The white chocolate sets more firmly, and the marshmallows and cereal meld together into this perfect, cohesive bite. So if you can, make them a day ahead of your event. Your future self will thank you.
Nutritional Information & Benefits
While these avalanche cookies are definitely a treat, they do have a few redeeming qualities. Here’s a rough nutritional breakdown per cookie (based on a batch of 24 cookies):
| Nutrient | Amount per Cookie |
|---|---|
| Calories | 140 |
| Total Fat | 7g |
| Saturated Fat | 4g |
| Carbohydrates | 19g |
| Sugar | 14g |
| Protein | 1g |
| Sodium | 45mg |
White chocolate contains calcium from the milk solids, and the rice cereal provides a small amount of iron. The marshmallows are mostly sugar, but they do make people smile, which has to count for something, right? If you’re looking to lighten them up, you can use a sugar-free white chocolate alternative or reduce the marshmallows slightly. But honestly? These are meant to be a celebration. I say enjoy them in moderation and savor every bite.
Potential allergens: This recipe contains dairy (white chocolate, butter). It may contain traces of nuts depending on the brand of white chocolate you use. Always check labels if you’re serving someone with allergies.
Conclusion
These no-bake white chocolate avalanche cookies are the kind of recipe that makes you look like a kitchen genius with minimal effort. They’re quick, they’re crowd-pleasing, and they’re endlessly adaptable. Whether you’re making them for a holiday party, a potluck, or just because it’s Tuesday and you deserve a treat, they never disappoint.
I love these cookies because they remind me of that afternoon at Carrie’s house—the casualness of it all, the way something so simple could be so memorable. They’ve become my go-to dessert for almost every occasion, and I hope they become yours too. Feel free to play around with the variations, add your own twist, and make them your own. That’s what cooking is all about, right?
If you try this recipe, I’d love to hear about it! Leave a comment below and let me know how they turned out, or share a photo of your avalanche cookies on social media. Don’t forget to tag me so I can see your creations. Happy baking (or, you know, no-baking)!
Frequently Asked Questions
Can I use white chocolate bars instead of chips?
Yes, absolutely! Just chop the white chocolate bar into small, even pieces so they melt uniformly. The quality of white chocolate bars is often higher than chips, so you might get an even creamier result.
Why did my white chocolate seize up?
White chocolate is sensitive to heat and moisture. If even a drop of water gets into the bowl while melting, it can seize into a grainy, clumpy mess. Make sure your bowl and spatula are completely dry, and melt the chocolate slowly in short intervals.
Can I make these cookies without a microwave?
Definitely! Use a double boiler on the stovetop. Fill a saucepan with an inch of water, bring it to a simmer, and place a heatproof bowl on top (make sure the bottom doesn’t touch the water). Stir the white chocolate and butter until melted, then proceed with the recipe.
How long do these cookies last?
Stored in an airtight container in the refrigerator, they’ll stay fresh for up to 1 week. You can also freeze them for up to 3 months. Just let them thaw in the fridge before serving.
Can I use large marshmallows instead of mini ones?
Yes, but I recommend cutting them into smaller pieces with kitchen shears or a knife. Large marshmallows are harder to distribute evenly, and you might end up with some cookies that are mostly marshmallow and others that have none. Mini marshmallows are just easier to work with.
Pin This Recipe!

Perfect No-Bake White Chocolate Avalanche Cookies

These no-bake white chocolate avalanche cookies are quick, easy, and incredibly delicious. With a perfect blend of creamy white chocolate, crunchy rice cereal, and soft marshmallows, they’re a crowd-pleasing treat that comes together in minutes.
- Prep Time: 15 minutes
- Cook Time: 0 minutes
- Total Time: 45 minutes
- Yield: 24 cookies 1x
- Category: Dessert
- Cuisine: American
Ingredients
- 12 ounces (340g) white chocolate chips
- 2 tablespoons (28g) unsalted butter
- 3 cups (85g) crispy rice cereal
- 1 ½ cups (about 85g) mini marshmallows
- 1 teaspoon vanilla extract
- a pinch of fine sea salt
- ½ cup (60g) chopped nuts (optional)
- ¼ cup (40g) dried cranberries (optional)
- ¼ cup (20g) coconut flakes (optional)
Instructions
- Line a large baking sheet with parchment paper or wax paper.
- Place the white chocolate chips and butter in a large microwave-safe bowl. Microwave in 30-second intervals, stirring well after each, until mostly melted (about 1 ½ to 2 minutes). Let residual heat finish melting.
- Stir in the vanilla extract and a pinch of salt until smooth and glossy.
- Let the mixture cool for 2-3 minutes.
- Add the rice cereal and mini marshmallows. Gently fold with a rubber spatula until evenly coated.
- Working quickly, use a cookie scoop or two spoons to drop rounded tablespoons of the mixture onto the prepared baking sheet, leaving space between each.
- Refrigerate for at least 30 minutes (or freeze for 15 minutes) until firm.
- Transfer to a serving platter and enjoy cold or at room temperature.
Notes
Let the white chocolate mixture cool slightly before adding marshmallows to prevent them from melting. Use fresh marshmallows for best texture. Don’t overheat white chocolate; it can seize. For extra flavor, toast the rice cereal in a 350°F oven for 3-4 minutes before using. Press a few extra mini marshmallows on top before setting for a prettier look. Cookies taste even better the next day.
Nutrition
- Serving Size: 1 cookie
- Calories: 140
- Sugar: 14
- Sodium: 45
- Fat: 7
- Saturated Fat: 4
- Carbohydrates: 19
- Protein: 1
Keywords: no-bake cookies, white chocolate cookies, avalanche cookies, easy dessert, no-bake dessert, rice cereal cookies, marshmallow cookies


