My husband claimed he hated dried fruit for a solid decade. Ten years. He’d pick raisins out of cookies, push dried apricots to the side of the plate, and make a face whenever I mentioned dehydrated anything. “It’s just chewy sugar,” he’d say, shrugging. I believed him. I mean, the man knows what he likes. So when I started testing dried orange slices for holiday baking last November, I made them strictly for myself. For the aesthetic. For the wreaths I was planning and the cocktail garnishes I dreamed about. I didn’t even mention it to him.
Then, on a random Tuesday afternoon, I walked into the kitchen and found him standing over the counter, holding a slice of dried orange like it was a potato chip. He was mid-crunch. The look on his face—pure surprise, like even he didn’t see it coming. “These are… actually good,” he said, crumbs flying. I didn’t say a word. I just smiled and handed him the jar. Maybe you’ve been there—when a recipe proves someone wrong without you even trying. That’s the magic of these perfect dried orange slices. They’re not just pretty. They’re addictive.
Honestly, I keep making them because they solve so many holiday problems at once. Need a quick hostess gift? Jar of dried oranges. Need a cake topper that isn’t plastic? Dried orange slices. Want your kitchen to smell like Christmas without lighting a single candle? You get the idea. This recipe turned me into a dried fruit believer, and now I can’t imagine the holidays without it.
Why You’ll Love This Recipe
Let me tell you why this recipe has earned a permanent spot in my holiday rotation. I’ve tested it six times to get the texture just right—crispy but not brittle, sweet but not cloying, with that gorgeous translucent glow that makes everything look expensive.
- Incredibly Easy : You only need two ingredients and an oven. No special dehydrator required. It’s basically foolproof once you know the trick about even slicing.
- Makes Your Kitchen Smell Amazing : The scent of oranges baking at a low temperature is pure holiday magic. It’s better than any candle I’ve ever bought.
- Perfect for Gifting : Pop them in a mason jar with a ribbon, and you’ve got a homemade gift that looks like it came from a fancy boutique.
- Totally Versatile : Use them on cakes, in cocktails, on cheese boards, or just eat them straight up (like my husband does).
- Lasts for Months : Stored properly, these beauties keep for up to six months. You can make them well ahead of the holiday rush.
What makes these different from other dried orange slices you’ve seen? It’s the technique. Most recipes tell you to boil the slices first, which can make them mushy. I skip that step entirely and rely on a low, slow oven bake with a tiny sprinkle of sugar. The result is a slice that’s perfectly crisp, with no chewy spots or burnt edges. It’s not just another garnish—it’s the best version I’ve ever made, and I’ve tested a lot of them.
There’s something deeply satisfying about pulling a tray of these out of the oven. The way the light catches them, the way they curl slightly at the edges—it’s comfort food for the eyes. And when you bite into one, that bright, concentrated orange flavor hits you like a sunbeam in the middle of winter. You deserve that little moment of joy.
What Ingredients You Will Need
This recipe uses the simplest ingredients you can imagine. Honestly, you might already have everything in your kitchen right now. The magic comes from the technique, not a long grocery list.
- Fresh Oranges (3-4 medium): This is the star of the show. You want firm, heavy oranges with smooth skin. Navel oranges work beautifully, but blood oranges or cara cara oranges add a stunning color variation. I personally prefer organic oranges since you’re eating the peel. The thinner the skin, the faster they dry.
- Granulated Sugar (2 tablespoons): Just a light dusting. You can use organic cane sugar or even coconut sugar for a deeper flavor. The sugar helps draw out moisture and adds that subtle sweetness. Don’t skip it—it’s what gives the slices that candy-like finish.
- Optional: Cinnamon Stick (1): Not for eating, but for adding to the baking tray. It infuses the air and the slices with a gentle warmth. I do this every time now because it makes the whole house smell like a holiday market.
- Optional: Vanilla Extract (1 teaspoon): Mix with water in a spray bottle and mist the slices before baking. It adds a lovely depth that complements the orange. I learned this trick from a pastry chef friend, and it’s a game-changer.
Ingredient Selection Tips: Look for oranges that feel heavy for their size—that means they’re juicy and fresh. Avoid any with soft spots or wrinkled skin. If you’re making these for a specific holiday event, buy your oranges a few days ahead so they’re at peak ripeness. I’ve found that organic oranges from the farmers’ market dry more evenly than conventional ones, probably because they haven’t been waxed as heavily.
Substitution Guidance: No oranges? Try lemons, limes, or grapefruits. Each citrus fruit brings its own personality. Lemons are tarter and brighter, great for spring baking. Grapefruits are more bitter, which pairs wonderfully with dark chocolate. You can even mix them on one tray for a rainbow effect. If you’re watching your sugar intake, you can reduce the sugar to just a teaspoon or skip it entirely—the slices will still dry beautifully, they just won’t have that candied sweetness.
Equipment Needed
You don’t need fancy gadgets for this recipe. Here’s what you’ll actually use:
- Sharp Chef’s Knife or Mandoline: A mandoline gives you perfectly even slices, which is the secret to uniform drying. I use my Benriner mandoline for this—it’s cheap and incredibly sharp. If you’re using a knife, make sure it’s razor-sharp. Dull knives crush the fruit and lead to uneven slices.
- Cutting Board: Any sturdy board works. I prefer a wooden one because it doesn’t dull my knife as fast.
- Baking Sheet: A standard half-sheet pan is perfect. Line it with parchment paper or a silicone baking mat for easy cleanup.
- Wire Rack: Optional, but placing the slices on a wire rack over the baking sheet allows air to circulate underneath, speeding up the drying process by about 15 minutes.
- Paper Towels: For patting the slices dry after washing. Don’t skip this—excess moisture is the enemy of crisp slices.
- Airtight Jar: For storage. A mason jar works perfectly. I use a Weck jar because it looks pretty on the counter, but any airtight container will do.
Budget-Friendly Tip: Don’t have a mandoline? A sharp knife and a steady hand work just fine. It might take a little longer, but the results are the same. I actually prefer using a knife for blood oranges because their delicate flesh can get crushed by a mandoline.
Preparation Method
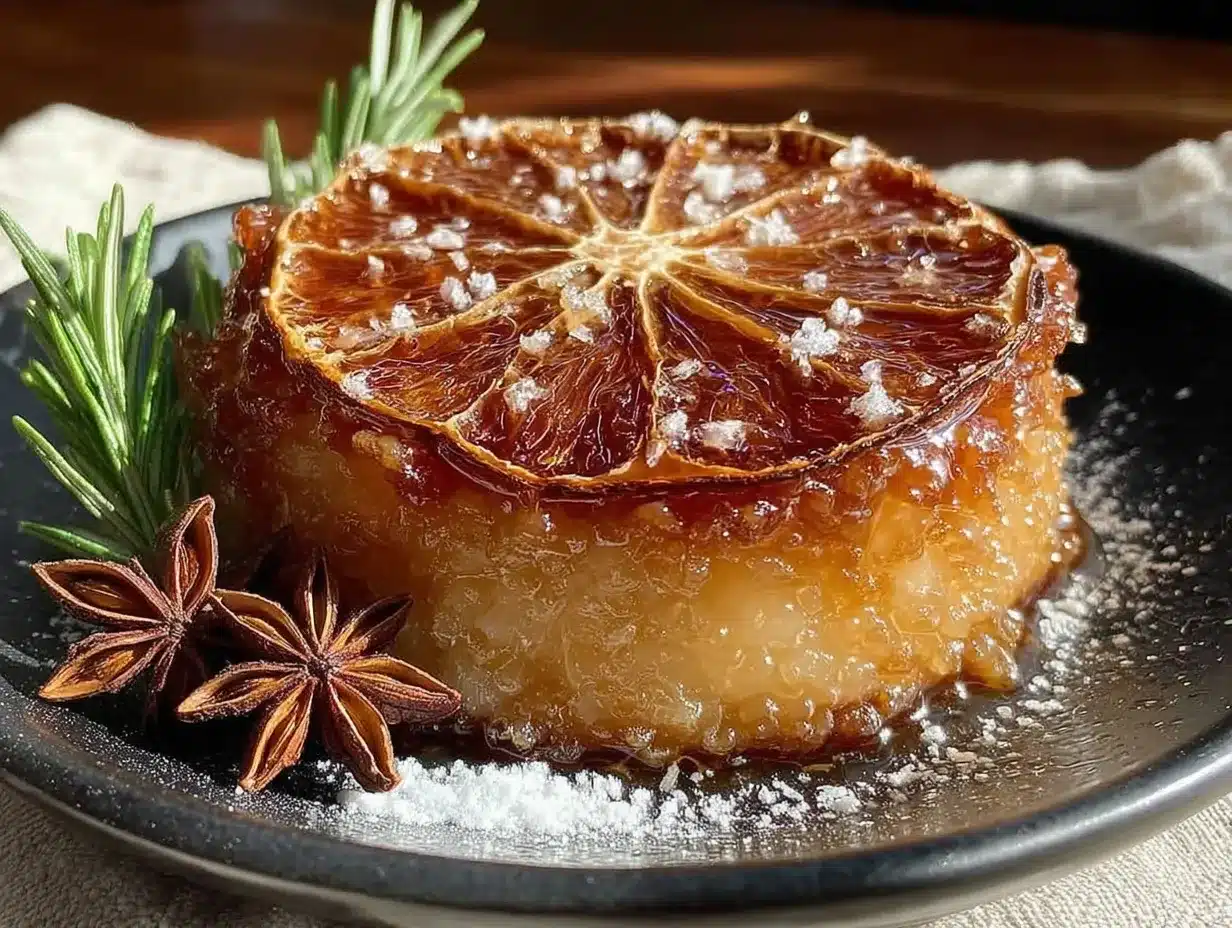
Follow these steps, and you’ll have perfect dried orange slices every single time. I’ve numbered everything so you can follow along without getting lost.
- Preheat your oven to 200°F (93°C). Yes, that low. I know it feels strange, but high heat will burn the sugars in the oranges before they have a chance to dry properly. Patience is your friend here. Line your baking sheet with parchment paper.
- Wash and dry the oranges thoroughly. Rub them under warm water to remove any wax or residue. Dry them completely with paper towels. Any water left on the skin will create steam in the oven, which makes the slices soggy instead of crisp.
- Slice the oranges evenly, about ¼-inch (6mm) thick. This is the most important step. If your slices are too thick, they’ll take forever to dry and might end up chewy. Too thin, and they’ll burn before they’re dry. Use a mandoline for consistency, or go slowly with a knife. I aim for slices that are roughly the thickness of a quarter coin. You should get about 8-10 slices per orange.
- Blot the slices with paper towels. Place the sliced oranges in a single layer on a clean kitchen towel or paper towels. Gently press another towel on top to absorb any excess juice. This step removes surface moisture and speeds up drying time significantly.
- Arrange the slices on the prepared baking sheet. Place them in a single layer, making sure they don’t overlap. Overlapping creates steam pockets, leading to uneven drying. If you’re using a wire rack, place it on the baking sheet and lay the slices on the rack. This allows hot air to circulate underneath.
- Sprinkle lightly with sugar. Use about ½ teaspoon per slice, distributed evenly. Don’t dump it all in one spot. The sugar not only adds sweetness but also helps draw out moisture. If you’re using the cinnamon stick, tuck it onto the tray between the slices.
- Bake for 3 to 4 hours, flipping halfway through. Set a timer for 1.5 hours, then flip each slice with a spatula. Rotate the baking sheet front to back for even baking. The total time depends on the thickness of your slices and the humidity in your kitchen. On a dry winter day, it might take 3 hours. On a humid summer day, it could take 4.5 hours.
- Check for doneness. The slices are ready when they feel dry to the touch and slightly leathery but not brittle. They should bend slightly without cracking. If they snap in half, they’ve gone too far—but don’t worry, they’re still usable for decoration. The edges should curl up just a little, and the flesh should look translucent and glassy.
- Cool completely on the baking sheet. This is crucial. As they cool, they’ll continue to dry out and become crisp. Leave them undisturbed for at least 30 minutes. Moving them while warm can cause them to break.
- Store in an airtight container. Once completely cool, transfer the slices to a jar or container. Keep them in a cool, dark place. They’ll stay beautiful for up to six months. I like to add a silica gel packet to the jar to absorb any lingering moisture.
Cooking Tips & Techniques
I’ve made plenty of mistakes with dried orange slices so you don’t have to. Here’s what I’ve learned the hard way.
The Biggest Mistake: Slicing Too Thick. My first batch looked gorgeous going into the oven—thick, juicy slices that seemed perfect. Four hours later, they were still wet in the center. I left them in for another two hours, and by then, the edges were burnt. The lesson? Stick to ¼-inch (6mm). It’s the sweet spot between quick drying and structural integrity.
Timing Strategy: I always make these on a day when I’m home anyway. Start them in the morning, and they’ll be done by early afternoon. If you need to speed things up, you can increase the oven temperature to 225°F (107°C), but check them every 30 minutes after the 2-hour mark. I don’t recommend going higher than that—the sugar will caramelize too fast and turn bitter.
The Humidity Factor: Living in a humid climate? Your slices will take longer to dry. I live in a dry climate, but I tested this recipe during a rainy week, and it added almost an hour to the baking time. On humid days, leave the oven door slightly cracked with a wooden spoon to let moisture escape. Also, avoid making these on rainy days if you can help it.
Consistency Tip: For perfectly uniform slices, use a mandoline. I resisted buying one for years, thinking it was unnecessary. Then I burned through two batches of expensive organic oranges because my knife skills weren’t consistent enough. A $20 mandoline solved everything. If you’re using a knife, practice on one orange first to get the rhythm down.
My Personal Failure: I once forgot to flip the slices halfway through. The bottom halves were pale and soft while the tops were perfectly dried. I had to put them back in for another hour, which dried out the tops even more. Don’t skip the flip—it’s not optional.
Pro Tip: Save the orange zest from the peels before slicing. Grate the zest off the whole oranges before you cut them, then freeze it in a baggie. You’ll have fresh zest for baking all winter long. I do this every time now, and it feels like getting two recipes out of one ingredient.
Variations & Adaptations
Once you’ve mastered the basic recipe, the possibilities are endless. Here are my favorite variations.
- Spiced Orange Slices: Before baking, mix 1 tablespoon of sugar with ½ teaspoon of cinnamon, ¼ teaspoon of nutmeg, and a pinch of cloves. Sprinkle this over the slices. The warm spices complement the orange beautifully and make the kitchen smell like a holiday bakery. I made these for a cookie exchange last year, and they disappeared before the cookies did.
- Vanilla-Infused Slices: Add 1 teaspoon of vanilla extract to a spray bottle with 2 tablespoons of water. Mist the slices lightly before baking. The vanilla adds a subtle sweetness that makes these taste almost like orange cream. My kids love these straight out of the jar.
- Chocolate-Dipped Orange Slices: Once the slices are completely cool, melt ½ cup of dark chocolate chips. Dip half of each slice into the chocolate and place on parchment paper to set. The combination of bitter chocolate and sweet orange is absolutely addictive. These make incredible gifts—just package them individually in cellophane bags.
- Citrus Medley: Don’t limit yourself to oranges. Slice up lemons, limes, and grapefruits along with the oranges. Each citrus brings a different flavor and color. Lemon slices are perfect for summer baking, while grapefruit slices pair beautifully with rosemary in savory dishes.
- Low-Sugar Version: Skip the sugar altogether. The slices will still dry beautifully, though they’ll be more tart. This version works wonderfully for savory applications like garnishing roast chicken or adding to cocktails where you don’t want extra sweetness.
Personal Variation: My favorite adaptation is the “Holiday Wreath” version. I arrange the dried orange slices in a circle on a baking sheet, then bake them with a sprig of rosemary and a cinnamon stick in the center. The rosemary infuses the oranges with a subtle pine scent. After drying, I string them with cranberries and hang them on the wall. They look stunning and smell even better.
Serving & Storage Suggestions
These dried orange slices are incredibly versatile. Here’s how to use and store them.
Serving Temperature and Presentation: Serve at room temperature. For a beautiful presentation, arrange the slices in a clear glass jar with a tight-fitting lid. Tie a ribbon around the neck and attach a tag with the date. They look gorgeous on a holiday table, especially when grouped with cinnamon sticks and star anise.
Complementary Dishes and Beverages: These slices are perfect for garnishing holiday cocktails like mulled wine, sangria, or a simple champagne flute. Float one in a cup of hot tea or cider for an instant flavor boost. They also work beautifully on cheese boards—pair them with aged cheddar, brie, or goat cheese. For baking, use them as a topper for cakes, cupcakes, cookies, or even a simple yogurt parfait.
Storage Instructions: Store in an airtight container at room temperature. Keep them away from direct sunlight and heat sources. A pantry or cupboard is perfect. Do not refrigerate—the moisture in the fridge will make them soft. If you live in a very humid environment, add a silica gel packet to the container to absorb excess moisture.
Reheating and Refreshing: If your slices lose their crispness over time (which can happen in humid weather), spread them on a baking sheet and pop them in a 200°F (93°C) oven for 10-15 minutes. Let them cool completely before returning to the container. This refreshes them beautifully.
How Flavors Develop: Interestingly, the flavor of dried orange slices deepens over the first week. The initial bright, sharp citrus note mellows into something richer and more complex. I actually prefer them after they’ve been stored for a week. The sugar crystallizes slightly on the surface, giving them a delicate crunch that’s incredibly satisfying.
Nutritional Information & Benefits
These dried orange slices are a surprisingly healthy treat, especially compared to store-bought candied fruit.
Estimated Nutritional Values (per slice): Calories: 25, Total Fat: 0g, Sodium: 0mg, Total Carbohydrates: 6g, Dietary Fiber: 1g, Sugars: 5g, Protein: 0g, Vitamin C: 15% of Daily Value. These values are approximate and depend on the size of your oranges and amount of sugar used.
Health Benefits: Oranges are packed with vitamin C, which supports immune health—especially important during the holiday season. The peel contains flavonoids and antioxidants that are preserved during the drying process. Unlike many store-bought dried fruits, these have no added preservatives, artificial colors, or high-fructose corn syrup. You control exactly what goes into them.
Dietary Considerations: This recipe is naturally gluten-free, dairy-free, vegan, and nut-free. With the low-sugar variation, it can also be suitable for lower-sugar diets. Always check your sugar source if you have dietary restrictions—some organic cane sugars may not be vegan if processed with bone char.
Potential Allergens: None from the recipe itself, but if you add optional ingredients like chocolate, check for dairy or soy. The basic recipe is allergen-friendly.
Personal Wellness Perspective: I love that these dried orange slices let me enjoy something sweet and beautiful without the guilt of processed candy. They satisfy my craving for something festive while giving me a little boost of vitamin C. It’s a small way to feel good about holiday indulgence.
Conclusion
These perfect dried orange slices are more than just a garnish—they’re a little piece of sunshine preserved for the darkest days of winter. They’re proof that the simplest recipes often bring the most joy. One orange, some sugar, and a low oven is all it takes to transform a humble fruit into something that feels special.
I love this recipe because it’s forgiving. You can slice unevenly, forget to flip them, or leave them in a little too long, and they’ll still be beautiful. They’ll still taste amazing. They’ll still make your kitchen smell like Christmas. And honestly, that’s the kind of recipe I want in my life—one that doesn’t demand perfection but delivers beauty anyway.
Now I want to hear from you. Have you tried making dried orange slices before? What’s your favorite way to use them? Drop a comment below and share your creations. Tag me in your photos on social media—I love seeing how you make this recipe your own. And if you try any of the variations, let me know which one was your favorite. Happy baking, friends!
Frequently Asked Questions
Can I use a dehydrator instead of an oven?
Absolutely! A dehydrator works beautifully for this recipe. Set it to 135°F (57°C) and let the slices dry for 6 to 8 hours, flipping halfway through. The result is even more consistent than an oven because the airflow is better. Just make sure your slices are evenly spaced and not overlapping.
Why are my dried orange slices still chewy after 4 hours?
This usually happens for one of three reasons: your slices are too thick, your oven temperature is too low, or your kitchen is very humid. Check your slice thickness first—aim for ¼-inch (6mm). If they’re thicker, they’ll need more time. You can also increase the oven temperature to 225°F (107°C) for the last hour to help them dry out.
How do I keep dried orange slices from turning brown?
Browning happens naturally as the sugars caramelize, but you can minimize it by baking at a lower temperature. Stick to 200°F (93°C) and avoid going over 225°F (107°C). Also, make sure your slices are evenly spaced so they dry quickly. If you notice browning on the edges, they’re done—remove them immediately.
Can I use these slices in baked goods like cakes or cookies?
Yes, but with caution. Dried orange slices are best used as a garnish after baking, not baked into the batter. If you add them to a cake batter, they’ll rehydrate and become soft and sticky. Instead, place them on top of a frosted cake or arrange them on a cookie just before serving. They add a beautiful visual element without compromising texture.
How long do dried orange slices actually last?
Stored properly in an airtight container at room temperature, they’ll last 4 to 6 months. After that, they’ll start to lose their color and flavor, but they’ll still be safe to eat. If you notice any mold or off smells, discard them immediately. For best quality, use them within 3 months of making them.
Pin This Recipe!
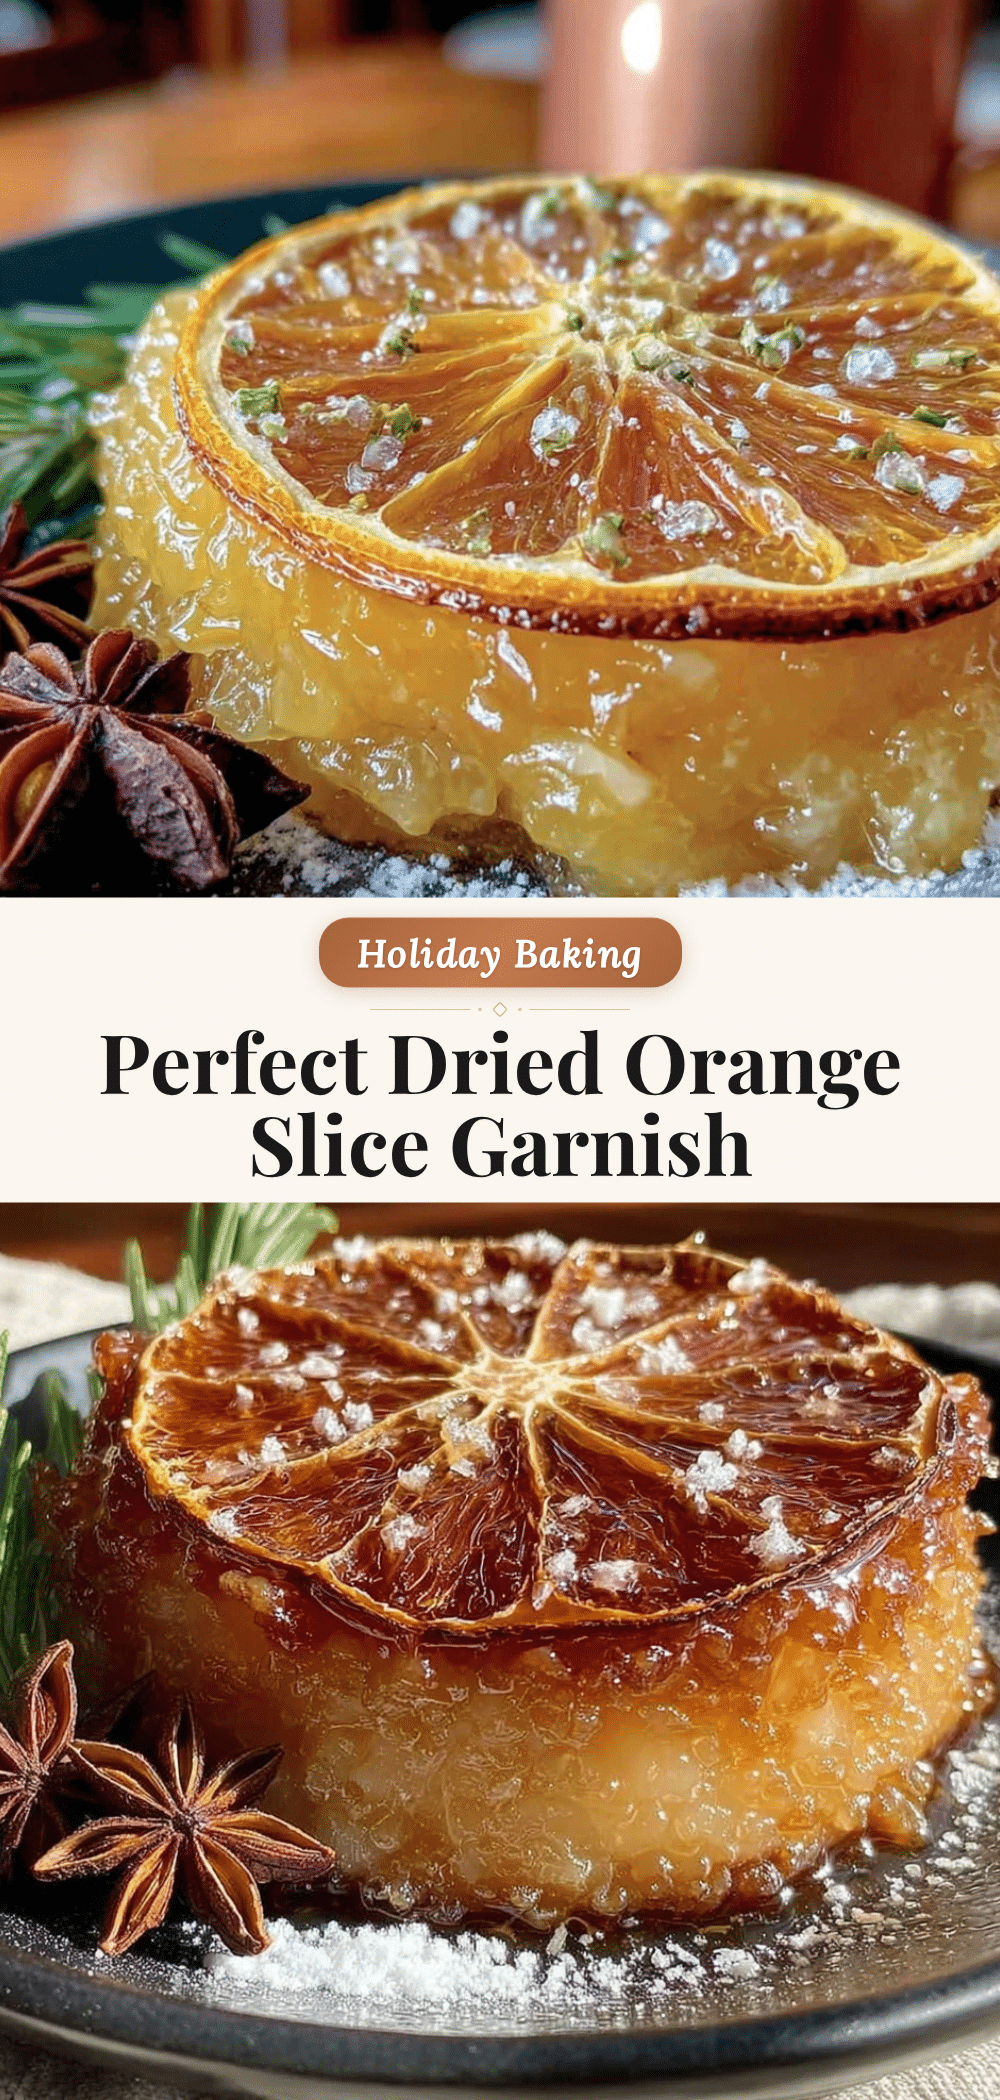
Perfect Dried Orange Slices: Easy Holiday Baking Garnish
These perfect dried orange slices are incredibly easy to make with just two ingredients and an oven. They make your kitchen smell amazing, are perfect for gifting, and last for months.
- Prep Time: 15 minutes
- Cook Time: 3 hours 30 minutes
- Total Time: 3 hours 45 minutes
- Yield: 24 servings 1x
- Category: Garnish
- Cuisine: American
Ingredients
- 3–4 medium fresh oranges (preferably organic)
- 2 tablespoons granulated sugar
- 1 cinnamon stick (optional, for infusing)
- 1 teaspoon vanilla extract (optional, mixed with water for misting)
Instructions
- Preheat your oven to 200°F (93°C). Line a baking sheet with parchment paper.
- Wash and dry the oranges thoroughly. Remove any wax or residue.
- Slice the oranges evenly, about ¼-inch (6mm) thick. Aim for 8-10 slices per orange.
- Blot the slices with paper towels to remove excess surface moisture.
- Arrange the slices in a single layer on the prepared baking sheet, ensuring they do not overlap. If using a wire rack, place it on the baking sheet and lay slices on the rack.
- Sprinkle lightly with sugar, about ½ teaspoon per slice. If using, tuck the cinnamon stick onto the tray between slices.
- Bake for 3 to 4 hours, flipping halfway through. Rotate the baking sheet front to back for even baking.
- Check for doneness: slices should feel dry, slightly leathery but not brittle, and edges should curl up slightly. The flesh should look translucent and glassy.
- Cool completely on the baking sheet for at least 30 minutes. They will continue to dry and become crisp as they cool.
- Store in an airtight container at room temperature. Add a silica gel packet if desired. They will keep for up to 6 months.
Notes
For even slices, use a mandoline. Avoid boiling the slices first as it can make them mushy. On humid days, leave the oven door slightly cracked with a wooden spoon to let moisture escape. For a low-sugar version, reduce or skip the sugar. Slices can be refreshed in a 200°F oven for 10-15 minutes if they lose crispness.
Nutrition
- Serving Size: 1 slice
- Calories: 25
- Sugar: 5
- Carbohydrates: 6
- Fiber: 1
Keywords: dried orange slices, holiday garnish, homemade gift, easy recipe, citrus garnish


