This was supposed to be a batch of simple chocolate cupcakes for my neighbor’s Halloween block party. You know, the kind you throw together without much thought—just a standard recipe, some basic frosting, maybe a few sprinkles if I was feeling ambitious. But then I realized I was out of cocoa powder. Completely out. And the store was already closed because I’d spent way too long trying to figure out a last-minute costume. So there I was, staring at a bowl of plain vanilla batter, a tube of neon green food coloring I’d bought for a science experiment that never happened, and a bag of candy eyeballs my kid had talked me into buying three weeks ago.
Honestly, I almost just gave up and ordered pizza. But something about the desperation of the moment—the clock ticking, the pressure of not wanting to show up empty-handed—made me grab that food coloring and squeeze. The batter turned a ridiculous, almost radioactive shade of green. I laughed out loud. It looked like something from a mad scientist’s kitchen. I baked them anyway, figuring they’d be a funny disaster. When they came out of the oven, puffed up and that weird, brilliant green, I had an idea. I frosted them with a simple white buttercream, plopped a candy eyeball in the center of each one, and drew little red veins radiating outward with some leftover strawberry syrup.
I almost didn’t bring them to the party. I mean, they looked ridiculous. But my neighbor took one bite, her eyes went wide, and she said, “These are the best things I’ve ever seen.” And honestly? She was right. They were moist, perfectly sweet, and that goofy monster eye design was an instant hit. The kids went crazy. The adults kept sneaking extras. I’ve made these easy monster eye cupcakes for every Halloween party since, and they never last long. Maybe you’ve been there—staring down a kitchen fail and wondering if you should just give up. Trust me, this one is worth the risk.
Why You’ll Love This Recipe
Let me tell you, these aren’t just another Halloween dessert. I’ve tested this recipe more times than I can count, tweaking the frosting consistency and the baking time until everything was absolutely perfect. These easy monster eye cupcakes are the kind of treat that makes people stop and smile before they even take a bite. Here is why they work so well:
- Quick & Easy: From start to finish, you are looking at about 45 minutes. The batter comes together in one bowl, and the decorating is so simple a five-year-old can help. Perfect for those last-minute Halloween cravings.
- Simple Ingredients: No fancy grocery trips needed. You likely already have flour, sugar, eggs, butter, and vanilla in your kitchen. The only special items are candy eyeballs and green food coloring—both easy to find at any grocery store or online.
- Perfect for Halloween Parties: Whether it is a school classroom party, a neighborhood gathering, or just a spooky movie night at home, these cupcakes fit right in. They are festive without being too scary for little ones.
- Crowd-Pleaser: I have brought these to three different Halloween parties now, and every single time, they are the first thing to disappear. Kids love the goofy monster face, and adults love how genuinely delicious they are.
- Unbelievably Delicious: The texture is what gets me every time. Light, fluffy vanilla cake with a rich buttercream frosting, all topped with that silly eyeball. It is comfort food with a spooky twist.
What makes these different from every other Halloween cupcake out there? It is the balance. The cake is moist without being dense, the frosting is sweet without being cloying, and the design is fun without requiring artistic talent. I have tried the fancy piped spiderwebs and the labor-intensive fondant decorations. They look great, but they take forever and often taste mediocre. These easy monster eye cupcakes are the opposite—they look like you tried harder than you actually did, and they taste like you spent all day in the kitchen. It is my favorite kind of recipe, honestly.
There is something about that first bite. The way the soft cake gives way to the creamy frosting, and then you hit that slightly chewy candy eyeball. It is silly and wonderful and exactly what Halloween should be. No stress, no fuss, just good food and a little bit of laughter.
What Ingredients You Will Need
This recipe uses simple, wholesome ingredients to deliver bold flavor and a satisfying texture without any fuss. Most of these are pantry staples, so you probably have everything on hand already. Here is what you will need:
For the Cupcakes
- 1 ½ cups all-purpose flour – Spoon and level it for the best texture. Too much flour makes dense cupcakes.
- 1 cup granulated sugar – Adds sweetness and helps with that tender crumb.
- ½ cup unsalted butter, softened – I use Land O’Lakes, but any brand works. Make sure it is truly softened, not melted.
- 2 large eggs, room temperature – Cold eggs can seize the batter. Let them sit out for 20 minutes first.
- ½ cup whole milk – Whole milk gives the richest flavor, but 2% works fine too.
- 1 ½ teaspoons baking powder – Make sure it is fresh. Old baking powder won’t give you that nice rise.
- ½ teaspoon salt – Balances the sweetness and enhances the vanilla flavor.
- 1 teaspoon vanilla extract – Pure vanilla makes a real difference here. Skip the imitation stuff if you can.
- Neon green gel food coloring – Gel is better than liquid because it colors without thinning the batter. I like the Wilton brand.
For the Frosting
- 1 cup unsalted butter, softened – Again, make sure it is soft but not melty. This is the base of your frosting.
- 3 ½ cups powdered sugar – Sift it if you have the patience. It prevents lumps.
- 2 tablespoons heavy cream – You can use milk in a pinch, but heavy cream makes the frosting extra luscious.
- 1 teaspoon vanilla extract – More vanilla goodness. Never enough.
- Pinch of salt – Just a tiny bit to cut the sweetness.
For Decoration
- 24-30 candy eyeballs – You can find these at craft stores or online. I like the ones with black pupils for maximum monster effect.
- Red gel icing or strawberry syrup – For drawing little veins around the eyeball. It adds that creepy, fun detail.
- Optional: Black gel icing – For drawing little eyebrows or mouths if you want to get fancy.
Ingredient selection tip: For the candy eyeballs, look for the ones that come in a mix of sizes. The variety makes the monsters look more chaotic and fun. Also, if you are making these for a school party, check that the candy eyeballs are nut-free if there are allergies involved. Most brands are, but it is always worth double-checking.
Substitution guidance: If you need these to be dairy-free, you can swap the butter for a good vegan butter stick (not margarine) and use almond milk instead of whole milk. The texture will be slightly different, but still delicious. For a gluten-free version, use a 1:1 gluten-free baking flour blend. I have tested it with Bob’s Red Mill, and it works beautifully.
Equipment Needed
You do not need a professional bakery setup for these easy monster eye cupcakes. Here is what you will need:
- Standard 12-cup muffin tin – Any non-stick pan works. If yours is older, use paper liners to prevent sticking.
- Paper cupcake liners – I like using orange or black ones for Halloween, but white works fine too.
- Two large mixing bowls – One for dry ingredients, one for wet. Glass or stainless steel is best.
- Hand mixer or stand mixer – A hand mixer is totally fine. I have made these with a whisk before, and it works, but your arm will get tired.
- Rubber spatula – For scraping down the sides of the bowl. Don’t skip this step.
- Cooling rack – Crucial for getting the cupcakes to room temperature before frosting.
- Piping bag or zip-top bag – A piping bag with a large round tip gives a nice finish, but snipping the corner of a zip-top bag works perfectly.
- Small offset spatula – Optional, but helpful for smoothing frosting.
If you do not have a piping bag, honestly, just use a butter knife. The monster eye design is forgiving. A little messy frosting actually adds to the creepy effect. I have done it both ways, and the kids never notice the difference.
Maintenance tip: If you are using a piping bag for the first time, twist the top tightly before squeezing. It prevents frosting from oozing out the top. Learned that one the hard way.
Preparation Method
Let me walk you through this step by step. I have made these easy monster eye cupcakes more times than I can count, so I have learned all the little tricks along the way.
- Preheat your oven to 350°F (175°C). Line your muffin tin with paper liners. This recipe makes about 18 standard cupcakes, so you might need to bake in two batches unless you have two tins.
- In a medium bowl, whisk together the flour, baking powder, and salt. Set this aside. Whisking aerates the flour and ensures the leavening is evenly distributed. No lumps allowed.
- In a large bowl, beat the softened butter and sugar together until light and fluffy. This takes about 3-4 minutes with a hand mixer on medium speed. You want it to look pale and almost doubled in volume. Scrape down the sides halfway through.
- Add the eggs one at a time, beating well after each addition. Then mix in the vanilla extract. The batter might look slightly curdled at this point—that is normal. Do not panic.
- Add the dry ingredients in three additions, alternating with the milk. Start with flour, then half the milk, then flour, then the rest of the milk, then finish with flour. Mix on low speed until just combined after each addition. Overmixing makes tough cupcakes.
- Now for the fun part: add the neon green gel food coloring. Start with about ½ teaspoon and mix it in. If you want a brighter green, add more drop by drop until you are happy. I usually end up using about 1 full teaspoon for that radioactive monster look.
- Divide the batter evenly among the liners. Fill each about ⅔ full. An ice cream scoop works great for this. Bake for 18-22 minutes, or until a toothpick inserted in the center comes out clean with a few moist crumbs.
- Let the cupcakes cool in the pan for 5 minutes, then transfer them to a cooling rack. They need to be completely cool before you frost them. I mean completely. If they are even slightly warm, the frosting will melt into a puddle. I have made that mistake exactly once.
- While the cupcakes cool, make the frosting. Beat the softened butter on medium speed until smooth and creamy, about 2 minutes. Gradually add the powdered sugar, one cup at a time, beating on low speed. Add the heavy cream, vanilla, and salt. Increase the speed to medium-high and beat for 3-4 minutes until light and fluffy. Scrape the bowl well.
- Transfer the frosting to your piping bag or zip-top bag. If using a zip-top bag, snip about ½ inch off one corner. Pipe a generous swirl of frosting onto each cooled cupcake. You want a nice thick layer because it holds the candy eyeball.
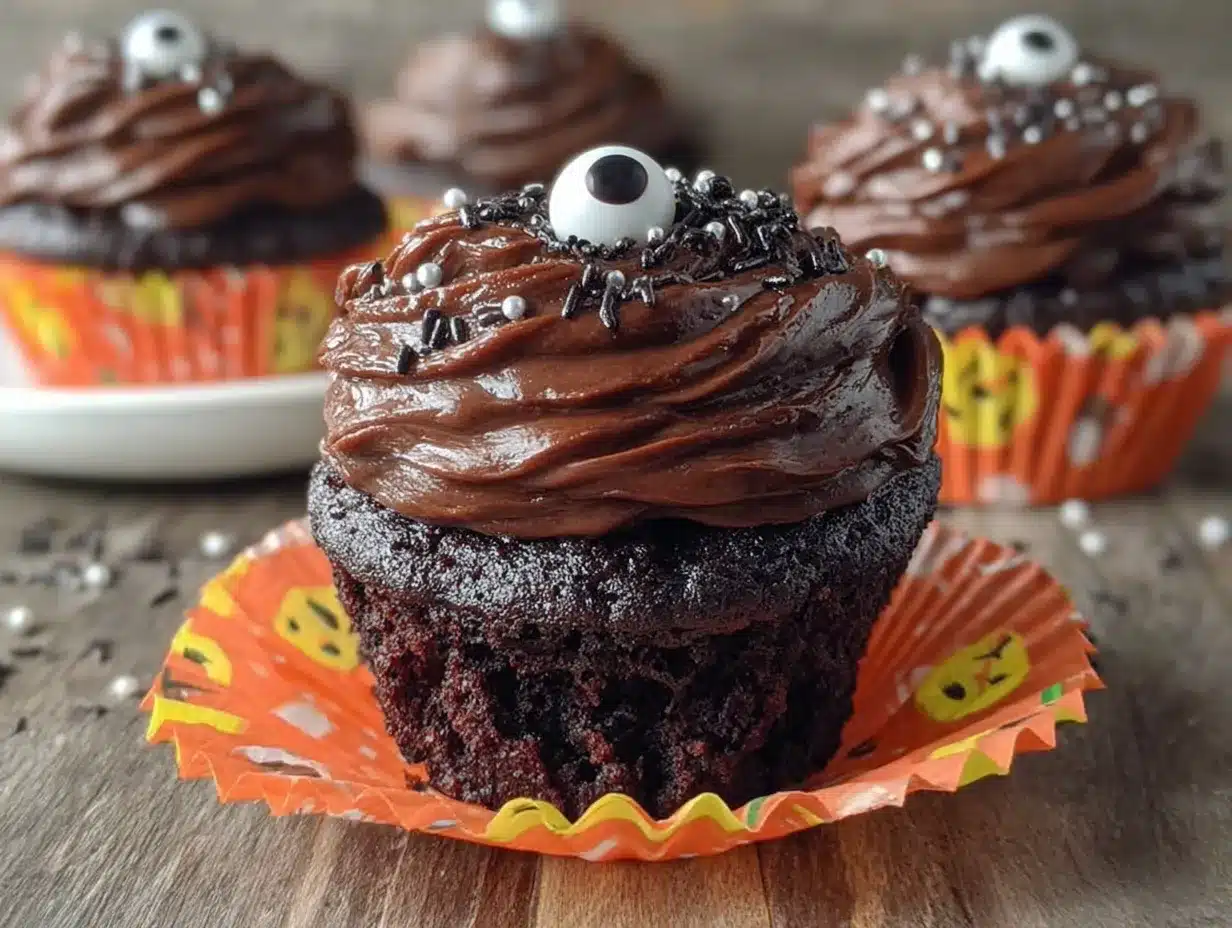
- Immediately place a candy eyeball in the center of each frosted cupcake. Press it in gently so it sticks. Then use the red gel icing or strawberry syrup to draw 3-4 thin lines radiating outward from the eyeball, like little veins. If you want, add a tiny black dot for a pupil effect or little eyebrows for extra personality.
- Let the frosting set for about 15 minutes before serving. This helps the candy eyeballs stay in place. If you are transporting them, pop them in the fridge for 30 minutes to firm up the frosting completely.
One thing I always tell people: do not skip the cooling step. I know it is tempting to rush, but warm cupcakes + cold frosting = a sad, melty mess. Trust me on this one.
Cooking Tips & Techniques
I have learned a few things the hard way while perfecting these easy monster eye cupcakes. Here are my best tips to save you the trouble.
Room temperature ingredients matter. I used to think this was just chef nonsense, but it really does make a difference. Cold eggs and cold milk can make your batter seize up, resulting in dense cupcakes. Let everything sit out for 20-30 minutes before you start. Set a timer if you have to. I have forgotten and ended up with sad, flat cupcakes more than once.
Do not overmix the batter. Once you add the flour, mix just until you do not see any white streaks. Overmixing develops the gluten, which gives you tough, rubbery cupcakes. We want light and fluffy. A few lumps in the batter are fine—they will bake out.
The gel food coloring is non-negotiable. Liquid food coloring will thin your batter and give you a pale, washed-out green. Gel coloring gives you that vibrant, cartoonish monster green without messing with the texture. I use Wilton brand, and one bottle lasts forever.
Test your oven temperature. Ovens run hot or cold more often than you think. I burned my first batch because my oven runs 25 degrees hotter than the dial says. An inexpensive oven thermometer saved my baking life. If your cupcakes are browning too fast on the edges but still raw in the middle, your oven is too hot.
Frosting consistency is key. Your buttercream should be thick enough to hold a peak but soft enough to pipe smoothly. If it is too stiff, add a splash more cream. If it is too runny, add a little more powdered sugar. The perfect consistency is when you can hold a spoonful upside down and it does not fall off. That is the sweet spot.
Let the frosting set before decorating. If you add the candy eyeballs immediately, they might slide off. Give the frosting a few minutes to form a slight crust. Or, if you are in a hurry, pop the frosted cupcakes in the fridge for 10 minutes. That works too.
Variations & Adaptations
One of the best things about these easy monster eye cupcakes is how easy they are to customize. Here are some variations I have tried and loved.
Chocolate Monster Eyes: Swap the vanilla cupcake base for a chocolate one. Use ¾ cup all-purpose flour and ½ cup unsweetened cocoa powder instead of the full 1 ½ cups flour. The dark chocolate looks amazing against the white frosting and green candy eyeballs. It gives the monsters a more sinister vibe.
Gluten-Free Version: I made these for a friend with celiac disease, and they turned out great. Use a 1:1 gluten-free baking flour blend. I recommend Bob’s Red Mill or King Arthur. Add an extra tablespoon of milk because gluten-free flours tend to absorb more liquid. Bake for the same amount of time, but check them a few minutes early.
Vegan Monster Eyes: Replace the butter with vegan butter sticks (I like Miyoko’s), use flax eggs (1 tablespoon ground flaxseed + 3 tablespoons water per egg), and swap the milk for unsweetened almond or oat milk. The frosting works best with vegan butter and powdered sugar. The texture is slightly denser but still delicious.
Spider Web Design: Instead of just veins, pipe a spider web pattern on each cupcake. Use white frosting as the base, then pipe concentric circles with black gel icing. Drag a toothpick from the center outward to create the web effect. It is a little more work but looks incredible.
Mini Monster Bites: Use a mini muffin tin instead of a standard one. Bake for only 10-12 minutes. These are perfect for classroom parties or snack tables where people want just a tiny bite. You will get about 36 mini cupcakes from one batch of batter.
I personally love the chocolate variation. It feels more Halloween-y somehow. The rich chocolate with that bright green eyeball is just such a fun contrast. Plus, kids go absolutely nuts for it.
Serving & Storage Suggestions
These easy monster eye cupcakes are best served at room temperature. The frosting is soft and creamy, the cake is tender, and the candy eyeball has just the right amount of chew. If you have refrigerated them, let them sit out for about 20 minutes before serving so the frosting softens up again.
For a Halloween party, arrange them on a platter lined with black or orange tissue paper. I like to scatter a few extra candy eyeballs around the platter for a fun, chaotic look. They pair perfectly with a glass of cold milk for the kids or a hot cup of coffee for the adults. If you are serving them alongside other Halloween treats, they go great with pumpkin-shaped cookies or a bowl of candy corn.
Storage instructions: Store any leftover cupcakes in an airtight container at room temperature for up to 2 days. If your kitchen is warm, refrigerate them instead. They will keep in the fridge for up to 5 days. The candy eyeballs might soften slightly in the fridge, but they still taste fine.
Freezing instructions: You can freeze the unfrosted cupcakes for up to 3 months. Wrap each one tightly in plastic wrap, then place them in a freezer bag. When you are ready to use them, thaw at room temperature for about an hour, then frost and decorate as usual. I have done this for a few parties, and nobody could tell they were frozen.
One thing I have noticed: the flavors actually meld together a little more after a day in the fridge. The vanilla seems to deepen, and the frosting gets a little more set. So if you can make them a day ahead, they might actually taste better. Just add the candy eyeballs right before serving so they stay crisp.
Nutritional Information & Benefits
Let me be real with you: these are cupcakes. They are a treat, not a health food. But here is the estimated nutritional breakdown for one standard cupcake with frosting and one candy eyeball:
- Calories: Approximately 320
- Fat: 18g
- Carbohydrates: 40g
- Protein: 3g
- Sugar: 28g
That said, there are a few bright spots. The butter provides a small amount of vitamin A, and the eggs add protein and choline, which is good for brain health. If you use whole milk, you get a little calcium too. I mean, it is not a salad, but it is not the worst thing you could eat either.
For dietary considerations: these cupcakes contain gluten, dairy, and eggs. They are not suitable for vegans or those with celiac disease unless you use the substitutions I mentioned earlier. The candy eyeballs are typically made from sugar, cornstarch, and gelatin, so they are not vegetarian. You can find vegan candy eyeballs online if needed.
My personal perspective? Halloween comes once a year. I say enjoy the treat, share them with friends, and do not stress about the numbers. Food is about joy and connection, and these cupcakes deliver plenty of both. Balance is key—eat your veggies the rest of the week and enjoy these on the spooky day.
Conclusion
These easy monster eye cupcakes have become my go-to Halloween recipe for a reason. They are fun, they are delicious, and they always, always get a reaction. That moment when someone sees that goofy green monster staring up at them from a cupcake—it is pure joy. I have made them for classroom parties, neighborhood gatherings, and even just for a quiet night in with a scary movie. They never disappoint.
I hope you give them a try. Customize them however you want—add more eyes, make them chocolate, go wild with the decorating. The recipe is forgiving, and the results are always worth it. If you make them, I would love to hear how they turned out. Drop a comment below and tell me about your Halloween party, or share a photo of your monster creations. It makes my day to see your versions.
So go ahead. Grab that neon green food coloring, dig out the candy eyeballs, and make something a little silly and a lot delicious. Halloween only comes once a year. Make it count.
Frequently Asked Questions
Can I use a boxed cake mix for these cupcakes?
Absolutely. If you are short on time, a white or vanilla boxed cake mix works perfectly. Just prepare it according to the package directions, add the green food coloring, and bake as instructed. The homemade frosting and decorating are what really make these special anyway.
How far in advance can I make these cupcakes?
You can bake the cupcakes up to 2 days ahead and store them in an airtight container at room temperature. Frost them the day you plan to serve them for the best appearance. The candy eyeballs should be added right before serving so they stay crisp and don’t absorb moisture from the frosting.
Can I use natural food coloring instead of gel?
You can, but the color will be much more muted. Natural green food coloring tends to look more like a pale sage green than a bright monster green. If you want that vibrant, cartoonish look, stick with gel. If you are okay with a softer, more natural shade, liquid food coloring works fine.
What if I can’t find candy eyeballs?
You can make your own! Use white chocolate melts or white candy coating. Melt them according to the package directions, drop small circles onto parchment paper, and press a mini chocolate chip or black sprinkle into the center for the pupil. Let them set completely before using. They look just as good as the store-bought ones.
My cupcakes came out dense. What went wrong?
Most likely, you overmixed the batter or your ingredients were too cold. Overmixing develops gluten, which makes cupcakes tough. Cold ingredients can also cause the batter to seize up. Next time, mix just until combined and make sure your butter, eggs, and milk are at room temperature before you start.
Pin This Recipe!
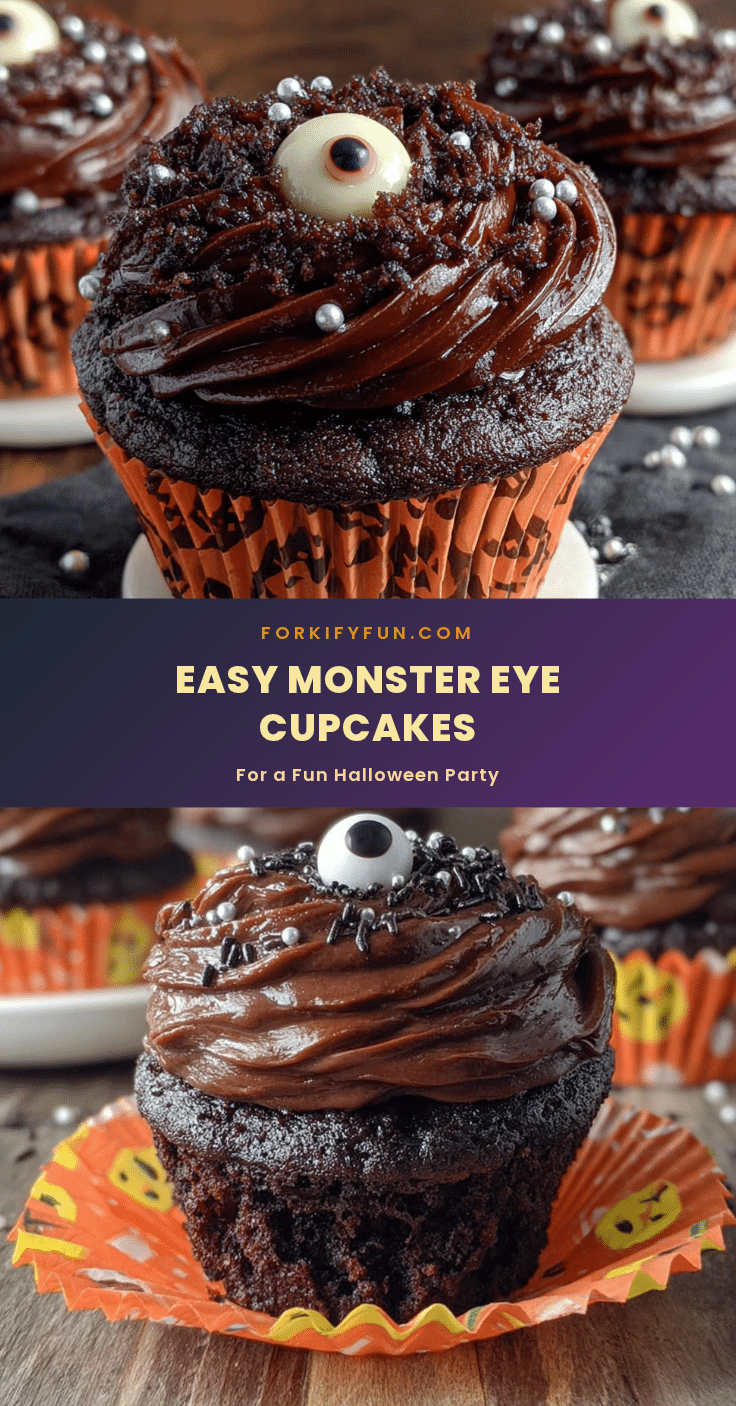
Easy Monster Eye Cupcakes: Best Fun Halloween Treat Recipe
These easy monster eye cupcakes are a fun and delicious Halloween treat. Made with a simple vanilla batter, neon green food coloring, and topped with a candy eyeball and red veins, they are perfect for parties and guaranteed to be a crowd-pleaser.
- Prep Time: 15 minutes
- Cook Time: 20 minutes
- Total Time: 45 minutes
- Yield: 18 servings 1x
- Category: Dessert
- Cuisine: American
Ingredients
- 1 ½ cups all-purpose flour
- 1 cup granulated sugar
- ½ cup unsalted butter, softened
- 2 large eggs, room temperature
- ½ cup whole milk
- 1 ½ teaspoons baking powder
- ½ teaspoon salt
- 1 teaspoon vanilla extract
- Neon green gel food coloring
- 1 cup unsalted butter, softened (for frosting)
- 3 ½ cups powdered sugar
- 2 tablespoons heavy cream
- 1 teaspoon vanilla extract (for frosting)
- Pinch of salt (for frosting)
- 24–30 candy eyeballs
- Red gel icing or strawberry syrup
- Optional: Black gel icing
Instructions
- Preheat your oven to 350°F (175°C). Line your muffin tin with paper liners.
- In a medium bowl, whisk together the flour, baking powder, and salt.
- In a large bowl, beat the softened butter and sugar together until light and fluffy, about 3-4 minutes.
- Add the eggs one at a time, beating well after each addition. Then mix in the vanilla extract.
- Add the dry ingredients in three additions, alternating with the milk. Mix on low speed until just combined.
- Add the neon green gel food coloring, starting with ½ teaspoon and adding more until desired color is reached.
- Divide the batter evenly among the liners, filling each about ⅔ full. Bake for 18-22 minutes, or until a toothpick inserted in the center comes out clean.
- Let the cupcakes cool in the pan for 5 minutes, then transfer them to a cooling rack to cool completely.
- While the cupcakes cool, make the frosting: Beat the softened butter until smooth, then gradually add the powdered sugar. Add the heavy cream, vanilla, and salt, and beat until light and fluffy.
- Transfer the frosting to a piping bag or zip-top bag. Pipe a generous swirl of frosting onto each cooled cupcake.
- Immediately place a candy eyeball in the center of each frosted cupcake. Use red gel icing or strawberry syrup to draw thin lines radiating outward from the eyeball.
- Let the frosting set for about 15 minutes before serving.
Notes
Do not skip the cooling step; warm cupcakes will melt the frosting. Use gel food coloring for vibrant color. For best results, let ingredients come to room temperature before starting.
Nutrition
- Serving Size: 1 cupcake
- Calories: 320
- Sugar: 28
- Sodium: 180
- Fat: 18
- Saturated Fat: 11
- Carbohydrates: 40
- Protein: 3
Keywords: Halloween cupcakes, monster eye cupcakes, easy Halloween treats, vanilla cupcakes, candy eyeballs, spooky desserts