The school Halloween party was in three hours and I’d completely forgotten. My son came flying through the door with a flier in his hand and that panicked look kids get when they think their mom has let them down. Every other parent would be bringing elaborate cupcakes with fondant spiders and those creepy-crawly cookies that take two days to decorate. I had a pack of hot dogs, some canned crescent rolls I’d bought on a whim, and a block of cheddar cheese in the fridge. Honestly, I almost just ran to the store for a store-bought veggie tray. But my son looked at me with those big eyes and said, “Mom, you always make the best stuff.” So I opened the fridge, grabbed what I had, and started winging it.
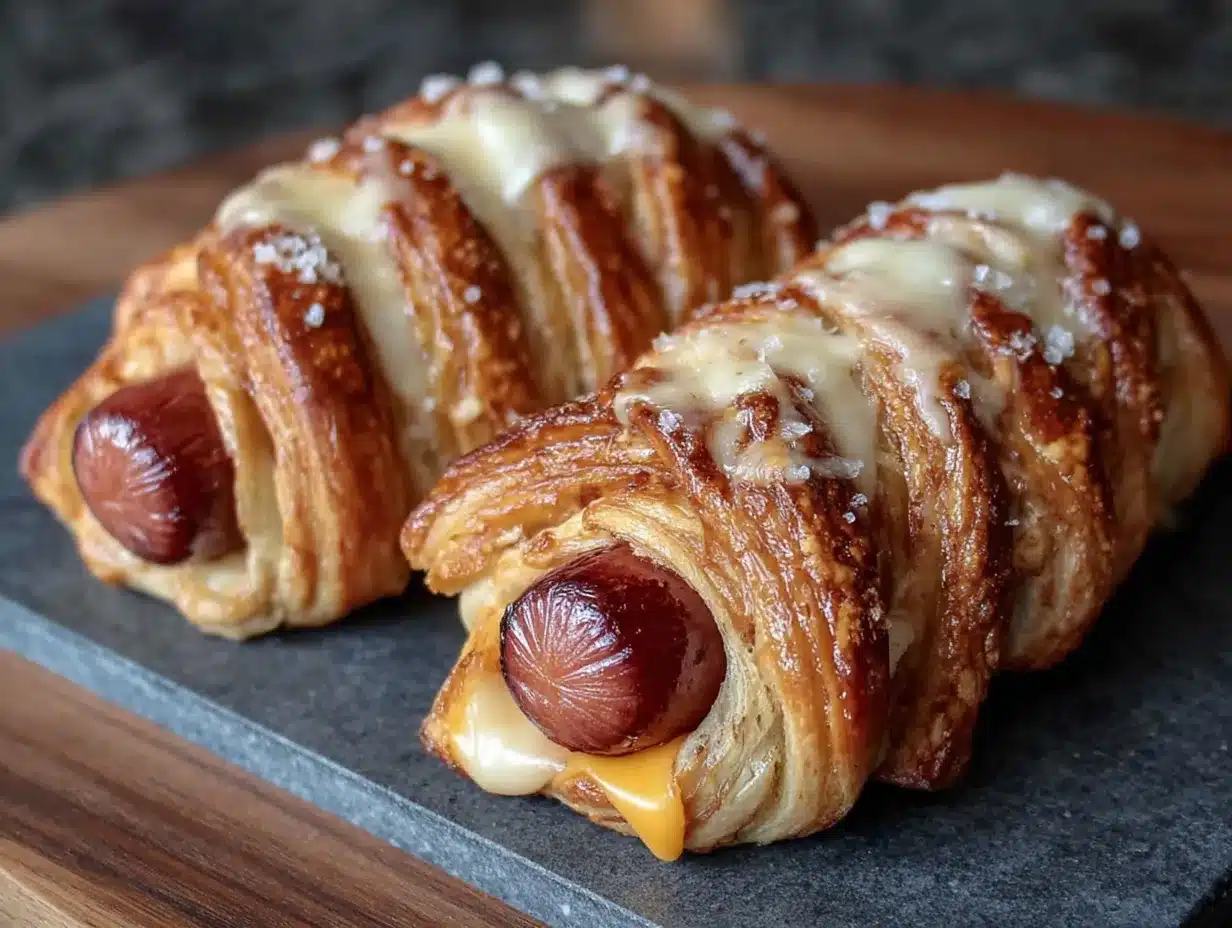
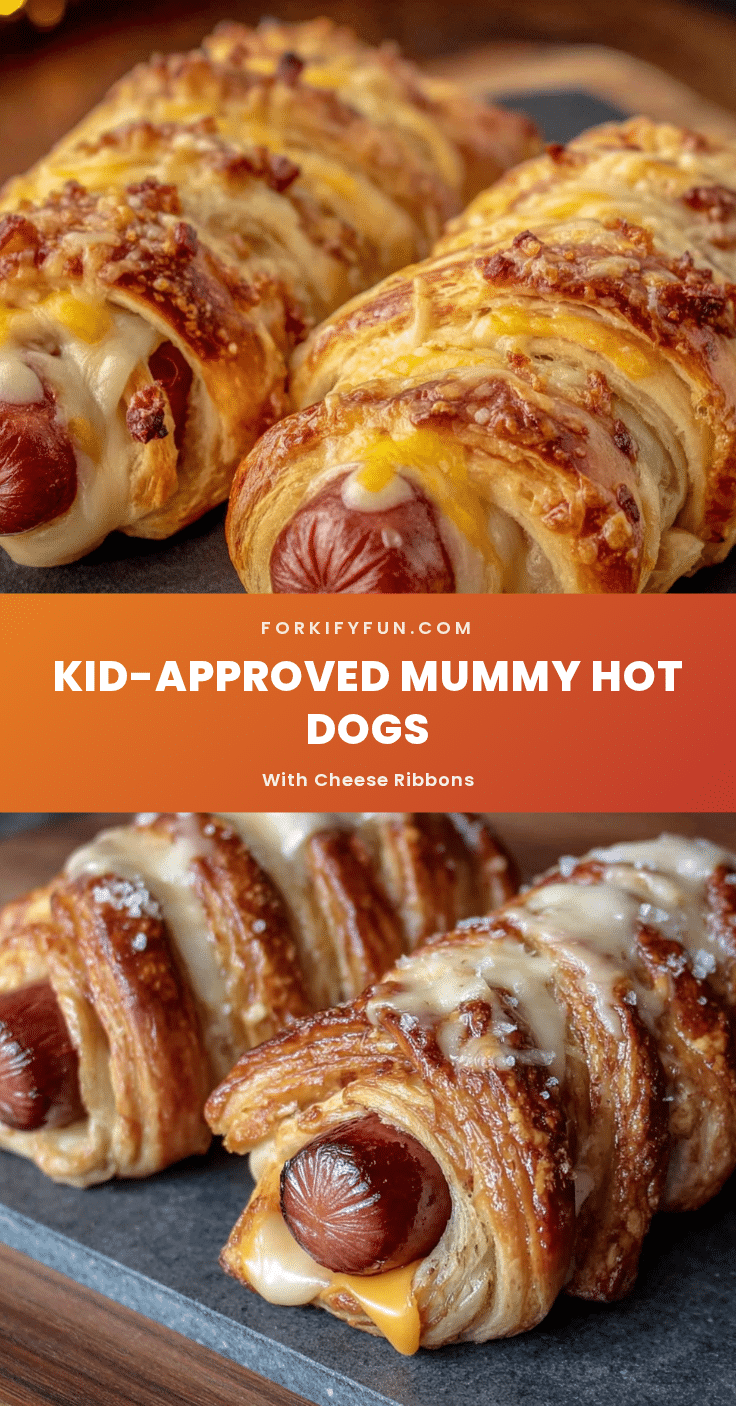
I sliced the hot dogs, wrapped them in strips of crescent dough like little bandages, and tucked thin ribbons of cheese in the gaps. Twenty minutes later, I had a baking sheet full of the most ridiculous, adorable, and honestly kind of hilarious little mummy hot dogs. They looked like tiny, tasty ghosts wrapped up for a nap. I threw them on a platter, added a little bowl of ketchup for the eyes, and we rushed out the door. I figured they’d be the weird thing nobody touched.
You know that feeling when you show up to something with a dish you threw together in a panic, and everyone just loses their minds? That was me. The mummy hot dogs were gone in ten minutes. Kids were running around with cheese ribbons hanging out of their mouths. Parents were asking for the recipe. My son was strutting around like he was the mayor of the party. And the best part? I spent maybe eight bucks and twenty minutes of my time. I’ve been making them every Halloween since, and honestly, they’re the one thing my kids request all year round. Let me tell you, there’s something magical about a recipe that makes everyone happy without making you crazy.
Why You’ll Love This Recipe
Let me be straight with you. I’ve tested this recipe more times than I can count, and it passes every single test a busy parent can throw at it. These mummy hot dogs aren’t just cute, they’re a real lifesaver.
- Quick & Easy: From fridge to table in under 25 minutes. No marinating, no chilling, no complicated steps. You can literally make these while helping with homework.
- Simple Ingredients: You probably already have hot dogs and cheese in your fridge. The crescent rolls are the only “special” ingredient, and they’re in every grocery store’s refrigerated section.
- Perfect for Halloween Parties: Whether it’s a school event, a neighborhood gathering, or just a fun dinner before trick-or-treating, these are the star of the show.
- Crowd-Pleaser: I’ve never met a kid who didn’t love these. Even picky eaters gobble them up. The cheese ribbons add a little melty magic that adults can’t resist either.
- Unbelievably Delicious: The combination of salty hot dog, flaky buttery dough, and gooey melted cheese is pure comfort food. It’s like a pigs in a blanket, but way more fun.
What makes these different from every other Halloween snack out there? It’s the cheese ribbons. Most mummy hot dog recipes just wrap the dough and call it a day. But tucking thin strips of cheddar into the gaps creates these little pockets of melted cheese that make every bite better. It’s not just a gimmick, it actually tastes incredible. Plus, the cheese helps hold the dough in place while baking, so your mummies stay wrapped up tight.
This recipe is the kind of thing that makes you feel like a superhero parent without actually doing much work. It’s fun, it’s fast, and it makes everyone at the table smile. Honestly, what more could you ask for on a busy school night?
What Ingredients You Will Need
This recipe uses simple, everyday ingredients to create something that looks way more complicated than it actually is. Most of these are pantry staples for any family kitchen.
For the Mummy Hot Dogs
- 8 hot dogs (standard size, about 1.6 oz each) – I prefer beef hot dogs for better flavor, but any kind works. Turkey or chicken hot dogs are great for a lighter option.
- 1 can (8 oz) refrigerated crescent roll dough – The kind that comes in a tube. I recommend Pillsbury for consistent results, but store brands work fine too.
- 4 slices cheddar cheese (about 1 oz each) – Use sharp cheddar for more flavor. Block cheese slices work better than pre-shredded, which won’t cut into clean ribbons.
- Ketchup or mustard (for the eyes) – Just a tiny dot on each mummy. You can also use small candy eyes if you want them extra cute.
Optional Additions
- 1 tablespoon melted butter (for brushing on top, adds golden shine)
- Everything bagel seasoning or sesame seeds (for a fun texture on the dough)
- Dipping sauces – Ketchup, mustard, ranch dressing, or honey mustard all work great
Ingredient Tips from My Kitchen: I’ve tried this with several brands of hot dogs, and my family prefers the all-beef ones from Nathan’s or Hebrew National. They have a firmer texture that holds up well to the dough. For the crescent rolls, don’t get the “big and flaky” version – the regular size is perfect for wrapping. The cheese is where you can really customize. I’ve used pepper jack for a little kick, Colby Jack for mildness, and even mozzarella for extra stretchiness. Just make sure it’s a block or slice you can cut into thin strips.
Substitution Guidance: For a gluten-free version, use gluten-free hot dogs and gluten-free crescent dough (available at most major grocery stores). For a dairy-free option, skip the cheese or use dairy-free cheese slices. The hot dogs themselves are usually dairy-free, but double-check the package. You can also use puff pastry instead of crescent dough, just roll it out a little thinner and cut into strips.
Equipment Needed
You don’t need fancy tools for this recipe, which is part of why I love it. Here’s what you’ll need:
- Baking sheet – A standard half-sheet pan works perfectly. Line it with parchment paper for easy cleanup.
- Sharp knife or pizza cutter – For cutting the cheese into ribbons and the dough into strips. A pizza cutter makes the dough strips much cleaner.
- Cutting board – Any clean surface for prep work.
- Small bowl – For melted butter if you’re using it.
- Pastry brush – Optional, but helpful for brushing butter on the dough.
- Toothpicks – Optional, for holding the dough in place if it starts to unravel.
My Personal Experience: I used to use a butter knife for everything, but once I switched to a pizza cutter for the dough strips, it was a game changer. The strips come out perfectly even, and it takes half the time. If you don’t have a pizza cutter, a sharp chef’s knife works just fine. For the cheese ribbons, I’ve found that a vegetable peeler actually works really well to get super thin, even strips. Just run it along the edge of the cheese block. It’s a little trick I picked up from making cheese boards, and it works perfectly here.
Preparation Method
Alright, let’s get to the fun part. This recipe comes together so fast, you’ll barely have time to make a mess.
- Preheat your oven to 375°F (190°C). Line a baking sheet with parchment paper. This step is important – the parchment prevents the cheese from sticking and makes cleanup a breeze. Trust me on this one.
- Prepare your cheese ribbons. Take your 4 slices of cheddar cheese and cut each slice into 4 thin strips, about ½ inch wide. You should have 16 strips total. If you’re using a block of cheese, cut it into thin slices and then into strips. The ribbons should be about the same length as your hot dogs. Set them aside.
- Open the crescent roll dough. Carefully unroll the can of crescent rolls. You’ll see they’re perforated into triangles. Don’t separate them along the perforations. Instead, use a pizza cutter or sharp knife to cut the entire sheet of dough lengthwise into 8 thin strips, each about ½ inch wide. You’ll have 8 long, skinny strips of dough.
- Prepare your hot dogs. Take each hot dog and make a small slit down the center, being careful not to cut all the way through. This creates a little pocket for the cheese. You can also just lay the cheese on top if you prefer, but tucking it in helps everything stay together.
- Assemble the mummies. Take one hot dog and tuck a cheese ribbon into the slit. Then, take one strip of crescent dough and start wrapping it around the hot dog, leaving small gaps between each wrap. You want it to look like a mummy’s bandages, so don’t cover the whole thing. Leave about ¼ inch of hot dog visible between each wrap. The dough should start at one end and spiral down to the other. If the strip is too long, just trim the excess. Pro tip: Leave a small space at the top of the hot dog where you’ll add the eyes later.
- Place on the baking sheet. Arrange your wrapped mummy hot dogs on the prepared baking sheet, leaving about 1 inch of space between each one. They’ll puff up a little as they bake, so give them room to breathe.
- Brush with butter (optional). If you want extra golden, shiny dough, melt 1 tablespoon of butter and brush it lightly over the tops of the mummies. This step is totally optional but makes them look bakery-fancy.
- Bake for 12-15 minutes. Pop the baking sheet into the preheated oven and bake until the dough is golden brown and puffed up, and the cheese is melted and bubbly. The exact time depends on your oven, so start checking at 12 minutes. You want the dough to be fully cooked and lightly browned. Sensory cue: Your kitchen will start smelling like buttery, cheesy goodness. That’s how you know it’s working.
- Add the eyes. Let the mummy hot dogs cool on the baking sheet for about 2 minutes. They’ll be hot, so give them a minute. Then, use a toothpick or the tip of a knife to add tiny dots of ketchup or mustard for the eyes. Place two dots near the top of each mummy. If you’re using candy eyes, press them gently into the dough while it’s still warm.
- Serve immediately. These are best enjoyed warm, right out of the oven. The cheese is stretchy and the dough is flaky. Move them to a serving platter and watch them disappear.
My Personal Note: The first time I made these, I wrapped the dough too tightly and the hot dogs ended up looking like little sausages in a blanket instead of mummies. The key is to leave those gaps. You want to see the hot dog peeking through, and you want the cheese to have a chance to melt and bubble out a little. It’s not a science, so don’t stress if they look a little messy. That’s part of the charm.
Cooking Tips & Techniques
I’ve made these mummy hot dogs more times than I can count, and I’ve learned a few things along the way. Here are my best tips to make sure yours turn out perfect every time.
Don’t Overwork the Dough. Crescent roll dough is delicate. If you handle it too much, it gets tough and doesn’t puff up as nicely. When you’re cutting the strips, use a sharp tool and work quickly. If the dough starts to feel sticky or warm, pop it in the fridge for five minutes. Cold dough is much easier to work with.
The Cheese Ribbon Trick. I learned this one the hard way. If you cut your cheese ribbons too thick, they won’t melt properly and you’ll end up with hard chunks in the middle of your mummy. Aim for ribbons that are about ⅛ inch thick. They should be thin enough to bend without breaking. If you’re using a vegetable peeler, you’ll get perfect ribbons every time.
Even Wrapping. Start wrapping the dough at one end of the hot dog and work your way to the other end in a spiral. Keep the tension light – you want the dough to be snug but not tight. If you pull it too tight, the dough will tear as it bakes. I usually hold the hot dog with one hand and wrap with the other, keeping the dough strip at a slight angle.
Common Mistake: Overcrowding the Pan. I made this mistake at a party once, and the mummies ended up touching each other as they baked. They turned into one giant blob of dough and hot dogs. Leave at least an inch of space between each mummy on the baking sheet. They’ll puff up and spread a little, so give them room to do their thing.
Timing Strategy. These are best served fresh, but you can prep them ahead of time. Assemble the mummies up to the baking step, then cover the baking sheet with plastic wrap and refrigerate for up to 4 hours. When you’re ready to bake, just add 2-3 minutes to the baking time since they’ll be cold. This is a lifesaver for party prep.
Variations & Adaptations
One of the best things about this recipe is how easy it is to change up. Here are some of my favorite variations.
Spicy Mummy Dogs. Use pepper jack cheese instead of cheddar, and add a thin slice of jalapeño under the cheese ribbon. My husband loves these. They have a nice little kick that adults appreciate, but they’re not too hot for most kids.
Breakfast Mummies. Swap the hot dogs for breakfast sausages or even cooked bacon strips. Use mozzarella cheese ribbons and serve with maple syrup for dipping. We’ve made these for Halloween morning breakfast and they’re a huge hit. The sweet and salty combo is amazing.
Vegetarian Version. Use veggie hot dogs or even cooked carrot sticks (peeled and blanched until tender). The carrot version is surprisingly good – the natural sweetness pairs well with the cheese and dough. My vegetarian friend requests these every year.
Puff Pastry Mummies. Instead of crescent roll dough, use thawed puff pastry. Roll it out slightly, cut into thin strips, and wrap the same way. The puff pastry gives a flakier, more buttery result. Just add 2-3 minutes to the baking time and watch carefully so they don’t burn.
Dipping Sauce Bar. Set up a little dipping station with ketchup, mustard, ranch dressing, honey mustard, and even a little sriracha mayo for the adults. Kids love having options, and it makes the meal feel more interactive. I’ve done this for birthday parties and it’s always a crowd-pleaser.
Serving & Storage Suggestions
These mummy hot dogs are best served warm, right after baking. The cheese is melty, the dough is flaky, and they’re just so much fun to eat. I like to arrange them on a large platter with the ketchup eyes facing up so everyone can see how cute they are. A little bowl of extra dipping sauce in the center completes the picture.
What to Serve With Them. These are hearty enough to be a main dish, but they also work great as an appetizer. For a full meal, I serve them with a simple side salad or some veggie sticks. For parties, I put them out with other finger foods like chips and dip, fruit skewers, and maybe some Halloween-themed cupcakes.
Storage Instructions. If you have leftovers (which rarely happens in my house), let them cool completely, then store them in an airtight container in the refrigerator for up to 3 days. The dough will soften a little, but they’re still tasty.
Reheating Tips. The best way to reheat these is in the oven or toaster oven at 350°F for about 5-7 minutes. This helps the dough crisp back up. You can also microwave them, but the dough will be soft and a little chewy. If you’re in a hurry, 30 seconds in the microwave works fine.
Freezer Instructions. You can freeze the assembled, unbaked mummies. Place them on a baking sheet and freeze until solid, then transfer to a freezer bag. They’ll keep for up to 2 months. To bake, add 5-7 minutes to the baking time. You don’t need to thaw them first. This is my secret weapon for Halloween parties – I make a double batch and freeze half for later.
Flavor Development. Honestly, these are best fresh. The magic is in the contrast between the hot, melty cheese and the flaky dough. Leftovers are still good, but they don’t have that same wow factor. So make only what you think you’ll eat, or plan to share them with friends.
Nutritional Information & Benefits
Let’s be real – these mummy hot dogs are a treat, not a health food. But they’re not as bad as you might think, especially if you make a few smart swaps.
Estimated Nutritional Values (per mummy hot dog):
- Calories: 210
- Protein: 8g
- Fat: 14g
- Carbohydrates: 14g
- Fiber: 0g
- Sugar: 3g
- Sodium: 580mg
Health Benefits: The hot dogs provide a decent amount of protein, which helps keep kids full and satisfied. The cheese adds calcium and vitamin D, which are important for growing bones. The crescent dough provides energy from carbohydrates. It’s not a balanced meal on its own, but paired with some veggies or fruit, it can be part of a healthy diet.
Dietary Considerations: This recipe contains gluten (from the crescent dough) and dairy (from the cheese). For a gluten-free version, use gluten-free hot dogs and gluten-free crescent dough. For a dairy-free version, skip the cheese or use dairy-free cheese. The hot dogs themselves are typically dairy-free, but always check the label.
My Wellness Perspective: I’m a firm believer in balance. We eat healthy most of the time, but special occasions call for fun food. These mummy hot dogs are a memory-making treat, not an everyday meal. I serve them with carrot sticks and apple slices on the side, and nobody complains. It’s all about moderation and making the fun stuff count.
Conclusion
These quick and easy mummy hot dogs with cheese ribbons are the kind of recipe that makes you look like a kitchen genius without any of the stress. They’re fun, they’re fast, and they’re absolutely delicious. The best part is watching the kids’ faces light up when they see them on the table. It’s pure joy, and it costs less than ten dollars to make.
I hope you give these a try, whether it’s for Halloween, a birthday party, or just a random Tuesday that needs a little extra fun. Don’t be afraid to customize them – use your family’s favorite hot dogs, try different cheeses, or set up a dipping sauce bar. The beauty of this recipe is how flexible it is.
I’d love to hear how yours turn out! Drop a comment below and tell me about your mummy hot dog adventures. Did your kids help wrap them? Did you try a fun variation? Share your photos and tag me – I love seeing your creations. And if you’re looking for more fun, kid-friendly recipes, check out my Halloween pizza mummies and spider web dip for a full spooky spread. Happy cooking, and happy Halloween!
Frequently Asked Questions
Can I make these mummy hot dogs ahead of time?
Yes! You can assemble them up to 4 hours ahead and keep them covered in the refrigerator. Add 2-3 minutes to the baking time. You can also freeze them unbaked for up to 2 months.
What kind of hot dogs work best?
Standard-sized beef hot dogs work best. They hold their shape well and have a good flavor. Turkey or chicken hot dogs also work, but they can be a little softer. Avoid jumbo or mini hot dogs, as they’ll change the wrapping proportions.
Can I use puff pastry instead of crescent rolls?
Absolutely! Puff pastry gives a flakier, more buttery result. Just roll it out slightly, cut into thin strips, and bake for 2-3 minutes longer. Watch carefully so it doesn’t burn.
How do I keep the dough from unraveling while baking?
Make sure you tuck the end of the dough strip under the hot dog when you finish wrapping. The cheese also helps hold everything in place. If you’re worried, you can use a toothpick to secure the end, just remember to remove it before serving.
Can I make these without cheese?
Yes, but they won’t be as fun. The cheese ribbons add flavor and help hold the dough in place. If you’re skipping the cheese, just wrap the dough a little tighter and make sure the ends are tucked under well. They’ll still be delicious!
Pin This Recipe!
Quick & Easy Mummy Hot Dogs with Cheese Ribbons

These adorable mummy hot dogs are wrapped in crescent dough with melty cheese ribbons, perfect for Halloween parties or a fun weeknight dinner. Ready in under 25 minutes, they’re a crowd-pleaser that makes everyone smile.
- Prep Time: 10 minutes
- Cook Time: 15 minutes
- Total Time: 25 minutes
- Yield: 8 servings 1x
- Category: Appetizer
- Cuisine: American
Ingredients
- 8 hot dogs (standard size, about 1.6 oz each)
- 1 can (8 oz) refrigerated crescent roll dough
- 4 slices cheddar cheese (about 1 oz each)
- Ketchup or mustard (for the eyes)
- 1 tablespoon melted butter (optional, for brushing)
- Everything bagel seasoning or sesame seeds (optional)
- Dipping sauces: ketchup, mustard, ranch dressing, or honey mustard (optional)
Instructions
- Preheat your oven to 375°F (190°C). Line a baking sheet with parchment paper.
- Prepare your cheese ribbons: Cut each slice of cheddar cheese into 4 thin strips, about ½ inch wide. You should have 16 strips total.
- Open the crescent roll dough. Do not separate along perforations. Use a pizza cutter or sharp knife to cut the entire sheet of dough lengthwise into 8 thin strips, each about ½ inch wide.
- Prepare your hot dogs: Make a small slit down the center of each hot dog, being careful not to cut all the way through.
- Assemble the mummies: Tuck a cheese ribbon into the slit of each hot dog. Then, wrap one strip of crescent dough around each hot dog in a spiral, leaving small gaps (about ¼ inch) between wraps. Leave a small space at the top for the eyes.
- Place the wrapped mummy hot dogs on the prepared baking sheet, leaving about 1 inch of space between each.
- Optional: Brush the tops with melted butter for a golden shine.
- Bake for 12-15 minutes, until the dough is golden brown and puffed, and the cheese is melted and bubbly.
- Let cool on the baking sheet for about 2 minutes. Add tiny dots of ketchup or mustard for the eyes using a toothpick or knife tip.
- Serve immediately.
Notes
For best results, leave gaps in the dough wrapping so the hot dog and cheese peek through. Don’t overwork the dough. You can assemble up to 4 hours ahead and refrigerate, then add 2-3 minutes to baking time. Freeze unbaked mummies for up to 2 months.
Nutrition
- Serving Size: 1 mummy hot dog
- Calories: 210
- Sugar: 3
- Sodium: 580
- Fat: 14
- Saturated Fat: 6
- Carbohydrates: 14
- Protein: 8
Keywords: mummy hot dogs, Halloween appetizer, pigs in a blanket, cheese ribbons, easy Halloween recipe, kid-friendly