“You know what would make Thanksgiving actually perfect? A pie made with real butter, not that weird shortening stuff.” My sister said this while we were digging through my pantry for pie pans, and honestly, she wasn’t wrong. I’d been making pumpkin pie the same way for years — using a store-bought crust because I thought homemade was too much work. But that conversation changed everything. I started experimenting with all-butter crusts, and let me tell you, the first time I pulled a flaky, golden beauty out of the oven, I nearly cried. It wasn’t just good — it was the kind of good that makes you question every pie you’ve ever eaten before.
This Flaky Homemade Pumpkin Pie with All-Butter Crust is the result of about a dozen test batches, some spectacular failures (butter leaking everywhere is a real thing), and one particularly memorable evening where I ate an entire pie by myself. Okay, maybe not the whole thing, but close enough. The crust shatters when you cut into it, and the filling is so silky and spiced that it tastes like fall in a slice. No weird ingredients, no complicated techniques — just real butter, good pumpkin, and a little patience.
Why You’ll Love This Recipe
This isn’t just another pumpkin pie recipe. I’ve spent years testing different butter-to-flour ratios, chilling times, and filling techniques to get this just right. The result? A pie that’s earned its spot at every family gathering I’ve hosted since.
- All-Butter Crust That Actually Stays Flaky : No shortening, no margarine — just cold butter that creates those delicate, shatteringly crisp layers you dream about.
- Simple Pantry Ingredients : You probably have most of this stuff already. No hunting down obscure spices or specialty flours.
- Perfect for Fall Gatherings : Whether it’s Thanksgiving, Friendsgiving, or just a cozy Sunday dinner, this pie steals the show every single time.
- Make-Ahead Friendly : The crust can be prepped days in advance, and the whole pie freezes beautifully. Stress-free hosting? Yes, please.
- That First Bite Moment : The contrast between the buttery, flaky crust and the creamy, spiced filling is honestly next-level comfort food.
What makes this different from every other pumpkin pie recipe out there? It’s the technique. I’m not just dumping butter into flour and hoping for the best. The way you handle the butter — keeping it cold, working it just enough, letting it rest — that’s what creates the magic. And the filling? It’s perfectly balanced between sweet and spiced, with a texture so smooth you’ll wonder why you ever settled for anything less.
Honestly, this is the kind of pie that makes people close their eyes after the first bite. It’s comfort food at its finest — homemade, from-scratch, and made with love (and a whole lot of butter).
What Ingredients You Will Need
This recipe uses simple, honest ingredients to create something truly special. Most of these are pantry staples, but a few key choices make all the difference.
For the All-Butter Crust
- 2 ½ cups all-purpose flour (315g) — I prefer King Arthur for consistent results, but any brand works. Just don’t use bread flour; it’ll make the crust tough.
- 1 teaspoon salt — Fine sea salt is best. It dissolves more evenly than kosher salt in dough.
- 1 tablespoon granulated sugar (12g) — Just a touch for flavor. It won’t make the crust sweet, promise.
- 1 cup unsalted butter (226g), very cold and cut into ½-inch cubes — This is non-negotiable. Salted butter throws off the salt balance, and the butter must be ice-cold. I pop mine in the freezer for 15 minutes before cutting.
- 6-8 tablespoons ice water (90-120ml) — Have extra on hand. Humidity affects how much you’ll need.
For the Pumpkin Filling
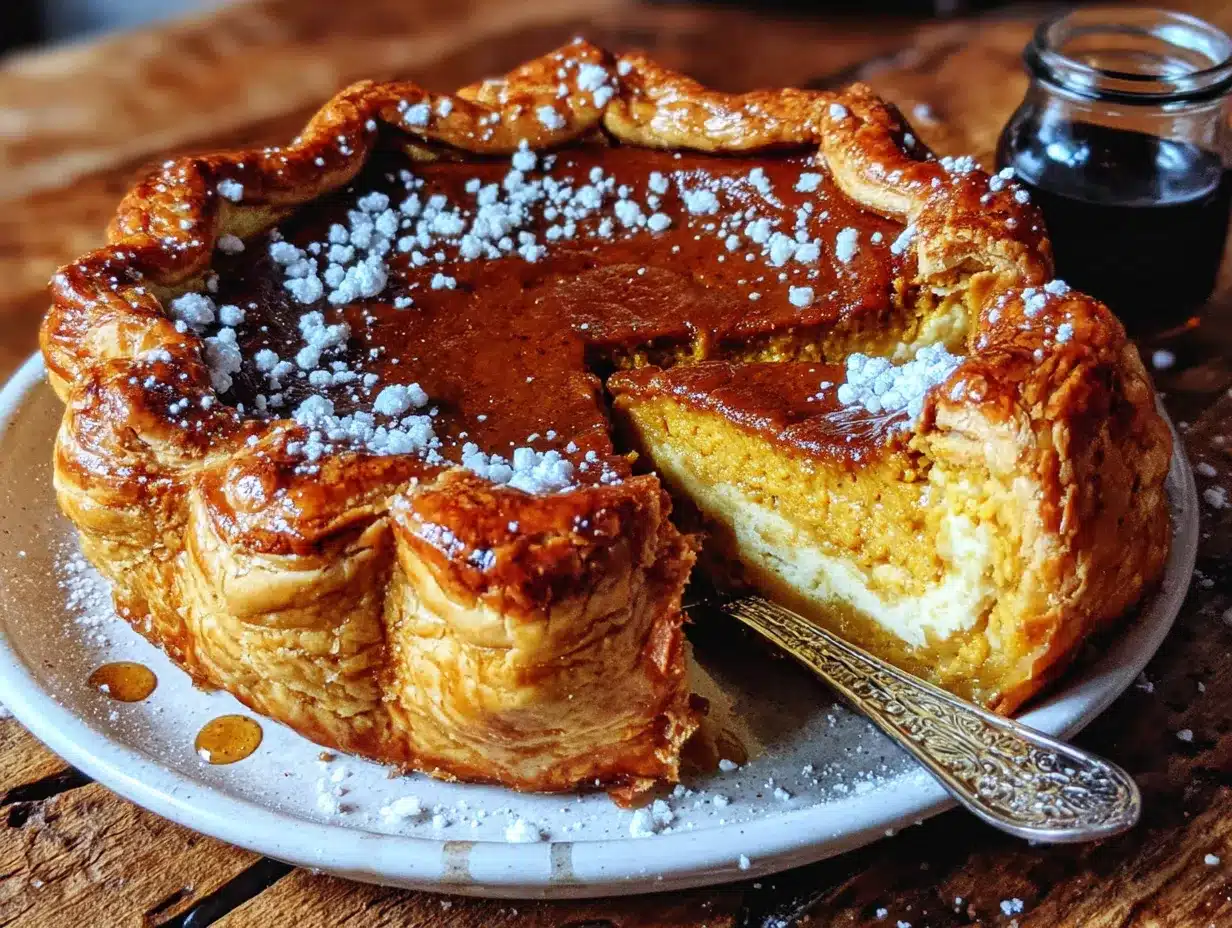
- 1 can (15 oz) pure pumpkin puree (425g) — Not pumpkin pie filling. Look for 100% pumpkin. I like Libby’s for its consistent thickness.
- ¾ cup granulated sugar (150g)
- ¼ cup packed light brown sugar (50g) — Adds a hint of molasses depth.
- 2 large eggs plus 1 egg yolk — The extra yolk adds richness without making the filling too heavy.
- 1 cup heavy cream (240ml) — For that silky, luxurious texture. Half-and-half works in a pinch but won’t be as creamy.
- 1 teaspoon vanilla extract
- 1 ½ teaspoons ground cinnamon
- ½ teaspoon ground ginger
- ½ teaspoon ground nutmeg — Freshly grated is amazing if you have it.
- ¼ teaspoon ground cloves
- ½ teaspoon salt
Ingredient Tip : For the best texture, make sure your eggs and cream are at room temperature before mixing. Cold ingredients can make the filling seize up and create a less smooth result. I just set them on the counter while I make the crust.
Equipment Needed
- 9-inch pie dish — Glass or ceramic works best. Metal can get too hot and overbrown the crust.
- Rolling pin — A heavy one helps. If you don’t have one, a wine bottle works in a pinch (I’ve done it).
- Parchment paper — For rolling and blind baking.
- Pie weights or dried beans — You need something heavy to weigh down the crust during blind baking.
- Large mixing bowls — One for the crust, one for the filling.
- Pastry cutter or two forks — For cutting butter into flour. Your hands work too, but they warm the butter.
- Plastic wrap — For chilling the dough.
- Whisk — For a smooth filling.
- Sharp knife or bench scraper — For trimming the dough.
- Cooling rack — Essential for even cooling.
If you’re new to pie-making, don’t stress about fancy equipment. I made pies for years with just a fork, a bowl, and a lot of patience. The most important tool is a good pie dish — I recommend a glass one so you can see when the bottom crust is golden.
Preparation Method
Take your time with this one. Rushing the crust is the number one mistake people make. Trust me, I’ve learned the hard way.
Step 1: Make the All-Butter Crust (20 minutes active, 1 hour chilling)
In a large bowl, whisk together the flour, salt, and sugar. Add the cold butter cubes and toss to coat them in flour. Using a pastry cutter or your fingertips, work the butter into the flour until you have pea-sized pieces with some larger flakes remaining. Don’t overwork it — you want visible bits of butter. Those create the flaky layers.
Sprinkle 6 tablespoons of ice water over the mixture and stir with a fork until the dough starts coming together. It should look shaggy and feel slightly moist. If it’s too dry, add more water one tablespoon at a time. Squeeze a small handful — if it holds together without crumbling, you’re good.
Turn the dough onto a lightly floured surface and gather it into a disk. Don’t knead it; just press it together. Wrap tightly in plastic wrap and refrigerate for at least 1 hour. Overnight is even better.
Step 2: Roll Out the Dough (15 minutes)
On a floured surface, roll the chilled dough into a 12-inch circle, about ⅛-inch thick. Rotate the dough occasionally and add more flour as needed to prevent sticking. Carefully transfer it to your pie dish by rolling it around your rolling pin, then unrolling it over the dish.
Gently press the dough into the bottom and up the sides of the dish. Trim the overhang to about ½ inch, then fold it under and crimp the edges however you like. I do a simple fluted edge with my fingers — nothing fancy. Place the crust in the freezer for 15 minutes while you preheat the oven.
Step 3: Blind Bake the Crust (25 minutes)
Preheat your oven to 375°F (190°C). Line the frozen crust with parchment paper, making sure it covers the edges, and fill with pie weights or dried beans. Bake for 15 minutes. Remove the parchment and weights, then bake for another 5-7 minutes until the bottom looks dry and lightly golden. Set aside to cool slightly.
Warning : Don’t skip the blind baking. A soggy bottom crust is the enemy of good pie. The freezer time and weights prevent the dough from shrinking and ensure it stays crisp.
Step 4: Make the Filling (10 minutes)
In a large bowl, whisk together the pumpkin puree, granulated sugar, and brown sugar until smooth. Add the eggs and egg yolk one at a time, whisking well after each. Stir in the heavy cream and vanilla. Sprinkle the cinnamon, ginger, nutmeg, cloves, and salt over the top, then whisk until everything is completely combined and silky.
The filling should be smooth and pourable. If you see any lumps, keep whisking — they’ll disappear.
Step 5: Bake the Pie (50-60 minutes)
Reduce the oven temperature to 350°F (175°C). Place the partially baked crust on a baking sheet (this catches any spills). Pour the filling into the warm crust — it should come almost to the top. Carefully transfer to the oven and bake for 50-60 minutes.
The pie is done when the edges are set but the center still jiggles slightly when you gently shake the pan. It will continue to set as it cools. If the crust edges start browning too quickly, tent them with foil or a pie shield around the 30-minute mark.
Step 6: Cool Completely (2-3 hours)
Place the pie on a cooling rack and let it cool to room temperature, about 2 hours. Don’t rush this — a warm pie will turn into a soupy mess when you cut it. For clean slices, refrigerate for at least 4 hours or overnight.
Sensory Cue : When it’s done, the kitchen should smell like a cozy fall day — warm spices, toasted butter, and sweet pumpkin. The filling will look slightly puffed and cracked around the edges, with a smooth, matte surface.
Cooking Tips & Techniques
I’ve made this pie more times than I can count, and I’ve messed up plenty along the way. Here’s what I’ve learned:
- Keep everything cold — The butter, the water, even your hands if possible. Warm butter melts into the flour instead of creating those flaky layers. If your kitchen is hot, chill the dough between steps.
- Don’t overwork the dough — Overmixing develops gluten, which makes the crust tough. Stop as soon as the dough holds together. A few floury patches are fine.
- The jiggle test is your friend — Overbaked pumpkin pie cracks and gets rubbery. Underbaked is runny. Aim for that gentle, uniform jiggle in the center, like Jell-O that’s almost set.
- Let it rest — I know it’s hard to wait, but letting the pie cool completely is crucial. The filling needs time to firm up. I once cut into a pie after an hour and ended up with pumpkin soup.
- Blind bake like you mean it — That first bake without filling is what keeps the crust from turning into a soggy mess. Don’t skip it, and don’t rush it.
One mistake I made early on? Using warm eggs and cream straight from the fridge. The filling came out lumpy and took forever to bake evenly. Now I always let them sit out for 20 minutes first. Small change, big difference.
Variations & Adaptations
This recipe is pretty perfect as-is, but here are some ways to make it your own:
- Gluten-Free Version : Swap the all-purpose flour for a 1:1 gluten-free baking flour blend. Add an extra tablespoon of ice water since gluten-free flours tend to be more absorbent.
- Dairy-Free Adaptation : Use cold vegan butter (I like Miyoko’s) in the crust and full-fat coconut cream in the filling. The texture will be slightly different but still delicious.
- Spice It Up : Add a pinch of black pepper or cardamom to the filling for a more complex flavor profile. I tried this last year and it was a hit.
- Pumpkin Seed Crunch : Sprinkle the top with pepitas and a little coarse sugar before baking for a crunchy, salty-sweet topping.
- Bourbon Maple Twist : Replace the vanilla with 2 tablespoons of bourbon and 1 tablespoon of maple syrup. The boozy warmth pairs beautifully with the spices.
My personal favorite variation is adding a layer of salted caramel apple crisp filling on the bottom before pouring in the pumpkin. It adds a fruity, caramelized surprise that everyone raves about.
Serving & Storage Suggestions
This pie is best served at room temperature or slightly chilled. I like to let it sit out for about 20 minutes after refrigerating — it takes the chill off and lets the flavors shine.
For serving, a dollop of lightly sweetened whipped cream is classic, but I also love a drizzle of warm caramel sauce or a scoop of vanilla bean ice cream. If you’re feeling fancy, a sprinkle of flaky sea salt on top balances the sweetness perfectly.
This pie pairs beautifully with a cup of hot coffee or a glass of cold milk. For a fall-themed dessert spread, serve it alongside baked apple cider donuts or pumpkin gnocchi in brown butter sage sauce for a savory-sweet combo.
Storage : Cover the pie loosely with foil or plastic wrap and refrigerate for up to 4 days. The flavors actually deepen after a day or two — it’s even better the next day.
Freezing : You can freeze the fully baked and cooled pie for up to 3 months. Wrap it tightly in plastic wrap, then foil. Thaw overnight in the refrigerator before serving. For best results, don’t freeze a pie that’s already been refrigerated for more than a day.
Reheating : To warm individual slices, microwave for 15-20 seconds. For the whole pie, place it in a 300°F (150°C) oven for 10-15 minutes. Just keep an eye on the crust so it doesn’t overbrown.
Nutritional Information & Benefits
Per slice (based on 8 servings):
- Calories: 420
- Fat: 26g
- Carbohydrates: 44g
- Protein: 6g
- Fiber: 3g
- Sugar: 24g
Pumpkin is packed with vitamin A, fiber, and antioxidants — it’s one of the healthiest parts of this indulgent dessert. The butter provides fat-soluble vitamins, and the spices (cinnamon, ginger, nutmeg) have anti-inflammatory properties. So while this isn’t exactly health food, it’s not empty calories either.
For a lighter option, you can reduce the sugar to ¾ cup total and use half-and-half instead of heavy cream. The texture will be slightly less luxurious, but it still tastes amazing.
Allergen note: This recipe contains dairy, gluten, and eggs. For dairy-free and gluten-free adaptations, see the variations section above.
Conclusion
This Flaky Homemade Pumpkin Pie with All-Butter Crust is the kind of recipe that becomes a tradition. It’s the pie you bring to Thanksgiving and watch disappear in minutes. It’s the one your family requests year after year, the one that makes people say, “Wait, you made this from scratch?” with genuine surprise.
I love this recipe because it reminds me that the best things in life are worth a little extra effort. Sure, you could buy a frozen pie — but you won’t get that shattering crust, that perfectly spiced filling, that feeling of pride when you pull it out of the oven. This pie is made with real ingredients and a whole lot of heart, and you can taste it in every single bite.
So go ahead — grab a stick of butter, open that can of pumpkin, and make some magic. And when you do, come back and tell me how it turned out. Did you add your own twist? Did the crust turn out flaky? I’d love to hear about it in the comments. Happy baking, friends!
Frequently Asked Questions
Can I use store-bought pie crust instead?
You can, but honestly, the all-butter crust is what makes this recipe special. Store-bought crusts often use shortening or hydrogenated oils, which don’t create the same flaky texture. If you’re short on time, try making just the crust a day ahead — it actually gets better after resting overnight.
Why is my pumpkin pie cracking on top?
Cracks usually mean the pie is overbaked. The filling expands as it heats, and if it gets too hot, the surface breaks. To prevent this, bake until the center is still slightly jiggly — it will continue to set as it cools. Also, don’t overmix the filling; too much air can cause cracking too.
Can I make this pie ahead of time?
Absolutely! You can make the crust up to 3 days in advance and keep it wrapped in the fridge. The fully baked pie keeps well in the refrigerator for up to 4 days. I actually think it tastes better on day two — the spices have time to meld and mellow out.
How do I get clean slices?
The secret is patience. Let the pie cool completely — at least 4 hours in the fridge. Use a sharp, thin-bladed knife and wipe it clean between cuts. For the cleanest slices, chill the pie overnight and cut it straight from the fridge.
Can I use fresh pumpkin instead of canned?
Yes, but you’ll need to roast and puree it first. Fresh pumpkin has more water than canned, so you’ll need to drain the puree in a cheesecloth-lined strainer for a few hours. Otherwise, the filling will be too runny. Canned pumpkin is actually more consistent, which is why most bakers (including me) prefer it for pies.
Pin This Recipe!
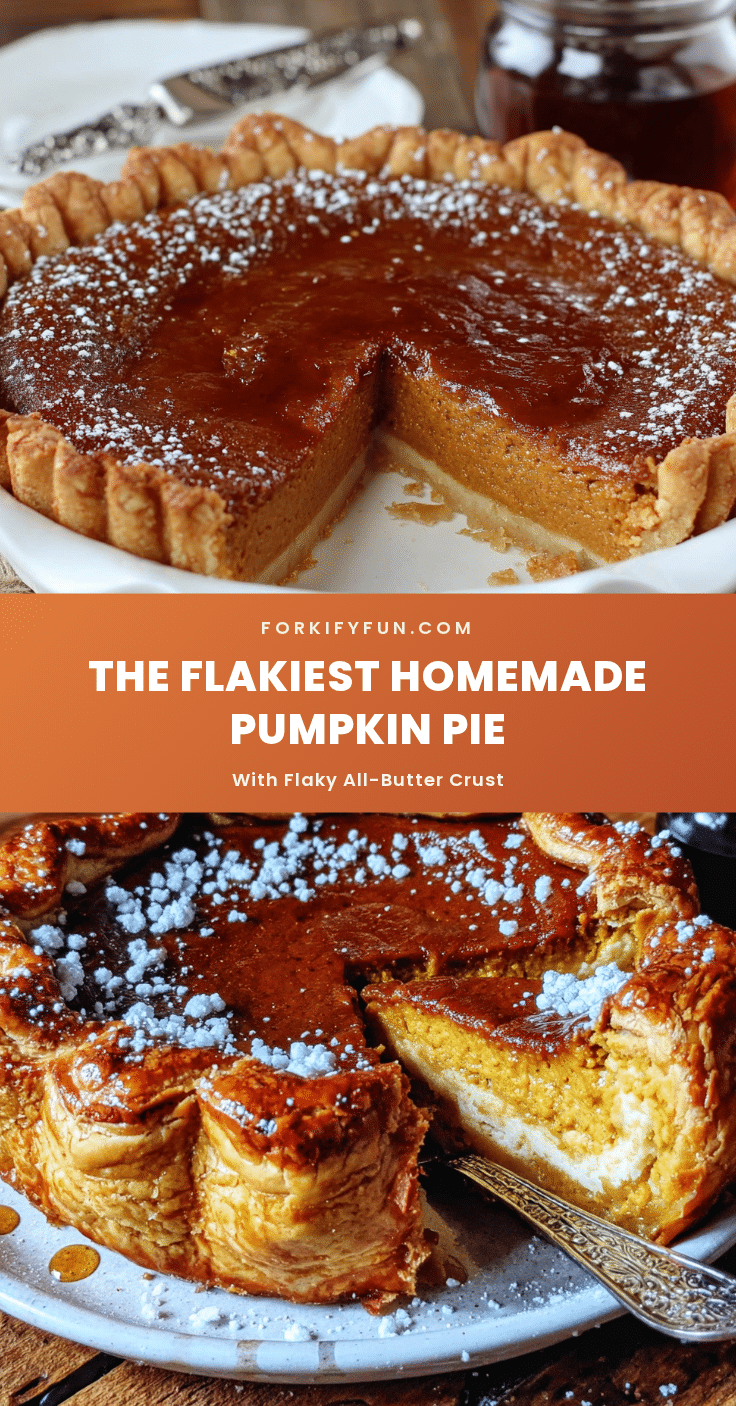
Ultimate Flaky Homemade Pumpkin Pie with All-Butter Crust
A flaky, golden all-butter crust filled with silky, spiced pumpkin filling. This from-scratch pie is the ultimate fall dessert, perfect for Thanksgiving or any cozy gathering.
- Prep Time: 20 minutes
- Cook Time: 50-60 minutes
- Total Time: 2 hours 10 minutes to 2 hours 20 minutes (plus chilling)
- Yield: 8 servings 1x
- Category: Dessert
- Cuisine: American
Ingredients
- 2 ½ cups all-purpose flour (315g)
- 1 teaspoon fine sea salt
- 1 tablespoon granulated sugar (12g)
- 1 cup unsalted butter (226g), very cold and cut into ½-inch cubes
- 6–8 tablespoons ice water (90-120ml)
- 1 can (15 oz) pure pumpkin puree (425g)
- ¾ cup granulated sugar (150g)
- ¼ cup packed light brown sugar (50g)
- 2 large eggs plus 1 egg yolk
- 1 cup heavy cream (240ml)
- 1 teaspoon vanilla extract
- 1 ½ teaspoons ground cinnamon
- ½ teaspoon ground ginger
- ½ teaspoon ground nutmeg
- ¼ teaspoon ground cloves
- ½ teaspoon salt
Instructions
- Make the all-butter crust: In a large bowl, whisk together flour, salt, and sugar. Add cold butter cubes and toss to coat. Using a pastry cutter or fingertips, work butter into flour until pea-sized pieces remain with some larger flakes. Sprinkle 6 tablespoons ice water over mixture and stir with a fork until dough starts coming together. Add more water if needed. Turn dough onto floured surface, gather into a disk, wrap in plastic wrap, and refrigerate for at least 1 hour.
- Roll out the dough: On a floured surface, roll chilled dough into a 12-inch circle, about ⅛-inch thick. Transfer to a 9-inch pie dish, press into bottom and sides, trim overhang to ½ inch, fold under, and crimp edges. Freeze for 15 minutes.
- Blind bake the crust: Preheat oven to 375°F (190°C). Line frozen crust with parchment paper and fill with pie weights or dried beans. Bake for 15 minutes. Remove parchment and weights, bake for another 5-7 minutes until bottom looks dry and lightly golden. Set aside to cool slightly.
- Make the filling: In a large bowl, whisk together pumpkin puree, granulated sugar, and brown sugar until smooth. Add eggs and egg yolk one at a time, whisking well after each. Stir in heavy cream and vanilla. Sprinkle cinnamon, ginger, nutmeg, cloves, and salt over top, then whisk until completely combined and silky.
- Bake the pie: Reduce oven temperature to 350°F (175°C). Place partially baked crust on a baking sheet. Pour filling into warm crust. Bake for 50-60 minutes until edges are set but center still jiggles slightly. If crust edges brown too quickly, tent with foil around 30 minutes.
- Cool completely: Place pie on a cooling rack and let cool to room temperature, about 2 hours. For clean slices, refrigerate for at least 4 hours or overnight.
Notes
Keep all ingredients cold for the flakiest crust. Don’t skip blind baking to avoid a soggy bottom. Let pie cool completely before slicing. For best results, refrigerate overnight. The pie can be made ahead and stored in the refrigerator for up to 4 days or frozen for up to 3 months.
Nutrition
- Serving Size: 1 slice (1/8 of pie)
- Calories: 420
- Sugar: 24
- Sodium: 380
- Fat: 26
- Saturated Fat: 16
- Carbohydrates: 44
- Fiber: 3
- Protein: 6
Keywords: pumpkin pie, all-butter crust, homemade pie, Thanksgiving dessert, fall dessert, flaky crust, pumpkin dessert