I ruined pumpkin cheesecake bars four times before I figured out what I was doing wrong. The first batch had a soggy crust that fell apart like wet sand. The second one cracked so badly it looked like a dried-up riverbed. The third was actually decent, but the caramel slid right off like it had somewhere better to be. And the fourth—well, the fourth taught me that not all salt is created equal when it comes to finishing a dessert. I was using table salt instead of flaky sea salt, and the whole thing tasted aggressive instead of balanced.
This recipe came from those failures. I wanted something that felt special enough for Thanksgiving but easy enough for a random Tuesday when you just need a little pumpkin in your life. Turns out, the trick was treating the cheesecake layer like a custard instead of a brick, and letting the caramel do its thing without rushing it. I also learned that room temperature ingredients aren’t just a suggestion—they’re basically the whole game when it comes to smooth cheesecake.
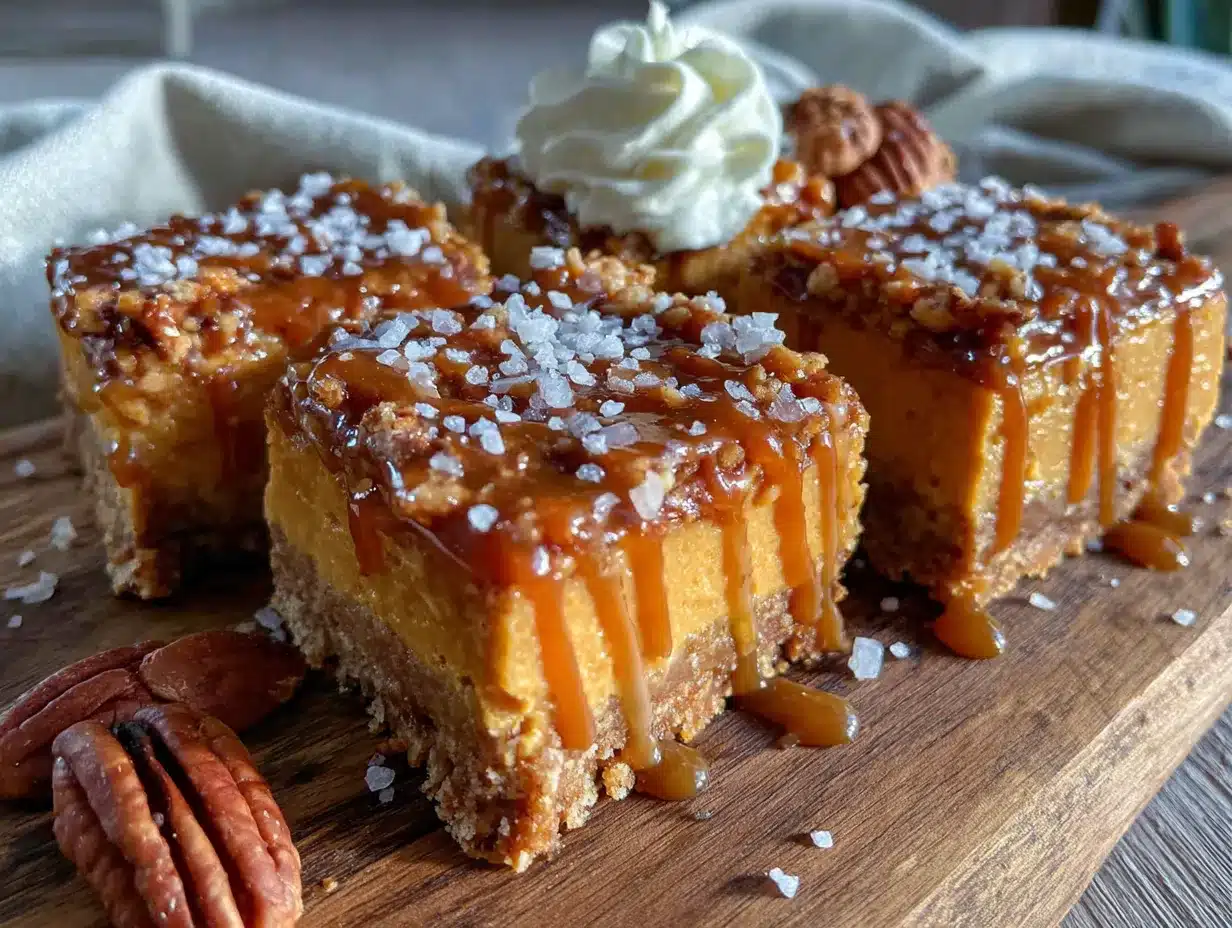
These bars have this way of making people close their eyes after the first bite. It’s the kind of dessert that feels like a hug, if hugs came with a salted caramel drizzle and a buttery shortbread crust. And honestly, after all those failed attempts, I can say with confidence—this version is the one worth making.
Why You’ll Love This Recipe
These salted caramel pumpkin cheesecake bars are the kind of dessert that makes you look like a hero without spending all day in the kitchen. I’ve tested this recipe more times than I care to admit, and every single time, people ask for the recipe before they’ve even finished their first bar.
- Quick & Easy : The whole thing comes together in about 40 minutes of active prep. The oven does the rest of the work while you go do something else.
- Simple Ingredients : You probably already have most of this stuff in your pantry. No weird specialty items or expensive extracts here.
- Perfect for Fall Gatherings : Whether it’s Thanksgiving, a Friendsgiving potluck, or just a cozy weekend treat, these bars fit right in.
- Crowd-Pleaser : I’ve served these to kids, adults, and even my picky aunt who “doesn’t like pumpkin.” She asked for seconds.
- Unbelievably Delicious : The combination of creamy pumpkin cheesecake, buttery shortbread crust, and salted caramel is honestly next-level. It’s the kind of dessert that makes you forget about pie entirely.
What makes these bars different from the rest is the texture. The cheesecake layer is silky and smooth—not dense or heavy—and the crust stays crisp even after a day or two in the fridge. I also use a specific technique for the caramel that keeps it pourable without turning into a sticky mess. If you’ve ever tried making salted caramel apple crisp before, you know how important that balance is.
This recipe isn’t just good—it’s the kind that makes you close your eyes after the first bite. It’s comfort food reimagined, with the same soul-soothing satisfaction but in bar form. Perfect for impressing guests without stress, or turning a simple evening into something memorable.
What Ingredients You Will Need
This recipe uses simple, wholesome ingredients to deliver bold flavor and satisfying texture without the fuss. Most of these are pantry staples, especially if you’ve been doing any fall baking lately.
For the Crust
- 1 ½ cups graham cracker crumbs (about 12 full sheets, crushed fine)
- ¼ cup granulated sugar
- 6 tablespoons unsalted butter, melted (I use Kerrygold for the flavor)
- Pinch of salt (skip if using salted butter)
For the Pumpkin Cheesecake Layer
- 16 ounces cream cheese, softened to room temperature (full-fat works best here)
- ¾ cup granulated sugar
- 2 large eggs, room temperature
- 1 cup pumpkin puree (not pumpkin pie filling—make sure it’s 100% pumpkin)
- 1 teaspoon vanilla extract
- 1 teaspoon pumpkin pie spice
- ½ teaspoon cinnamon
- ¼ teaspoon nutmeg (freshly grated if you have it)
- 2 tablespoons all-purpose flour (helps prevent cracking)
For the Salted Caramel Sauce
- ½ cup unsalted butter, cut into pieces
- 1 cup packed brown sugar (light or dark—dark gives deeper flavor)
- ½ cup heavy cream, room temperature
- 1 teaspoon vanilla extract
- 1 teaspoon flaky sea salt (like Maldon—don’t use table salt here)
For the caramel, I really recommend using a heavy-bottomed saucepan. It distributes heat more evenly and reduces the chance of burning. If you’ve made caramel apple cider sangria before, you already know how important good caramel is to fall recipes.
Equipment Needed
You don’t need a fancy kitchen to pull these off, but a few specific tools make the process a lot smoother.
- 9×9-inch baking pan (an 8×8 works too, but bars will be slightly thicker)
- Parchment paper (for easy lifting—don’t skip this)
- Electric mixer (handheld or stand mixer both work fine)
- Large mixing bowls (at least two)
- Heavy-bottomed saucepan (for the caramel—cheap pans burn faster)
- Rubber spatula
- Measuring cups and spoons
- Food processor or zip-top bag (for crushing graham crackers)
- Cooling rack
If you don’t have a food processor, just put the graham crackers in a zip-top bag and crush them with a rolling pin. It’s a little therapeutic, honestly. And if you don’t have a heavy-bottomed saucepan for the caramel, use the heaviest pot you own. Thin pans can cause hot spots that burn the sugar before it’s fully melted.
Preparation Method
Let me walk you through this step by step. Trust me, following the order here makes a difference.
Step 1: Prep Your Pan
Preheat your oven to 325°F (163°C). Line your 9×9-inch pan with parchment paper, leaving some overhang on two opposite sides. This creates handles for lifting the bars out later. Lightly grease the parchment with butter or non-stick spray.
Step 2: Make the Crust
In a medium bowl, combine the graham cracker crumbs, sugar, and salt. Pour in the melted butter and stir until every crumb is coated. The mixture should look like wet sand and hold together when you squeeze it. Press this firmly into the bottom of your prepared pan. Use the bottom of a measuring cup to get it even and compact. Bake for 10 minutes, then set aside to cool slightly while you make the filling.
Step 3: Make the Cheesecake Filling
In a large bowl, beat the softened cream cheese with an electric mixer on medium speed until smooth and creamy—about 2 minutes. Scrape down the sides and bottom of the bowl. Add the sugar and beat for another minute until well combined.
Add the eggs one at a time, beating on low after each just until incorporated. Overmixing at this stage adds too much air, which causes cracks later. Add the pumpkin puree, vanilla, pumpkin pie spice, cinnamon, and nutmeg. Mix on low until just combined. Finally, fold in the flour with a rubber spatula until you don’t see any white streaks.
The batter should be smooth, thick, and a beautiful orange color. If it looks curdled or separated, your cream cheese wasn’t warm enough—but don’t panic, it’ll still bake up fine.
Step 4: Assemble and Bake
Pour the cheesecake filling over the pre-baked crust and spread it evenly. Gently tap the pan on the counter a few times to release any air bubbles. Bake at 325°F for 35-40 minutes, or until the edges are set but the center still jiggles slightly when you shake the pan. It will continue to set as it cools.
Turn off the oven, crack the door open, and let the bars sit inside for 10 minutes. This gradual cooling helps prevent cracks. Then remove them to a cooling rack and let them cool completely at room temperature—about 1 hour. After that, refrigerate for at least 4 hours, preferably overnight. This is crucial for clean slices.
Step 5: Make the Salted Caramel
While the bars chill, make the caramel. In a heavy-bottomed saucepan over medium heat, melt the butter. Add the brown sugar and whisk constantly until the mixture is smooth and bubbling—about 3-4 minutes. Slowly pour in the heavy cream while whisking continuously. The mixture will bubble up, so be careful. Let it simmer for 2 minutes, then remove from heat. Stir in the vanilla and flaky sea salt.
Let the caramel cool for about 15 minutes before using. It will thicken as it cools. If it gets too thick, just microwave it for 10 seconds to loosen it up.
Step 6: Slice and Serve
Once the bars are fully chilled, use the parchment overhang to lift them out of the pan. Place on a cutting board and use a sharp knife to slice into 16 squares. Wipe the knife clean between cuts for neat edges. Drizzle with caramel sauce and sprinkle a little extra flaky salt on top.
Cooking Tips & Techniques
I learned most of these the hard way, so you don’t have to.
Room temperature ingredients are non-negotiable. Cold cream cheese creates lumps that never fully smooth out. Cold eggs can make the batter seize up. Set everything out on the counter about an hour before you start baking. If you forgot, you can soften cream cheese in the microwave on 50% power in 10-second bursts, but it’s not quite the same.
Don’t overmix the cheesecake batter. I know it’s tempting to keep beating until it’s perfectly smooth, but too much air creates bubbles that lead to cracks. Mix just until everything comes together, then stop.
The water bath alternative. Traditional cheesecake recipes call for a water bath to prevent cracking. These bars don’t need one because they’re shallow enough to bake evenly without it. But if you’re worried, place a small pan of hot water on the oven rack below the bars. The steam helps keep the surface moist.
Caramel troubleshooting. If your caramel crystallizes or turns grainy, you probably stirred it too much after it started boiling. Next time, let it bubble undisturbed once it reaches a boil. If it’s too thin, simmer it a little longer. Too thick? Add a splash of cream and whisk it in.
If you’re looking for more fall baking inspiration, these small batch pumpkin cream cheese muffins use a similar technique and are perfect for when you don’t want a full pan of dessert.
Variations & Adaptations
One of the best things about this recipe is how flexible it is. Here are some variations I’ve tried and loved.
Gluten-Free Version : Use gluten-free graham crackers or crushed gluten-free shortbread cookies for the crust. The filling doesn’t contain much flour, so swapping in a gluten-free all-purpose blend works perfectly.
Dairy-Free Adaptation : Use dairy-free cream cheese (I like Miyoko’s or Violife) and a plant-based butter for the crust. For the caramel, use coconut cream instead of heavy cream and vegan butter. The texture will be slightly different, but still delicious.
Extra Pumpkin Spice : If you’re a pumpkin spice fanatic, add an extra teaspoon of pumpkin pie spice to the filling and sprinkle a little cinnamon-sugar on top before baking. This version tastes like fall in every single bite.
Chocolate Twist : Add a layer of melted dark chocolate between the crust and the cheesecake filling. Just spread about ½ cup of melted chocolate over the pre-baked crust and let it set before adding the filling. The combination of chocolate, pumpkin, and salted caramel is ridiculous.
Nutty Crust : Replace half the graham cracker crumbs with finely chopped pecans or walnuts. Toast them first for extra flavor. This adds a nice crunch and pairs beautifully with the caramel.
For a completely different take on fall flavors, try making cozy pumpkin gnocchi in brown butter sage sauce for a savory pumpkin option.
Serving & Storage Suggestions
These bars are best served cold or at room temperature. I personally love them straight from the fridge because the cheesecake layer is firmer and the caramel stays thick and glossy. If you prefer a softer texture, let them sit on the counter for 15 minutes before serving.
For presentation, drizzle the caramel sauce over each bar individually right before serving. Add a tiny pinch of flaky sea salt on top and maybe a few toasted pumpkin seeds for crunch. They look stunning on a dessert platter alongside other fall treats like baked apple cider donuts with cinnamon sugar.
Storage: Keep leftover bars in an airtight container in the refrigerator for up to 5 days. Place a piece of parchment paper between layers to prevent sticking. The caramel sauce can be stored separately in a jar in the fridge for up to 2 weeks.
Freezing: These bars freeze beautifully. Wrap individual bars tightly in plastic wrap, then place them in a freezer-safe bag or container. They’ll keep for up to 3 months. Thaw in the refrigerator overnight before serving. Add fresh caramel after thawing for best results.
Reheating: If you want warm caramel, microwave individual bars for about 10-15 seconds. The cheesecake will soften slightly, and the caramel will get all melty and delicious. Just don’t overdo it or the bars might get too soft.
The flavors actually get better after a day or two in the fridge. The pumpkin spice mellows out and blends with the cream cheese, and the caramel seeps into the edges of the bars just a little bit. It’s one of those rare desserts that tastes even better on day two.
Nutritional Information & Benefits
Here’s the estimated nutritional breakdown for one bar (based on 16 servings):
| Nutrient | Amount per Serving |
|---|---|
| Calories | 285 |
| Total Fat | 18g |
| Saturated Fat | 11g |
| Cholesterol | 75mg |
| Sodium | 210mg |
| Total Carbohydrates | 29g |
| Dietary Fiber | 1g |
| Sugars | 22g |
| Protein | 4g |
| Vitamin A | 45% DV |
| Calcium | 4% DV |
| Iron | 4% DV |
Pumpkin is packed with vitamin A and antioxidants, which support eye health and immune function. The cream cheese adds calcium and protein, while the eggs provide B vitamins and healthy fats. This isn’t a health food by any stretch, but it’s nice to know there’s some nutritional value hiding under all that caramel.
Dietary Considerations: This recipe contains dairy, eggs, and gluten. For a gluten-free version, use GF graham crackers. For dairy-free, use plant-based alternatives as mentioned in the variations section. This recipe is not suitable for vegans in its current form.
Potential Allergens: Dairy, eggs, wheat/gluten. The caramel may contain traces of nuts depending on your equipment or specific ingredients used.
Conclusion
These salted caramel pumpkin cheesecake bars are the dessert I turn to every single fall. They’re forgiving enough for beginners but impressive enough for holiday tables. The combination of creamy pumpkin cheesecake, buttery crust, and that glossy salted caramel is honestly hard to beat.
I love that you can make them ahead of time, freeze them for later, and customize them however you want. Whether you stick with the classic version or try one of the variations, I promise these bars will earn a permanent spot in your fall baking rotation.
If you make these, I’d love to hear how they turned out. Drop a comment below and let me know if you tried any fun variations—I’m always looking for new ideas to test in my kitchen. And don’t forget to pin this recipe for later so you can find it when pumpkin season rolls around again.
Happy baking, friends. May your caramel stay smooth and your cheesecake stay crack-free.
Frequently Asked Questions
Can I use canned pumpkin pie filling instead of pumpkin puree?
No, I wouldn’t recommend it. Pumpkin pie filling is already sweetened and spiced, which would throw off the balance of this recipe. Stick with 100% pumpkin puree so you can control the sweetness and spice levels yourself.
Why did my cheesecake layer crack?
Cracks usually happen from overmixing the batter or drastic temperature changes. Make sure your ingredients are room temperature, mix on low speed, and let the bars cool gradually in the oven with the door cracked open. The flour in the recipe also helps prevent cracking.
Can I make these bars without a mixer?
Yes, but you’ll need some arm strength. Make sure the cream cheese is very soft, and use a sturdy whisk or wooden spoon. A rubber spatula works for folding, but you’ll want to really beat the cream cheese and sugar together until smooth.
How do I get clean slices?
Chill the bars for at least 4 hours, preferably overnight. Use a sharp knife and wipe it clean between each cut. You can also run the knife under hot water and dry it off before slicing—the warmth helps cut through the cheesecake cleanly.
Can I double this recipe for a 9×13 pan?
Absolutely. Double all the ingredients and bake in a 9×13-inch pan. You’ll need to increase the baking time by about 10-15 minutes. Keep an eye on it—the center should still jiggle slightly when you shake the pan.
Pin This Recipe!
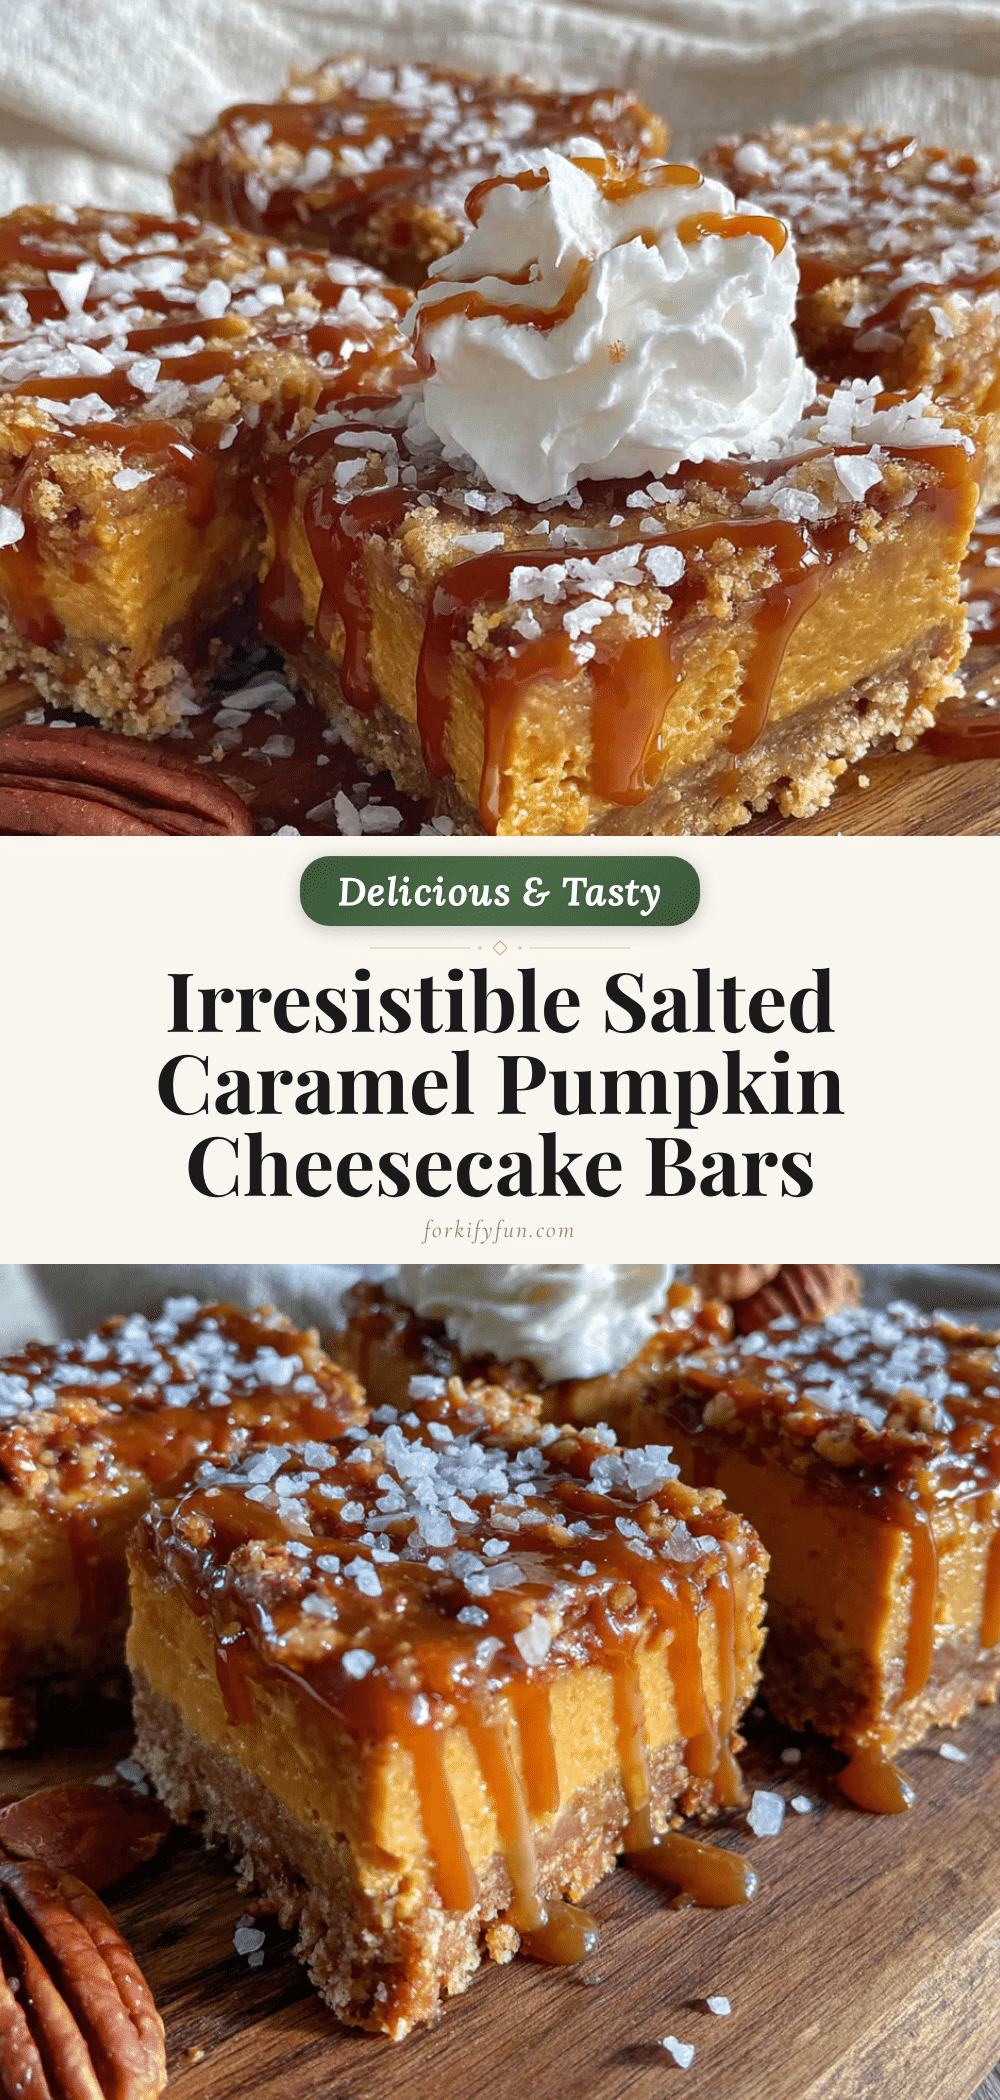
Best Salted Caramel Pumpkin Cheesecake Bars Recipe
These salted caramel pumpkin cheesecake bars feature a buttery shortbread crust, a silky pumpkin cheesecake layer, and a glossy salted caramel drizzle. They’re easy enough for a weeknight treat but impressive enough for Thanksgiving.
- Prep Time: 40 minutes
- Cook Time: 35-40 minutes
- Total Time: 5 hours 15 minutes (includes chilling)
- Yield: 16 servings 1x
- Category: Dessert
- Cuisine: American
Ingredients
- 1 ½ cups graham cracker crumbs (about 12 full sheets, crushed fine)
- ¼ cup granulated sugar
- 6 tablespoons unsalted butter, melted
- Pinch of salt
- 16 ounces cream cheese, softened to room temperature
- ¾ cup granulated sugar
- 2 large eggs, room temperature
- 1 cup pumpkin puree (not pumpkin pie filling)
- 1 teaspoon vanilla extract
- 1 teaspoon pumpkin pie spice
- ½ teaspoon cinnamon
- ¼ teaspoon nutmeg (freshly grated if available)
- 2 tablespoons all-purpose flour
- ½ cup unsalted butter, cut into pieces
- 1 cup packed brown sugar (light or dark)
- ½ cup heavy cream, room temperature
- 1 teaspoon vanilla extract
- 1 teaspoon flaky sea salt (like Maldon)
Instructions
- Preheat oven to 325°F (163°C). Line a 9×9-inch baking pan with parchment paper, leaving overhang on two opposite sides. Lightly grease the parchment.
- In a medium bowl, combine graham cracker crumbs, ¼ cup sugar, and a pinch of salt. Pour in melted butter and stir until every crumb is coated. Press firmly into the bottom of the prepared pan. Bake for 10 minutes, then set aside to cool slightly.
- In a large bowl, beat softened cream cheese with an electric mixer on medium speed until smooth and creamy, about 2 minutes. Scrape down sides. Add ¾ cup sugar and beat for another minute.
- Add eggs one at a time, beating on low after each just until incorporated. Add pumpkin puree, 1 teaspoon vanilla, pumpkin pie spice, cinnamon, and nutmeg. Mix on low until just combined. Fold in flour with a rubber spatula until no white streaks remain.
- Pour cheesecake filling over pre-baked crust and spread evenly. Tap pan on counter to release air bubbles. Bake at 325°F for 35-40 minutes, until edges are set but center jiggles slightly. Turn off oven, crack door open, and let bars sit inside for 10 minutes. Then remove to a cooling rack and cool completely at room temperature (about 1 hour). Refrigerate for at least 4 hours, preferably overnight.
- While bars chill, make caramel: In a heavy-bottomed saucepan over medium heat, melt ½ cup butter. Add brown sugar and whisk constantly until smooth and bubbling, about 3-4 minutes. Slowly pour in heavy cream while whisking continuously. Let simmer for 2 minutes, then remove from heat. Stir in 1 teaspoon vanilla and flaky sea salt. Let cool for about 15 minutes before using.
- Once bars are fully chilled, use parchment overhang to lift them out of the pan. Place on a cutting board and slice into 16 squares with a sharp knife, wiping knife clean between cuts. Drizzle with caramel sauce and sprinkle extra flaky salt on top.
Notes
Room temperature ingredients are crucial for a smooth cheesecake. Don’t overmix the batter to avoid cracks. For clean slices, chill bars at least 4 hours (overnight is best) and wipe knife between cuts. Caramel can be stored separately in the fridge for up to 2 weeks. Bars freeze well for up to 3 months.
Nutrition
- Serving Size: 1 bar
- Calories: 285
- Sugar: 22
- Sodium: 210
- Fat: 18
- Saturated Fat: 11
- Carbohydrates: 29
- Fiber: 1
- Protein: 4
Keywords: salted caramel, pumpkin cheesecake bars, fall dessert, Thanksgiving dessert, cheesecake bars, pumpkin dessert, caramel bars