The front door swung open and a gust of cold October air swept through the kitchen, carrying the sound of laughter and someone yelling about a lost zombie arm. I was stirring a pot, elbow-deep in onions and garlic, when my sister appeared in the doorway holding a bag of candy corn and looking guilty. “I told everyone to come here after the parade,” she said. “There’s like, twelve of them. Maybe fifteen.” I looked down at the pot. I looked at the clock. I looked back at the pot. And that is the exact moment this Easy One-Pot Halloween Chili for a Crowd was born—out of panic, a half-empty pantry, and the stubborn refusal to order pizza on the best night of the year.
I had ground beef in the freezer, a few cans of beans rattling around the cupboard, and a jar of roasted tomatoes I’d been saving for a rainy day. The trick was making it stretch without making it taste thin. So I doubled the spices, threw in some smoked paprika that was about to expire, and let it simmer while I dug through the Halloween costume bin for something that didn’t smell like last year’s sweat. By the time the werewolves and witches piled through the door, the chili was bubbling away, thick and fragrant, filling the whole house with that deep, warm smell that says you’re about to eat something good.
That night, someone ate four bowls. Four. I watched them go back for more, ladle clinking against the pot, and I knew I’d accidentally stumbled onto something worth keeping. This isn’t a fussy recipe. It doesn’t ask you to brown things in batches or toast spices in a separate pan. It’s the kind of chili you make when you need to feed a crowd fast, when the doorbell keeps ringing, and when the only thing that matters is that everyone gets a warm bowl in their hands. It’s messy, it’s hearty, and honestly? It tastes better when you’re wearing a fake mustache.
Why You’ll Love This Recipe
I’ve made a lot of chili in my life. Some were too watery, some were too spicy, and some just sat there on the plate like they’d given up. This one is different. It’s the chili I go back to every time I need something reliable, something that works without a lot of hand-holding or fancy ingredients.
- One Pot, Zero Drama : Everything cooks in a single Dutch oven or large pot. You brown the meat, sweat the veggies, dump in the rest, and walk away. Less cleanup means more time for costume judging.
- Feeds a Hungry Crowd : This recipe scales beautifully. I’ve made it for six people and I’ve made it for twenty. The proportions hold up, the flavor deepens, and nobody leaves the table hungry.
- Pantry-Friendly Ingredients : Canned tomatoes, canned beans, frozen corn, basic spices. You probably have most of this stuff already. No special trips to the store required.
- Customizable Heat Level : Want it mild? Leave out the cayenne. Want it spicy? Add a diced jalapeño with the seeds or a splash of hot sauce at the end. You’re in control.
- Better the Next Day : Like all great chili, this one gets better after a night in the fridge. The flavors meld, the texture thickens, and leftovers become the best lunch of the week.
This isn’t just another chili recipe. It’s the one I tested on a Tuesday night with a kitchen full of hungry people, the one that got requested again for the Halloween block party, and the one that made a friend text me at midnight asking for the measurements. It’s straightforward, it’s forgiving, and it delivers every single time.
What Ingredients You Will Need
This recipe leans on simple, wholesome ingredients that work together to create a chili that’s hearty, flavorful, and deeply satisfying. No weird extracts, no obscure spices. Just good food that does its job.
- 2 pounds ground beef (80/20 works best—enough fat for flavor, not so much that you’re draining grease for days)
- 1 large yellow onion, diced (about 2 cups; sweet onions work too if that’s what you have)
- 1 red bell pepper, diced (adds color and a subtle sweetness that balances the heat)
- 4 cloves garlic, minced (fresh is non-negotiable here; jarred stuff tastes flat)
- 2 tablespoons chili powder (I use a blend from Penzeys, but any standard chili powder works)
- 1 tablespoon ground cumin (this is where the warmth comes from—don’t skip it)
- 1 teaspoon smoked paprika (regular paprika works, but smoked adds that campfire depth)
- 1/2 teaspoon cayenne pepper (optional; leave it out for a kid-friendly version)
- 1 teaspoon dried oregano (Mexican oregano if you have it, but standard is fine)
- 1 can (14.5 ounces) fire-roasted diced tomatoes (I prefer Muir Glen for the smoky flavor)
- 1 can (15 ounces) tomato sauce (look for one with no added sugar)
- 1 can (15 ounces) black beans, drained and rinsed (rinsing removes excess sodium and that metallic can taste)
- 1 can (15 ounces) kidney beans, drained and rinsed (dark red kidney beans hold their shape better than light)
- 1 cup frozen corn kernels (no need to thaw; just dump them in)
- 2 cups beef broth (low-sodium so you control the salt level)
- 1 tablespoon brown sugar (sounds weird, but it rounds out the acidity of the tomatoes)
- Salt and black pepper (to taste; I start with 1 teaspoon salt and 1/2 teaspoon pepper)
- Optional toppings : shredded cheddar cheese, sour cream, sliced jalapeños, chopped cilantro, diced avocado, crushed tortilla chips
A quick note on beans: I’ve made this chili with pinto beans instead of kidney beans and it was still excellent. If you’re feeding someone who claims to hate beans, you can reduce the amount or swap in extra corn. But honestly, the beans are what make it feel like a meal instead of just meat soup.
Equipment Needed
You don’t need a professional kitchen to pull this off. Here’s what you’ll actually use:
- Large Dutch oven or heavy-bottomed pot (6-quart or larger; I use a Le Creuset, but any enameled cast iron or stainless steel pot works)
- Sharp chef’s knife (dull knives make dicing an onion feel like a punishment)
- Cutting board (wood or plastic, just make sure it’s stable)
- Wooden spoon or sturdy spatula (for breaking up the meat and stirring)
- Can opener (the manual kind never lets you down)
- Measuring spoons (eyeballing chili powder is risky business)
- Ladle (for serving; a 1/2-cup ladle is perfect for portion control)
If you don’t have a Dutch oven, a deep skillet or even a slow cooker will work. For the slow cooker version, brown the meat and sweat the veggies on the stovetop first, then transfer everything to the slow cooker and cook on low for 6-8 hours. I’ve done it both ways, and while the stovetop version develops a slightly deeper flavor from the direct heat, the slow cooker version is a lifesaver on busy days.
Preparation Method
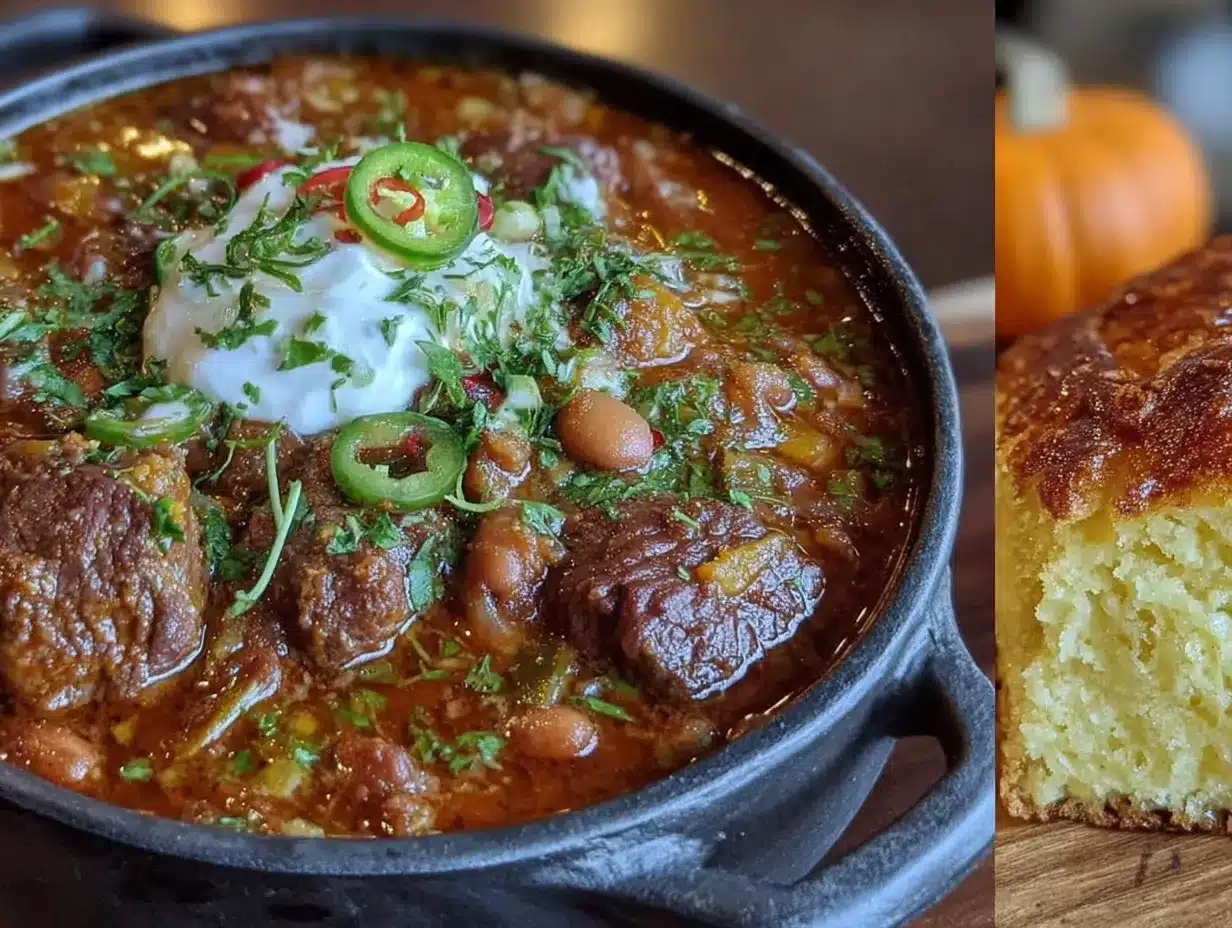
Let’s get cooking. This comes together faster than you think, and the whole thing happens in one pot. No juggling multiple pans, no transferring between dishes. Just one pot and a lot of delicious chaos.
- Heat the pot over medium-high heat. Add a drizzle of olive oil—about a tablespoon—and let it shimmer. Drop in the ground beef and break it apart with your wooden spoon. Let it brown without stirring too much; you want actual browning, not gray steaming. This takes about 6-8 minutes. If there’s a lot of excess fat, spoon out all but about 2 tablespoons. Leaving a little fat adds flavor.
- Add the onion and bell pepper. Stir them into the beef and let them cook for 4-5 minutes, until the onion turns translucent and the pepper softens. The kitchen will start smelling like dinner at this point. Scrape up any browned bits from the bottom of the pot—that’s flavor gold.
- Stir in the garlic and all the spices. Chili powder, cumin, smoked paprika, cayenne (if using), oregano. Stir constantly for about 30 seconds until the spices are fragrant. Be careful not to burn them; burnt cumin tastes bitter and there’s no coming back from that.
- Pour in the diced tomatoes and tomato sauce. Stir everything together, scraping the bottom of the pot to release any remaining browned bits. The mixture will look a little soupy at this stage—that’s normal. Trust the process.
- Add the beans, corn, beef broth, and brown sugar. Stir until everything is evenly distributed. The brown sugar might seem like a strange addition, but it balances the acidity of the tomatoes and rounds out the heat from the spices. Don’t skip it.
- Bring the chili to a boil, then reduce the heat to low. Cover the pot with the lid slightly ajar to let steam escape. Let it simmer for at least 30 minutes, stirring occasionally. If you have more time, let it go for 45 minutes to an hour. The longer it simmers, the thicker and more flavorful it gets.
- Taste and adjust seasoning. Add salt and pepper as needed. I usually start with 1 teaspoon of salt and add more after the chili has simmered. Remember that canned beans and broth already contain sodium, so go easy at first.
- Serve hot with your favorite toppings. Ladle into bowls and let everyone customize their own. Shredded cheese, sour cream, diced avocado, crushed tortilla chips, sliced jalapeños—set it all out and let the chaos begin.
One thing I learned the hard way: don’t rush the browning step. If you crowd the pot or stir too often, the meat steams instead of searing, and you lose that deep, savory flavor that makes chili taste like it cooked all day. Give the beef space and patience.
Cooking Tips & Techniques
I’ve messed up this chili more times than I care to admit. Here’s what I learned so you don’t have to repeat my mistakes.
Brown the meat in batches if needed. If your pot isn’t wide enough to hold all the beef in a single layer, do it in two batches. Crowding the pan drops the temperature and the meat releases liquid instead of browning. You want crispy edges, not boiled meat.
Toast your spices. That 30-second window after you add the spices isn’t just for show. Toasting them in the hot fat wakes up their essential oils and makes them more aromatic. The difference between chili with untoasted spices and toasted spices is the difference between okay and unforgettable.
Let it rest before serving. If you can, let the chili sit off the heat for 10-15 minutes before serving. This allows the flavors to settle and the texture to thicken slightly. It also means you won’t burn your mouth on the first bite, which I’ve done more times than I’d like to admit.
Don’t oversalt early. As the chili simmers, the liquid reduces and the salt concentration increases. If you add all your salt at the beginning, you might end up with a pot of brine. Add half the salt early, then taste and adjust toward the end.
Use the back of your spoon to check thickness. Drag a spoon across the bottom of the pot. If the chili parts and stays separated for a second before slowly flowing back together, it’s the right consistency. If it runs back together immediately, it needs more time.
Variations & Adaptations
This chili is a starting point, not a final destination. Here are some ways to make it your own based on what I’ve tried over the years.
Vegetarian Version : Skip the ground beef and add an extra can of black beans and a can of pinto beans. Saute an extra bell pepper and a diced zucchini for bulk. The texture is different but still satisfying. I made this for a vegetarian friend last year and she asked for the recipe before she finished her first bowl.
Turkey Chili : Substitute ground turkey for the beef. Use 93% lean turkey and add an extra tablespoon of olive oil to compensate for the lower fat content. The flavor is milder, so you might want to increase the chili powder by half a tablespoon.
Spicy Pumpkin Chili : This is my personal favorite fall variation. Stir in 1 cup of pumpkin puree along with the tomatoes. It adds creaminess, a subtle sweetness, and a ridiculous amount of vitamin A. Plus, it’s Halloween—pumpkin belongs everywhere.
White Chicken Chili Variation : If you’re in the mood for something different, try my creamy white chicken chili with crispy tortilla strips. It uses shredded chicken, white beans, and a creamy broth that’s completely different from this red chili but just as satisfying for a crowd.
Smoky Chipotle Version : Add 1-2 minced chipotle peppers in adobo sauce along with the spices. The smokiness pairs beautifully with the fire-roasted tomatoes and gives the chili a deeper, almost barbecue-like flavor. Start with one pepper and taste before adding more—chipotle heat sneaks up on you.
Beer-Infused Chili : Replace 1 cup of the beef broth with a dark beer like a stout or a porter. Add it after the spices and let it cook off for 2-3 minutes before adding the tomatoes. The beer adds a malty richness that’s especially good on cold nights.
Serving & Storage Suggestions
This chili is at its best when served piping hot in deep bowls with a mountain of toppings. I like to set up a small topping bar so everyone can customize their bowl. Shredded sharp cheddar, a dollop of sour cream, diced red onion, fresh cilantro, and a few pickled jalapeños are my go-to lineup. Crushed tortilla chips add crunch, while a squeeze of lime brightens everything up.
For a full Halloween spread, serve this chili alongside my soft pretzel bites with beer cheese for dipping, or a batch of salted caramel apple crisp for dessert. The sweet-salty combo is a perfect way to end a chili night.
Storage : Let the chili cool completely before transferring to airtight containers. It keeps in the refrigerator for up to 5 days. The flavors actually improve after a day or two, so don’t be afraid to make it ahead.
Freezing : This chili freezes beautifully. Portion it into freezer-safe bags or containers, leaving about an inch of headspace for expansion. It will keep for up to 3 months. Thaw overnight in the refrigerator before reheating.
Reheating : Reheat on the stovetop over medium-low heat, stirring occasionally. Add a splash of beef broth or water if the chili has thickened too much. You can also microwave individual portions in 30-second bursts, stirring between each. The texture won’t be quite as good as stovetop, but it works in a pinch.
Nutritional Information & Benefits
This chili is packed with protein, fiber, and a surprising amount of vitamins. Here’s the approximate nutritional breakdown per serving (based on 8 servings, without toppings):
- Calories : 385
- Protein : 28g
- Fat : 14g
- Carbohydrates : 34g
- Fiber : 9g
- Sugar : 8g
- Sodium : 780mg
The black beans and kidney beans are excellent sources of soluble fiber, which helps regulate blood sugar and keeps you feeling full longer. The bell peppers and tomatoes provide a solid dose of vitamin C, while the cumin and chili powder offer anti-inflammatory properties. If you use grass-fed beef, you’ll also get a boost of omega-3 fatty acids and conjugated linoleic acid.
For a lower-sodium version, use no-salt-added canned tomatoes and broth, and rinse your beans thoroughly. You can also reduce the salt in the recipe and rely on the spices for flavor—you might be surprised how little salt you actually need.
One note on allergens: this recipe contains no dairy, eggs, nuts, or gluten in the base recipe, but check your broth and spice blends for hidden additives. The toppings (cheese, sour cream, tortilla chips) can be adjusted based on dietary needs.
Conclusion
This Easy One-Pot Halloween Chili for a Crowd has become my go-to for every fall gathering, from costume parties to casual Sunday dinners. It’s the recipe I turn to when I want to feed people without spending the whole evening in the kitchen. It’s forgiving, it’s flexible, and it tastes like the kind of meal someone made with love—even if that someone was frantically stirring while wearing a vampire cape.
I’d love to hear how this chili turns out for you. Did you add something unexpected? Did you serve it with a side I haven’t tried? Drop a comment below and tell me about your Halloween chili adventures. And if you make it for a crowd, snap a photo and tag me—I want to see your spooky spread. Until next time, keep your pot hot and your toppings plentiful.
Frequently Asked Questions
Can I make this chili in a slow cooker?
Absolutely. Brown the beef and saute the vegetables on the stovetop first, then transfer everything to a slow cooker. Cook on low for 6-8 hours or on high for 3-4 hours. The flavor will be slightly milder than the stovetop version, but it’s still excellent and incredibly convenient.
How can I thicken my chili if it’s too watery?
Let it simmer uncovered for an additional 10-15 minutes to allow excess liquid to evaporate. You can also mash some of the beans against the side of the pot with a fork—the starch will naturally thicken the broth. A tablespoon of tomato paste stirred in works too.
Can I use dried beans instead of canned?
Yes, but you’ll need to cook them separately first. Soak 1 cup of dried beans overnight, drain them, then simmer in fresh water for 1-2 hours until tender. Drain and add them to the chili in place of the canned beans. This adds about 30 minutes of active prep time but gives you more control over texture and sodium.
What toppings go best with Halloween chili?
Anything goes, but the classics are shredded cheddar, sour cream, diced avocado, sliced jalapeños, and crushed tortilla chips. For a Halloween twist, add some “spider” olives (olives with cream cheese eyes) or serve the chili in hollowed-out mini pumpkin bowls. Kids love the presentation.
How do I make this chili less spicy for kids?
Omit the cayenne pepper entirely and use a mild chili powder blend. You can also reduce the amount of chili powder to 1 tablespoon. Serve with extra sour cream and cheese, which help neutralize any remaining heat. Most kids handle this version well—it’s flavorful without being overwhelming.
Pin This Recipe!

Easy One-Pot Halloween Chili for a Crowd

This hearty, one-pot chili is perfect for feeding a hungry crowd on Halloween or any fall gathering. Made with ground beef, beans, and a smoky spice blend, it’s forgiving, flexible, and tastes even better the next day.
- Prep Time: 15 minutes
- Cook Time: 45 minutes
- Total Time: 1 hour
- Yield: 8 servings 1x
- Category: Main Course
- Cuisine: American
Ingredients
- 2 pounds ground beef (80/20)
- 1 large yellow onion, diced (about 2 cups)
- 1 red bell pepper, diced
- 4 cloves garlic, minced
- 2 tablespoons chili powder
- 1 tablespoon ground cumin
- 1 teaspoon smoked paprika
- 1/2 teaspoon cayenne pepper (optional)
- 1 teaspoon dried oregano
- 1 can (14.5 ounces) fire-roasted diced tomatoes
- 1 can (15 ounces) tomato sauce
- 1 can (15 ounces) black beans, drained and rinsed
- 1 can (15 ounces) kidney beans, drained and rinsed
- 1 cup frozen corn kernels
- 2 cups beef broth (low-sodium)
- 1 tablespoon brown sugar
- Salt and black pepper to taste (start with 1 teaspoon salt and 1/2 teaspoon pepper)
- Optional toppings: shredded cheddar cheese, sour cream, sliced jalapeños, chopped cilantro, diced avocado, crushed tortilla chips
Instructions
- Heat the pot over medium-high heat. Add a drizzle of olive oil—about a tablespoon—and let it shimmer. Drop in the ground beef and break it apart with your wooden spoon. Let it brown without stirring too much; you want actual browning, not gray steaming. This takes about 6-8 minutes. If there’s a lot of excess fat, spoon out all but about 2 tablespoons. Leaving a little fat adds flavor.
- Add the onion and bell pepper. Stir them into the beef and let them cook for 4-5 minutes, until the onion turns translucent and the pepper softens. The kitchen will start smelling like dinner at this point. Scrape up any browned bits from the bottom of the pot—that’s flavor gold.
- Stir in the garlic and all the spices. Chili powder, cumin, smoked paprika, cayenne (if using), oregano. Stir constantly for about 30 seconds until the spices are fragrant. Be careful not to burn them; burnt cumin tastes bitter and there’s no coming back from that.
- Pour in the diced tomatoes and tomato sauce. Stir everything together, scraping the bottom of the pot to release any remaining browned bits. The mixture will look a little soupy at this stage—that’s normal. Trust the process.
- Add the beans, corn, beef broth, and brown sugar. Stir until everything is evenly distributed. The brown sugar might seem like a strange addition, but it balances the acidity of the tomatoes and rounds out the heat from the spices. Don’t skip it.
- Bring the chili to a boil, then reduce the heat to low. Cover the pot with the lid slightly ajar to let steam escape. Let it simmer for at least 30 minutes, stirring occasionally. If you have more time, let it go for 45 minutes to an hour. The longer it simmers, the thicker and more flavorful it gets.
- Taste and adjust seasoning. Add salt and pepper as needed. I usually start with 1 teaspoon of salt and add more after the chili has simmered. Remember that canned beans and broth already contain sodium, so go easy at first.
- Serve hot with your favorite toppings. Ladle into bowls and let everyone customize their own. Shredded cheese, sour cream, diced avocado, crushed tortilla chips, sliced jalapeños—set it all out and let the chaos begin.
Notes
Brown the meat in batches if needed to avoid steaming. Toast spices for 30 seconds to enhance flavor. Let chili rest 10-15 minutes before serving. Add salt gradually as liquid reduces. For a thicker chili, simmer uncovered or mash some beans against the pot. Leftovers keep in the fridge for up to 5 days or freeze for up to 3 months.
Nutrition
- Serving Size: 1 bowl (about 1.5 cu
- Calories: 385
- Sugar: 8
- Sodium: 780
- Fat: 14
- Saturated Fat: 5
- Carbohydrates: 34
- Fiber: 9
- Protein: 28
Keywords: Halloween chili, one-pot chili, easy chili, crowd-pleasing chili, ground beef chili, fall recipe, comfort food


