My buddy Dave took one bite, stopped mid-sentence, and just pointed at the platter with this look on his face like I’d just solved a problem he didn’t know he had. We were standing in his driveway before the big game, the grill going, a cooler of drinks sweating in the October chill, and these crispy bacon-wrapped jalapeño poppers were disappearing faster than I could pull them off the tray. He didn’t say a word for a solid ten seconds—just grabbed two more and walked away shaking his head. That’s when I knew I had finally nailed the recipe.
I’d been messing around with different versions for months. Some were too greasy, some lost all their crunch, and a few were so mild they might as well have been stuffed bell peppers. But this batch? The bacon was shatter-crisp, the cheese filling was creamy with a little tang, and the jalapeños still had that warm, buzzing heat that makes you reach for another beer. Honestly, tailgating food needs to do two things: survive being eaten outside in the cold, and make people forget they’re standing on asphalt. These poppers do both.
The secret is in how you prep the peppers and what you do to the bacon before wrapping. It’s not complicated—I promise you don’t need any fancy equipment or a culinary degree. But there are a few small tricks that separate the poppers that disappear in five minutes from the ones that sit there getting sad and soggy. I’ve tested this more times than I care to admit, and this version is the one I keep coming back to. Let me show you exactly how to make them.
Why You’ll Love This Recipe
These aren’t your average jalapeño poppers. I’ve eaten my fair share of sad, rubbery versions at parties, and I refused to let that happen in my own kitchen. After testing this recipe across three different tailgates, two family cookouts, and one very competitive Super Bowl party, I can tell you with confidence—this is the one you want.
- Perfect for Tailgating : They hold up well at room temperature, reheat like a dream, and fit right in your hand while you’re standing around a cooler. No plates required.
- Simple Ingredients : You need jalapeños, cream cheese, cheddar, bacon, and a few pantry staples. That’s it. No chasing down obscure grocery items.
- Crowd-Pleaser : I’ve watched self-proclaimed “I don’t like spicy food” people eat four of these in a row. The cheese balances the heat beautifully.
- Unbelievably Crispy : The bacon gets perfectly crunchy without burning, and the filling stays creamy and intact. No sad, soggy bottoms here.
- Make-Ahead Friendly : You can prep them the night before and bake them right before the party starts. Game changer for busy hosts.
What makes these different from every other recipe out there is the par-cooking method for the bacon and the way we handle the jalapeños. Most recipes just wrap raw bacon around raw peppers and hope for the best. That’s how you end up with flabby bacon or overcooked peppers. I’ll show you a better way—one that delivers consistent results every single time.
These poppers are the kind of appetizer that makes people hover around the serving tray. They’re the first thing to run out at every gathering I bring them to. And honestly? That feeling never gets old.
What Ingredients You Will Need
This recipe uses simple, everyday ingredients that come together to create something way more impressive than the sum of their parts. Most of these are probably already in your kitchen, which makes these poppers perfect for last-minute tailgate plans.
For the Poppers
- 12 large jalapeño peppers – Look for peppers that are firm, smooth, and evenly shaped. Avoid any that are soft or have wrinkled skin. Larger peppers are easier to stuff and hold more filling. If you want less heat, look for peppers without many white lines (those are stress marks that indicate more spice).
- 8 ounces cream cheese, softened to room temperature – Full-fat cream cheese gives the richest texture and holds up best during baking. I use Philadelphia because it’s consistently creamy and doesn’t get grainy when mixed.
- 1 cup sharp cheddar cheese, shredded – Sharp cheddar adds way more flavor than mild. Grating it yourself from a block makes a noticeable difference in melt quality and texture. Pre-shredded cheese has anti-caking agents that can make the filling grainy.
- 1/4 cup cooked and crumbled bacon (optional, but highly recommended) – This adds an extra layer of bacon flavor inside the filling. Save yourself some time and cook extra bacon when you’re doing the par-cooking for the wrappers.
- 2 green onions, thinly sliced – They add a mild onion bite and a little freshness that cuts through the richness. Don’t skip these—they make a real difference.
- 1/2 teaspoon garlic powder – Adds savory depth without overwhelming the other flavors. Fresh garlic can be too intense here since it won’t cook long enough to mellow.
- 1/4 teaspoon smoked paprika – This gives the filling a subtle smoky note that complements the bacon beautifully. Regular paprika works too, but smoked is better.
- 1/4 teaspoon salt – Just a pinch to bring everything together. Remember that the bacon and cheese both have salt, so don’t overdo it.
- 1/8 teaspoon black pepper – Freshly ground is always better, but pre-ground works fine in a pinch.
For the Bacon Wrap
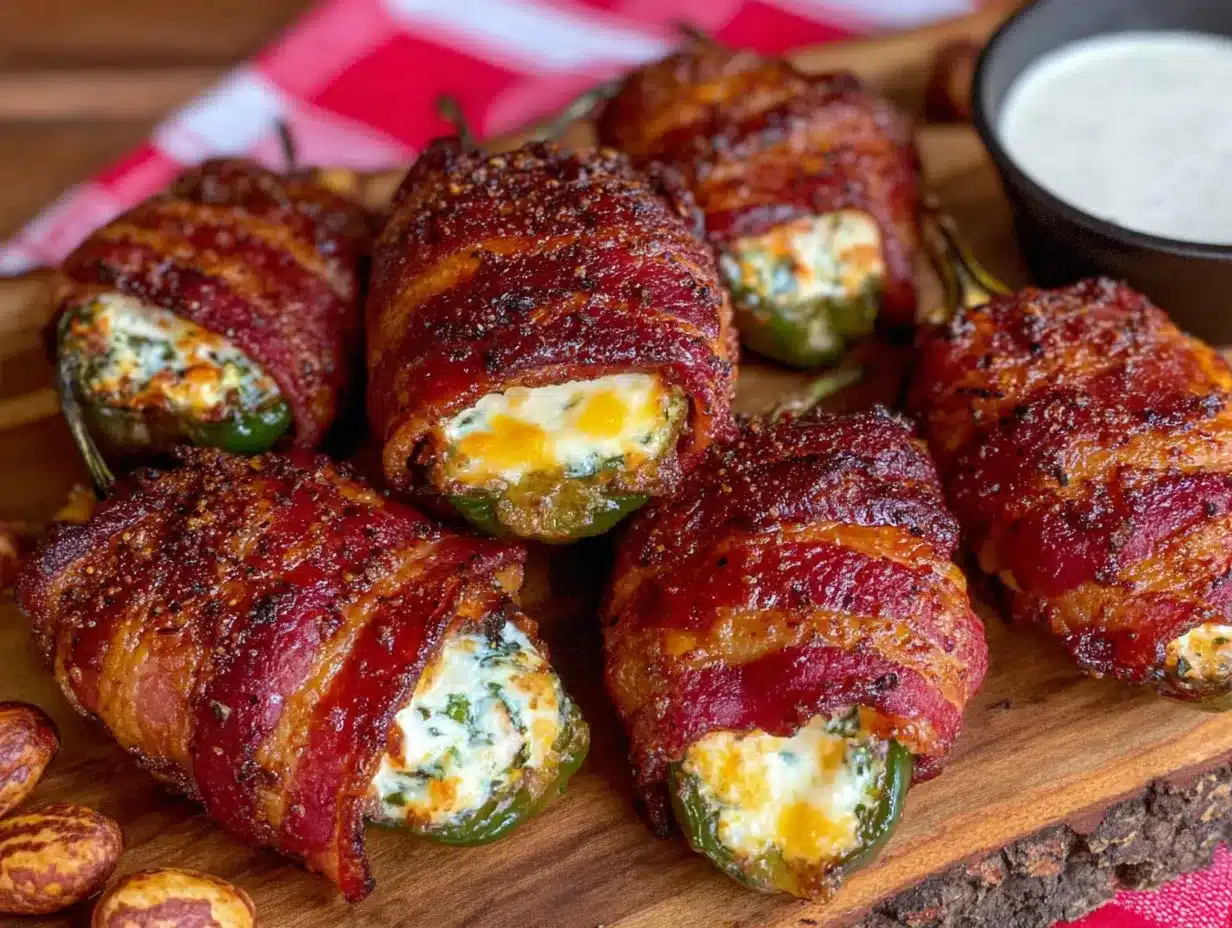
- 12 slices thin-cut bacon – This is important. Thin-cut bacon crisps up faster and wraps more easily around the peppers. Thick-cut bacon takes too long to cook through and can end up chewy while the pepper gets overcooked. I prefer Wright Brand or Oscar Mayer for consistent thickness.
For Serving (Optional)
- Ranch dressing or blue cheese dressing – For dipping. Some people love it, but honestly, these poppers are plenty flavorful on their own. I usually put out a small bowl of ranch for the indecisive folks.
- Fresh cilantro or chives, chopped – A sprinkle on top before serving adds color and freshness.
If you’re looking to switch things up, you can substitute the cheddar with pepper jack cheese for extra heat, or use Neufchâtel cheese for a slightly lower-fat option. For a dairy-free version, try using a plant-based cream cheese alternative—just know the texture will be a little softer.
Equipment Needed
You don’t need much to make these poppers, which is part of why they’re so great for tailgating. Here’s what you’ll want to have on hand:
- Baking sheet – A half-sheet pan works perfectly. Line it with parchment paper or aluminum foil for easier cleanup. I’ve learned the hard way that caramelized cream cheese is a nightmare to scrub off an unlined pan.
- Wire rack – This is the secret to crispy bacon all the way around. Placing the poppers on a wire rack set inside the baking sheet allows heat to circulate underneath so the bacon crisps evenly. No wire rack? You can use a cooling rack that’s oven-safe, or just flip the poppers halfway through baking.
- Small paring knife – For cutting the jalapeños. A sharp knife makes clean cuts and reduces the risk of slipping.
- Small spoon or melon baller – For scooping out the seeds and membranes. A regular teaspoon works fine, but a melon baller is oddly perfect for this job.
- Mixing bowl – For combining the filling ingredients. Any medium-sized bowl will do.
- Rubber spatula – For mixing and stuffing. Helps get every last bit of filling into the peppers.
- Kitchen shears – Great for trimming bacon slices to size if needed. Not essential, but helpful.
- Paper towels – For drying the jalapeños after washing and for patting the bacon dry before wrapping.
If you’re making these for a big crowd and need to double the recipe, two baking sheets with wire racks will save you from overcrowding. Overcrowding leads to steaming instead of crisping, and nobody wants that.
Preparation Method
Let me walk you through this step by step. I’ve made these poppers more times than I can count, and these are the exact steps I follow every time for consistent, crispy results.
Step 1: Prep the Jalapeños
Preheat your oven to 400°F (200°C). Wash the jalapeños thoroughly and pat them completely dry with paper towels. Any moisture on the outside will steam the peppers instead of letting them roast properly. Cut each jalapeño in half lengthwise from stem to tip. Use a small spoon to scrape out all the seeds and white membranes. This is where most of the heat lives, so if you want milder poppers, be extra thorough. If you like more heat, leave a little bit of membrane intact. Wear gloves if you have sensitive skin—I learned this the hard way after touching my eye hours later and regretting every life choice that led to that moment.
Step 2: Par-Cook the Bacon
This is the step that changes everything. Lay the bacon slices on a microwave-safe plate lined with paper towels and cook for 2-3 minutes, or until the bacon is just starting to render fat but is still flexible and pliable. You want it partially cooked but not crispy. Alternatively, you can cook the bacon in a skillet for about 2 minutes per side over medium heat. This step renders out some of the fat so the bacon crisps up beautifully in the oven without making the poppers greasy. Let the bacon cool slightly on a paper towel-lined plate. Save a few slices to crumble into the filling if you’re using the optional bacon bits.
Step 3: Make the Filling
In a medium mixing bowl, combine the softened cream cheese, shredded cheddar, crumbled bacon (if using), sliced green onions, garlic powder, smoked paprika, salt, and pepper. Mix until everything is evenly combined. Taste the filling—yes, raw. You want to make sure the seasoning is right before you stuff the peppers. Adjust salt or spice if needed. The filling should be creamy, flavorful, and slightly tangy from the cream cheese.
Step 4: Stuff the Peppers
Using a small spoon or your fingers (clean hands work great here), fill each jalapeño half with the cream cheese mixture. Don’t overstuff—you want the filling to be level with the cut edge of the pepper, not mounded on top. Overstuffed poppers tend to leak filling during baking, which makes a mess and wastes all that good cheesy goodness. Smooth the filling with the back of the spoon so it looks neat.
Step 5: Wrap with Bacon
Take a partially cooked bacon slice and wrap it around each stuffed jalapeño half. Start at one end and wrap diagonally so the bacon covers the filling and the pepper. The bacon should overlap slightly as you go. Tuck the ends underneath the popper so they stay in place during baking. If your bacon slices are too long, trim them with kitchen shears. The bacon should be snug but not tight enough to squeeze the filling out.
Step 6: Arrange and Bake
Place the wrapped poppers on a wire rack set inside a baking sheet, spacing them about 1 inch apart. This allows hot air to circulate around each popper, ensuring the bacon crisps evenly on all sides. Bake at 400°F (200°C) for 20-25 minutes, or until the bacon is crispy and golden brown and the filling is hot and bubbly. If you want extra-crispy bacon, you can switch the oven to broil for the last 1-2 minutes, but watch them closely—bacon can go from perfect to burnt in seconds.
Step 7: Cool and Serve
Let the poppers cool on the wire rack for 5-10 minutes before serving. This allows the filling to set slightly so you don’t burn your mouth on molten cream cheese. Trust me on this—I’ve made that mistake more than once, and it’s not worth the impatient bite. Serve warm, with ranch or blue cheese dressing on the side if you like. Sprinkle with fresh cilantro or chives for a pop of color.
Cooking Tips & Techniques
After making these poppers for every gathering I’ve hosted in the last two years, I’ve picked up a few tricks that make a real difference. Here are the ones I swear by:
The par-cooking trick is non-negotiable. I learned this after my first batch came out with sad, flabby bacon that tasted more like boiled pork than crispy goodness. By partially cooking the bacon first, you remove excess fat and start the crisping process before the peppers even hit the oven. The result is bacon that’s shatter-crisp without being burnt, and peppers that are tender but not mushy.
Don’t skip the wire rack. I know it’s one more thing to wash, but it makes a huge difference. When poppers sit directly on the baking sheet, the bottoms steam in the rendered bacon fat. The wire rack lifts them up so heat circulates underneath, giving you crispy bacon all the way around. If you don’t have a wire rack, flip the poppers halfway through baking to crisp both sides.
Watch your oven temperature. Every oven runs a little differently. I start checking my poppers at the 18-minute mark because my oven runs hot. If your bacon is browning too quickly but the filling isn’t hot yet, tent the poppers loosely with foil and continue baking until the filling is bubbly.
Let the cream cheese soften naturally. I know the microwave is tempting, but softened cream cheese that’s been microwaved can get grainy and separate when mixed. Take it out of the fridge 30 minutes before you start prepping. If you forgot, cut it into small cubes and let it sit on the counter while you wash the peppers—it’ll soften faster.
One failure I’ll never forget: I once tried to make these with thick-cut bacon because I thought “more bacon = better.” The bacon was still chewy after 30 minutes, and the peppers were practically collapsing from the extended cook time. Thin-cut bacon is the way to go. Don’t be like me.
Multitasking tip: While the bacon is par-cooking, prep the jalapeños and mix the filling. This way everything comes together in about 15 minutes of active prep time.
Variations & Adaptations
One of the best things about this recipe is how easy it is to customize. Here are some variations I’ve tried and loved:
Spicy Sausage Poppers
Add 1/4 cup cooked and crumbled spicy Italian sausage to the cream cheese filling. The fennel and red pepper flakes in the sausage add a whole new layer of flavor that pairs beautifully with the jalapeños. This is my husband’s favorite version.
Smoky Chipotle Poppers
Mix 1-2 teaspoons of minced chipotle peppers in adobo sauce into the cream cheese filling. The smoky heat from the chipotles complements the bacon and adds a deeper, more complex spice. Start with one teaspoon and add more if you like heat. This version is incredible if you’re serving these with a smoky Texas cowboy caviar on the side.
Air Fryer Method
If you don’t want to heat up your whole kitchen, these poppers work beautifully in an air fryer. Preheat the air fryer to 375°F (190°C). Arrange the poppers in a single layer in the basket (you may need to work in batches). Cook for 10-12 minutes, flipping halfway through, until the bacon is crispy and the filling is hot. The air fryer actually makes the bacon even crispier than the oven, in my experience.
Dairy-Free Version
Use a plant-based cream cheese alternative and dairy-free cheddar shreds. The texture will be slightly softer, but the flavor is still fantastic. I’ve used Kite Hill cream cheese and Violife cheddar with good results.
Mild Poppers for the Heat-Averse
If you’re serving these to people who don’t love spicy food, use mini sweet peppers instead of jalapeños. They have the same shape and crunch but zero heat. The bacon and cheese filling is still delicious, and nobody will feel left out.
Serving & Storage Suggestions
These poppers are best served warm, right after the bacon has crisped up and the filling is still molten and gooey. Let them rest for about 5 minutes before serving so nobody burns their tongue—but don’t let them sit too long, because the bacon will start to lose its crunch.
For a full tailgate spread, I love serving these alongside cilantro lime shrimp tacos or a big bowl of BLT pasta salad. The creamy, spicy poppers balance perfectly with something fresh and tangy. A cold beer or a spicy margarita is the ideal drink pairing—the carbonation and citrus cut through the richness of the bacon and cheese.
To store leftovers: Let the poppers cool completely, then transfer them to an airtight container. They’ll keep in the refrigerator for up to 4 days. The bacon will lose some of its crunch during storage, but they’re still delicious reheated.
To reheat: The oven is your best bet for restoring crispiness. Place the poppers on a wire rack set over a baking sheet and reheat at 350°F (175°C) for 8-10 minutes. You can also use an air fryer at 350°F for 4-5 minutes. The microwave will work in a pinch, but the bacon will be soft and chewy—still tasty, but not as good.
To freeze: You can freeze unbaked poppers for up to 3 months. Assemble them completely, then place them on a baking sheet in the freezer until solid. Transfer to a freezer bag or container. Bake from frozen, adding 5-8 minutes to the cooking time. I’ve done this for last-minute parties, and they turn out just as good as fresh.
The flavors actually develop a bit overnight in the fridge, so leftover poppers sometimes taste even better the next day. Not that they usually last that long.
Nutritional Information & Benefits
Let’s be honest—these are tailgate food, not health food. But that doesn’t mean they’re without redeeming qualities. Here’s the approximate nutritional breakdown for one popper (based on 24 poppers from 12 jalapeños):
| Nutrient | Amount per Popper |
|---|---|
| Calories | 120-140 |
| Total Fat | 10-12g |
| Saturated Fat | 5-6g |
| Cholesterol | 30-35mg |
| Sodium | 250-300mg |
| Total Carbohydrates | 2-3g |
| Dietary Fiber | 0.5-1g |
| Sugars | 1-2g |
| Protein | 5-6g |
Jalapeños are actually a good source of vitamin C and capsaicin, which has anti-inflammatory properties. The cream cheese and cheddar provide calcium and protein, while the bacon adds—well, it adds flavor and happiness. These poppers are naturally low in carbohydrates, making them a great option for anyone watching their carb intake. They’re also gluten-free, so your celiac friends can enjoy them without worry.
If you’re looking for a lighter option, you can use reduced-fat cream cheese and turkey bacon. The texture won’t be quite as rich, but the flavor is still solid. Pair them with a big creamy dill cucumber salad for a more balanced meal.
Conclusion
These crispy bacon-wrapped jalapeño poppers have become my go-to for every tailgate, game day party, and summer cookout. They’re the kind of appetizer that makes people forget about the main event—I’ve watched grown adults argue over the last one more times than I can count. The combination of creamy, spicy, salty, and crunchy is just impossible to resist.
What I love most about this recipe is how forgiving it is. You can prep them ahead, adjust the heat level to your crowd, and they always turn out great. The par-cooking trick for the bacon is the kind of small detail that makes a huge difference, and once you try it, you’ll never go back to the old way.
I’d love to hear how these turn out for you. Did you try a variation? Did you serve them at a tailgate that turned into a popper-eating competition? Drop a comment below and let me know. And if you’re looking for more game day inspiration, check out these cheesy chicken quesadilla roll-ups or this smoky red, white, and blue potato salad for a full spread that’ll have everyone asking for the recipes.
Now go make some poppers. Your tailgate crew will thank you.
Frequently Asked Questions
Can I make these poppers ahead of time?
Absolutely. You can assemble the poppers completely up to 24 hours in advance and keep them covered in the refrigerator. When you’re ready to bake, add about 5 minutes to the cooking time since they’ll be starting from cold. You can also freeze them unbaked for up to 3 months.
How do I prevent the bacon from getting soggy?
The par-cooking step is key here. By partially cooking the bacon before wrapping, you remove excess moisture and fat that would otherwise steam the bacon during baking. Using a wire rack also helps by allowing air to circulate underneath the poppers.
Can I use pickled jalapeños instead of fresh?
I don’t recommend it. Pickled jalapeños have a completely different texture and flavor profile—they’re much softer and more vinegary. Fresh jalapeños hold their shape better during baking and provide that essential crunch that makes these poppers so satisfying.
How spicy are these poppers?
That depends entirely on the jalapeños you buy and how thoroughly you remove the seeds and membranes. If you remove all the white membranes and seeds, the heat level is very mild—more of a warm background note than a punch. If you leave some membrane intact, you’ll get more heat. For the spiciest version, use serrano peppers instead of jalapeños.
What’s the best way to reheat leftover poppers?
The oven or air fryer are your best options for restoring crispiness. Reheat at 350°F (175°C) for 8-10 minutes in the oven, or 4-5 minutes in an air fryer. The microwave works but will make the bacon soft. Leftover poppers also taste great cold, straight from the fridge—don’t judge until you try it.
Pin This Recipe!
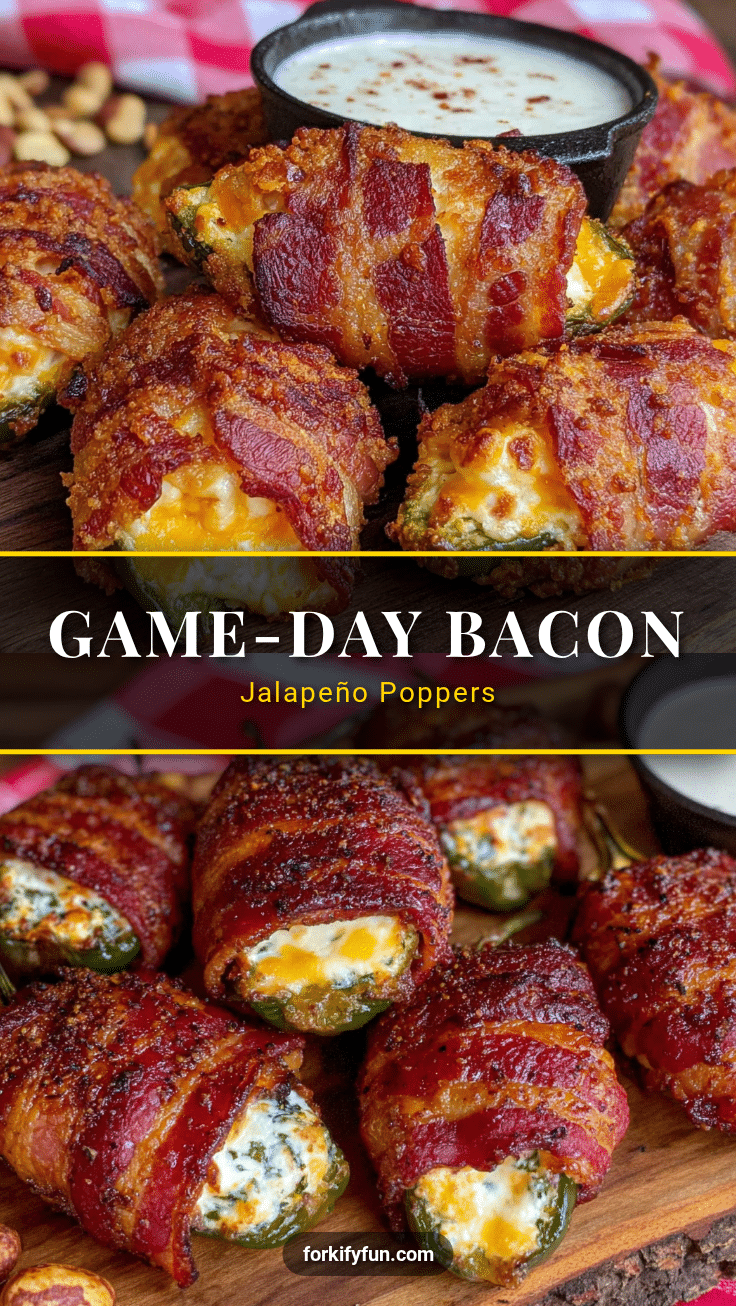
Best Crispy Bacon-Wrapped Jalapeño Poppers Recipe for Tailgating

These crispy bacon-wrapped jalapeño poppers are the ultimate tailgate appetizer, featuring a creamy cheese filling and shatter-crisp bacon. Perfect for game day, they hold up well at room temperature and are a guaranteed crowd-pleaser.
- Prep Time: 15 minutes
- Cook Time: 25 minutes
- Total Time: 40 minutes
- Yield: 24 poppers (12 servings) 1x
- Category: Appetizer
- Cuisine: American
Ingredients
- 12 large jalapeño peppers
- 8 ounces cream cheese, softened to room temperature
- 1 cup sharp cheddar cheese, shredded
- 1/4 cup cooked and crumbled bacon (optional, but highly recommended)
- 2 green onions, thinly sliced
- 1/2 teaspoon garlic powder
- 1/4 teaspoon smoked paprika
- 1/4 teaspoon salt
- 1/8 teaspoon black pepper
- 12 slices thin-cut bacon
- Ranch dressing or blue cheese dressing (for serving, optional)
- Fresh cilantro or chives, chopped (for serving, optional)
Instructions
- Preheat your oven to 400°F (200°C). Wash the jalapeños thoroughly and pat them completely dry with paper towels. Cut each jalapeño in half lengthwise from stem to tip. Use a small spoon to scrape out all the seeds and white membranes.
- Lay the bacon slices on a microwave-safe plate lined with paper towels and cook for 2-3 minutes, or until the bacon is just starting to render fat but is still flexible and pliable. Alternatively, cook the bacon in a skillet for about 2 minutes per side over medium heat. Let the bacon cool slightly on a paper towel-lined plate.
- In a medium mixing bowl, combine the softened cream cheese, shredded cheddar, crumbled bacon (if using), sliced green onions, garlic powder, smoked paprika, salt, and pepper. Mix until everything is evenly combined. Taste the filling and adjust seasoning if needed.
- Using a small spoon or your fingers, fill each jalapeño half with the cream cheese mixture. Don’t overstuff—the filling should be level with the cut edge of the pepper. Smooth the filling with the back of the spoon.
- Take a partially cooked bacon slice and wrap it around each stuffed jalapeño half. Start at one end and wrap diagonally so the bacon covers the filling and the pepper. The bacon should overlap slightly. Tuck the ends underneath the popper.
- Place the wrapped poppers on a wire rack set inside a baking sheet, spacing them about 1 inch apart. Bake at 400°F (200°C) for 20-25 minutes, or until the bacon is crispy and golden brown and the filling is hot and bubbly. For extra-crispy bacon, broil for the last 1-2 minutes, watching closely.
- Let the poppers cool on the wire rack for 5-10 minutes before serving. Serve warm, with ranch or blue cheese dressing on the side if desired. Sprinkle with fresh cilantro or chives for a pop of color.
Notes
The par-cooking step for the bacon is key to achieving crispy results. Using a wire rack allows heat to circulate underneath, preventing soggy bottoms. For milder poppers, remove all seeds and membranes. For extra heat, leave some membrane intact or use serrano peppers. Let cream cheese soften naturally for best texture. Poppers can be assembled up to 24 hours in advance and refrigerated, or frozen unbaked for up to 3 months.
Nutrition
- Serving Size: 2 poppers
- Calories: 260
- Sugar: 3
- Sodium: 550
- Fat: 22
- Saturated Fat: 11
- Carbohydrates: 5
- Fiber: 1
- Protein: 11
Keywords: jalapeño poppers, bacon-wrapped, tailgate appetizer, game day snack, crispy bacon, cream cheese, spicy appetizer, gluten-free, low-carb