My son Leo did not trust thermos mac and cheese. Let me be real with you — he had good reason. The first time I packed it, he came home and said the noodles were mushy and the cheese tasted like nothing. I wanted to prove him wrong, but honestly, I was starting to think thermos pasta was a lost cause. You know how it goes — you see those perfect lunchbox photos online and think, “Yeah right, that’s staged.” Well, turns out it kind of is, unless you know the trick.
I spent a solid month experimenting with different pasta shapes, cheese combinations, and preheating methods. My kitchen looked like a dairy explosion, and my family was sick of mac and cheese by week two. But somewhere around batch number seven, something clicked. The noodles stayed firm, the sauce stayed creamy, and Leo actually finished his lunch. That was the moment I knew I had cracked the code.
This creamy thermos mac and cheese for school lunch is the result of all that trial and error. It is not complicated, and it does not require fancy ingredients. What it does require is a little patience with the prep work and a willingness to trust the process. Once you see your kid come home with an empty thermos, you will understand why I kept going. That quiet satisfaction of knowing they ate well — that is what this recipe is really about.
Why You’ll Love This Recipe
Let me tell you why this recipe stands out from every other mac and cheese you have tried. I tested this thing six different ways before landing on the version that actually works. Here is what makes it special:
- Stays Creamy for Hours — The sauce does not separate or turn into a gluey mess by lunchtime. It stays velvety smooth, even after sitting in a thermos for four hours.
- No Soggy Noodles — I figured out the exact cooking time so the pasta finishes cooking in the thermos without turning to mush. It is al dente at lunch, not overcooked.
- Simple Pantry Ingredients — You probably have everything in your kitchen right now. No weird processed cheese blocks or powdered packets needed.
- Kid-Approved and Parent-Trusted — My picky eater gives this two thumbs up, and I feel good knowing exactly what is in it.
- Budget-Friendly — This costs way less than those store-bought shelf-stable lunch kits, and it tastes a hundred times better.
What makes this different from other thermos recipes is the technique. Most people just dump hot mac and cheese into a thermos and hope for the best. I use a specific preheating method and a slightly undercooked pasta trick that ensures everything comes together perfectly. It is not complicated, but it makes all the difference.
This recipe is the kind that makes you feel like a superhero parent without actually working that hard. You pack it in the morning, send it off, and trust that your kid is getting a warm, homemade lunch. Honestly, that peace of mind is worth more than any fancy kitchen gadget.
What Ingredients You Will Need
This recipe uses simple, everyday ingredients to create a creamy thermos mac and cheese for school lunch that holds up beautifully. No fancy cheese shops required — just good old grocery store staples.
- Elbow macaroni (2 cups, dry) — I recommend Barilla or De Cecco for the best texture. They hold their shape well and do not turn to mush. Avoid the really thin generic brands here.
- Sharp cheddar cheese (2 cups, freshly shredded) — Please shred it yourself. The pre-shredded stuff has anti-caking agents that make the sauce grainy. I learned this the hard way after a particularly sad batch.
- Whole milk (1 cup) — The fat content matters here. Whole milk gives you that rich, creamy sauce that stays smooth in the thermos. Low-fat milk works in a pinch but the texture is noticeably thinner.
- Unsalted butter (2 tablespoons) — Adds richness and helps create that silky roux base.
- All-purpose flour (2 tablespoons) — This thickens the cheese sauce so it coats every noodle perfectly.
- Dijon mustard (1 teaspoon) — Do not skip this. It does not make the mac and cheese taste like mustard. It just brightens the cheese flavor and adds a little tang that kids cannot identify but adults will notice.
- Garlic powder (½ teaspoon) — Adds depth without being overpowering. My kids have no idea it is in there.
- Salt (½ teaspoon, plus more for pasta water) — Season the pasta water generously. That is where most of the flavor happens.
- Black pepper (¼ teaspoon) — Just a touch for balance.
- Optional mix-ins — A handful of frozen peas, some steamed broccoli florets, or diced ham can be stirred in before packing. I do this when I want to sneak in some veggies.
For the best results, use block cheese and shred it yourself. It melts so much smoother, and the sauce stays creamy instead of turning gritty. I keep a block of sharp cheddar in my fridge specifically for this recipe now.
If you need a dairy-free version, full-fat oat milk and a good vegan cheddar shred can work, but the texture will be slightly different. I have tested it, and it is still good — just not quite as luxurious as the original.
Equipment Needed
You do not need a lot of fancy tools for this recipe, but a few key items make the process much smoother.
- Thermos or insulated food jar (10-12 ounce capacity) — This is non-negotiable. A good quality thermos keeps the heat in and the food warm for hours. I use a Stanley or Thermos brand, but any well-insulated container works.
- Medium saucepan (3-quart) — For cooking the pasta and making the cheese sauce.
- Wooden spoon or silicone spatula — For stirring the roux and sauce without scratching your pan.
- Box grater or microplane — For shredding the cheese. I prefer a box grater for block cheese because it gives you nice, even shreds that melt evenly.
- Measuring cups and spoons — Precision matters here, especially with the flour and milk ratios.
- Colander — For draining the pasta.
- Small whisk — Helps smooth out the roux and prevents lumps in the cheese sauce.
If you do not have a thermos yet, I recommend investing in one with a wide mouth for easy eating and cleaning. The narrow ones are hard to fill and even harder to wash. I learned that after scrubbing one for ten minutes with a bottle brush.
Preparation Method
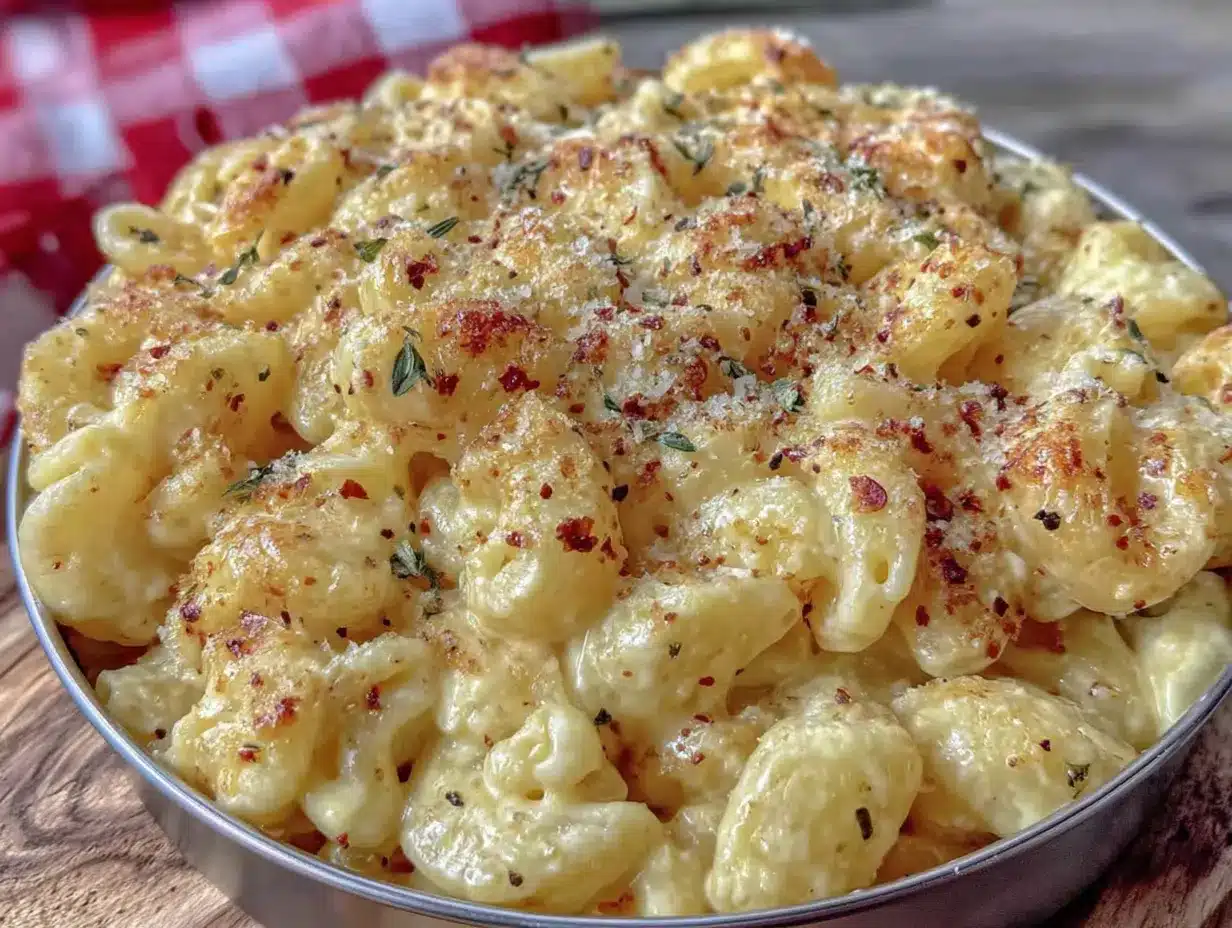
Follow these steps carefully, and you will have a creamy thermos mac and cheese for school lunch that stays perfect until noon.
- Preheat your thermos. Fill it with boiling water, screw the lid on, and let it sit while you cook. This step is critical. A cold thermos will suck the heat right out of your mac and cheese. I set a timer for five minutes to make sure I do not forget.
- Bring a large pot of salted water to a rolling boil. Use about a tablespoon of salt per gallon of water. The water should taste like the sea — that is where your pasta gets its flavor.
- Cook the elbow macaroni for 1-2 minutes less than the package directions. For most brands, that means about 6-7 minutes instead of 8-9. The pasta will finish cooking in the thermos, so you want it slightly underdone. Taste a piece — it should be firm but not crunchy in the center.
- Drain the pasta and rinse it briefly with cool water to stop the cooking process. Do not rinse too long or the noodles will get cold. Just a quick splash and drain.
- In the same saucepan, melt the butter over medium heat. Let it foam up, then stir in the flour. Cook this mixture for about 1-2 minutes, stirring constantly. It should smell nutty and look like wet sand. This is called a roux, and it is the foundation of your creamy sauce.
- Slowly pour in the milk while whisking constantly. Keep whisking until the mixture thickens and starts to bubble, about 2-3 minutes. If you stop whisking, lumps will form, and nobody wants lumpy mac and cheese.
- Reduce the heat to low and add the shredded cheese one handful at a time. Stir until each addition is fully melted before adding the next. This gradual approach prevents the sauce from breaking or turning grainy.
- Stir in the Dijon mustard, garlic powder, salt, and pepper. Taste the sauce and adjust the seasoning if needed. It should be slightly saltier than you think because the pasta will absorb some of the flavor.
- Add the cooked pasta to the sauce and stir until every piece is coated. The sauce will seem a little thin at this point — that is okay. It will thicken as it sits in the thermos.
- Empty the hot water from your thermos and dry the inside quickly with a paper towel. Be careful — it is hot.
- Spoon the mac and cheese directly into the preheated thermos. Fill it all the way to the top to minimize air space, which helps retain heat. Screw the lid on tightly.
- Wrap the thermos in a small kitchen towel for extra insulation if you want, though a good thermos does not need it.
The mac and cheese will stay warm and creamy for at least 4-5 hours. I have tested it at the 6-hour mark, and it was still warm — not piping hot, but definitely not cold. Perfect for a school lunch.
Cooking Tips & Techniques
I messed up this recipe more times than I care to admit, so let me save you the trouble with these hard-earned tips.
Do not skip the thermos preheating step. I thought it was unnecessary the first few times, and my mac and cheese came out lukewarm by lunch. The hot water creates a thermal barrier that keeps your food hot for hours. It takes five minutes and makes all the difference.
Undercook the pasta by a full 2 minutes. This was my biggest breakthrough. When you cook pasta to al dente and then put it in a hot thermos, it keeps cooking. If you start with fully cooked pasta, you end up with mush by lunchtime. Trust me on this one — I have the sad, soggy photos to prove it.
Use freshly shredded cheese. I know it is tempting to buy the bagged shreds. I have been there on a busy morning. But the anti-caking powder in those bags makes your sauce grainy and thick. A block of sharp cheddar and two minutes of grating gives you a silky smooth sauce every time.
Make the sauce slightly thinner than you think it should be. The pasta absorbs liquid as it sits, so a sauce that looks perfect on the stove will be too thick by lunchtime. Aim for a consistency that is just a bit looser than gravy — it will thicken up beautifully in the thermos.
Pack the thermos while everything is still piping hot. Do not let the mac and cheese cool down on the counter while you pack lunches. Work quickly to transfer it from the pot to the thermos. Every degree of heat you lose is heat that cannot be recovered.
Fill the thermos completely. Air is the enemy of heat retention. If you have leftover mac and cheese, save it for a snack and fill the thermos to the brim. Your kid will get a warmer lunch, and you get a little taste test.
Variations & Adaptations
This creamy thermos mac and cheese for school lunch is endlessly adaptable. Here are some of my favorite variations.
Broccoli and Cheddar — Steam some broccoli florets until just tender, chop them small, and stir them into the mac and cheese before packing. My kids eat broccoli this way without complaint. It is magic.
Protein-Packed Version — Add diced cooked chicken, crumbled bacon, or small meatballs to the mix. This turns lunch into a complete meal that keeps kids full through afternoon classes. I do this on days when I know they have a late lunch.
Spicy Adult Version — Stir in a pinch of cayenne pepper or a few dashes of hot sauce along with the seasonings. This is for parents who want to pack their own lunch or older kids who like heat. Start with a little and adjust from there.
Gluten-Free Option — Use gluten-free elbow pasta and a gluten-free all-purpose flour blend for the roux. The texture is slightly different, but my gluten-intolerant friend swears by this version. Just be careful not to overcook the gluten-free pasta — it gets mushy faster.
Veggie-Packed Hidden Version — Puree a cup of steamed cauliflower or butternut squash and stir it into the cheese sauce before adding the pasta. The flavor blends right in, and the veggies add creaminess and nutrients. My kids have never noticed.
I personally love the broccoli version for weekday lunches. It feels like a complete meal without any extra effort, and the broccoli stays bright green and tender after hours in the thermos. Just make sure to chop it small so it mixes evenly with the pasta.
Serving & Storage Suggestions
This mac and cheese is designed to be eaten straight from the thermos, but here is how to make the experience better.
Serving Temperature — The mac and cheese will be warm, not piping hot, after a few hours in the thermos. That is the ideal eating temperature for kids. It is safe, comforting, and ready to eat immediately. No waiting for it to cool down.
What to Pack Alongside — A thermos of mac and cheese pairs beautifully with a side of apple slices, baby carrots, cucumber sticks, or a small fruit cup. For a heartier lunch, add a BLT pasta salad on the side for variety. The contrast of warm creamy pasta and cold crunchy vegetables is a winner with most kids.
Storage Instructions — If you have leftover mac and cheese that did not fit in the thermos, store it in an airtight container in the refrigerator for up to 3 days. Reheat it in a saucepan with a splash of milk to restore the creaminess. The microwave works in a pinch but tends to dry it out.
Freezer Tips — You can freeze the mac and cheese in individual portions for up to 2 months. Thaw it in the refrigerator overnight, then reheat on the stovetop with a little milk. Do not freeze it already packed in the thermos — the texture will suffer.
Flavor Development — Honestly, this mac and cheese tastes even better the next day. The flavors meld together overnight, and the texture stays remarkably good. I sometimes make a double batch on purpose just for leftovers.
Nutritional Information & Benefits
Here is the estimated nutritional breakdown for one serving of this creamy thermos mac and cheese for school lunch (about 1 cup, without mix-ins):
| Nutrient | Amount Per Serving |
|---|---|
| Calories | 380 |
| Protein | 15g |
| Carbohydrates | 42g |
| Fat | 18g |
| Saturated Fat | 10g |
| Calcium | 320mg |
| Iron | 2mg |
This recipe provides a good source of calcium from the cheese and milk, which supports bone health in growing kids. The carbohydrates from the pasta provide steady energy for the school day, while the protein helps keep them full until the final bell.
If you are looking to boost the nutritional profile, mix in some finely chopped broccoli or cauliflower. The cheese sauce masks the vegetable flavor completely, and you get extra fiber and vitamins without any complaints. I have been doing this for months, and my kids have no idea.
This recipe contains dairy and gluten, so it is not suitable for those with allergies to these ingredients. For a dairy-free version, use full-fat oat milk and a good vegan cheddar shred. The texture will be slightly different but still delicious.
Conclusion
This creamy thermos mac and cheese for school lunch is the recipe I wish I had when my son started kindergarten. It took me way too many failed batches to figure out the right technique, but now I can pack a warm, homemade lunch in under 20 minutes without breaking a sweat. The look on Leo’s face when he comes home with an empty thermos is worth every bit of trial and error.
I encourage you to make this recipe your own. Add your kid’s favorite mix-ins, adjust the cheese blend to your taste, or double the batch so you have leftovers for yourself. The beauty of this recipe is that it is forgiving once you understand the basic principles — preheat the thermos, undercook the pasta, and use freshly shredded cheese.
If you try this recipe, I would love to hear how it went. Drop a comment below and let me know what your kids thought, or share your own twist on the classic. And if you are looking for more lunchbox inspiration, check out our easy cheesy chicken quesadilla roll-ups or the healthy thermos-friendly mac and cheese with hidden veggies for another option. Happy packing, and may your thermoses always come home empty.
Frequently Asked Questions
Can I use any type of pasta for thermos mac and cheese?
Elbow macaroni works best because it is small and cooks evenly, but you can use any small pasta shape like shells, rotini, or ditalini. Avoid large shapes like penne or rigatoni because they do not heat through evenly in the thermos.
How long will the mac and cheese stay warm in a thermos?
A good quality thermos will keep the mac and cheese warm for 4-5 hours. I have tested it at the 6-hour mark, and it was still warm — not piping hot, but definitely not cold. Preheating the thermos with boiling water is the key to maximum heat retention.
Can I make this recipe ahead of time and reheat it in the morning?
Yes, you can make the mac and cheese the night before and store it in the refrigerator. In the morning, reheat it on the stovetop with a splash of milk until it is piping hot, then pack it into a preheated thermos. The texture is slightly better when made fresh, but this method works in a pinch.
Why did my mac and cheese turn out dry in the thermos?
This usually happens when the sauce was too thick before packing, or the pasta was overcooked and absorbed too much liquid. Make the sauce slightly thinner than you think it should be, and undercook the pasta by 1-2 minutes. The thermos environment continues to cook the pasta and thicken the sauce.
Can I add vegetables to the thermos mac and cheese?
Absolutely! Finely chopped steamed broccoli, peas, or diced carrots work beautifully. Stir them into the mac and cheese before packing. The heat from the thermos will keep them warm without overcooking them. Just make sure the vegetables are cooked to your liking before adding them.
Pin This Recipe!
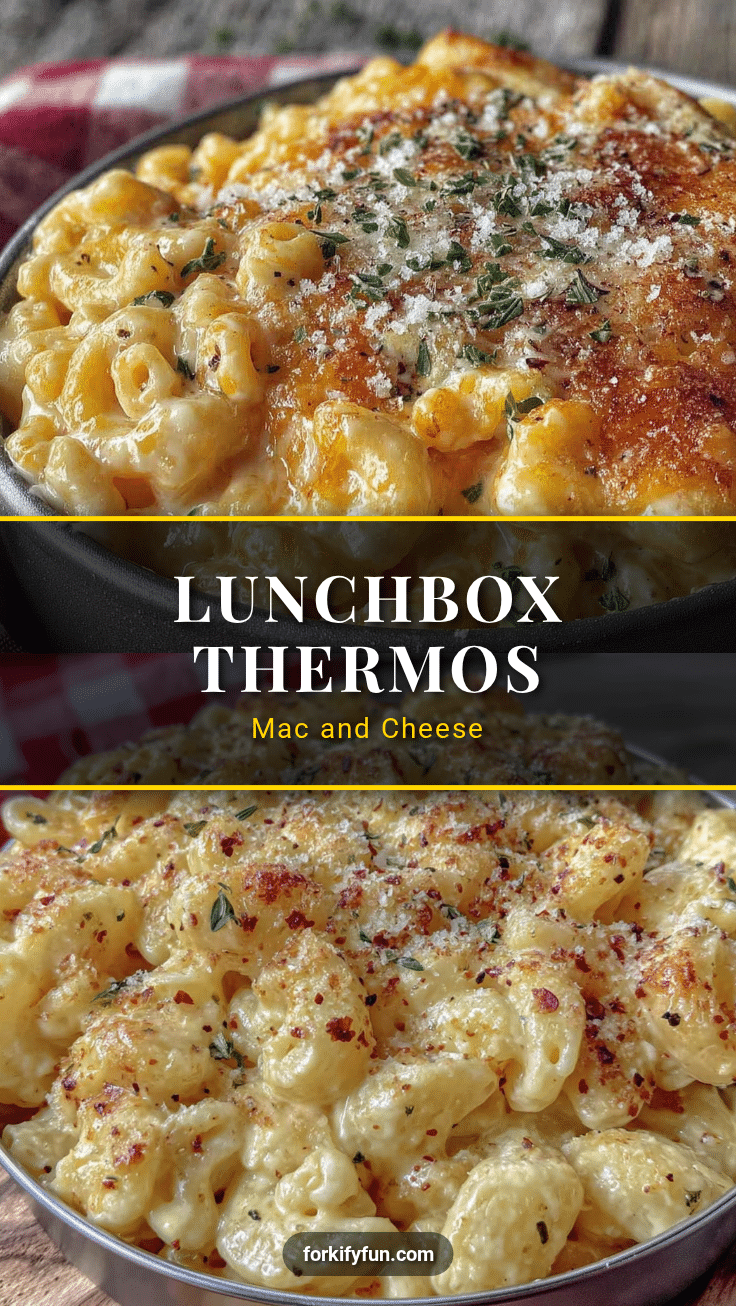
Easy Thermos Creamy Mac and Cheese for School Lunch

This creamy thermos mac and cheese stays warm and velvety for hours, with no soggy noodles or grainy sauce. Perfect for school lunches, it uses simple pantry ingredients and a foolproof technique that keeps kids coming home with an empty thermos.
- Prep Time: 10 minutes
- Cook Time: 15 minutes
- Total Time: 25 minutes
- Yield: 4 servings 1x
- Category: Main Course
- Cuisine: American
Ingredients
- 2 cups dry elbow macaroni (Barilla or De Cecco recommended)
- 2 cups freshly shredded sharp cheddar cheese
- 1 cup whole milk
- 2 tablespoons unsalted butter
- 2 tablespoons all-purpose flour
- 1 teaspoon Dijon mustard
- ½ teaspoon garlic powder
- ½ teaspoon salt (plus more for pasta water)
- ¼ teaspoon black pepper
- Optional mix-ins: frozen peas, steamed broccoli florets, or diced ham
Instructions
- Preheat your thermos: Fill it with boiling water, screw the lid on, and let it sit while you cook.
- Bring a large pot of salted water to a rolling boil (about 1 tablespoon salt per gallon).
- Cook the elbow macaroni for 1-2 minutes less than package directions (about 6-7 minutes). It should be firm but not crunchy.
- Drain the pasta and rinse briefly with cool water to stop cooking. Do not rinse too long.
- In the same saucepan, melt the butter over medium heat. Stir in the flour and cook for 1-2 minutes, stirring constantly, until the mixture smells nutty.
- Slowly pour in the milk while whisking constantly. Continue whisking until the mixture thickens and bubbles, about 2-3 minutes.
- Reduce heat to low and add the shredded cheese one handful at a time, stirring until each addition is fully melted.
- Stir in the Dijon mustard, garlic powder, salt, and pepper. Taste and adjust seasoning.
- Add the cooked pasta to the sauce and stir until every piece is coated. The sauce will seem a little thin.
- Empty the hot water from the thermos and dry the inside quickly with a paper towel.
- Spoon the mac and cheese directly into the preheated thermos, filling it to the top to minimize air space. Screw the lid on tightly.
- Optional: Wrap the thermos in a small kitchen towel for extra insulation.
Notes
Do not skip preheating the thermos with boiling water—it’s critical for heat retention. Undercook the pasta by a full 2 minutes to prevent mushiness. Use freshly shredded cheese for a smooth sauce. Make the sauce slightly thinner than you think; it will thicken in the thermos. Pack the thermos while everything is piping hot and fill it completely to minimize air space.
Nutrition
- Serving Size: 1 cup
- Calories: 380
- Sugar: 4
- Sodium: 480
- Fat: 18
- Saturated Fat: 10
- Carbohydrates: 42
- Fiber: 2
- Protein: 15
Keywords: thermos mac and cheese, school lunch, creamy mac and cheese, thermos pasta, kid-friendly lunch, homemade mac and cheese


