Introduction
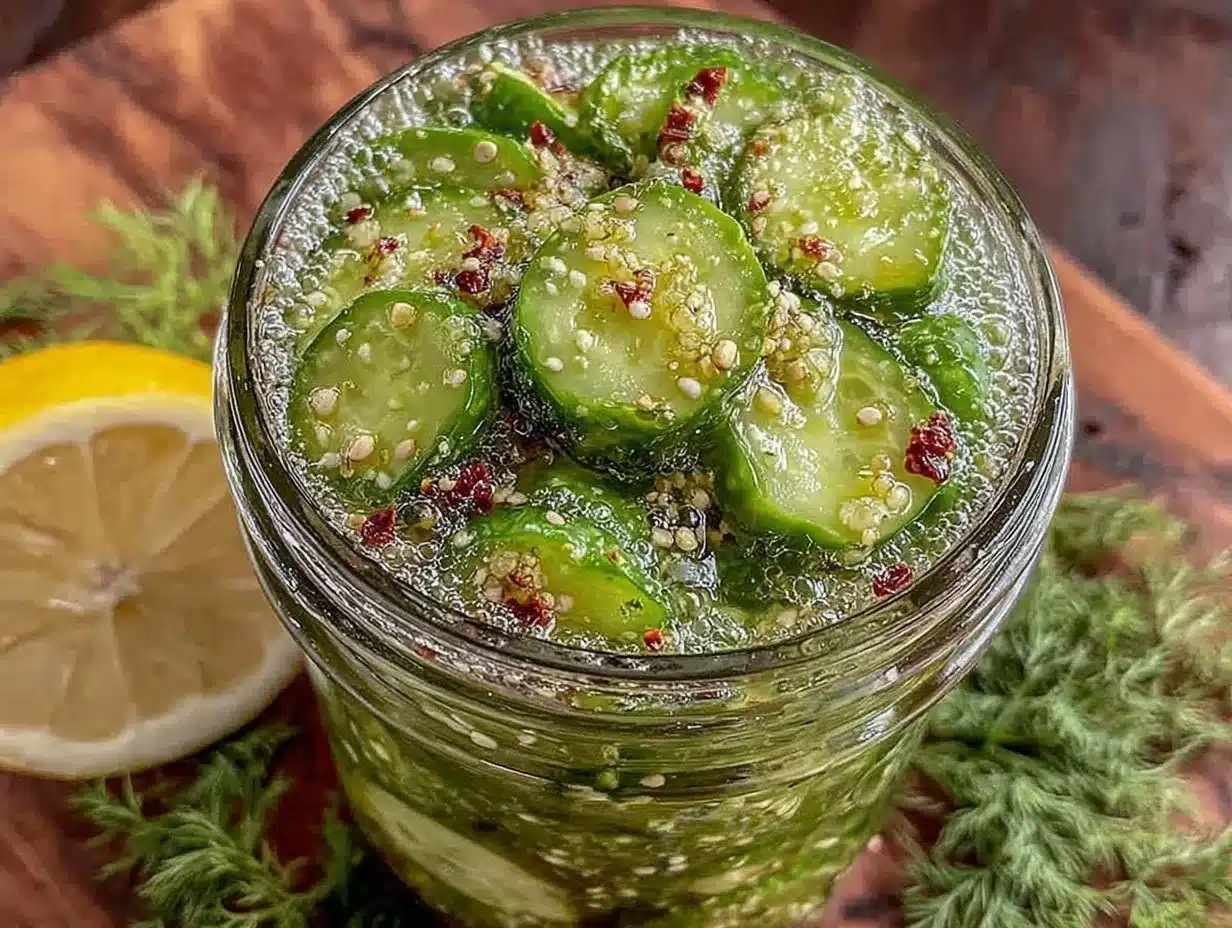
I figured making pickles would be a drawn-out ordeal involving jars, boiling water, and a whole lot of waiting. Honestly, it took about 24 hours for that notion to fall apart completely. The first time I made these easy quick refrigerator dill pickles, I tossed sliced cucumbers into a simple brine, shoved the container in the fridge, and forgot about the whole canning drama. Within a day, I was crunching into bright, tangy pickles that tasted like they’d simmered in a jar for weeks. The smell of dill and garlic mingling with vinegar hit my nose in the best way, and the crispness was just spot-on. No hot water baths, no sterilizing jars—just quick, fresh pickles that somehow felt homemade yet effortless.
What surprised me most was how approachable the recipe was. I’m the type who learns by doing, not by reading endless how-tos, so this method fit me perfectly. It made me realize that you don’t need fancy equipment or a pantry full of pickling spices to pull off classic dill pickles. This recipe stuck with me because it’s straightforward enough for beginners but delivers a flavor punch that even pickle aficionados appreciate. There’s a quiet satisfaction in knowing you can whip up a batch whenever you want, no pressure, no fuss. That’s why these refrigerator dill pickles have become my go-to snack and a secret weapon at potlucks.
Why You’ll Love This Recipe
Making pickles in your fridge might sound too simple to be tasty, but trust me, these easy quick refrigerator dill pickles are the real deal. Here’s why this recipe works so well:
- Quick & Easy: Ready to eat in as little as 24 hours, perfect for last-minute cravings or when you want fresh pickles without the wait.
- Simple Ingredients: No obscure spices or specialty stores needed—just cucumbers, fresh dill, garlic, vinegar, and a couple of pantry staples.
- Perfect for Beginners: No canning skills required. If you’ve ever been intimidated by traditional pickle-making, this recipe is your new best friend.
- Crowd-Pleaser: Crunchy, tangy, and packed with flavor, these pickles always disappear fast at gatherings, whether it’s a barbecue or a snack table.
- Customizable Flavor: You can tweak the brine to be more garlicky, spicier, or even add a touch of sweetness depending on your mood.
This isn’t just another dill pickle recipe. I’ve tested various vinegar blends and seasoning combos, and this version nails the balance between tartness and herbaceous notes. The secret? Fresh dill sprigs and a pinch of mustard seeds that add subtle depth without overpowering the cucumbers. Plus, because they’re stored in the fridge, the pickles keep their crisp snap rather than going mushy. Honestly, these pickles are the kind that make you close your eyes and savor that satisfying crunch and tang after the first bite. They’ve become my go-to for adding a quick punch of flavor to sandwiches, salads, or even a simple snack on the side.
What Ingredients You Will Need
This recipe uses simple, wholesome ingredients to deliver bold flavor and satisfying crunch without the fuss. Most of these are pantry staples or fresh produce you can grab easily from any market. Here’s what you’ll need:
- For the Pickles:
- Fresh cucumbers (Kirby or pickling cucumbers are ideal, about 4-5 medium cucumbers, roughly 1.5 pounds / 700 grams)
- Fresh dill sprigs (about 4-5 sprigs, packed with flavor)
- Garlic cloves, peeled and smashed (3-4 cloves for that punch of garlic)
- For the Brine:
- White vinegar (1 cup / 240 ml) – I prefer Heinz for a clean, sharp tang
- Water (1 cup / 240 ml)
- Granulated sugar (1 tablespoon) – balances the acidity nicely
- Kosher salt (1 tablespoon) – Diamond Crystal is my go-to for consistent flavor
- Mustard seeds (1 teaspoon) – adds subtle warmth and complexity
- Black peppercorns (1 teaspoon) – whole, for a mild peppery note
- Red pepper flakes (optional, ½ teaspoon) – for a little kick if you like heat
Feel free to swap white vinegar with apple cider vinegar if you want a fruitier twist. For a gluten-free option, all ingredients here are naturally gluten-free. If fresh dill isn’t available, dill seeds can work, but fresh sprigs give a brighter, more pungent flavor. And if you don’t have mustard seeds, a pinch of dry mustard powder will do in a pinch, though the texture will be different. The cucumbers should be firm and fresh—avoid any that are soft or have lots of blemishes to keep your pickles crisp.
Equipment Needed
Making these refrigerator dill pickles doesn’t require specialized gear, which is part of what makes this recipe so accessible.
- A large, sharp knife for slicing cucumbers evenly (I like a serrated knife for grip and clean cuts).
- A cutting board to keep things tidy.
- A large mixing bowl or container to toss the cucumbers with salt (this helps draw out excess moisture for crisper pickles).
- Glass jars or airtight containers (1-quart / 1-liter size works well). Mason jars are perfect but any sealable container safe for acidic foods will do.
- A measuring cup and spoons for precise brine measurements.
- Optional: a small saucepan to warm the brine ingredients just so the sugar and salt dissolve fully (though you can stir by hand in a jar if you prefer).
If you don’t have mason jars, I’ve used BPA-free plastic containers before with good results—just make sure they seal tightly to keep flavors fresh. Also, a funnel can help pour the brine into jars without spills, but it’s not essential. Keeping your knives sharp is a small but important detail; it makes slicing cucumbers faster and cleaner, which helps the pickles stay crisp.
Preparation Method
- Slice the cucumbers: Wash the cucumbers well, then slice them into ¼-inch (6 mm) thick rounds or spears, depending on your preference. If using spears, cut each cucumber lengthwise into quarters.
- Salt the cucumbers: Place the sliced cucumbers in a large bowl and sprinkle with about 1 teaspoon of kosher salt. Toss gently to coat evenly. Let them sit for 30 minutes to draw out excess water. This step is key for crunchy pickles.
- Prepare the brine: In a small saucepan, combine the white vinegar, water, sugar, and kosher salt. Warm over medium heat, stirring occasionally until the sugar and salt dissolve completely. Remove from heat and let cool to room temperature.
- Pack the jars: Rinse the cucumbers lightly to remove excess salt and drain well. Layer the cucumbers, dill sprigs, garlic cloves, mustard seeds, black peppercorns, and red pepper flakes (if using) in your clean jars.
- Pour the brine: Carefully pour the cooled brine over the cucumbers, filling the jars completely so the cucumbers are fully submerged. Leave about ½ inch (1.3 cm) of headspace at the top.
- Seal and refrigerate: Close the jars with tight-fitting lids and place them in the refrigerator. Let the pickles marinate for at least 24 hours before tasting. They’ll develop more flavor if left for 2-3 days.
- Enjoy: Once ready, these pickles keep well in the fridge for up to 2 weeks. Always use clean utensils to remove pickles to avoid contamination.
Pro tip: If you’re in a hurry, you can slice cucumbers thinner to speed up the pickling process, but be careful not to slice too thin as they might get soggy faster. The smell of fresh dill and garlic in the fridge as these pickle is magical—honestly, it’s the kind of thing that makes you want to open the jar every hour. If you notice any cloudy brine or off smells, toss the batch—freshness is key here.
Cooking Tips & Techniques
Here are some practical tips I’ve learned from trial and error that make this recipe foolproof:
- Always use fresh cucumbers: Older cucumbers tend to be watery and less crisp, which can lead to soggy pickles.
- Salt the cucumbers first: This little step really helps keep the texture crisp by pulling out excess moisture, which is a trick I wish I’d known sooner.
- Don’t skip cooling the brine: Pouring hot brine over the cucumbers can cook them slightly and ruin that fresh crunch.
- Pack jars tightly: This ensures even flavor distribution and prevents cucumbers from floating above the brine.
- Use clean utensils: To keep pickles fresh longer, always use a fork or tongs instead of your fingers when grabbing pickles from the jar.
- Adjust to taste: If you like your pickles more garlicky or spicy, add extra cloves or red pepper flakes. I’ve found that a little goes a long way here.
- Multitask your fridge space: These pickles don’t take up much room, so you can keep them alongside other fridge staples—perfect when making meals like my creamy loaded potato salad for a picnic or barbecue.
Variations & Adaptations
While this recipe nails classic dill pickles, I like to switch things up depending on mood and what’s in the pantry:
- Spicy Dill Pickles: Add extra red pepper flakes or a few sliced jalapeño peppers for a fiery kick.
- Garlic Lovers’ Pickles: Double or triple the garlic cloves for a bold, savory punch.
- Sweet & Sour Pickles: Increase the sugar to 2 tablespoons and add a cinnamon stick or a couple of cloves for a sweet twist.
- Herb-Infused Pickles: Try adding fresh thyme, rosemary, or even a bay leaf for a different herbal profile.
- Low Sodium Version: Reduce the salt in the brine by half, but keep the salting step for cucumbers to preserve crunch.
For a different texture, I once tried slicing cucumbers into thin ribbons with a vegetable peeler—it was fun but a little messier to eat. Also, if you want to experiment with fermentation, you can leave the jars out for a day or two before refrigerating, but that’s a different ballgame from this quick version.
Serving & Storage Suggestions
These easy quick refrigerator dill pickles are best served cold straight from the fridge. They pair wonderfully with sandwiches, burgers, or even as a tangy side to roasted meats. I often slice them up to add a punch of flavor to salads or plate them alongside cheese and crackers for a snack platter.
Store the pickles in the refrigerator where they’ll keep fresh for up to 2 weeks. Over time, the flavors will deepen, and the pickles become even more savory. Just remember to keep the cucumbers submerged in brine and use clean utensils to avoid spoilage.
If you want to re-crisp the pickles after a few days, briefly soak them in ice water before serving. For a no-fuss appetizer, these pickles go hand-in-hand with creamy deviled eggs—try pairing them with my creamy deviled eggs recipe for a crowd-pleasing combo.
Nutritional Information & Benefits
One serving (about 3 medium slices) of these refrigerator dill pickles contains approximately:
| Calories | 10 |
|---|---|
| Carbohydrates | 2 g |
| Protein | 0.3 g |
| Fat | 0 g |
| Sodium | 400 mg (varies by brine amount) |
These pickles are low in calories and fat while providing a small boost of vitamins from fresh cucumbers and antioxidants from dill. The vinegar may aid digestion and support blood sugar regulation. Keep in mind they are relatively high in sodium, so they’re best enjoyed in moderation if you’re watching salt intake. Overall, they’re a guilt-free snack that adds brightness and crunch to any meal.
Conclusion
Easy quick refrigerator dill pickles have become a staple in my kitchen because they bring fresh, crisp pickles to the table without drama or complicated steps. Whether you’re a newbie in the kitchen or someone who just wants good pickles fast, this recipe hits the mark every time. I love how flexible it is—you can adjust the flavors, the spice level, or the texture to suit your taste.
Try making a batch and see how they fit into your meals and snacks. You might even find yourself reaching for them as often as I do, whether to add zing to a sandwich or as a tasty nibble while prepping dinner. And if you get inspired to pair these pickles with other homemade favorites, my crispy star-shaped cinnamon sugar donuts or the fresh patriotic yogurt parfaits offer a sweet contrast that’s hard to beat. Drop a comment below with your own pickle twists—I’m always curious about how others make this recipe their own.
Here’s to crunchy, tangy pickles made your way—no canning jars or stress required.
FAQs
How long do refrigerator dill pickles last?
They typically keep well in the fridge for up to 2 weeks when stored in a sealed container and kept submerged in brine.
Can I use regular cucumbers instead of pickling cucumbers?
While pickling cucumbers are best for crispness, you can use regular cucumbers. Just be aware they might be a bit less crunchy and more watery.
Do I need to peel the cucumbers before pickling?
Peeling is optional. The skins add extra crunch and nutrients, but if they’re waxed or tough, peeling might improve texture.
Can I make these pickles without vinegar?
Vinegar is essential for quick refrigerator pickles to develop that tangy flavor and preserve the cucumbers. Without it, you’d be making fermented pickles, which require a different process.
How can I make my pickles spicier?
Add more red pepper flakes, sliced jalapeños, or even a dash of hot sauce to the brine before refrigerating for an extra spicy kick.
Pin This Recipe!
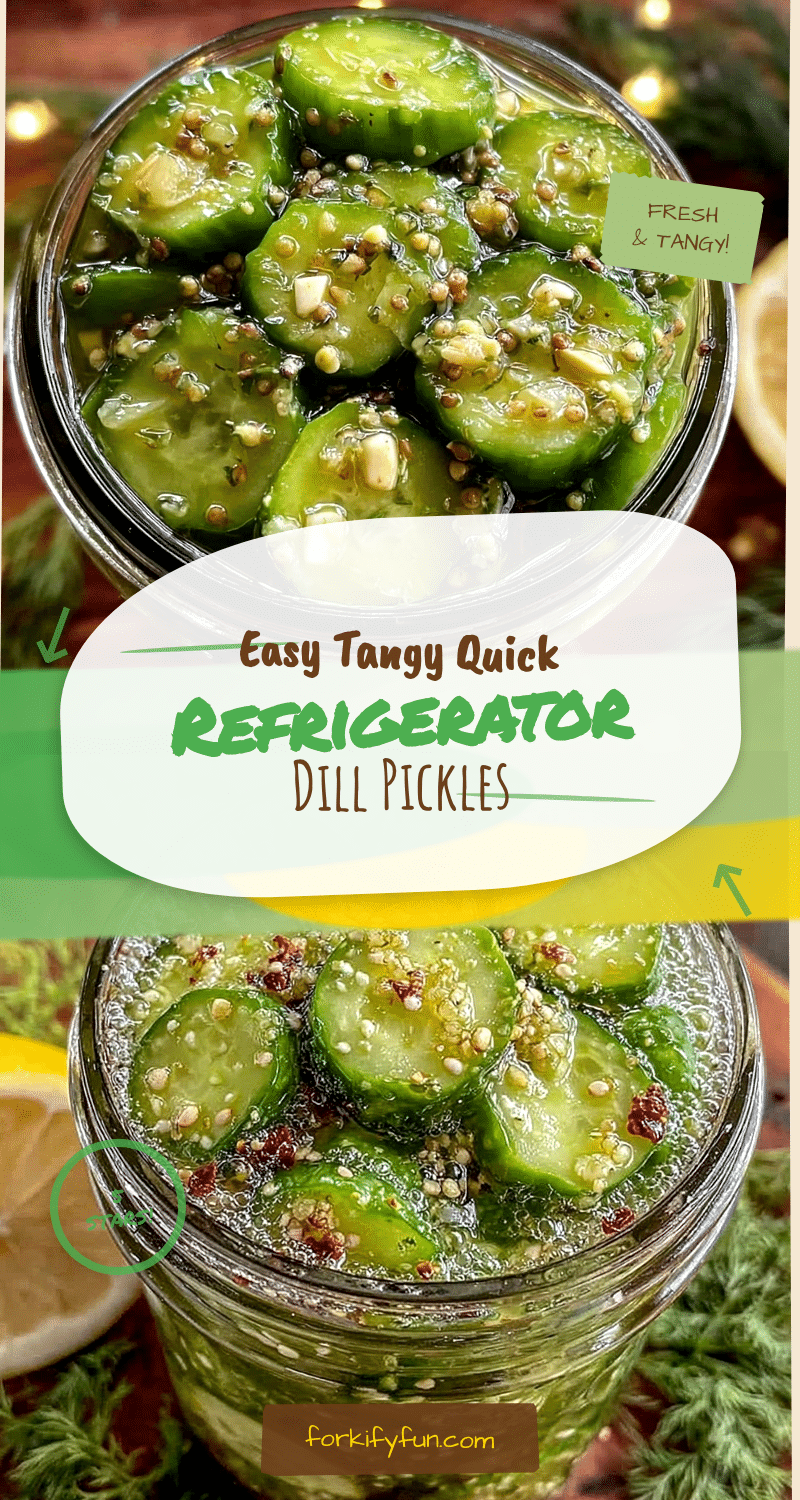
Easy Quick Refrigerator Dill Pickles Recipe Perfect for No Canning Beginners
This recipe offers a quick and easy way to make crunchy, tangy dill pickles in your refrigerator without any canning. Ready to eat in as little as 24 hours, it’s perfect for beginners and uses simple ingredients.
- Prep Time: 10 minutes
- Cook Time: 10 minutes
- Total Time: 24 hours 20 minutes
- Yield: 4-5 cups of pickles (about 4-5 servings) 1x
- Category: Condiment / Snack
- Cuisine: American
Ingredients
- 4–5 medium fresh cucumbers (Kirby or pickling cucumbers), about 1.5 pounds / 700 grams
- 4–5 fresh dill sprigs
- 3–4 garlic cloves, peeled and smashed
- 1 cup white vinegar (240 ml)
- 1 cup water (240 ml)
- 1 tablespoon granulated sugar
- 1 tablespoon kosher salt
- 1 teaspoon mustard seeds
- 1 teaspoon whole black peppercorns
- ½ teaspoon red pepper flakes (optional)
Instructions
- Wash the cucumbers well, then slice into ¼-inch (6 mm) thick rounds or spears (cut lengthwise into quarters if using spears).
- Place sliced cucumbers in a large bowl and sprinkle with about 1 teaspoon kosher salt. Toss gently to coat evenly and let sit for 30 minutes to draw out excess water.
- In a small saucepan, combine white vinegar, water, sugar, and kosher salt. Warm over medium heat, stirring occasionally until sugar and salt dissolve. Remove from heat and cool to room temperature.
- Rinse cucumbers lightly to remove excess salt and drain well.
- Layer cucumbers, dill sprigs, garlic cloves, mustard seeds, black peppercorns, and red pepper flakes (if using) in clean glass jars or airtight containers.
- Pour cooled brine over cucumbers, filling jars completely so cucumbers are fully submerged, leaving about ½ inch (1.3 cm) headspace.
- Seal jars tightly and refrigerate for at least 24 hours before tasting. For best flavor, let marinate 2-3 days.
- Enjoy chilled. Pickles keep well in the fridge for up to 2 weeks. Use clean utensils to remove pickles to avoid contamination.
Notes
Use fresh, firm cucumbers for best crunch. Salting cucumbers before pickling draws out excess moisture for crispness. Cool the brine before pouring to avoid cooking cucumbers. Store pickles submerged in brine and use clean utensils to prevent spoilage. Pickles keep up to 2 weeks refrigerated. Adjust garlic and red pepper flakes to taste for spiciness. For re-crisping, soak pickles briefly in ice water before serving.
Nutrition
- Serving Size: About 3 medium slice
- Calories: 10
- Sodium: 400
- Carbohydrates: 2
- Protein: 0.3
Keywords: quick pickles, refrigerator pickles, dill pickles, easy pickles, no canning pickles, beginner pickle recipe, crunchy pickles


