My phone buzzed while I was mid-chaos in the kitchen — surprise barbecue at the last minute, and honestly, the fridge looked like a ghost town. No chips, no dips, just a lonely bag of sugar cookies from the freezer and a jar of royal icing left from some forgotten baking project. The patriotic picnic mood was already in full swing outside, but I had absolutely zero festive treats ready to go.
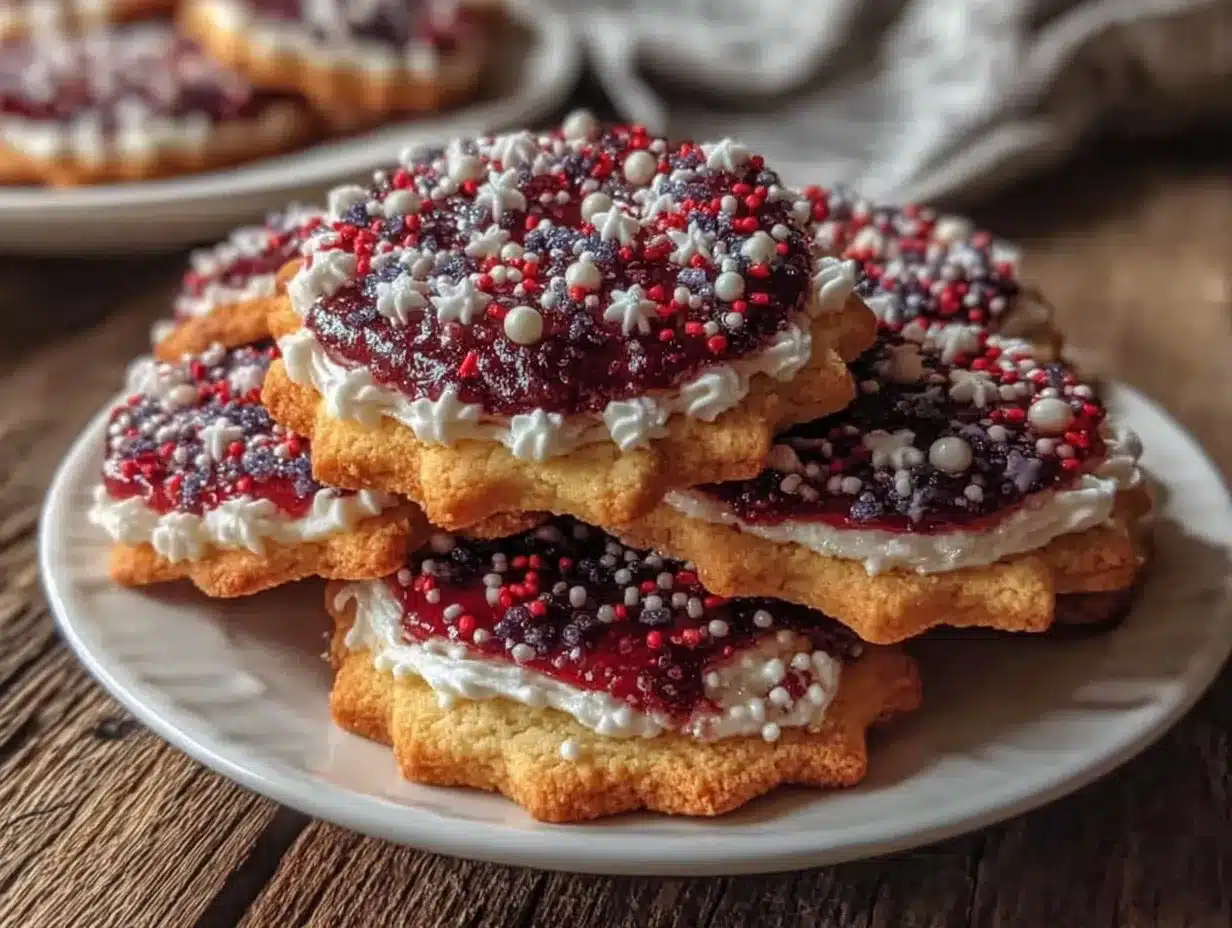
So, I grabbed those frozen sugar cookies, whipped up a quick batch of red, white, and blue royal icing from pantry staples, and started decorating on the fly. The kitchen smelled like vanilla and sugar as I squeezed on the icing, racing the setting sun. The beauty? Those cookies turned out to be the star of the party, bright and cheerful (and honestly, a little messy) — the perfect sweet to match the fireworks later that night.
Since then, this recipe has stuck around whenever I need something festive, fast, and fun with a nostalgic twist. It’s become my go-to because it’s not just about looks — the cookies are tender, buttery, and melt in your mouth, while the royal icing adds that crisp, glossy finish that feels so classic. Plus, it’s a treat that brings a little bit of joy and pride, no matter how thrown-together the day might have started.
That unexpected moment taught me how easy it is to turn simple ingredients into something special. These Perfect Red, White & Blue Sugar Cookies with Royal Icing aren’t just a recipe — they’re a small reminder that sometimes the best celebrations come from what’s right in front of you.
Why You’ll Love This Recipe
This recipe has been tested through many spontaneous gatherings and planned celebrations alike. What makes it truly stand out is how approachable and rewarding it is, no matter your baking skills.
- Quick & Easy: Comes together in under 45 minutes — perfect for last-minute holiday get-togethers or impromptu dessert cravings.
- Simple Ingredients: Uses pantry staples and a few basic baking supplies, so you won’t have to dash to the store.
- Perfect for Patriotic Occasions: Whether it’s Independence Day, Memorial Day, or any red, white, and blue themed party, these cookies fit right in.
- Crowd-Pleaser: Kids love decorating these, and adults can’t get enough of the buttery cookie paired with sweet, glossy royal icing.
- Unbelievably Delicious: The cookie texture is tender yet sturdy enough to hold the icing, making every bite a balanced mix of soft and crisp.
- Unique Icing Technique: The royal icing recipe here dries perfectly smooth with a slight sheen, thanks to a secret addition of cornstarch that I’ve tried after a few failed batches. This keeps the icing from cracking and makes decorating a breeze.
This isn’t just another sugar cookie recipe with red and blue sprinkles. It’s got personality and a little bit of history baked into every bite — and I think that’s why it keeps coming back to my table, year after year. If you’ve ever wondered how to get that flawless look on festive cookies without stress, this is definitely your recipe.
What Ingredients You Will Need
This recipe calls for straightforward ingredients that come together to create a cookie that’s both tender and flavorful, with a royal icing that’s smooth and glossy. Most of these are pantry staples, so you can whip this up anytime.
- For the Sugar Cookies:
- All-purpose flour, 2 ¾ cups (345 g) — sifted for a light texture
- Baking powder, 1 teaspoon — for just a touch of lift
- Salt, ½ teaspoon — balances sweetness
- Unsalted butter, 1 cup (226 g), softened — I like using Plugrá for its creaminess
- Granulated sugar, 1 ½ cups (300 g) — adds that classic sweetness
- Large egg, 1, room temperature — binds everything together
- Vanilla extract, 1 teaspoon — pure, not imitation, for best flavor
- Milk, 2 tablespoons (30 ml) — just enough to keep dough soft but not sticky
- For the Royal Icing:
- Powdered sugar, 4 cups (480 g), sifted — to avoid lumps
- Egg whites or pasteurized meringue powder, 3 tablespoons — I prefer meringue powder for safety and convenience
- Fresh lemon juice, 1 tablespoon — adds brightness and helps with setting
- Vanilla extract, 1 teaspoon — or almond extract for a subtle twist
- Cornstarch, 1 teaspoon — my secret to a smooth, crack-free finish
- Gel food coloring in red and blue — I recommend AmeriColor gels for vibrant colors that don’t thin out the icing
Optional: If you want to add some sparkle, grab edible glitter or pearl dust. For seasonal swaps, fresh blueberries can be used as decoration for a fresh take. If you’re gluten-free, try swapping the all-purpose flour with a 1-to-1 gluten-free baking blend — just watch the dough consistency.
Equipment Needed
These cookies require some basic baking tools that you probably already have, but a few specialty items make decorating a lot easier and more fun.
- Mixing bowls (large and medium)
- Electric mixer or stand mixer — this speeds up creaming the butter and sugar really well
- Measuring cups and spoons — precise measurements keep your dough consistent
- Rolling pin — a smooth, lightweight one helps you roll dough evenly
- Cookie cutters in stars and circles — classic shapes for the red, white, and blue theme
- Baking sheets lined with parchment paper or silicone mats — prevents sticking and helps even baking
- Cooling racks — to cool cookies before decorating
- Piping bags and small round tips (sizes #1 or #2) — for neat royal icing work
- Small bowls or cups for mixing colored icing
If you don’t have piping bags, no worries — plastic sandwich bags with a tiny corner snipped off work just fine in a pinch. I’ve also found that silicone baking mats are a great budget-friendly alternative to parchment paper and can be reused many times.
Preparation Method
- Mix Dry Ingredients: In a medium bowl, whisk together 2 ¾ cups (345 g) sifted all-purpose flour, 1 teaspoon baking powder, and ½ teaspoon salt. Set aside.
- Cream Butter and Sugar: Using an electric mixer, beat 1 cup (226 g) softened unsalted butter and 1 ½ cups (300 g) granulated sugar on medium speed until light and fluffy, about 3-4 minutes. This step is key for tender, melt-in-your-mouth cookies.
- Add Egg and Vanilla: Beat in 1 large egg and 1 teaspoon vanilla extract until combined. Scrape down the bowl as needed.
- Combine Dry and Wet: Gradually add dry ingredients to the butter mixture alternately with 2 tablespoons (30 ml) milk. Mix on low speed just until the dough comes together — be careful not to overmix or cookies will be tough.
- Chill the Dough: Flatten dough into a disk, wrap in plastic wrap, and refrigerate for at least 1 hour. Chilling helps the dough firm up, making it easier to roll out and cut.
- Preheat Oven and Prepare Baking Sheets: Heat oven to 350°F (175°C). Line baking sheets with parchment paper or silicone mats.
- Roll and Cut: Lightly flour your surface and rolling pin. Roll dough to about ¼-inch (6 mm) thickness. Cut out shapes using star and circle cutters, transferring cookies to baking sheets about 1 inch (2.5 cm) apart.
- Bake: Bake for 8-10 minutes or until edges just begin to turn golden. Keep a close eye—overbaking dries them out.
- Cool: Let cookies cool on baking sheets for 5 minutes, then transfer to wire racks to cool completely before icing.
- Make Royal Icing: In a large bowl, beat 4 cups (480 g) sifted powdered sugar, 3 tablespoons meringue powder, 1 tablespoon fresh lemon juice, 1 teaspoon vanilla extract, and 1 teaspoon cornstarch with 5-6 tablespoons (75-90 ml) warm water until stiff peaks form. The cornstarch addition keeps the icing silky and crack-free.
- Divide and Color Icing: Separate icing into three bowls. Leave one white, tint one with red gel food coloring, and the last with blue. Stir gently to keep icing fluffy.
- Decorate: Fill piping bags with each color. Outline cookies with white icing and flood the center using a spoon or piping bag. Use red and blue icing to pipe stars, stripes, or polka dots on top while the base is still wet for smooth blending. Let icing dry completely (at least 4 hours or overnight) before stacking or storing.
Pro Tip: If your icing feels too thick for flooding, add water a teaspoon at a time until it flows easily but isn’t runny. And remember—patience is key with royal icing. Rushing the drying will cause cracks.
Cooking Tips & Techniques
Getting these sugar cookies just right can be a balancing act, but with a few tricks, you’ll master this recipe every time.
- Butter Temperature Matters: Make sure your butter is softened but not melted. If it’s too soft, your dough will be greasy and hard to handle. My go-to is leaving butter out for 30 minutes before baking.
- Don’t Overwork Dough: Overmixing develops gluten, which makes cookies tough. Mix just until combined, then chill. I once skipped chilling — big mistake, cookies spread way too thin.
- Rolling Evenly: Use rolling pin bands or measure thickness with a ruler. Uneven dough leads to uneven baking. I learned this the hard way when one batch was burnt on the edges while the center was doughy.
- Royal Icing Consistency: Flooding icing should be like honey — thick enough to hold shape but thin enough to spread. Outline icing needs to be thicker to hold edges crisp.
- Coloring Tips: Gel food coloring works best because it doesn’t water down your icing. Stir gently to avoid air bubbles that can create uneven surfaces.
- Drying Time: Allow royal icing to dry in a cool, dry place, uncovered. Avoid humid kitchens or your icing won’t set properly.
- Multitask: While cookies bake and cool, prep your icing colors. I like to mix the icing while my last batch is in the oven to save time.
Variations & Adaptations
This recipe is flexible — customize the look and taste to fit your occasion or dietary needs.
- Flavor Variations: Add almond extract or lemon zest to the cookie dough for a fresh twist. I’ve also swapped vanilla for peppermint extract during winter holidays — surprisingly festive!
- Gluten-Free Option: Use a 1-to-1 gluten-free baking blend instead of all-purpose flour. The cookies turn out slightly softer but just as delicious.
- Alternative Icing: Try cream cheese frosting for a tangy contrast. It won’t have the same shiny finish but tastes amazing on these cookies.
- Different Shapes: Beyond stars and circles, try flag shapes or even small firework bursts for summer parties.
- Vegan Adaptation: Use vegan butter and aquafaba (chickpea water) for royal icing instead of egg whites. The texture changes but it works well for those avoiding animal products.
One fun twist I tried was making mini cookies and layering them with fresh berries and whipped cream for a patriotic dessert stack — a nice change of pace for family brunches.
Serving & Storage Suggestions
These cookies are best served at room temperature, where the soft cookie and crisp icing textures shine through. Arrange them on a festive platter with a scattering of fresh blueberries and strawberries for an inviting, colorful display.
They pair wonderfully with classic lemonade, iced tea, or even a creamy vanilla milkshake if you want to get indulgent. For a savory-sweet combo at your gathering, serve alongside bacon-wrapped jalapeño poppers or slow cooker BBQ pulled pork sliders for a crowd-pleasing spread.
Store cookies in an airtight container at room temperature for up to 5 days. If you want to keep them longer, freeze undecorated cookies for up to 3 months. Once decorated, freezing is tricky because royal icing can crack. To refresh, warm frozen cookies slightly at room temperature before serving — this softens the cookie without melting the icing.
Flavors often deepen after a day or two, so if you can wait, they taste even better the next day.
Nutritional Information & Benefits
Each sugar cookie with royal icing contains approximately 180-200 calories, with about 7 grams of fat and 25 grams of carbohydrates. The recipe uses real butter, providing a source of fat-soluble vitamins, and egg whites which add a bit of protein.
The icing uses meringue powder, which is pasteurized and safe, avoiding raw egg whites. This recipe is naturally gluten-containing but can be adapted for gluten-free diets as noted earlier.
While these cookies are a treat and best enjoyed in moderation, the use of fresh lemon juice in the icing adds a touch of vitamin C, and the bright colors can make snack time more joyful, especially for kids learning about balance and celebration.
Conclusion
These Perfect Red, White & Blue Sugar Cookies with Royal Icing are a simple, joyful way to celebrate any patriotic occasion or just add a little sparkle to your baking routine. I love how this recipe balances classic flavors with a festive look — it’s proof you don’t need a fully stocked pantry or hours of prep to make something special.
Feel free to make these your own by tweaking flavors, shapes, or colors to suit your style and occasion. I’d love to hear what creative variations you try or how this recipe fits into your celebrations.
So next time you have a last-minute party or just want to bake something that looks as good as it tastes, these cookies won’t let you down. Happy baking!
Frequently Asked Questions
Can I make the cookie dough ahead of time?
Yes! You can prepare the dough up to 3 days ahead and keep it wrapped tightly in the fridge. Just bring it to room temperature before rolling out.
Is royal icing safe to eat raw?
This recipe uses meringue powder, which is pasteurized and safe. Avoid using raw egg whites unless you’re sure they are pasteurized.
How do I prevent my cookies from spreading too much?
Chilling the dough for at least an hour before rolling and baking helps cookies keep their shape. Also, avoid using too much butter or overworking the dough.
What if my royal icing is too thick or too thin?
Add a few drops of water to thin it out or powdered sugar to thicken. The icing should flow easily for flooding but hold shape for outlining.
Can I store decorated cookies in the fridge?
It’s better to store them at room temperature in an airtight container. Refrigeration can cause moisture that dulls the icing’s shine and may cause cracking.
Pin This Recipe!
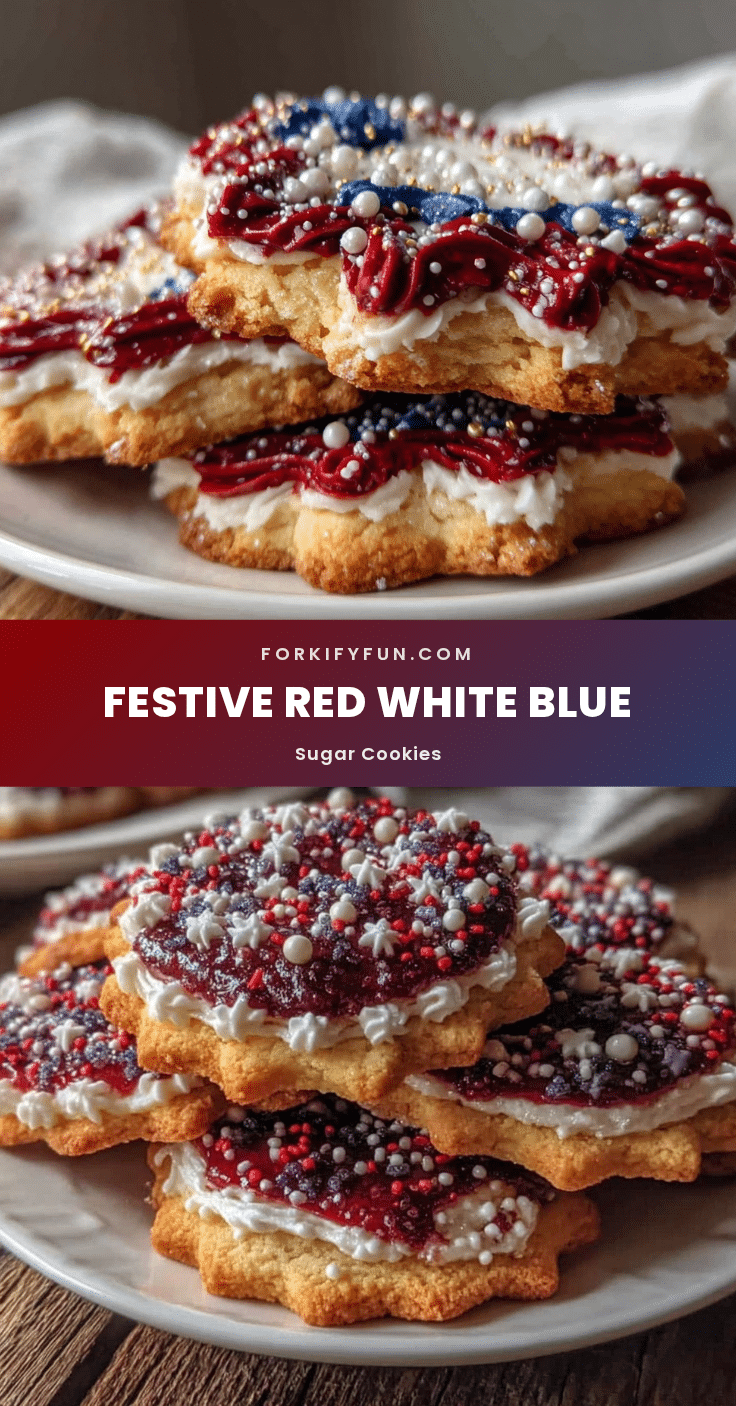
Perfect Red White & Blue Sugar Cookies Easy Royal Icing Recipe
Tender, buttery sugar cookies decorated with smooth, glossy red, white, and blue royal icing, perfect for patriotic occasions and quick celebrations.
- Prep Time: 15 minutes
- Cook Time: 10 minutes
- Total Time: 1 hour 25 minutes
- Yield: 24 servings 1x
- Category: Dessert
- Cuisine: American
Ingredients
- 2 ¾ cups (345 g) all-purpose flour, sifted
- 1 teaspoon baking powder
- ½ teaspoon salt
- 1 cup (226 g) unsalted butter, softened
- 1 ½ cups (300 g) granulated sugar
- 1 large egg, room temperature
- 1 teaspoon vanilla extract
- 2 tablespoons (30 ml) milk
- 4 cups (480 g) powdered sugar, sifted
- 3 tablespoons meringue powder or egg whites
- 1 tablespoon fresh lemon juice
- 1 teaspoon vanilla extract or almond extract
- 1 teaspoon cornstarch
- Gel food coloring in red and blue
- Optional: edible glitter or pearl dust
- Optional: fresh blueberries for decoration
Instructions
- Mix dry ingredients: whisk together flour, baking powder, and salt in a medium bowl; set aside.
- Cream butter and sugar: beat softened butter and granulated sugar on medium speed until light and fluffy, about 3-4 minutes.
- Add egg and vanilla: beat in egg and vanilla extract until combined, scraping down bowl as needed.
- Combine dry and wet: gradually add dry ingredients alternately with milk on low speed until dough forms; avoid overmixing.
- Chill dough: flatten dough into a disk, wrap in plastic wrap, refrigerate at least 1 hour.
- Preheat oven to 350°F (175°C) and line baking sheets with parchment paper or silicone mats.
- Roll and cut: lightly flour surface and rolling pin, roll dough to ¼-inch thickness, cut shapes with star and circle cutters, place 1 inch apart on baking sheets.
- Bake cookies for 8-10 minutes until edges begin to turn golden; avoid overbaking.
- Cool cookies on baking sheets 5 minutes, then transfer to wire racks to cool completely.
- Make royal icing: beat powdered sugar, meringue powder, lemon juice, vanilla extract, cornstarch, and 5-6 tablespoons warm water until stiff peaks form.
- Divide icing into three bowls; leave one white, tint one red, and one blue with gel food coloring.
- Decorate cookies: outline with white icing, flood centers, then pipe red and blue designs while base is wet; let dry at least 4 hours or overnight.
Notes
Use softened but not melted butter for best dough texture. Chill dough at least 1 hour to prevent spreading. Gel food coloring prevents thinning of icing. Add water a teaspoon at a time to adjust icing consistency. Let royal icing dry in a cool, dry place uncovered to avoid cracking. Store decorated cookies at room temperature in airtight containers for up to 5 days; freeze undecorated dough up to 3 months.
Nutrition
- Serving Size: 1 cookie
- Calories: 190
- Sugar: 18
- Sodium: 90
- Fat: 7
- Saturated Fat: 4
- Carbohydrates: 25
- Fiber: 0.5
- Protein: 2
Keywords: sugar cookies, royal icing, patriotic cookies, red white and blue, easy sugar cookies, holiday cookies, 4th of July cookies


