I was standing in the frozen food aisle last October, staring at a bag of frozen meatballs, when the smell of smoked paprika hit me from someone’s cart. And just like that, I was seven years old in my Aunt Lena’s tiny kitchen, the one with the yellow linoleum floor that always felt sticky no matter how much she scrubbed. She was pulling a baking sheet out of the oven, and there they were—little crescent rolls wrapped around little sausages, but she had drawn tiny eyes on them with mustard. She called them mummies. I remember thinking they were the funniest, most perfect thing I’d ever seen. She passed away a few years ago, and I haven’t thought about those mummy pigs in a blanket in decades. But there in that fluorescent-lit aisle, I could feel the heat from her oven and hear her laugh when I asked if the mummies were going to come to life.
So I bought the sausages. And the crescent rolls. And I went home determined to make them myself, but better—cozier, more flavorful, the kind of thing you’d actually want to eat on a chilly October evening, not just at a party. I mean, let’s be honest, regular pigs in a blanket are great, but they’re not exactly soul food. These mummies though? They’re different. Maybe you’ve been there—craving something that feels like a hug but also looks like you tried, even if you didn’t really try that hard.
This recipe became my October tradition. It’s the one I make when the air gets crisp and the days get short, and I need something that takes thirty minutes and makes me feel like I’m back in that yellow kitchen. I’ve tweaked it over the years—added garlic butter, figured out the best way to get the eyes just right, learned how to keep the crescent dough from unraveling mid-bake. And now I’m sharing it with you. Honestly, if you make these once, they’ll become your tradition too.
Why You’ll Love This Recipe
These Cozy Mummy Pigs in a Blanket aren’t just another appetizer. They’re the kind of recipe that makes you look like a Halloween hero without breaking a sweat. I’ve tested this version at least a dozen times—through potlucks, kids’ parties, and quiet nights in—and every single time, they disappear before anything else on the table.
- Quick & Easy: From fridge to table in just 30 minutes. No complicated techniques, no fancy equipment, no stress. Perfect for when you’re juggling costumes and candy and somehow need to feed people too.
- Simple Ingredients: You probably have most of these in your kitchen right now. Crescent rolls, little smokies, and a few pantry staples. That’s it. No special trips to specialty stores.
- Perfect for Halloween: These are the star of any spooky spread. Kids love the mummy look, and adults love that they actually taste amazing. They work for parties, classroom treats, or just a fun dinner.
- Crowd-Pleaser: I’ve served these to picky eaters, foodie friends, and everyone in between. They’re universally loved. There’s something about the combination of flaky, buttery dough and savory sausage that just works.
- Unbelievably Delicious: The garlic butter brushed on top takes these from good to can’t-stop-eating-them. And when you add the little mustard eyes? Pure magic. It’s comfort food that also happens to be adorable.
What makes this version different from the rest is the attention to detail. I spent three batches figuring out exactly how to wrap the dough so it looks like bandages but doesn’t fall apart. I found the perfect baking temperature to get the dough golden and flaky without burning the bottoms. And that garlic butter? It’s not an afterthought—it’s the secret to making these taste like something special, not just a store-bought shortcut. This isn’t just another recipe. It’s the one you’ll come back to every October.
What Ingredients You Will Need
This recipe uses simple, everyday ingredients to create something that feels special. Most of these are pantry staples, so you can whip up a batch whenever the craving hits. Here’s what you’ll need and why each ingredient matters.
For the Mummies
- 1 can (8 oz) refrigerated crescent roll dough — I prefer Pillsbury for the flakiest texture, but any brand works. Look for the sheets if you can find them (less perforation to worry about), but the regular rolls work fine too.
- 24 little smokies (cocktail sausages) — Hillshire Farm is my go-to for consistent flavor and texture. You can also use beef or turkey smokies depending on your preference. Look for the mini size—about 1.5 inches long.
- 2 tablespoons unsalted butter, melted — This is the base for our garlic butter brush. Use salted butter if that’s what you have, just reduce any additional salt.
- 1 clove garlic, minced (or ½ teaspoon garlic powder) — Fresh garlic gives a more robust flavor, but garlic powder works in a pinch. I’ve used both, and honestly, the powder is more forgiving if you accidentally burn it.
- ½ teaspoon dried parsley (optional) — Adds a pop of green and a hint of freshness. Totally optional, but it makes them look prettier.
- Mustard (yellow or Dijon) for the eyes — Yellow mustard gives that classic mummy look, but Dijon works if you want a more sophisticated flavor. I’ve also used sriracha for spicy mummies!
For the Dipping Sauce (Optional but Recommended)
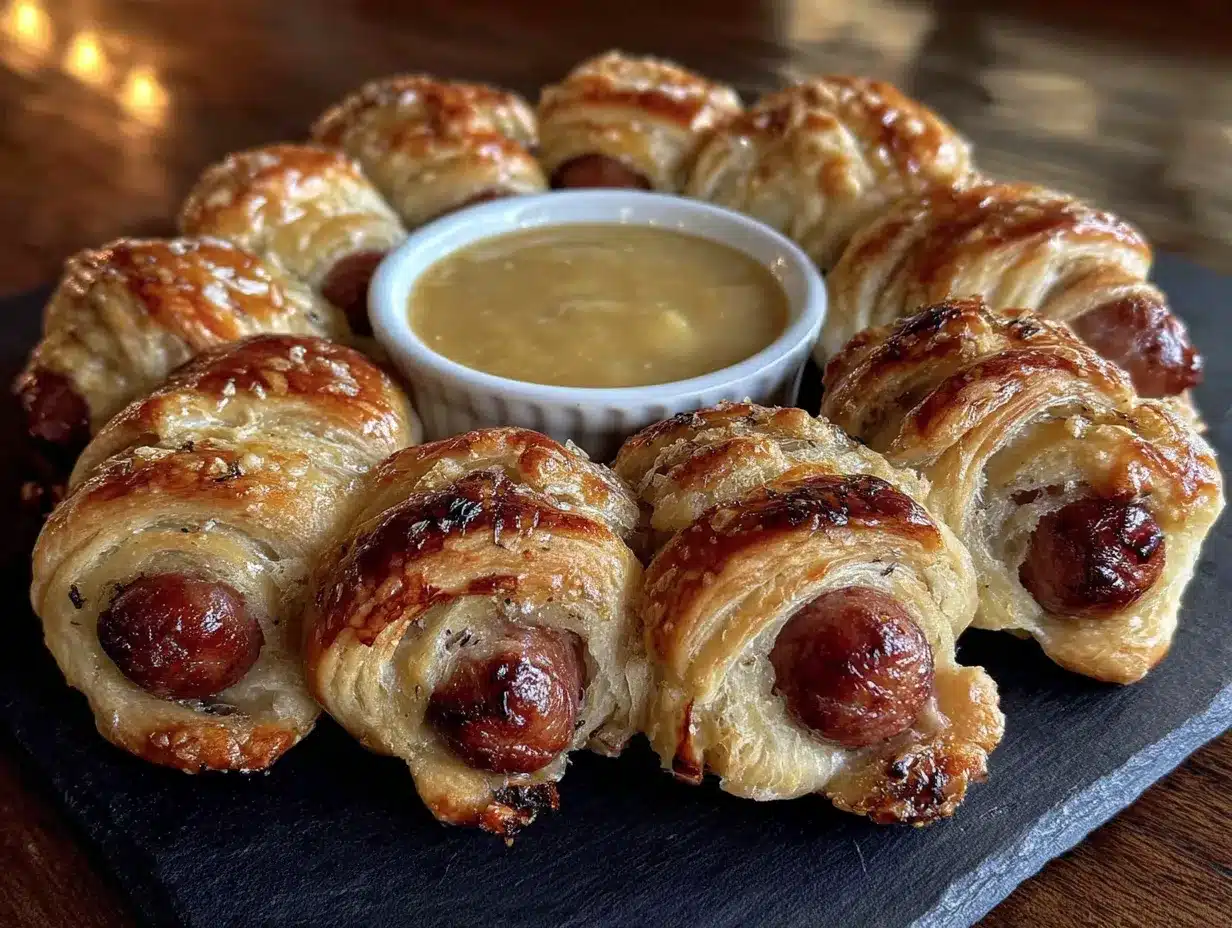
- ¼ cup ketchup — The classic pairing. Simple and always works.
- 1 tablespoon honey — Adds sweetness that balances the savory mummies. (adds richness)
- 1 teaspoon Worcestershire sauce — For depth of flavor. (use dairy-free milk if needed)
- Pinch of smoked paprika — Brings a subtle smokiness that ties everything together.
Ingredient Tips: When buying little smokies, look for ones that are uniform in size so they cook evenly. I’ve tried the jumbo ones, and they don’t work as well—the dough-to-sausage ratio gets thrown off. For the crescent rolls, keep them refrigerated until you’re ready to use them. Warm dough is sticky and hard to work with. If you’re dairy-free, use vegan butter for the garlic brush—it still works beautifully. And if you can’t find little smokies, you can use hot dogs cut into thirds. Just make sure they’re fully cooked before wrapping.
Equipment Needed
You don’t need much for this recipe, which is part of the beauty. Here’s what you’ll need:
- Baking sheet — A standard half-sheet pan works perfectly. Line it with parchment paper or a silicone baking mat for easy cleanup. I’ve used both, and the silicone mat gives slightly more even browning.
- Small bowl — For mixing the garlic butter. Any small bowl will do.
- Pastry brush — For brushing the garlic butter onto the dough. If you don’t have one, you can use a spoon or even your fingers (just wash your hands first). I’ve definitely used a paper towel in a pinch—it works, but it’s messy.
- Knife or pizza cutter — For cutting the crescent roll dough into strips. A pizza cutter gives cleaner edges, but a sharp knife works fine.
- Toothpicks (optional) — If the dough starts to unravel, a toothpick can hold it in place. I’ve only needed this once, but it’s good to have on hand.
- Small piping bag or plastic sandwich bag — For piping the mustard eyes. If you don’t have a piping bag, snip a tiny corner off a sandwich bag. It’s not fancy, but it works perfectly.
That’s it. No stand mixer, no food processor, no special gadgets. This is a low-fuss recipe that anyone can make. My first time, I used a butter knife to cut the dough and a chopstick to apply the mustard eyes. It was messy, but the mummies still turned out adorable.
Preparation Method
Let’s get to the fun part. Follow these steps, and you’ll have a tray of cozy mummy pigs in a blanket in no time. I’ve included all the little details I wish someone had told me the first time.
- Preheat your oven to 375°F (190°C). Give it a full 10 minutes to come to temperature. While it’s heating, line your baking sheet with parchment paper or a silicone mat. Don’t skip this step—trust me, cleanup is so much easier.
- Prepare the garlic butter. In a small bowl, combine the melted butter, minced garlic (or garlic powder), and dried parsley if using. Stir it together and set aside. The longer it sits, the more the garlic infuses the butter. I usually make this first and let it hang out while I prep everything else.
- Unroll the crescent roll dough. Carefully open the can and unroll the dough onto a clean cutting board. If you’re using the perforated sheets, press the seams together gently to create a solid sheet. If you’re using the sheet version, you’re already set. Don’t press too hard—you want to keep the layers distinct for that flaky texture.
- Cut the dough into strips. Using a pizza cutter or sharp knife, cut the dough lengthwise into 24 thin strips. Aim for about ½ inch wide. They don’t have to be perfect—in fact, uneven strips make the mummies look more authentic. I learned this the hard way after spending 10 minutes trying to get perfectly uniform strips. They looked too neat, and the mummies didn’t look wrapped.
- Wrap the little smokies. Take one strip of dough and wrap it around a little smokie, starting at one end and working your way to the other. Leave a small gap in the middle for the eyes—about ¼ inch. Don’t wrap too tightly, or the dough will tear as it bakes. Think of it like wrapping a gift: snug but not suffocating. Repeat with all 24 smokies.
- Place the mummies on the baking sheet. Arrange them about 1 inch apart. They won’t spread much, but you want a little room for air circulation. If the dough feels loose, you can secure the end with a dab of water or a toothpick. I’ve only had this happen with refrigerated dough that was too warm.
- Brush with garlic butter. Using your pastry brush, gently brush each mummy with the garlic butter mixture. Be thorough but not excessive—you want a light coating. Reserve a little butter for brushing again halfway through baking. This double-brush technique is the secret to that golden, glossy finish.
- Bake for 10-12 minutes. Place the baking sheet in the preheated oven and bake until the dough is golden brown and puffed. At the 6-minute mark, pull them out and brush with the remaining garlic butter. This gives them an extra layer of flavor and helps them brown evenly. Watch them closely in the last 2 minutes—oven temperatures vary, and you don’t want burnt mummies.
- Let them cool slightly. Remove the baking sheet from the oven and let the mummies cool for 2-3 minutes. They’ll be very hot inside. Use this time to prepare the mustard eyes and dipping sauce.
- Add the eyes. Fill a small piping bag or sandwich bag with a tiny bit of mustard. Snip off the very tip—like, really tiny, you can always cut more. Pipe two small dots onto each mummy where you left the gap. If you mess up, just wipe it off and try again. The mustard doesn’t stain, and no one will notice a few smudges.
- Make the dipping sauce (optional). In a small bowl, whisk together the ketchup, honey, Worcestershire sauce, and smoked paprika. Taste and adjust—I like mine a little sweeter, so I add an extra drizzle of honey. Serve alongside the mummies.
- Serve immediately. These are best warm, straight from the oven. The dough is flakiest, the sausages are juiciest, and the butter is still glossy. Set them out on a platter with the dipping sauce and watch them disappear.
Cooking Tips & Techniques
I’ve made these mummies more times than I can count, and I’ve made every mistake in the book. Here’s what I’ve learned so you don’t have to.
Keep the dough cold. This is the number one tip. Warm dough is sticky, hard to cut, and prone to tearing. If your kitchen is warm, pop the dough in the fridge for 5 minutes before cutting. I learned this after a particularly frustrating batch where the dough turned into a sticky mess. Cold dough cuts cleanly and wraps beautifully.
Don’t overfill the mummies. It’s tempting to use bigger sausages or wrap them more tightly, but resist. The dough needs room to puff up and get flaky. If you wrap too tightly, the mummies will look flat and the dough will be dense. Leave that little gap for the eyes—it’s not just for decoration, it’s structural.
Watch the baking time. Ovens are liars. My oven runs hot, so I start checking at 9 minutes. Yours might need a full 12. The mummies are done when the dough is golden brown and the sausages are heated through. If the bottoms are browning too fast, slide another baking sheet underneath to insulate them.
Multitask strategically. While the mummies are baking, make the dipping sauce and prep the mustard bag. This saves you from scrambling at the end. I also like to set out my serving platter and napkins while they’re in the oven. It makes the whole process feel smoother.
Use a light hand with the mustard. A little goes a long way. I once got carried away and ended up with mummies that looked like they were crying yellow tears. Start with tiny dots and add more if needed. You can always pipe more, but you can’t take it away.
The double-brush technique is non-negotiable. I know it’s an extra step, but it makes a huge difference. The first brush adds flavor, the second brush adds shine and helps the dough brown evenly. Skip it, and you’ll have pale, sad-looking mummies. And nobody wants sad mummies.
Variations & Adaptations
One of the best things about this recipe is how easy it is to customize. Here are some variations I’ve tried and loved.
Spicy Mummies: Use spicy little smokies or add a pinch of cayenne to the garlic butter. For the eyes, use sriracha instead of mustard. The heat is a nice contrast to the buttery dough. I made these for a game night, and they were gone in minutes.
Cheesy Mummies: Before wrapping the dough around the sausage, add a thin strip of cheddar or mozzarella cheese. It melts into the dough and creates a gooey, delicious surprise. Just make sure the cheese is fully enclosed, or it will leak onto the baking sheet. I learned this the messy way.
Vegetarian Mummies: Swap the little smokies for vegetarian cocktail sausages or even pieces of roasted carrot or zucchini. The dough and garlic butter are already vegetarian, so this is an easy swap. I’ve used MorningStar Farms sausages with great results.
Gluten-Free Mummies: Use gluten-free crescent roll dough. It’s available at most grocery stores now, and it works surprisingly well. The texture is slightly different—a little more crumbly—but the flavor is still there. Just handle the dough gently, as it tears more easily.
Breakfast Mummies: Use breakfast sausage links instead of little smokies. Brush with maple butter (melted butter + maple syrup) instead of garlic butter. These are perfect for a Halloween morning or a fun brunch. I served these at a Halloween brunch last year, and they were a hit with both kids and adults.
Pizza Mummies: Before wrapping, brush the dough with a little pizza sauce and sprinkle with Italian seasoning. Use the mustard eyes as usual. Serve with extra pizza sauce for dipping. It’s like a calzone in mummy form.
Serving & Storage Suggestions
These mummies are best served warm, straight from the oven. The dough is at its flakiest, the sausages are juicy, and the garlic butter is still glistening. Arrange them on a platter with the dipping sauce in the center. I like to add a few sprigs of parsley or rosemary around the edges for color—it makes the platter look festive without much effort.
For a Halloween party, serve them alongside other spooky snacks like crispy garlic chicken wings (they look like bat wings!), pumpkin-shaped cheese balls, or ghost-shaped cookies. They also pair beautifully with a warm bowl of tomato soup for a cozy dinner. If you’re serving them as a main dish, double the recipe—trust me, they go fast.
Storage: If you have leftovers (unlikely, but possible), store them in an airtight container in the refrigerator for up to 3 days. The dough will soften slightly, but they’re still delicious. To reheat, place them on a baking sheet in a 350°F oven for 5-7 minutes. The microwave works too, but the dough won’t be as crispy. I’ve also reheated them in an air fryer at 350°F for 3 minutes—that’s my preferred method for leftover mummies.
Freezing: You can freeze the unbaked mummies. Assemble them completely, place them on a baking sheet, and freeze until solid. Transfer to a freezer bag and store for up to 2 months. To bake, place them on a lined baking sheet and add 2-3 minutes to the baking time. No need to thaw. I’ve done this for holiday prep, and it works beautifully.
Flavor development: These are best fresh, but the flavors do meld nicely after a day in the fridge. The garlic butter soaks into the dough, making it even more flavorful. Just don’t expect the same flaky texture as fresh-baked.
Nutritional Information & Benefits
Let’s be real—these are a treat, not a health food. But knowing what’s in them helps you enjoy them mindfully. Here’s the estimated nutritional breakdown per mummy (based on 24 mummies using standard ingredients):
- Calories: 110-130
- Protein: 4g
- Carbohydrates: 8g
- Fat: 7g
- Saturated Fat: 3g
- Sodium: 300mg
- Sugar: 2g
Health Benefits: While these aren’t a health food, the little smokies do provide a decent amount of protein, which helps keep you full. The garlic in the butter has been linked to immune-boosting properties—perfect for cold and flu season. And honestly, sometimes the best thing you can do for your health is enjoy a comforting treat with people you love. Food is about more than just nutrients; it’s about connection and joy.
Dietary Considerations: This recipe contains gluten (crescent rolls), dairy (butter), and processed meats. For a gluten-free version, use gluten-free crescent dough. For a dairy-free version, use vegan butter. For a lower-sodium option, look for reduced-sodium little smokies. As always, check your specific ingredient labels for allergen information.
Conclusion
These Cozy Mummy Pigs in a Blanket are more than just a Halloween appetizer—they’re a little piece of comfort wrapped in flaky dough. Every time I make them, I think of my Aunt Lena and her yellow kitchen, and I smile. That’s the power of food, isn’t it? It connects us to people and moments we thought we’d forgotten.
I hope you make these and make them your own. Add your favorite dipping sauce, experiment with the variations, and don’t stress about making them perfect. The slightly imperfect ones are always the most charming. And if you have kids, let them help with the wrapping and the eyes—it’s messy and fun and exactly the kind of memory that sticks.
When you make these, I’d love to hear about it. Leave a comment below and tell me how they turned out, what variations you tried, or even just share a memory that this recipe brought back for you. And if you’re looking for another cozy recipe to round out your Halloween menu, check out my creamy pumpkin pasta—it’s the perfect main dish to serve alongside these mummies. Happy Halloween, friend. Go make some cozy mummies and enjoy every bite.
Frequently Asked Questions
Can I make these ahead of time?
Absolutely! You can assemble the mummies up to 24 hours in advance and keep them covered in the refrigerator. Just add 1-2 minutes to the baking time since they’ll be starting from cold. You can also freeze them unbaked for up to 2 months.
Why did my crescent dough unravel during baking?
This usually happens when the dough is too warm or wrapped too loosely. Make sure your dough is cold when you start, and press the end of the strip gently to seal it. If they’re still unraveling, use a toothpick to hold the end in place during baking—just remove it before serving.
Can I use hot dogs instead of little smokies?
Yes! Cut each hot dog into thirds or quarters, depending on the size. Just make sure they’re fully cooked before wrapping. I’ve done this for a more budget-friendly option, and it works great. The mummies will be slightly larger, so you might get fewer total pieces.
What can I use instead of mustard for the eyes?
You have options! Ketchup works, but it’s runnier, so use a very small piping tip. Sriracha gives a spicy kick. You can also use tiny dots of melted chocolate for a sweet version, or even black sesame seeds pressed gently into the dough before baking. Get creative!
How do I keep the mummies warm for a party?
Set your oven to the lowest temperature (usually 170°F or 200°F) and place the mummies on a baking sheet inside. They’ll stay warm without overcooking for up to 30 minutes. Alternatively, use a slow cooker on the “warm” setting with the lid slightly ajar to let steam escape. Just don’t leave them in too long, or the dough will get soggy.
Pin This Recipe!
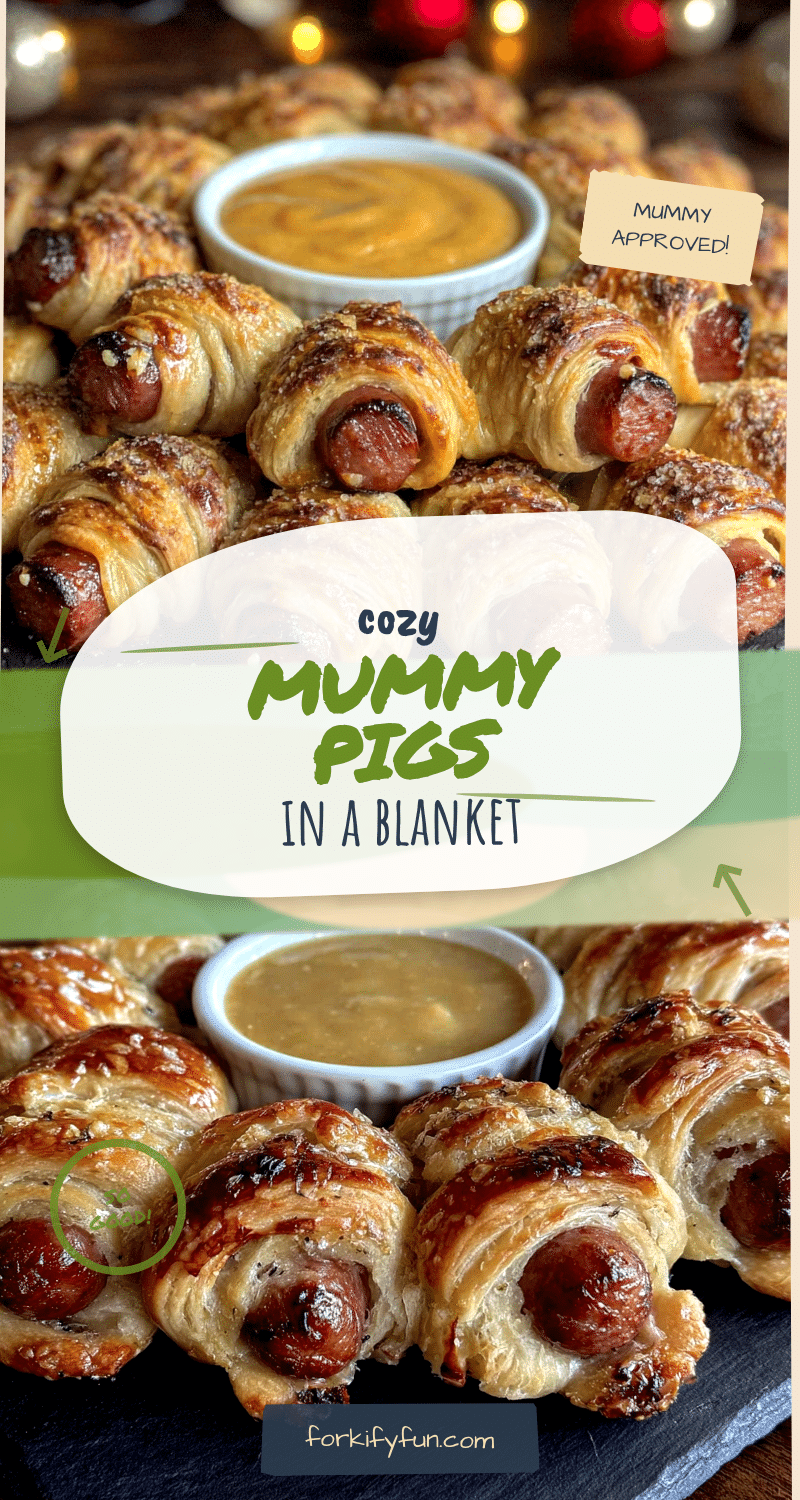
30-Minute Cozy Mummy Pigs in a Blanket – Easy Halloween Appetizer

These adorable mummy pigs in a blanket are wrapped in flaky crescent dough, brushed with garlic butter, and baked until golden. Perfect for Halloween parties or a cozy fall snack, they come together in just 30 minutes with simple ingredients.
- Prep Time: 15 minutes
- Cook Time: 12 minutes
- Total Time: 27 minutes
- Yield: 24 mummies 1x
- Category: Appetizer
- Cuisine: American
Ingredients
- 1 can (8 oz) refrigerated crescent roll dough
- 24 little smokies (cocktail sausages)
- 2 tablespoons unsalted butter, melted
- 1 clove garlic, minced (or ½ teaspoon garlic powder)
- ½ teaspoon dried parsley (optional)
- Mustard (yellow or Dijon) for the eyes
- ¼ cup ketchup
- 1 tablespoon honey
- 1 teaspoon Worcestershire sauce
- Pinch of smoked paprika
Instructions
- Preheat your oven to 375°F (190°C). Line a baking sheet with parchment paper or a silicone mat.
- In a small bowl, combine melted butter, minced garlic (or garlic powder), and dried parsley (if using). Set aside.
- Unroll the crescent roll dough onto a clean cutting board. If using perforated sheets, gently press the seams together to create a solid sheet.
- Using a pizza cutter or sharp knife, cut the dough lengthwise into 24 thin strips, about ½ inch wide.
- Take one strip of dough and wrap it around a little smokie, starting at one end and working to the other. Leave a small gap in the middle for the eyes (about ¼ inch). Repeat with all 24 smokies.
- Place the mummies on the prepared baking sheet, about 1 inch apart. If the dough feels loose, secure the end with a dab of water or a toothpick.
- Brush each mummy with the garlic butter mixture. Reserve a little butter for brushing again halfway through baking.
- Bake for 10-12 minutes. At the 6-minute mark, remove from the oven and brush with the remaining garlic butter. Continue baking until golden brown and puffed.
- Remove from the oven and let cool for 2-3 minutes.
- Fill a small piping bag or sandwich bag with a tiny bit of mustard. Snip off the very tip and pipe two small dots onto each mummy where you left the gap.
- In a small bowl, whisk together ketchup, honey, Worcestershire sauce, and smoked paprika for the dipping sauce. Serve alongside the mummies.
- Serve immediately while warm.
Notes
Keep the dough cold for easier handling. Don’t overfill the mummies; leave a gap for the eyes. The double-brush technique with garlic butter is key for a golden, glossy finish. For best results, serve immediately.
Nutrition
- Serving Size: 1 mummy
- Calories: 120
- Sugar: 2
- Sodium: 300
- Fat: 7
- Saturated Fat: 3
- Carbohydrates: 8
- Protein: 4
Keywords: Halloween appetizer, pigs in a blanket, mummy pigs, crescent rolls, little smokies, easy appetizer, 30-minute recipe