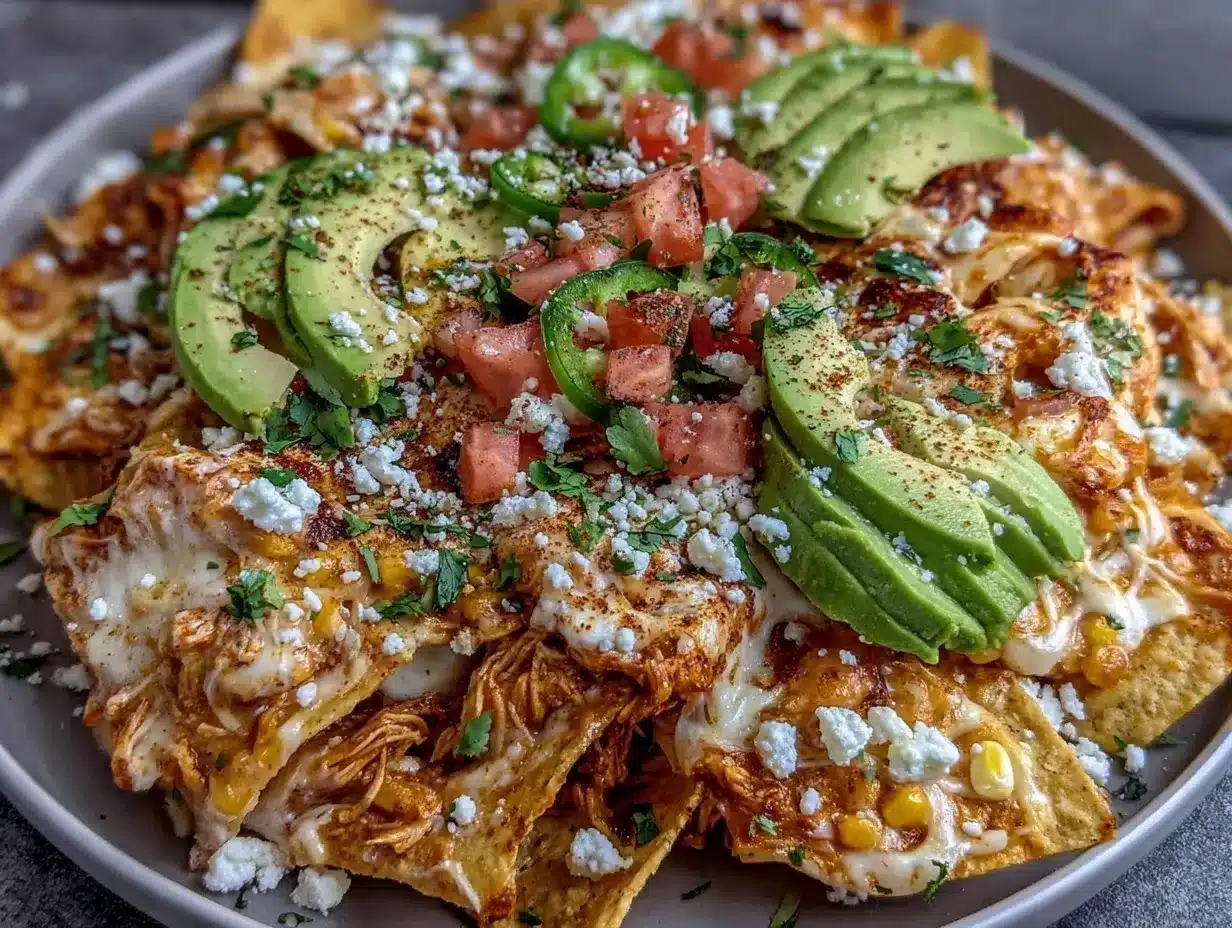
Picture this: a tray piled high with golden, crispy tortilla chips, each one buried beneath a blanket of juicy chicken chili, roasted corn bursting with sweetness, and a cascade of melty, bubbling cheese. The first time I made these Mexican Street Corn Chicken Chili Nachos, the aroma was so good it stopped my kids mid-video game. There’s something about the smoky scent from the chili, the tangy lime, and the toasted corn that makes your kitchen feel like the heart of a street fiesta. The moment I slid the pan out of the oven, everyone gathered around—forks in hand, not waiting for plates (let’s be honest, napkins barely survived). It was one of those moments where you just have to pause, breathe in all that flavor, and grin because you know you’ve stumbled onto something dangerously easy and seriously satisfying.
Honestly, I wish I’d known about loaded nachos like these years ago—when I was knee-high to a grasshopper, my mom would make plain cheese nachos for movie night, but these? They’re on another level. The recipe was born on a rainy Saturday, when I decided to reinvent chili night with a little Mexican street corn magic. I grabbed what I had (some leftover rotisserie chicken, a can of beans, and a bag of frozen corn), and suddenly, the whole thing came together. The best part? My family couldn’t stop sneaking chips off the tray as it cooled (can you blame them?). These nachos are now our go-to for game days, potlucks, and whenever we want to brighten up our Pinterest boards with some serious comfort food. I’ve tested this recipe more times than I can count (in the name of research, of course), and it’s become a staple for family gatherings and gifting. Each bite feels like a warm hug—trust me, you’re going to want to bookmark this one!
Why You’ll Love This Mexican Street Corn Chicken Chili Nachos Recipe
If you’re still wondering whether these loaded nachos are worth the hype—let me break it down for you (with a little help from my own kitchen experiments and family taste tests). There’s a reason this recipe keeps showing up at our parties and weeknight dinners.
- Quick & Easy: Comes together in under 30 minutes—perfect for busy weeknights, spontaneous gatherings, or when you need a last-minute appetizer that everyone will ask about.
- Simple Ingredients: No fancy shopping trips necessary. You’ll probably find everything you need in your pantry or fridge—rotisserie chicken, canned beans, tortilla chips, and frozen corn. Done.
- Perfect for Any Occasion: These nachos are the ultimate crowd-pleaser for game days, movie nights, potlucks, and backyard barbecues. They’re also great for “just because” snacking.
- Crowd-Pleaser: From picky eaters to spice lovers, everyone ends up reaching for seconds. Even my teenager (who claims he “doesn’t like beans”) devours these nachos.
- Unbelievably Delicious: The combo of creamy, spicy chicken chili, sweet roasted corn, and tangy cotija cheese makes every bite pure comfort food. It’s everything you love about Mexican street corn and chili—on a chip.
What sets this recipe apart? Instead of just dumping chili and cheese on chips, I blend the classic flavors of elote with smoky chicken chili—think lime, cilantro, chili powder, and a little creamy mayo for that true street corn vibe. I use roasted corn (sometimes grilled for extra flavor), and a splash of hot sauce gives it that kick you crave. Honestly, after the first bite, you’ll close your eyes and just savor it. This is comfort food reimagined: it’s faster, lighter, and way more fun than traditional nachos. You get all the soul-soothing satisfaction of chili, the zing of street corn, and the crispy goodness of nachos—without any fuss. If you want a recipe that can impress guests and still be easy enough for a Tuesday night, this is it.
What Ingredients You Will Need
Let’s talk ingredients—because loaded nachos are only as good as what goes on top. This Mexican Street Corn Chicken Chili Nachos recipe keeps things simple, but every ingredient packs a punch. Most of these are pantry staples or fridge regulars, so you won’t be running all over town to track them down. Here’s what you’ll need:
- For the Chicken Chili:
- 2 cups cooked chicken, shredded (rotisserie chicken works wonders—saves time and adds flavor)
- 1 can black beans, drained and rinsed (15 oz / 425g)
- 1 can fire-roasted tomatoes (14.5 oz / 411g)
- 1/2 cup diced onion (about 75g; yellow or white)
- 2 cloves garlic, minced
- 1-2 tablespoons chili powder (adjust for heat preference)
- 1 teaspoon cumin
- 1/2 teaspoon smoked paprika (adds that smoky depth)
- 1/2 teaspoon salt
- 1/4 teaspoon black pepper
- 1/2 cup chicken broth (120ml; use low-sodium if you like)
- For the Mexican Street Corn Topping:
- 2 cups corn kernels (about 330g; fresh, frozen, or canned—grilled if possible for extra flavor)
- 2 tablespoons mayonnaise (for that elote creaminess—use avocado mayo for a lighter option)
- 1/4 cup sour cream (60g; swap with Greek yogurt for more protein)
- 1/4 cup chopped cilantro (about 10g)
- Juice of 1 lime (about 2 tablespoons / 30ml)
- 1/2 teaspoon chili powder
- 1/4 teaspoon salt
- 1/2 cup crumbled cotija or feta cheese (65g; if you can’t find cotija, feta or parmesan works)
- For Assembly:
- 1 large bag tortilla chips (about 12 oz / 340g; thick, restaurant-style chips hold up best)
- 2 cups shredded Mexican blend cheese (225g; Monterey Jack and cheddar are great options)
- 1/4 cup sliced jalapeños (fresh or pickled; optional for heat)
- Extra lime wedges, cilantro, and hot sauce for serving
Ingredient Tips: I love using Trader Joe’s fire-roasted corn in summer, but any sweet corn will do. For cheese, Sargento’s Mexican blend melts beautifully. If you’re gluten-free, check that your chips are certified (most are, but you never know). For a dairy-free version, swap in vegan cheese and mayo—easy peasy. This recipe is flexible, so don’t stress if you need to substitute beans or chicken for what you have on hand.
Equipment Needed
- Large Baking Sheet: Essential for spreading out your nachos and getting that perfect crispy edge. A rimmed sheet is best—less risk of chips sliding off.
- Medium Saucepan: For simmering the chicken chili. You don’t need anything fancy; I’ve used everything from nonstick to stainless steel.
- Mixing Bowls: One for the street corn topping, one for tossing the chili. If you’re short, just rinse and reuse.
- Sharp Chef’s Knife: For dicing onions, chopping cilantro, and slicing jalapeños. A good knife makes prep way quicker (and safer—trust me, dull knives are no joke).
- Measuring Cups and Spoons: For getting those spice ratios just right. Eyeballing works for some things, but chili powder is easy to overdo.
- Box Grater (optional): If shredding your own cheese—always melts better than pre-shredded.
If you don’t have a rimmed baking sheet, use a casserole dish or even a cast iron skillet for a rustic look. For grilling corn, a grill pan works in winter. I’ve tried budget-friendly equipment from Target and thrift stores, and honestly, you don’t need top-of-the-line tools for nachos (just keep your baking sheet clean and dry for extra crunch).
Preparation Method
-
Preheat your oven.
Set to 400°F (200°C). If your oven runs hot, drop to 375°F (190°C). This helps the cheese melt evenly and the chips get crispy. -
Make the chicken chili.
In a medium saucepan, heat a splash of oil over medium heat. Add diced onion and sauté for 2-3 minutes until soft and translucent. Stir in minced garlic and cook for another 30 seconds (don’t let it burn—garlic goes bitter fast).
Add shredded chicken, black beans, fire-roasted tomatoes, chili powder, cumin, smoked paprika, salt, and pepper. Pour in chicken broth. Stir well and bring to a simmer. Let it cook for 8-10 minutes, stirring occasionally, until thickened slightly. Taste and adjust seasoning if needed.
Troubleshooting: If the chili looks too dry, add an extra splash of broth. If too soupy, simmer uncovered for a few minutes. It should be thick enough to spoon onto chips without making them soggy. -
Prepare the Mexican street corn topping.
If using fresh corn, grill or roast in a dry skillet for 5 minutes until lightly charred. If using frozen, thaw and pat dry. In a mixing bowl, combine corn kernels, mayonnaise, sour cream, lime juice, chili powder, salt, and half the cilantro. Stir until creamy.
Note: For extra flavor, add a pinch of smoked paprika or a splash of hot sauce. The mixture should be tangy and just a little spicy. -
Assemble the nachos.
Spread tortilla chips in an even layer on your baking sheet. Spoon chicken chili over chips, making sure every chip gets a little love. Sprinkle with shredded cheese and jalapeños.
Top with dollops of street corn mixture, then sprinkle crumbled cotija cheese and remaining cilantro over everything.
Tip: Layer in stages—chips, chili, cheese, then corn—so each bite is loaded. -
Bake.
Place in the oven for 8-10 minutes, or until cheese is melted and bubbling. Keep an eye out: chips burn fast if left too long.
Sensory cue: The cheese should be gooey, edges lightly browned, and the corn topping just starting to toast. -
Garnish and serve.
Remove nachos from oven. Squeeze extra lime over the top, sprinkle with more cilantro, and drizzle with hot sauce if you like it spicy.
Serve immediately, straight from the pan, with extra lime wedges on the side.
Efficiency tip: Prep garnishes while nachos bake to save time.
Cooking Tips & Techniques
- Don’t overload your chips. I learned the hard way—too much topping and you get a soggy mess. Spread chili and cheese evenly so most chips stay crispy underneath.
- Roast your corn. If you have time, grill or roast fresh corn for a smoky street corn flavor. Even canned corn benefits from a quick pan-sear.
- Use thick, sturdy chips. Restaurant-style chips hold up best. Thin chips just crumble under all that delicious weight—I’ve tried, and it’s sad to lose half your nachos to the bottom of the pan.
- Layer for the win. I used to just dump everything on top, but layering chili, cheese, and corn ensures every bite is loaded. For extra cheesiness, add a little cheese between layers.
- Watch the oven. Cheese goes from perfect to burnt pretty fast. Set a timer for 8 minutes and check—go longer if needed, but don’t walk away.
- Multitasking tips: Make the street corn topping while the chili simmers. Chop garnishes while everything bakes. Keeps cleanup minimal!
- Common mistakes: Using wet toppings or runny chili will make chips soggy. If your chili is too thin, simmer longer or drain off some liquid before assembling.
- If making ahead: Prep chili and corn topping but wait to assemble until it’s time to bake. Nachos are best fresh.
I’ve burned a batch or two by getting distracted—now I always set a timer and prep garnishes while the oven does its thing. Consistency comes from using the same chip brand and cheese blend (I like Sargento or Kraft). If your cheese isn’t melting well, try shredding it fresh (pre-shredded can have anti-caking agents that slow things down).
Variations & Adaptations
- Dairy-Free Nachos: Use vegan cheese and dairy-free mayo/sour cream for the street corn topping. I’ve tried Daiya cheese—it melts better than you’d think!
- Vegetarian Option: Swap chicken for sautéed mushrooms or jackfruit. Add extra beans for protein. The street corn and chili seasoning make it just as satisfying.
- Spicy Buffalo Twist: Toss shredded chicken with buffalo sauce instead of chili powder. Top with ranch or blue cheese crumbles. My kids loved this version with a little extra kick!
- Seasonal Variation: In summer, use fresh grilled corn and heirloom tomatoes. In winter, canned or frozen work just fine.
- Low-Carb Nachos: Use pork rinds or baked veggie chips instead of traditional tortilla chips. It’s surprisingly good and keeps things lower-carb.
For allergen swaps, use gluten-free chips and check cheese labels. If you want to play with flavor, add smoked jalapeños or a dash of chipotle powder. One of my favorite variations is swapping out black beans for pinto beans and adding roasted poblano peppers—gives a rich, earthy flavor that’s hard to beat.
Serving & Storage Suggestions
These nachos are best served piping hot, straight from the pan—trust me, it’s a fight for the crispy corner pieces! For presentation, pile onto a big platter and garnish with lime wedges, cilantro sprigs, and sliced jalapeños. If you’re feeling fancy, add a dollop of guacamole or pico de gallo on the side.
For drinks, I love pairing with a cold Mexican lager, a tangy margarita, or even sparkling water with lime. If serving as a meal, add a simple green salad or a bowl of tortilla soup.
Leftover nachos don’t keep their crunch, but you can refrigerate any extra chili and corn topping for up to 3 days. Store in airtight containers. To reheat, spread chips on a baking sheet, top with chili and cheese, and bake at 350°F (175°C) for 5-6 minutes until warm and crispy. The flavors deepen overnight, so leftovers make a tasty lunch—just don’t expect the chips to be as crisp as day one!
Nutritional Information & Benefits
Here’s a rough estimate per generous serving (about 1/4 of the recipe):
- Calories: 520
- Protein: 28g
- Carbohydrates: 49g
- Fat: 22g
- Fiber: 7g
- Sodium: 980mg
This recipe packs a good protein punch from chicken and beans, with fiber from corn and beans. Using grilled corn and fresh lime ups the vitamin content, while swapping in Greek yogurt for sour cream adds probiotics and extra protein. If you go for gluten-free chips or vegan cheese, it’s easy to adapt for most diets. Watch out for dairy and corn allergies, and pick low-sodium options if needed. I love that this recipe fills you up without feeling heavy—plus, it sneaks in veggies and lean protein, which is always a win in my book.
Conclusion
If you’re craving something that feels like a party on a plate, these Mexican Street Corn Chicken Chili Nachos are absolutely worth making. They’re loaded with flavor, customizable to your taste, and (let’s face it) dangerously easy for any night of the week. I love how they bring my family together—everyone huddled around the table, grabbing chips and swapping stories. You can switch up toppings and spices, so don’t be afraid to make it your own. I hope you love this recipe as much as we do—honestly, nachos like these make any day brighter.
Let me know in the comments if you tried a twist or added your favorite toppings! Share this recipe with friends, pin it to your Pinterest board, or tag me when you make it—I’d love to see your loaded nachos creations. Happy munching, and may your chips always stay crispy!
FAQs About Mexican Street Corn Chicken Chili Nachos
Can I make these nachos ahead of time?
You can prep the chicken chili and the street corn topping in advance, but assemble and bake the nachos just before serving for best crunch.
What’s the best cheese for loaded nachos?
Mexican blend, Monterey Jack, or cheddar all melt nicely. Freshly shredded cheese works better than pre-shredded for that gooey finish.
Can I use canned corn instead of fresh?
Absolutely! Drain it well, and consider roasting it in a skillet for a few minutes to boost flavor.
How do I make these nachos vegetarian?
Skip the chicken and add extra beans, sautéed mushrooms, or jackfruit for a hearty meat-free option.
What chips hold up best for loaded nachos?
Thick, restaurant-style tortilla chips are ideal—they won’t get soggy as quickly and can handle all the toppings.
Pin This Recipe!
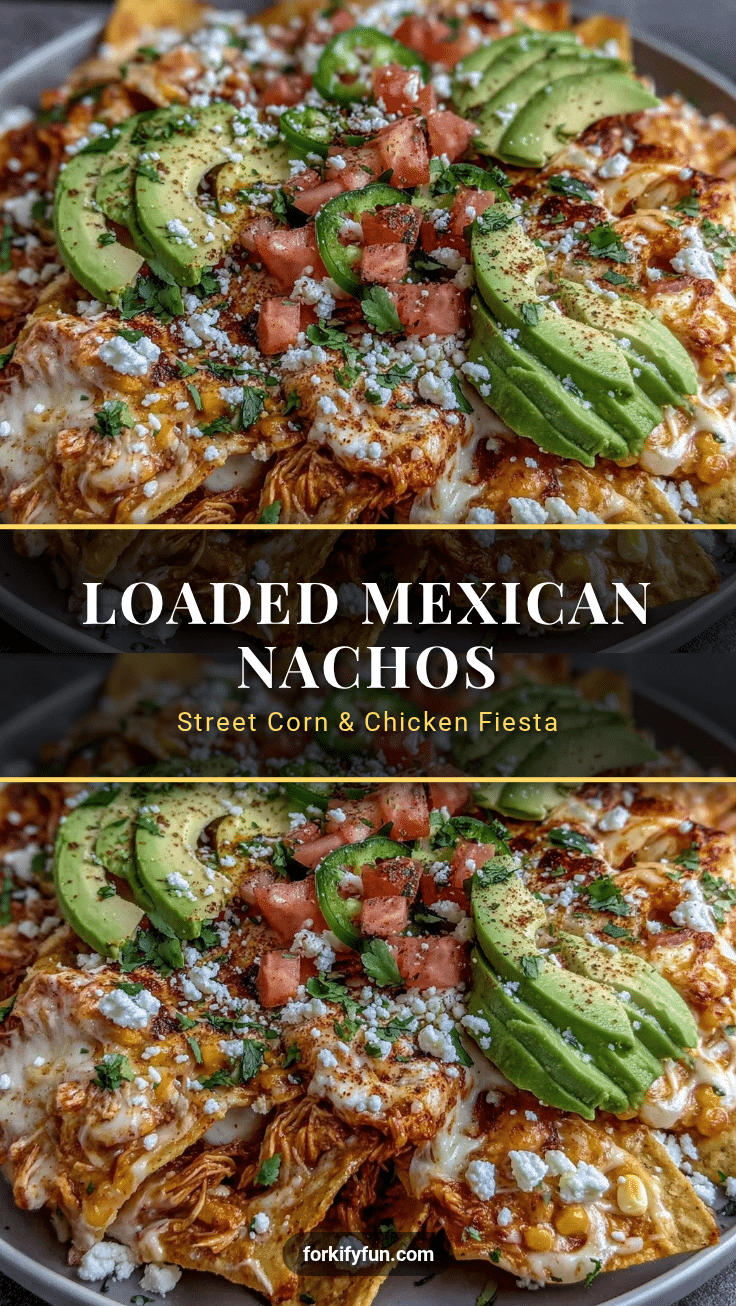
Mexican Street Corn Chicken Chili Nachos

These loaded nachos combine smoky chicken chili, sweet roasted corn, and melty cheese for a crowd-pleasing appetizer that’s quick, easy, and bursting with Mexican street corn flavor. Perfect for game days, potlucks, or weeknight comfort food.
- Prep Time: 15 minutes
- Cook Time: 15 minutes
- Total Time: 30 minutes
- Yield: 4 servings 1x
- Category: Appetizer
- Cuisine: Mexican
Ingredients
- 2 cups cooked chicken, shredded (rotisserie chicken recommended)
- 1 can black beans, drained and rinsed (15 oz)
- 1 can fire-roasted tomatoes (14.5 oz)
- 1/2 cup diced onion (yellow or white)
- 2 cloves garlic, minced
- 1–2 tablespoons chili powder
- 1 teaspoon cumin
- 1/2 teaspoon smoked paprika
- 1/2 teaspoon salt
- 1/4 teaspoon black pepper
- 1/2 cup chicken broth (low-sodium optional)
- 2 cups corn kernels (fresh, frozen, or canned; grilled if possible)
- 2 tablespoons mayonnaise (or avocado mayo)
- 1/4 cup sour cream (or Greek yogurt)
- 1/4 cup chopped cilantro
- Juice of 1 lime (about 2 tablespoons)
- 1/2 teaspoon chili powder
- 1/4 teaspoon salt
- 1/2 cup crumbled cotija or feta cheese (or parmesan)
- 1 large bag tortilla chips (about 12 oz; thick, restaurant-style)
- 2 cups shredded Mexican blend cheese (Monterey Jack and cheddar are good options)
- 1/4 cup sliced jalapeños (fresh or pickled, optional)
- Extra lime wedges, cilantro, and hot sauce for serving
Instructions
- Preheat oven to 400°F (200°C). If your oven runs hot, use 375°F (190°C).
- In a medium saucepan, heat a splash of oil over medium heat. Add diced onion and sauté for 2-3 minutes until soft and translucent. Stir in minced garlic and cook for another 30 seconds.
- Add shredded chicken, black beans, fire-roasted tomatoes, chili powder, cumin, smoked paprika, salt, and pepper. Pour in chicken broth. Stir well and bring to a simmer. Cook for 8-10 minutes, stirring occasionally, until thickened slightly. Adjust seasoning if needed.
- If chili is too dry, add a splash of broth. If too soupy, simmer uncovered for a few minutes until thick enough to spoon onto chips.
- Prepare the Mexican street corn topping: If using fresh corn, grill or roast in a dry skillet for 5 minutes until lightly charred. If using frozen, thaw and pat dry. In a mixing bowl, combine corn kernels, mayonnaise, sour cream, lime juice, chili powder, salt, and half the cilantro. Stir until creamy.
- Spread tortilla chips in an even layer on a large baking sheet. Spoon chicken chili over chips, ensuring even coverage. Sprinkle with shredded cheese and jalapeños.
- Top with dollops of street corn mixture, then sprinkle crumbled cotija cheese and remaining cilantro over everything.
- Bake for 8-10 minutes, or until cheese is melted and bubbling. Watch closely to avoid burning.
- Remove nachos from oven. Squeeze extra lime over the top, sprinkle with more cilantro, and drizzle with hot sauce if desired.
- Serve immediately, straight from the pan, with extra lime wedges on the side.
Notes
Use thick, restaurant-style chips for best results. Grill or roast corn for extra flavor. Layer toppings for maximum crunch and cheesiness. Prep chili and corn topping ahead, but assemble and bake just before serving. For dairy-free or vegetarian options, substitute vegan cheese/mayo or mushrooms/jackfruit for chicken.
Nutrition
- Serving Size: About 1/4 of the rec
- Calories: 520
- Sugar: 5
- Sodium: 980
- Fat: 22
- Saturated Fat: 9
- Carbohydrates: 49
- Fiber: 7
- Protein: 28
Keywords: nachos, Mexican street corn, chicken chili, loaded nachos, easy appetizer, game day, party food, comfort food, family recipe