“You want me to set up a nacho bar for the party? Just throw some chips and cheese out, right?” That was my skeptical thought when my friend texted me last minute about hosting a get-together. Honestly, I was juggling a mountain of work and barely had time to breathe. But, well, I figured, how hard could it be? Turns out, assembling a flavorful loaded nacho bar with all the fixings is a whole vibe—and it quickly became my go-to for last-minute entertaining.
I started pulling together whatever I had in the fridge and pantry—sharp cheddar, spicy jalapeños, creamy guacamole, and even some leftover seasoned ground beef from a weeknight dinner. Each topping brought a little magic, and I realized this wasn’t just a snack; it was a full-on experience. The crunch, the heat, the creamy dips—everything layered perfectly. Guests kept coming back for more, and I caught myself sneaking bites when no one was watching.
Later, I found myself making this nacho bar three times in a week, tweaking toppings and sauces like a bit of a nacho obsessive. It’s funny how such a simple concept can turn chaotic evenings into moments of genuine comfort and fun. And honestly, it’s the unexpected star when friends ask for something easy but crave-worthy. That’s why this recipe stuck—it’s not just about piling chips high, it’s about bringing flavor, warmth, and a little bit of party magic to any table.
Why You’ll Love This Recipe
Having tested this loaded nacho bar recipe through multiple gatherings and solo snack sessions, I can vouch for its unbeatable appeal. Here’s why this recipe stands out:
- Quick & Easy: It all comes together in under 30 minutes, perfect for those busy days when you want to impress with zero stress.
- Simple Ingredients: Most of these toppings are pantry staples or fresh produce you likely have on hand—no last-minute grocery runs needed.
- Perfect for Parties: Whether it’s game day, a casual hangout, or a family movie night, this nacho bar is a guaranteed crowd-pleaser.
- Crowd-Pleaser: Kids and adults alike rave about the combination of melty cheese, seasoned beef, and fresh fixings that keep everyone coming back.
- Unbelievably Delicious: The balance of crunchy, creamy, spicy, and tangy keeps each bite exciting and satisfying.
This isn’t just another nacho recipe. I like to give the seasoned ground beef a quick simmer with smoky spices to deepen the flavor, and the homemade guacamole adds that fresh zing you won’t find in store-bought dips. Plus, layering the toppings thoughtfully prevents sogginess and keeps the chips crisp—a small trick I picked up over time that makes all the difference. Honestly, after a few tries and tweaks, this recipe feels like a cozy celebration on a plate.
What Ingredients You Will Need
This recipe uses simple, wholesome ingredients to deliver bold flavor and satisfying texture without the fuss. Most are easy to find year-round, and plenty of options let you swap things out based on your pantry or preferences.
- Tortilla Chips: Choose sturdy, thick-cut chips that won’t break under the weight of toppings. I recommend Mission brand for best crunch.
- Ground Beef: About 1 pound (450g) of lean ground beef, seasoned with taco spices (cumin, paprika, chili powder, garlic powder). For a lighter twist, swap for ground turkey or plant-based crumbles.
- Cheese: Sharp cheddar and Monterey Jack cheeses, shredded (about 2 cups or 200g total). They melt beautifully and create that gooey, irresistible layer.
- Black Beans: 1 cup (240ml), rinsed and drained. Adds protein and texture.
- Fresh Jalapeños: Thinly sliced, adjust amount to your heat preference.
- Tomatoes: Diced Roma tomatoes or cherry tomatoes halved (1 cup or 150g), for freshness.
- Red Onion: Finely chopped (½ cup or 75g) to add a little sharpness and crunch.
- Green Onions: Sliced for garnish.
- Fresh Cilantro: Chopped, about ¼ cup (15g), for brightness.
- Guacamole: Homemade or store-bought (about 1 cup or 240g). I personally mash ripe avocados with lime juice, salt, and a touch of garlic.
- Sour Cream or Greek Yogurt: About ½ cup (120ml) for creaminess. Greek yogurt is a tangier, protein-packed substitute.
- Pickled Jalapeños: Optional, for extra tang and heat.
- Lime Wedges: For squeezing on top just before serving.
- Taco Seasoning: A mix of chili powder, cumin, smoked paprika, garlic powder, onion powder, oregano, salt, and pepper (about 2 tbsp or 30g). You can use store-bought or mix your own.
Equipment Needed
Setting up a loaded nacho bar is pretty straightforward when you have the right tools. Here’s what you’ll need:
- Large Baking Sheet or Oven-Safe Tray: For layering and melting the chips and toppings. I prefer rimmed sheets to catch any drips.
- Mixing Bowls: One for the beef mixture, another for tossing toppings, and a small bowl for guacamole or sour cream.
- Sharp Knife and Cutting Board: Essential for chopping tomatoes, onions, and jalapeños safely.
- Skillet or Frying Pan: To cook and season the ground beef evenly. A nonstick pan makes cleanup easier.
- Cheese Grater: Freshly shredded cheese melts better than pre-shredded varieties.
- Spoons and Serving Utensils: For guests to help themselves to toppings.
If you don’t have an oven-safe tray, a cast iron skillet can double as a serving dish that keeps nachos warm. Also, investing in a good-quality chef’s knife really speeds up prep and feels safer. For budget-friendly options, simple nonstick pans and mixing bowls from your local store will do just fine.
Preparation Method
- Preheat your oven to 375°F (190°C). This temperature crisps the chips gently while melting the cheese without drying everything out.
- Cook the ground beef: Heat a skillet over medium-high heat. Add 1 lb (450g) of lean ground beef and cook, breaking it up with a spoon, until browned and cooked through—about 7 minutes. Drain excess fat.
- Season the beef: Stir in 2 tbsp (30g) of your taco seasoning along with ¼ cup (60ml) water. Simmer for 3-4 minutes until the mixture thickens and spices are well absorbed. Remove from heat and set aside.
- Prepare toppings: While the beef cooks, dice 1 cup (150g) tomatoes, finely chop ½ cup (75g) red onion, slice jalapeños, and chop cilantro and green onions. Rinse and drain 1 cup (240ml) black beans.
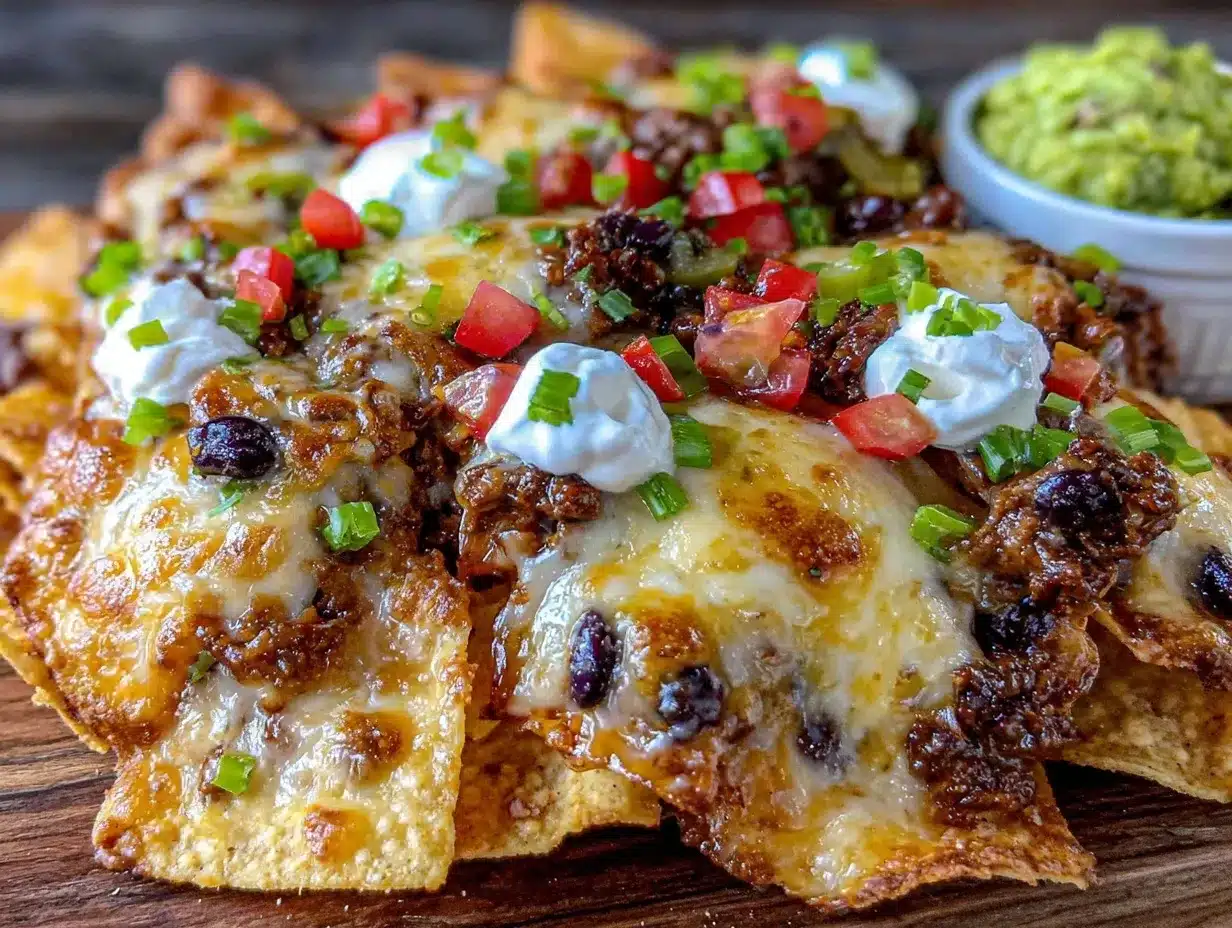
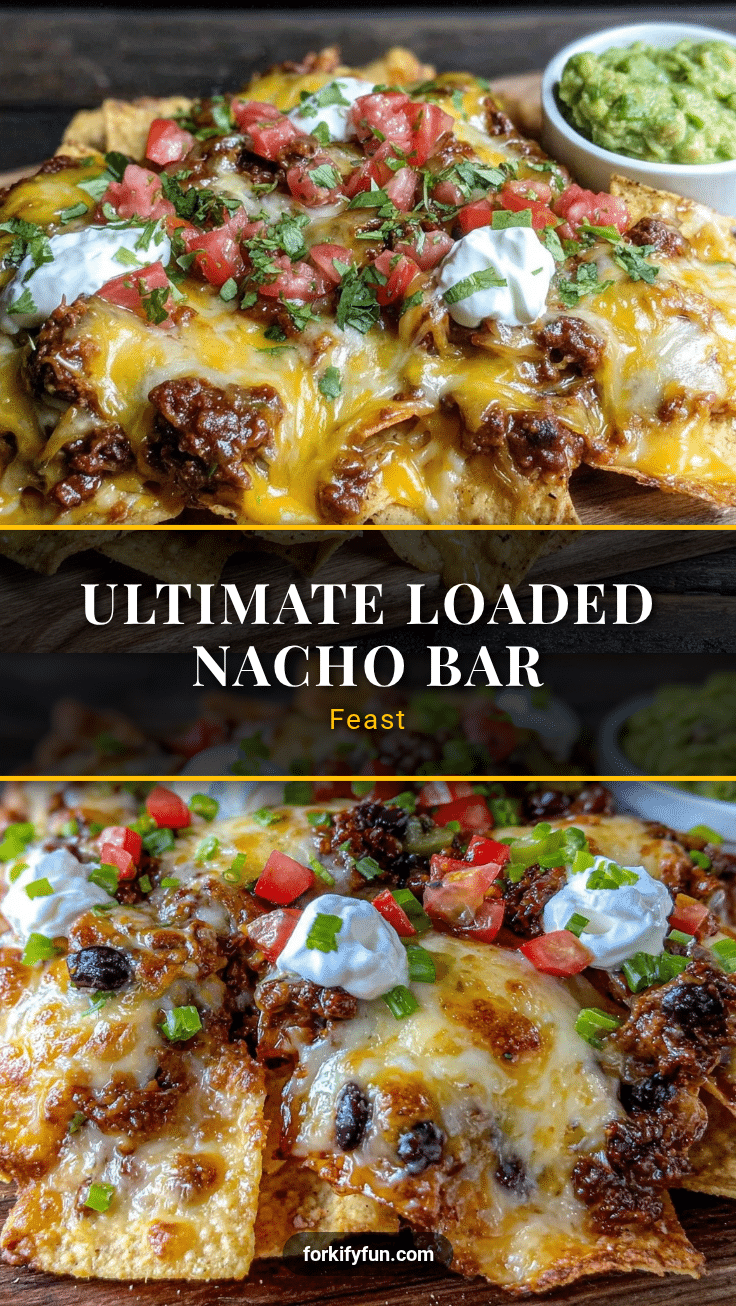
- Layer the nachos: Spread a generous layer of sturdy tortilla chips on your baking sheet. Evenly distribute the cooked beef, black beans, diced tomatoes, and jalapeños over the chips. Sprinkle 2 cups (200g) shredded cheddar and Monterey Jack cheese on top.
- Bake: Place the tray in the oven and bake for 8-10 minutes, or until the cheese is melted and bubbly. Keep an eye on it to avoid burning.
- Add fresh toppings: Remove from oven and scatter chopped red onions, green onions, and cilantro over the top. Dollop with guacamole and sour cream or Greek yogurt. Add pickled jalapeños and lime wedges on the side for guests to customize.
- Serve immediately: Nachos are best enjoyed fresh and warm to keep that perfect crunch. Encourage guests to pile on their favorite fixings for a fun, interactive snack.
Pro tip: If you want to prep ahead, cook and season the beef a day before and store it in the fridge. Then, simply assemble and bake when you’re ready to serve. This saves a ton of time and stress.
Cooking Tips & Techniques
One of the trickiest parts of a loaded nacho bar is keeping the chips crisp under all those toppings. I learned this the hard way after soggy first batches. Here’s what works best:
- Use thick, sturdy chips: Thin, flimsy ones just won’t hold up. Corn tortilla chips labeled “restaurant style” or “thick cut” are your friends here.
- Layer wisely: Don’t pile everything on at once. Spread toppings evenly and bake uncovered so moisture evaporates, preventing sogginess.
- Control cheese distribution: Cheese acts like a glue and moisture barrier. A good layer over the toppings helps keep chips crisp underneath.
- Warm but don’t overbake: Overbaking dries out cheese and chips. Melt cheese until bubbly and remove promptly.
- Fresh toppings last: Add fresh ingredients like tomatoes, onions, and guacamole after baking to preserve their texture and flavor.
Multitasking tip: While the beef simmers, chop your veggies and prep dips. This keeps everything moving smoothly and lets you plate up the nachos hot and fresh. Also, don’t be shy about customizing spices; a pinch of smoked paprika or a dash of cayenne can really punch up flavor.
Variations & Adaptations
This loaded nacho bar is a flexible framework for all kinds of tastes and dietary needs. Here are some variations I’ve tried and loved:
- Vegetarian Nachos: Swap ground beef for extra black beans, grilled corn, or seasoned sautéed mushrooms. Add some diced avocado for creaminess.
- Spicy Kick: Add chipotle peppers in adobo sauce to the beef or sprinkle cayenne into the cheese layer for smoky heat.
- Gluten-Free: Use certified gluten-free tortilla chips and double-check seasonings to avoid gluten-containing additives.
- Different Protein: Try shredded rotisserie chicken or turkey meatballs crumbled for a fresh twist.
- Cheese Variations: Mix in queso fresco or pepper jack for a more authentic Tex-Mex flavor.
One personal favorite variation is swapping the beef for spicy Korean ground beef from my easy Korean ground beef bowl. It adds a surprising twist that guests love, blending savory and sweet with the classic nacho crunch.
Serving & Storage Suggestions
These nachos are best served hot and fresh from the oven, when the cheese is melty and the chips are still crispy. Set up your bar with plenty of small bowls for toppings so guests can customize their plates. A squeeze of fresh lime right before eating adds a bright pop of flavor that you don’t want to skip.
If you have leftovers (and honestly, good luck with that), store them in an airtight container in the fridge for up to 2 days. When reheating, spread the nachos on a baking sheet and warm at 350°F (175°C) for about 8 minutes to help revive the crispness. Avoid microwaving if possible—it tends to make chips soggy.
Flavors actually deepen after a day, especially the seasoned beef and beans, so leftovers can be surprisingly tasty. Just keep fresh toppings like guacamole and sour cream separate until serving.
Nutritional Information & Benefits
Per serving (about 1 cup): approximately 350 calories, 20g protein, 25g carbohydrates, and 18g fat. This recipe balances protein from beef and beans with fiber and vitamins from fresh veggies.
Key benefits include vitamin C from lime and tomatoes, healthy fats from avocado in the guacamole, and calcium from cheese. The black beans add plant-based protein and fiber, helping keep you full and satisfied.
For those watching carbs, you can reduce chip quantity or swap for baked chips. Those avoiding dairy can omit cheese and use dairy-free sour cream alternatives to keep it inclusive. Just be mindful of allergens like dairy and corn when serving a crowd.
Personally, I appreciate how this recipe offers comfort food vibes without going overboard on processed ingredients—it feels like a treat you can enjoy without guilt.
Conclusion
This flavorful loaded nacho bar with all the fixings has become my secret weapon for fuss-free entertaining and satisfying cravings alike. It’s flexible, approachable, and packed with layers of flavor that bring people together in the best way. Whether you’re feeding a crowd or just craving a fun snack, this recipe invites you to make it your own.
Don’t hesitate to swap toppings, tweak spices, or try different proteins until you find your perfect combo. I love how the simple joy of piling chips high with tasty fixings can turn an ordinary night into something memorable. If you give it a try, I’d love to hear what twists you add or how it became a favorite in your home.
So get ready to gather your favorite toppings, warm up the oven, and enjoy a festive, flavorful feast that’s as easy as it is delicious.
FAQs
Can I make this loaded nacho bar vegetarian?
Absolutely! Use extra black beans, sautéed mushrooms, or grilled veggies instead of meat. You can also add plant-based protein crumbles for a similar texture.
How do I keep the chips from getting soggy?
Use sturdy chips and layer cheese generously to create a moisture barrier. Bake uncovered just until cheese melts and add fresh toppings after baking to keep crunch.
Can I prepare the toppings ahead of time?
Yes, cook and season the beef and prep fresh toppings a day ahead. Store separately and assemble right before baking for best results.
What’s a good substitute for sour cream?
Greek yogurt works great as a tangy, protein-rich alternative. For dairy-free options, try coconut yogurt or cashew-based sour cream substitutes.
Can I add other proteins to this nacho bar?
Definitely! Shredded chicken, pulled pork, or even grilled chicken work wonderfully and add variety.
Pin This Recipe!
Loaded Nacho Bar Recipe Easy Steps for the Best Flavorful Party Nachos

A quick and easy loaded nacho bar recipe perfect for parties, featuring seasoned ground beef, melty cheese, fresh toppings, and customizable fixings for a crowd-pleasing snack.
- Prep Time: 15 minutes
- Cook Time: 15 minutes
- Total Time: 30 minutes
- Yield: 6 servings 1x
- Category: Appetizer
- Cuisine: Tex-Mex
Ingredients
- Tortilla chips (sturdy, thick-cut, about 10-12 oz)
- 1 lb lean ground beef
- 2 tbsp taco seasoning (chili powder, cumin, smoked paprika, garlic powder, onion powder, oregano, salt, pepper)
- 2 cups shredded sharp cheddar and Monterey Jack cheese (about 7 oz)
- 1 cup black beans, rinsed and drained
- Fresh jalapeños, thinly sliced (to taste)
- 1 cup diced Roma or cherry tomatoes
- ½ cup finely chopped red onion
- Sliced green onions (for garnish)
- ¼ cup chopped fresh cilantro
- 1 cup guacamole (homemade or store-bought)
- ½ cup sour cream or Greek yogurt
- Pickled jalapeños (optional)
- Lime wedges (for serving)
- ¼ cup water (for simmering beef)
Instructions
- Preheat oven to 375°F (190°C).
- Heat a skillet over medium-high heat. Add ground beef and cook, breaking it up, until browned and cooked through, about 7 minutes. Drain excess fat.
- Stir in taco seasoning and ¼ cup water. Simmer for 3-4 minutes until thickened and spices are absorbed. Remove from heat.
- Prepare toppings: dice tomatoes, chop red onion, slice jalapeños, chop cilantro and green onions, rinse and drain black beans.
- Spread a generous layer of tortilla chips on a large baking sheet.
- Evenly distribute cooked beef, black beans, diced tomatoes, and jalapeños over chips.
- Sprinkle shredded cheddar and Monterey Jack cheese evenly on top.
- Bake for 8-10 minutes until cheese is melted and bubbly. Watch closely to avoid burning.
- Remove from oven and scatter chopped red onions, green onions, and cilantro over the top.
- Dollop guacamole and sour cream or Greek yogurt on top.
- Add pickled jalapeños and lime wedges on the side for guests to customize.
- Serve immediately while warm and crispy.
Notes
Use thick, sturdy tortilla chips to prevent sogginess. Layer cheese generously to create a moisture barrier. Add fresh toppings after baking to keep chips crisp. Cook and season beef ahead to save time. For reheating leftovers, warm in oven at 350°F for 8 minutes to revive crispness. Avoid microwaving to prevent soggy chips.
Nutrition
- Serving Size: About 1 cup
- Calories: 350
- Sugar: 3
- Sodium: 450
- Fat: 18
- Saturated Fat: 7
- Carbohydrates: 25
- Fiber: 5
- Protein: 20
Keywords: loaded nachos, nacho bar, party snacks, Tex-Mex, ground beef nachos, easy appetizers, crowd-pleaser