Let me tell you, the scent of buttery sugar and a hint of almond wafting from my oven is enough to make anyone’s mouth water—especially when those treats look like creepy, crispy witch fingers! The first time I baked these Crispy Witch Finger Cookies, I was instantly hooked. It was one of those moments where you pause, take a deep breath, and just smile because you realize you’ve stumbled onto a Halloween classic that’s as fun to make as it is to eat.
Years ago, when I was knee-high to a grasshopper, my grandma used to tell me stories about witches and their magic spells. Baking these cookies brings back that nostalgic feeling, mixing a little childhood wonder with a dash of playful spookiness. Honestly, I wish I’d discovered this recipe sooner—it’s dangerously easy and perfect for brightening up any Halloween party or just adding a pinch of eerie fun to your kitchen.
My family couldn’t stop sneaking these off the cooling rack (and I can’t really blame them). The crispy texture, combined with the almond flavor and that unmistakable spooky finger look, made these cookies a staple for our Halloween gatherings. You know what? They’re perfect for potlucks, a sweet treat for your kids, or even just to impress your friends on your Pinterest cookie board. After testing the recipe a handful of times (in the name of research, of course), it’s become a go-to for me—like a warm, crunchy hug that’s just a little bit wicked.
Why You’ll Love This Recipe
This Crispy Witch Finger Cookies recipe isn’t your run-of-the-mill spooky treat. It’s been tested, tweaked, and tasted to perfection, making sure it hits all the right notes. Here’s why you’re going to love baking and munching on these creepy delights:
- Quick & Easy: Whip these up in under 45 minutes, perfect for last-minute Halloween plans or when you just need a spooky snack fast.
- Simple Ingredients: No need for fancy or hard-to-find items—you probably already have everything in your pantry or fridge.
- Perfect for Halloween Parties: These crispy witch finger cookies steal the show every time, making your spooky spread unforgettable.
- Crowd-Pleaser: Kids and adults alike rave about the crunchy texture and eerie appearance. They’re as fun to make as they are to eat.
- Unbelievably Delicious: The almond extract gives a unique flavor punch, while the crispy bite keeps you coming back for more.
What sets this recipe apart? It’s all about the perfect balance of flavors and texture. The dough is easy to shape, and the almond extract adds that signature taste you won’t find in most cookies. Plus, the jagged almond “nails” and knuckle details make these cookies look like they crawled straight out of a witch’s spellbook. Honestly, this isn’t just a cookie recipe—it’s your best Halloween treat ever.
What Ingredients You Will Need
This recipe uses simple, wholesome ingredients to deliver bold flavor and satisfying texture without the fuss. Most are pantry staples, and a few tips on selection make all the difference.
- All-purpose flour: 2 ½ cups (315 grams) – provides the sturdy base for the cookies
- Baking powder: 1 teaspoon – helps the cookies rise just enough for a crisp bite
- Salt: ½ teaspoon – balances the sweetness
- Unsalted butter: ¾ cup (170 grams), softened – I recommend using a good-quality brand like Kerrygold for a rich flavor
- Granulated sugar: ¾ cup (150 grams) – adds sweetness and crunch
- Large egg: 1, room temperature – binds the dough together
- Almond extract: 1 teaspoon – the star flavor that makes these witch fingers so memorable
- Whole almonds: about 24, sliced lengthwise – these act as the creepy fingernails (use raw, unroasted for best sticking)
- Optional: Red food coloring gel or red decorating gel – for a bloody, spooky effect around the nails
Pro tip: For a gluten-free twist, you can swap the all-purpose flour with a gluten-free blend, but be mindful that the texture might change slightly. If you prefer a dairy-free version, try using a plant-based butter substitute and a flax egg instead of a regular egg.
Equipment Needed
- Mixing bowls: At least two—one for dry ingredients and one for wet
- Electric mixer or hand whisk: Electric mixer speeds up the process, but a sturdy whisk works fine
- Baking sheet: A rimmed cookie sheet lined with parchment paper or a silicone mat
- Measuring cups and spoons: For accuracy—especially with flour and baking powder
- Cooling rack: To let those crispy witch finger cookies cool evenly without getting soggy
- Small knife or toothpick: To score the knuckle lines on the fingers
If you don’t have an electric mixer, no worries—this dough is forgiving and can be mixed by hand. For budget-friendly baking, parchment paper alternatives like silicone mats are reusable and worth the investment.
Preparation Method

- Preheat your oven to 350°F (175°C). Line a baking sheet with parchment paper or a silicone mat to prevent sticking. This step sets the stage for perfectly crispy cookies.
- Mix dry ingredients: In a medium bowl, whisk together 2 ½ cups (315 g) of all-purpose flour, 1 teaspoon baking powder, and ½ teaspoon salt. This ensures even distribution and a tender crumb.
- Cream butter and sugar: In a large bowl, beat ¾ cup (170 g) softened unsalted butter with ¾ cup (150 g) granulated sugar until light and fluffy—about 3-4 minutes. The texture should look pale and creamy, which means you’ve incorporated enough air for a crisp bite.
- Add egg and almond extract: Beat in 1 large egg and 1 teaspoon almond extract until combined. This adds moisture and that signature almond flavor. Make sure your egg is at room temperature to avoid dough separation.
- Combine wet and dry: Gradually add the dry ingredients to the wet, mixing on low speed or folding with a spatula until a soft dough forms. If the dough feels too sticky, sprinkle in a little more flour, a tablespoon at a time.
- Shape the fingers: Divide the dough into 24 equal portions (about 1 tablespoon or 15 grams each). Roll each portion into a finger shape about 3 inches (7.5 cm) long and 1 inch (2.5 cm) wide. Flatten slightly with your palm for a more realistic look.
- Add knuckle details: Use a small knife or toothpick to gently score 2-3 knuckle lines on each finger. Press a sliced almond at the tip for the fingernail, slightly angling it for creepy effect.
- Optional blood effect: For a spooky touch, dab a tiny bit of red food coloring gel or decorating gel around the almond nails. This makes your witch fingers look freshly plucked!
- Bake: Place the baking sheet in the oven and bake for 15-18 minutes, or until the edges are golden brown and the cookies are crisp. Keep an eye on them—oven temps vary, and you want that perfect crunch without burning.
- Cool completely: Transfer cookies to a cooling rack and let cool for at least 15 minutes. They crisp up more as they cool, so resist the urge to snack right away (though I won’t blame you if you do).
Cooking Tips & Techniques
Here’s the lowdown from my kitchen experiments and a few lessons learned the hard way. First, don’t skip softening the butter—that’s key for the dough’s texture. Using cold butter will make the dough tough to mix and shape.
When shaping the fingers, don’t make them too thick. You want them crisp and delicate, not doughy in the middle. If you find the dough too sticky to handle, chilling it for 15 minutes helps a lot.
Scoring the knuckles is fun but be gentle—too deep, and the cookies might break during baking. Also, placing the almond nails at a slight angle adds realism and keeps them from popping off.
Keep a close eye in the last 5 minutes of baking. These cookies can go from golden to burnt pretty quickly. Using a silicone mat helps with even baking and easy cleanup.
Finally, multitask by prepping the dough and shaping the fingers while the oven preheats. That way, you’re ready to bake the moment the oven hits temperature—nothing beats fresh, warm witch fingers!
Variations & Adaptations
Want to mix things up? Here are some fun ways to make these witch finger cookies your own:
- Chocolate Witch Fingers: Add ¼ cup (25 g) cocoa powder to the dry ingredients for a rich chocolate twist. You can even dip the finished nails in melted dark chocolate for extra spookiness.
- Gluten-Free Option: Swap the all-purpose flour for a gluten-free blend that includes xanthan gum. The texture will be slightly different but still delicious.
- Nut-Free Version: Replace almond extract with vanilla extract and use small candy eyes or colored icing for nails instead of almonds to avoid nuts.
- Spiced Up: Add ½ teaspoon ground cinnamon and a pinch of nutmeg to the dough for a warm, autumnal flavor that pairs perfectly with Halloween vibes.
- Vegan-Friendly: Use plant-based butter and a flax egg (1 tbsp ground flaxseed + 3 tbsp water) instead of the regular egg to keep it vegan without sacrificing texture.
Personally, I once tried the chocolate version with a pinch of cayenne pepper—let’s just say it was a spooky surprise that kept guests guessing!
Serving & Storage Suggestions
Serve these crispy witch finger cookies at room temperature for the best crunch and flavor. They look fantastic arranged on a platter with a little “spooky blood” drizzle (extra red decorating gel) for effect. Pair with a glass of cold milk or a steaming cup of spiced cider to complete the Halloween vibe.
If you’re not gobbling them up immediately (though seriously, why wait?), store the cookies in an airtight container at room temperature for up to 5 days. To keep them extra crispy, place a slice of bread in the container—the moisture-absorbing trick works wonders.
For longer storage, freeze the baked cookies in a single layer on a baking sheet, then transfer to a freezer-safe container or bag. Thaw at room temperature before serving. Reheating briefly in a warm oven (300°F/150°C for 5 minutes) refreshes their crispiness.
Fun fact: the flavors actually deepen the next day, making these cookies even more addictive after they’ve rested overnight.
Nutritional Information & Benefits
Each crispy witch finger cookie contains approximately:
| Per Cookie | Calories | Fat | Carbohydrates | Protein |
|---|---|---|---|---|
| 1 cookie (~24 total) | 110 kcal | 6 g | 13 g | 1.5 g |
The key ingredient, almond extract, adds a rich flavor without extra sugar or fat. Using real butter provides healthy fats that support satiety. You could say these cookies are a treat with a little something extra, especially when you consider the joy and nostalgia they bring.
For those with dietary considerations, this recipe can be adapted to be gluten-free, vegan, or nut-free with the substitutions mentioned earlier. Just be mindful of potential allergens like nuts and eggs if serving to guests.
Conclusion
So, there you have it—crispy witch finger cookies that are as fun to make as they are to eat. They’re a perfect mix of spooky and delicious, bringing a little magic to your Halloween festivities. Whether you stick to the classic almond version or try one of the variations, these cookies are sure to impress without the stress.
I love this recipe because it captures the playful spirit of Halloween and delivers pure, nostalgic comfort in every bite. Plus, the crunchy texture and eerie look make it a conversation starter every time.
Give this recipe a try and don’t be shy about making it your own—leave a comment below with your favorite twists or questions! And hey, if you loved these crispy witch finger cookies, share the spooky love with your friends and family. Happy haunting and happy baking!
FAQs About Crispy Witch Finger Cookies
Can I make these cookies ahead of time?
Yes! You can prepare the dough and refrigerate it for up to 24 hours before shaping and baking. The baked cookies also keep well for several days at room temperature.
What if I don’t have almond extract?
You can substitute vanilla extract, but keep in mind the flavor won’t be quite the same. Almond extract gives these cookies their signature spooky flavor.
How do I keep the cookies crispy?
Store them in an airtight container with a slice of bread to absorb moisture. Reheating briefly in a low oven also helps restore crispness.
Can I use pre-sliced almonds for the nails?
Yes, just make sure they’re raw or lightly toasted. Avoid salted or flavored almonds to keep the taste balanced.
Is there a way to make these cookies less sweet?
Reducing the sugar by 1-2 tablespoons can tone down the sweetness, but keep in mind it may affect the texture slightly. You can also pair the cookies with unsweetened beverages to balance flavors.
Pin This Recipe!
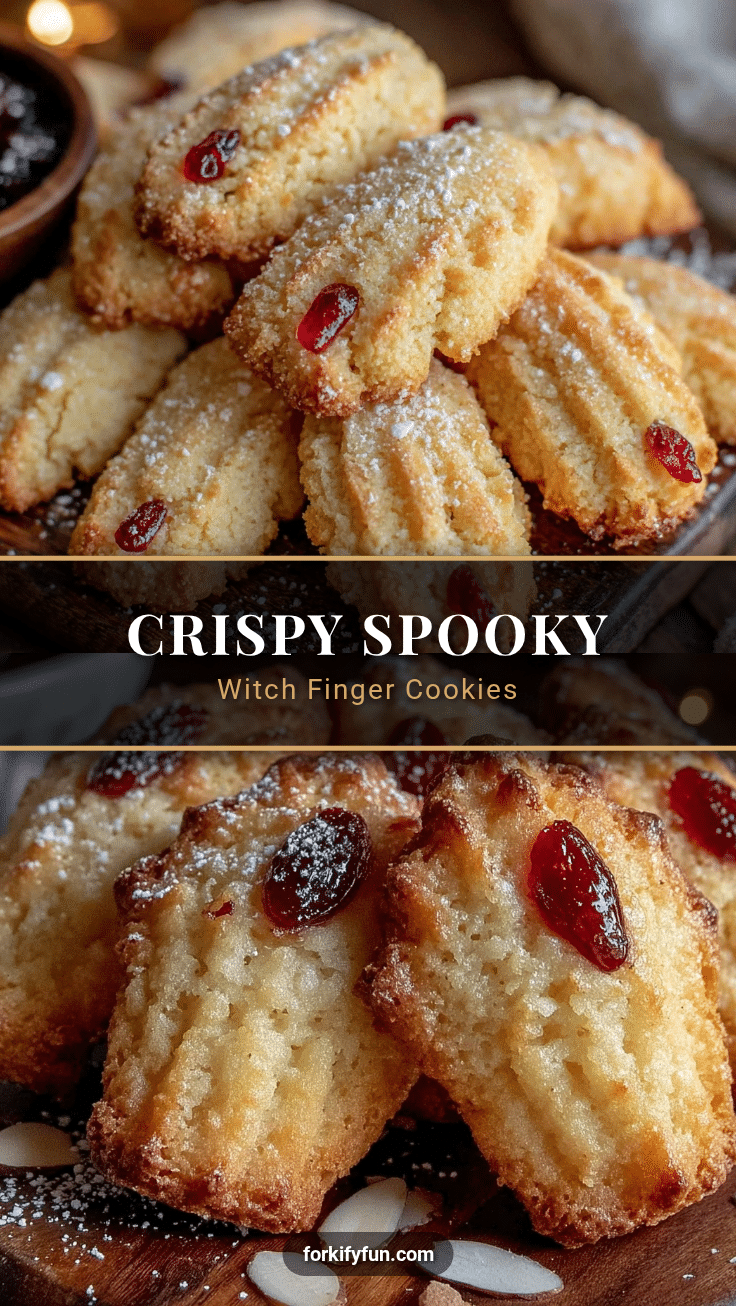
Crispy Witch Finger Cookies

These crispy witch finger cookies are a spooky and delicious Halloween treat with a buttery almond flavor and a crunchy texture, perfect for parties and festive fun.
- Prep Time: 15 minutes
- Cook Time: 18 minutes
- Total Time: 33 minutes
- Yield: 24 cookies 1x
- Category: Dessert
- Cuisine: American
Ingredients
- 2 ½ cups (315 grams) all-purpose flour
- 1 teaspoon baking powder
- ½ teaspoon salt
- ¾ cup (170 grams) unsalted butter, softened
- ¾ cup (150 grams) granulated sugar
- 1 large egg, room temperature
- 1 teaspoon almond extract
- About 24 whole almonds, sliced lengthwise (raw, unroasted)
- Optional: red food coloring gel or red decorating gel
Instructions
- Preheat your oven to 350°F (175°C). Line a baking sheet with parchment paper or a silicone mat.
- In a medium bowl, whisk together the flour, baking powder, and salt.
- In a large bowl, beat the softened butter and granulated sugar until light and fluffy, about 3-4 minutes.
- Beat in the egg and almond extract until combined.
- Gradually add the dry ingredients to the wet ingredients, mixing on low speed or folding with a spatula until a soft dough forms. If too sticky, add more flour a tablespoon at a time.
- Divide the dough into 24 equal portions (about 1 tablespoon or 15 grams each). Roll each into a finger shape about 3 inches long and 1 inch wide. Flatten slightly.
- Use a small knife or toothpick to score 2-3 knuckle lines on each finger. Press a sliced almond at the tip for the fingernail, angling it slightly.
- Optional: Dab a tiny bit of red food coloring gel around the almond nails for a bloody effect.
- Bake for 15-18 minutes until edges are golden brown and cookies are crisp.
- Cool completely on a cooling rack for at least 15 minutes before serving.
Notes
Use softened butter for best texture. Chill dough if too sticky. Score knuckles gently to avoid breaking. Watch cookies closely in last 5 minutes to prevent burning. Store in airtight container with a slice of bread to keep crispy. Can be frozen and reheated at 300°F for 5 minutes to refresh crispiness.
Nutrition
- Serving Size: 1 cookie
- Calories: 110
- Fat: 6
- Carbohydrates: 13
- Protein: 1.5
Keywords: Halloween cookies, witch finger cookies, crispy cookies, almond cookies, spooky treats, Halloween dessert