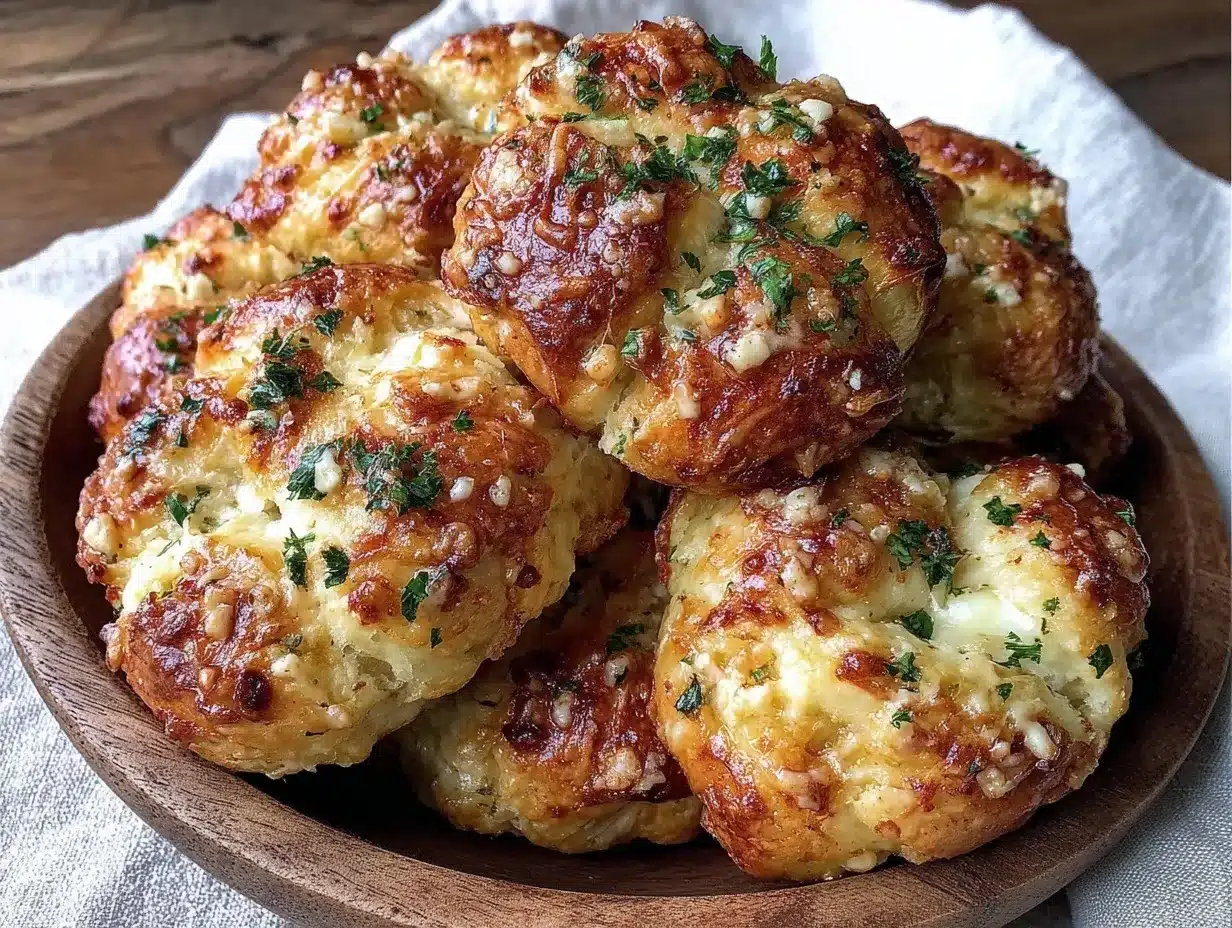
Let me tell you, the smell of garlic mingling with bubbling, melted cheese and the crisp scent of golden knots fresh from the oven is the kind of aroma that stops you in your tracks. The first time I baked these crispy cheesy garlic knots, I was instantly hooked. I remember that moment perfectly—the kind where you pause, take a deep breath, and just smile because you know you’re onto something truly special. Those tender, fluffy crusts with a crunchy, cheesy exterior felt like a warm hug for my taste buds.
Years ago, when I was knee-high to a grasshopper, my grandma used to make her own garlicky bread, but it never had that perfect balance of fluff and crispiness that these knots have. I stumbled onto this recipe one rainy weekend, trying to recreate that nostalgic comfort with a bit more flair. Honestly, it’s dangerously easy and has become a staple for family gatherings and casual weeknight dinners alike.
My family couldn’t stop sneaking these knots off the cooling rack (and I can’t really blame them). They’re perfect for potlucks, game nights, or a sweet treat for your kids after school. You know what? Once you try these crispy cheesy garlic knots with tender, fluffy crust, you’re going to want to bookmark this one for good. I’ve tested this recipe more times than I can count—in the name of research, of course—and it just keeps getting better.
Why You’ll Love This Recipe
This crispy cheesy garlic knots recipe is genuinely one of those crowd-pleasers that’s quick, simple, and downright delicious. Here’s why you’ll want to make these again and again:
- Quick & Easy: Comes together in under 45 minutes, perfect for busy weeknights or last-minute cravings.
- Simple Ingredients: No fancy grocery trips needed; you probably already have everything in your pantry and fridge.
- Perfect for Any Occasion: Whether it’s brunch, a casual dinner, or a party appetizer, these knots fit right in.
- Crowd-Pleaser: Kids, adults, picky eaters—you name it, everyone raves about these.
- Unbelievably Delicious: The crispy outside meets the soft, fluffy inside with a savory cheesy garlic punch that keeps you coming back.
What sets this recipe apart is the technique that creates that perfect crust without sacrificing softness inside. No more tough or doughy knots! I like to blend the garlic butter with fresh herbs and a touch of parmesan, which gives it this irresistible flavor that’s not overly garlicky but just right. This isn’t just another cheesy garlic bread twist—it’s the kind of recipe that makes you close your eyes after the first bite and say, “Yep, this is it.”
It’s comfort food reimagined—easy, flavorful, and with the kind of texture that feels like pure, nostalgic comfort. Plus, it’s a great way to impress guests without the stress. Honestly, once you try this recipe, it’ll become your go-to for cozy nights and celebrations alike.
What Ingredients You Will Need
This recipe uses simple, wholesome ingredients to deliver bold flavor and satisfying texture without the fuss. Most are pantry staples, and a few fresh touches make all the difference. Here’s what you’ll need:
- For the dough:
- All-purpose flour – 3 ½ cups (420 g), sifted (for best texture use King Arthur brand)
- Active dry yeast – 2 ¼ tsp (1 packet)
- Warm water – 1 ¼ cups (300 ml), about 110°F (43°C)
- Sugar – 1 tbsp (to help yeast bloom)
- Salt – 1 tsp (balances flavor)
- Olive oil – 2 tbsp (adds richness and moisture)
- For the garlic cheese topping:
- Unsalted butter – 4 tbsp (melted, for coating)
- Fresh garlic – 4 cloves (minced fine for max flavor)
- Fresh parsley – 2 tbsp (chopped, optional but highly recommended)
- Grated Parmesan cheese – ½ cup (50 g, for that irresistible cheesy crust)
- Shredded mozzarella cheese – 1 cup (approx. 100 g, for gooey melty goodness)
- Salt – a pinch (to taste)
Ingredient tips: For the freshest garlic flavor, use fresh cloves instead of pre-minced. If you want to make this gluten-free, swapping the flour for a high-quality gluten-free blend works well, just be sure to add a bit of xanthan gum if your blend doesn’t have it. You can swap mozzarella with a dairy-free cheese if needed, but the texture won’t be quite the same.
Equipment Needed
- Large mixing bowl – for dough mixing and rising
- Measuring cups and spoons – for precise ingredient amounts
- Stand mixer with dough hook (optional) – handy for kneading, but kneading by hand works too
- Baking sheet or pizza stone – for baking the knots
- Parchment paper or silicone baking mat – prevents sticking and aids crispiness
- Small saucepan or microwave-safe bowl – to melt butter and infuse garlic
- Pastry brush – to evenly coat knots with garlic butter
- Kitchen towel or plastic wrap – to cover dough while rising
If you don’t have a stand mixer, no worries—knead by hand on a floured surface for about 8-10 minutes until smooth. I prefer using a pizza stone for crispier bottoms, but a baking sheet lined with parchment works just fine. For budget-friendly options, parchment paper is a must-have kitchen helper and can be found cheaply online or at your local store.
Preparation Method
- Activate the yeast: In a small bowl, combine warm water (1 ¼ cups, 300 ml) and sugar (1 tbsp). Sprinkle the yeast (2 ¼ tsp) on top and let it sit for 5-10 minutes until foamy. This means the yeast is alive and ready to work.
- Make the dough: In a large bowl, mix the flour (3 ½ cups, 420 g) and salt (1 tsp). Create a well in the center and pour in the yeast mixture and olive oil (2 tbsp). Stir with a wooden spoon until it forms a shaggy dough.
- Knead the dough: Transfer the dough to a lightly floured surface and knead for 8-10 minutes until smooth and elastic. If using a stand mixer, knead with a dough hook on medium speed for about 6 minutes. The dough should be soft but not sticky.
- First rise: Lightly oil a clean bowl, place the dough inside, and cover with a kitchen towel or plastic wrap. Let it rise in a warm place for 1 to 1 ½ hours, or until doubled in size. The dough should feel pillowy and spring back gently when poked.
- Shape the knots: Punch down the dough to release air. Divide it into 12 equal pieces (about 2 oz or 56 g each). Roll each piece into a 10-inch (25 cm) rope. Tie each rope into a loose knot and place them on a parchment-lined baking sheet, leaving space between each.
- Second rise: Cover the knots again and let them rise for 30-40 minutes until puffed but not doubled.
- Prepare garlic butter: While the knots rise, melt the butter (4 tbsp) in a small saucepan over low heat. Stir in minced garlic (4 cloves) and chopped parsley (2 tbsp). Keep warm to infuse flavors.
- Bake the knots: Preheat your oven to 400°F (200°C). Brush each knot generously with the garlic butter, then sprinkle with shredded mozzarella (1 cup) and grated Parmesan (½ cup). Bake for 15-18 minutes until golden brown and cheese is bubbly and lightly browned.
- Final touch: Remove from oven and brush again with remaining garlic butter for extra flavor and shine. Let cool for 5 minutes before serving.
Pro tip: If you find your knots aren’t browning evenly, rotate the baking sheet halfway through. Also, avoid over-kneading to keep the crust tender and fluffy inside.
Cooking Tips & Techniques
Getting that perfect balance between crispy crust and soft inside takes a little finesse, but I’ve learned a few tricks over the years. First, make sure your yeast is fresh—expired yeast will seriously slow your rise. Warm water is key; too hot and you kill the yeast, too cold and it won’t activate well.
When kneading, it’s tempting to rush, but taking your time to develop the gluten will give you that fluffy texture you’re after. I like to knead until the dough’s smooth and a bit tacky but not sticky. If it sticks to your fingers, dust with a little flour but don’t go overboard.
Letting the dough rise twice is what makes these knots so tender. I’ve made the mistake of skipping the second rise, and honestly, the texture wasn’t the same—too dense and heavy.
When applying the garlic butter, be generous! It’s the flavor bomb here. Also, sprinkling cheese before baking creates that golden, bubbly topping that makes these knots irresistible. If you want a more intense garlic flavor, you can add a pinch of garlic powder to the dough.
Lastly, patience is your friend. Let the knots cool just a bit before digging in or the cheese can be dangerously hot. But trust me, the wait is worth it.
Variations & Adaptations
These crispy cheesy garlic knots are wonderfully versatile. Here are a few ways I’ve tweaked the recipe to keep things interesting:
- Herb Infused: Swap parsley for fresh rosemary or thyme for a more earthy, aromatic flavor.
- Spicy Kick: Add red pepper flakes to the garlic butter for a gentle heat that wakes up the palate.
- Vegan Version: Use dairy-free butter and vegan cheese shreds; just be sure to check that your yeast is vegan-friendly.
- Stuffed Knots: Before tying, add a small cube of mozzarella inside the dough rope for a gooey cheesy center surprise.
- Whole Wheat Option: Replace half the all-purpose flour with whole wheat flour for a nuttier flavor and heartier texture.
I once tried swapping mozzarella with smoked gouda—talk about a flavor game-changer! Feel free to experiment; these knots take well to different cheeses and herbs.
Serving & Storage Suggestions
Serve these knots warm, right out of the oven, when their crust is at its crispiest and cheese melty. They pair beautifully with marinara sauce for dipping or alongside a fresh green salad for a light meal. A cold glass of lemonade or a crisp white wine complements the rich garlic and cheese flavors nicely.
If you have leftovers, store them in an airtight container at room temperature for up to 2 days. For longer storage, freeze the knots in a single layer on a baking sheet, then transfer to a freezer bag for up to 3 months.
To reheat, pop them in a preheated 350°F (175°C) oven for about 8-10 minutes to restore their crispiness. Microwave reheating tends to make them soggy, so I avoid that if possible. Flavors actually deepen after a day, so if you can wait, leftovers taste even better the next day.
Nutritional Information & Benefits
Each cheesy garlic knot is roughly 150-180 calories, depending on size and cheese amount. They provide a good source of protein from the mozzarella and Parmesan and some healthy fats from the olive oil and butter.
Garlic isn’t just tasty—it’s known for its immune-boosting and anti-inflammatory properties, which is a nice bonus when enjoying these treats. Using fresh herbs adds antioxidants and a fresh flavor punch without extra calories.
While not low-carb, these knots can fit into a balanced diet when enjoyed in moderation. For gluten-free options, swapping flour can help, and vegan adaptations make them accessible for different diets. Just be aware of dairy allergies if you’re serving to guests.
Conclusion
Honestly, these crispy cheesy garlic knots with tender, fluffy crust are a recipe you’ll want in your back pocket. They’re simple enough for a weeknight snack but fancy enough to impress without breaking a sweat. Customize them with your favorite herbs or cheeses and watch how quickly they disappear at the table.
I love this recipe because it brings a little bit of joy and nostalgia every time I make it, and I hope it does the same for you. Please leave a comment to share your twists or questions—you know I love hearing from fellow garlic knot fans. And hey, if you try this recipe, don’t forget to share it with your friends and family. You’re gonna have everyone asking for seconds!
So go ahead, tie up some love in dough, and enjoy every crispy, cheesy bite!
FAQs
Can I make the dough ahead of time?
Yes! You can prepare the dough and let it rise slowly in the fridge overnight. Just bring it back to room temperature before shaping and baking.
What if I don’t have fresh garlic?
You can use garlic powder or pre-minced garlic, but fresh garlic gives the best flavor and aroma.
How do I keep the knots crispy after baking?
Store them loosely covered with a kitchen towel; avoid airtight containers at room temperature to prevent sogginess. Reheat in the oven to bring back crispiness.
Can I freeze the knots before baking?
Absolutely. Freeze shaped knots on a baking sheet, then transfer to a bag. Bake from frozen, adding a few extra minutes to the bake time.
What’s the best cheese to use?
Mozzarella is classic for meltiness, but mixing in Parmesan adds a sharp, salty crust. Feel free to experiment with provolone or gouda for different flavor profiles.
Pin This Recipe!
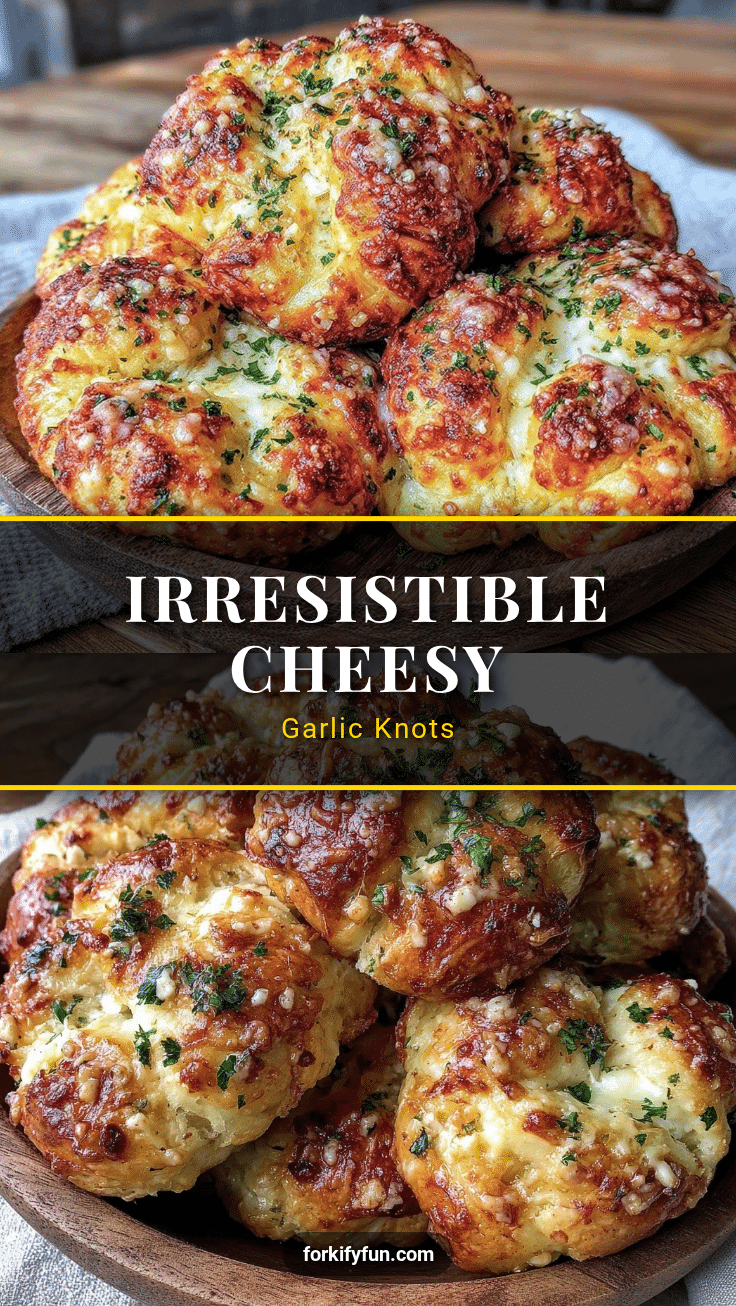
Crispy Cheesy Garlic Knots

These crispy cheesy garlic knots feature a tender, fluffy crust with a crunchy, cheesy exterior, perfect for any occasion and easy to make in under 45 minutes.
- Prep Time: 20 minutes
- Cook Time: 18 minutes
- Total Time: 1 hour 45 minutes
- Yield: 12 knots 1x
- Category: Appetizer
- Cuisine: Italian-American
Ingredients
- 3 ½ cups all-purpose flour (420 g), sifted
- 2 ¼ tsp active dry yeast (1 packet)
- 1 ¼ cups warm water (300 ml), about 110°F (43°C)
- 1 tbsp sugar
- 1 tsp salt
- 2 tbsp olive oil
- 4 tbsp unsalted butter, melted
- 4 cloves fresh garlic, minced
- 2 tbsp fresh parsley, chopped (optional)
- ½ cup grated Parmesan cheese (50 g)
- 1 cup shredded mozzarella cheese (approx. 100 g)
- Pinch of salt (to taste)
Instructions
- Activate the yeast: In a small bowl, combine warm water and sugar. Sprinkle the yeast on top and let it sit for 5-10 minutes until foamy.
- Make the dough: In a large bowl, mix flour and salt. Create a well in the center and pour in the yeast mixture and olive oil. Stir until a shaggy dough forms.
- Knead the dough: Transfer to a floured surface and knead for 8-10 minutes until smooth and elastic, or knead with a stand mixer dough hook on medium speed for 6 minutes.
- First rise: Lightly oil a clean bowl, place dough inside, cover with a towel or plastic wrap, and let rise in a warm place for 1 to 1 ½ hours until doubled in size.
- Shape the knots: Punch down dough, divide into 12 equal pieces (~2 oz or 56 g each). Roll each into a 10-inch rope and tie into a loose knot. Place on parchment-lined baking sheet.
- Second rise: Cover knots and let rise for 30-40 minutes until puffed but not doubled.
- Prepare garlic butter: Melt butter in a small saucepan over low heat. Stir in minced garlic and chopped parsley. Keep warm.
- Bake the knots: Preheat oven to 400°F (200°C). Brush knots with garlic butter, sprinkle with mozzarella and Parmesan cheese. Bake 15-18 minutes until golden and bubbly.
- Final touch: Remove from oven, brush again with remaining garlic butter, and let cool for 5 minutes before serving.
Notes
Use fresh garlic for best flavor. Knead dough until smooth but not sticky. Let dough rise twice for tender texture. Rotate baking sheet halfway through baking for even browning. Store knots loosely covered to keep crispy. Reheat in oven to restore crispiness.
Nutrition
- Serving Size: 1 knot
- Calories: 165
- Sugar: 1.5
- Sodium: 220
- Fat: 8
- Saturated Fat: 4.5
- Carbohydrates: 18
- Fiber: 1
- Protein: 6
Keywords: garlic knots, cheesy garlic knots, homemade garlic knots, cheesy bread, garlic bread, easy appetizer, party food, comfort food