Introduction
There’s something magical about the sweet-tart aroma of raspberries and lemon swirling through the kitchen—especially when you’re making Creamy Raspberry Lemon Cheesecake Bars. Imagine pulling a pan out of the oven, the buttery crust sizzling, the creamy filling gently puffed, and a glossy layer of jewel-toned raspberries glistening on top. Honestly, the first time I baked these, my entire house smelled like a fancy bakery and my heart did a little happy dance.
Years ago, when I was knee-high to a grasshopper, my grandma used to whip up lemon bars for Sunday dinners. But let’s face it: I always wished for something a little richer, like cheesecake, but with that same bright, sunny flavor. That’s how these raspberry lemon cheesecake bars became a family favorite. I was instantly hooked the moment I tried combining the zing of lemon with the creamy goodness of cheesecake—then topped it off with fresh raspberries. It was the sort of moment where you pause, take a deep breath, and just smile because you know you’re onto something truly special.
The real test? My family couldn’t stop sneaking pieces off the cooling rack (I caught my husband with crumbs on his shirt more than once). These bars became our go-to for potlucks, birthdays, and those “just because” afternoons. They’re dangerously easy to make, provide pure, nostalgic comfort, and look stunning enough to brighten up any Pinterest dessert board. If you love creamy desserts with a burst of fruit, you’re going to want to bookmark this one. I’ve tested this recipe more times than I should admit—in the name of research, of course—and now it’s a staple for gifting and family gatherings. It feels like a warm hug every time, and I honestly wish I’d discovered this combo years ago.
Why You’ll Love This Recipe
Let me share a few reasons why these creamy raspberry lemon cheesecake bars have become an absolute must-have in my kitchen. After baking more cheesecakes than I can count, I can say these bars stand out for their ease, flavor, and universal appeal.
- Quick & Easy: These come together in under an hour (plus chilling)—perfect for busy weeknights or last-minute dessert cravings.
- Simple Ingredients: No fancy grocery trips needed; most ingredients are pantry staples you probably already have.
- Perfect for Any Occasion: They’re just right for brunches, holiday gatherings, birthday parties, or sweet treats for your kids after school.
- Crowd-Pleaser: Seriously, kids and adults alike always go for seconds. They’re the bars that disappear first at potlucks.
- Unbelievably Delicious: The creamy, tangy cheesecake filling pairs perfectly with the tartness of raspberries and brightness of lemon.
Here’s what makes my version different: I blend cottage cheese into the cream cheese base for extra silkiness (trust me, it works!), and I use real lemon zest and juice for a punchy citrus flavor. No artificial lemon extract here—just fresh, vibrant taste.
This isn’t just another cheesecake bar recipe. It’s the one that makes you close your eyes after the first bite and savor the balance of flavors. It’s comfort food, but lighter and fresher, with just enough sophistication to impress your guests without any stress. Whether you’re whipping these up for a fancy dinner or a casual afternoon snack, these creamy raspberry lemon cheesecake bars will turn any moment into something memorable.
What Ingredients You Will Need
This recipe uses simple, wholesome ingredients to deliver bold flavor and a satisfying, creamy texture without any fuss. Honestly, you’ll probably find most of these in your fridge or pantry already. Let’s break it down:
- For the Crust:
- Graham cracker crumbs (1 1/2 cups / 150g) – I like Honey Maid for best texture.
- Unsalted butter, melted (1/2 cup / 115g) – gives that rich, golden base.
- Granulated sugar (1/4 cup / 50g) – adds just a touch of sweetness.
- Pinch of salt – balances the flavors.
- For the Cheesecake Filling:
- Cream cheese, softened (16 oz / 450g) – full-fat for maximum creaminess.
- Cottage cheese (1/2 cup / 120g) – blend it smooth for ultra-silky bars.
- Granulated sugar (3/4 cup / 150g) – for just-right sweetness.
- Large eggs (2) – room temperature (helps everything blend nicely).
- Fresh lemon juice (1/4 cup / 60ml) – brings the zesty punch.
- Lemon zest (from 2 lemons) – don’t skip this! It’s all about the aroma.
- Pure vanilla extract (1 tsp / 5ml) – rounds out the flavors.
- Pinch of salt – makes the lemon pop.
- For the Raspberry Swirl & Topping:
- Fresh raspberries (1 cup / 125g) – reserve some for topping.
- Raspberry jam or preserves (2 tbsp / 35g) – helps with the swirl effect.
- Optional: mixed fresh fruit (blueberries, sliced strawberries, kiwi) for an extra colorful topping.
- Ingredient Tips:
- Use full-fat dairy for the creamiest bars (I’ve tried low-fat—it’s just not the same).
- If raspberries aren’t in season, frozen berries work, but thaw and drain them well.
- For gluten-free bars, swap graham crackers with a gluten-free alternative.
- Lactose intolerant? Substitute dairy-free cream cheese and coconut yogurt for cottage cheese.
- Want it a little sweeter? Add 1-2 extra tablespoons of sugar to the filling.
Every ingredient works together to create a creamy, tangy, and fruity bite that’ll keep you coming back for more. I always recommend tasting your lemons before zesting—sometimes they’re extra tart, so you can adjust the sugar if needed.
Equipment Needed

You don’t need a ton of fancy gadgets for these creamy raspberry lemon cheesecake bars, which is honestly a relief. Here’s what works best:
- 8×8-inch (20x20cm) square baking pan – glass or metal both work; line it with parchment for easy removal.
- Mixing bowls – at least two (one for the crust, one for the filling).
- Hand mixer or stand mixer – I use a hand mixer for less fuss, but a stand mixer is great for extra smoothness.
- Food processor or blender (optional) – for blending cottage cheese if you want ultra-creamy texture.
- Measuring cups and spoons – accuracy makes a difference here.
- Microplane or zester – for getting just the zest off those lemons.
- Rubber spatula – for scraping every last bit of creamy filling and smoothing the top.
- Small offset spatula or butter knife – perfect for swirling the raspberry on top.
If you don’t have a food processor, just mash the cottage cheese with a fork and mix well—it’s not the end of the world. For budget-friendly options, I’ve used dollar store spatulas and they work just fine. Just make sure your mixer is in good working order; nothing ruins a cheesecake like a lumpy filling!
Preparation Method
- Prepare the crust:
- Preheat your oven to 350°F (175°C).
- Line your 8×8-inch (20x20cm) pan with parchment, leaving a little overhang for easy lifting later.
- In a medium bowl, mix 1 1/2 cups (150g) graham cracker crumbs, 1/2 cup (115g) melted butter, 1/4 cup (50g) sugar, and a pinch of salt.
- Press mixture evenly into the bottom of the pan (use the back of a spoon or your fingers—don’t be shy!).
- Bake crust for 10 minutes, until just set and lightly golden. Let cool while you prep the filling.
- Make the filling:
- In a large bowl, beat 16 oz (450g) softened cream cheese and 1/2 cup (120g) cottage cheese (blended smooth if you prefer) until creamy and lump-free (about 2 minutes).
- Add 3/4 cup (150g) sugar, 2 large eggs, 1/4 cup (60ml) lemon juice, zest from 2 lemons, 1 tsp (5ml) vanilla extract, and a pinch of salt.
- Mix until just combined—don’t over-mix or the bars may crack.
- Assemble bars:
- Pour the cheesecake filling over the cooled crust and smooth the top.
- In a small bowl, lightly mash 1 cup (125g) raspberries with 2 tbsp (35g) raspberry jam.
- Dollop spoonfuls of the raspberry mixture over the filling, then swirl gently with a butter knife or spatula for a marbled effect (don’t overdo it—less is more).
- Bake:
- Bake in the center of your oven for 30–35 minutes, until the edges are set but the center still has a slight jiggle.
- If you notice browning, tent the pan lightly with foil during the last 10 minutes.
- Remove and cool completely on a rack (about 1 hour).
- Chill and top:
- Refrigerate bars for at least 2 hours, or overnight for best texture.
- Once chilled, lift bars out using parchment and cut into squares.
- Top with extra fresh raspberries, and if you’re feeling fancy, sprinkle on more lemon zest or add mixed fruit for a Pinterest-worthy look.
- Serving:
- Serve cold for the creamiest texture.
- If you notice condensation after chilling, gently blot with a paper towel before topping with fruit.
Personal tip: If the filling cracks a little, don’t worry—it’ll be hidden under the fruit. And hey, a rustic look is part of the charm!
Cooking Tips & Techniques
Let’s be real: cheesecake bars can be a little finicky, but I’ve learned a few tricks over the years.
- Room temperature ingredients: Always start with room temp cream cheese and eggs for a silky-smooth filling. Cold cream cheese will leave lumps (been there, done that).
- Don’t overmix: Mix just until the filling is smooth. Overbeating can lead to cracks or a dense texture.
- Crust press technique: Use the bottom of a measuring cup to press the crust evenly—no more lopsided bars!
- Gentle swirling: When swirling the raspberry layer, less is more. Big swirls look pretty, but too much mixing will muddy the colors.
- Watch the bake: Bars are done when the edges are set and the center is slightly wobbly. Overbaking leads to dry, crumbly bars. If unsure, err on the side of underbaking; they firm up in the fridge.
- Cooling patience: Let bars cool fully before chilling—warm cheesecake tends to sweat in the fridge, making the crust soggy.
Once, I rushed the cooling step, and my bars ended up a little mushy. Not the end of the world, but they’re so much better chilled overnight! If you want extra-thick bars, double the filling and add 10 minutes to the bake time. Multitasking tip: prep your fruit topping while the bars bake and clean up the kitchen so you’re not left with a mess later.
Consistency is key: measure accurately, and don’t skip the parchment liner. It makes lifting and cutting the bars a breeze!
Variations & Adaptations
One of the best things about creamy raspberry lemon cheesecake bars is how easily you can switch things up to suit your taste or dietary needs. Here are my favorite variations:
- Gluten-Free: Use gluten-free graham crackers or almond flour for the crust. I’ve tried this for my gluten-sensitive cousin, and it was just as delicious.
- Dairy-Free: Substitute dairy-free cream cheese and coconut yogurt for the filling. Top with coconut whipped cream for extra flair.
- Mixed Berry Swirl: Swap out raspberries for blueberries, blackberries, or even chopped strawberries. In summer, a mix looks gorgeous and tastes super fresh.
- Chocolate Lemon Bars: Add 1/4 cup (45g) mini chocolate chips to the filling for a sweet twist. My kids love this version—who doesn’t love chocolate?
- Lemon-Lime Bars: Use half lemon, half lime juice and zest for a tangy citrus blend. This is especially nice in spring when limes are extra juicy.
- Nutty Crust: Mix in 1/3 cup (40g) chopped pecans or almonds to the crust for flavor and crunch.
If you’re allergic to eggs, try a flaxseed “egg” (1 tbsp flaxseed meal + 3 tbsp water, let sit 5 minutes) for a plant-based version. I once swapped the raspberry swirl for apricot preserves and it was a hit at a summer picnic. Don’t be afraid to experiment—cheesecake bars are surprisingly forgiving!
Serving & Storage Suggestions
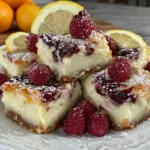
There’s nothing quite like serving these creamy raspberry lemon cheesecake bars chilled, with a generous heap of fresh fruit on top. Presentation matters—cut them into neat squares and arrange on a pretty platter for parties or wrap individually for grab-and-go snacks.
- Serving: Serve cold for best texture. Top with fresh raspberries, blueberries, or sliced strawberries. A sprinkle of lemon zest or a dollop of whipped cream adds a touch of elegance.
- Pairings: These bars go beautifully with a cup of tea, lemonade, or even a crisp rosé wine for adult gatherings.
- Storage: Store bars in an airtight container in the fridge for up to 5 days. If stacking, separate layers with parchment to prevent sticking.
- Freezing: Freeze bars (without fruit topping) for up to 2 months. Thaw in the fridge overnight, then add fresh fruit when serving.
- Reheating: Honestly, these are best cold. But if you prefer them a little softer, bring to room temperature for 20 minutes before eating.
As the bars sit, the flavors meld and deepen—so sometimes day two is even better than day one!
Nutritional Information & Benefits
Here’s a quick look at what you’re getting in each slice:
- Approximate per bar (1/12th batch): 220 calories, 13g fat, 22g carbs, 5g protein
- Key benefits: Raspberries are loaded with antioxidants and vitamin C, while lemons provide a boost of immune-boosting nutrients.
- Using cottage cheese adds extra protein and calcium for stronger bones.
- Gluten-free and dairy-free options available for most dietary needs.
- Contains eggs and dairy; swap for plant-based alternatives if needed.
From a wellness perspective, I love that these bars offer a moderate serving size with real fruit. They’re a lighter option than full-on cheesecake, but every bit as satisfying.
Conclusion
If you’re searching for a dessert that’s creamy, tangy, and bursting with fresh flavor, these creamy raspberry lemon cheesecake bars are worth every bite. They’re simple to make, customizable for any crowd, and honestly, they never fail to put a smile on my face.
Feel free to tweak the recipe with your favorite fruits, swap ingredients to fit dietary needs, or get creative with the presentation. That’s the beauty of homemade desserts—they’re personal, nostalgic, and a little imperfect (just like us!).
I love these bars because they remind me of sunny afternoons and family kitchens. If you try this recipe, drop a comment below, share your photos, or let me know your favorite twist. You might just create your own family tradition. Happy baking, and remember: a little lemon zest can brighten any day!
FAQs
Can I use frozen raspberries for the cheesecake bars?
Yes, you can use frozen raspberries! Just thaw and drain them well so they don’t water down the filling or make the swirl too runny.
How do I prevent cheesecake bars from cracking?
Don’t overmix the filling and avoid overbaking. Let the bars cool gradually before chilling. Minor cracks are normal and easily hidden with fruit topping.
Can I double the recipe for a larger batch?
Absolutely! Double all ingredients and use a 9×13-inch pan. Baking time may increase by 10–15 minutes; look for the same “edges set, center wobbly” test.
Are these bars gluten-free?
The standard recipe uses graham crackers, but you can swap for gluten-free crackers or almond flour for a gluten-free version.
What’s the best way to cut neat cheesecake squares?
Chill bars fully, then use a sharp knife dipped in hot water and wiped dry between cuts. This helps get those clean, bakery-style edges you see on Pinterest!
Pin This Recipe!
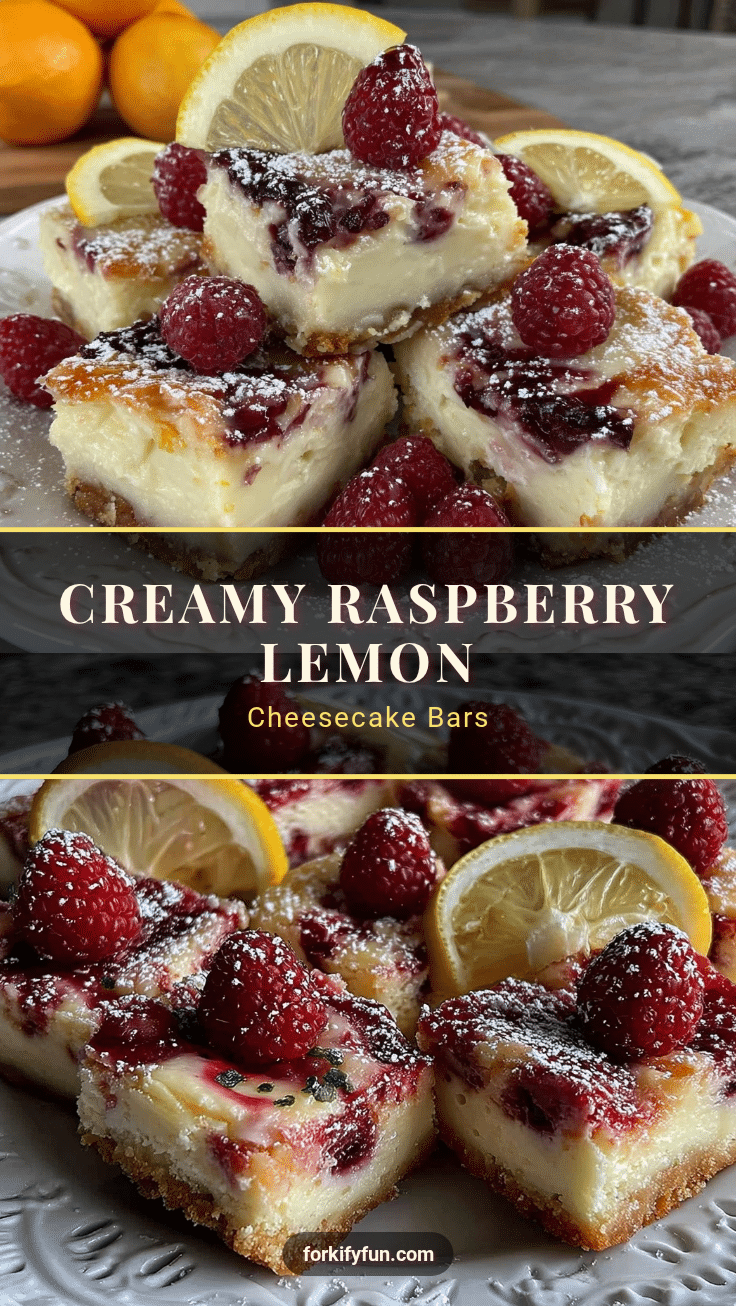
Creamy Raspberry Lemon Cheesecake Bars
These creamy raspberry lemon cheesecake bars feature a buttery graham cracker crust, silky cheesecake filling with cottage cheese, and a vibrant raspberry swirl. They’re easy to make, bursting with fresh fruit flavor, and perfect for any occasion.
- Prep Time: 20 minutes
- Cook Time: 35 minutes
- Total Time: 2 hours 55 minutes
- Yield: 12 bars 1x
- Category: Dessert
- Cuisine: American
Ingredients
- 1 1/2 cups graham cracker crumbs
- 1/2 cup unsalted butter, melted
- 1/4 cup granulated sugar
- Pinch of salt
- 16 oz cream cheese, softened
- 1/2 cup cottage cheese
- 3/4 cup granulated sugar
- 2 large eggs, room temperature
- 1/4 cup fresh lemon juice
- Zest from 2 lemons
- 1 tsp pure vanilla extract
- Pinch of salt
- 1 cup fresh raspberries (reserve some for topping)
- 2 tbsp raspberry jam or preserves
- Optional: mixed fresh fruit (blueberries, sliced strawberries, kiwi) for topping
Instructions
- Preheat oven to 350°F (175°C). Line an 8×8-inch pan with parchment paper, leaving an overhang.
- In a medium bowl, mix graham cracker crumbs, melted butter, sugar, and a pinch of salt. Press evenly into the bottom of the pan.
- Bake crust for 10 minutes until set and lightly golden. Let cool.
- In a large bowl, beat cream cheese and cottage cheese (blended smooth if preferred) until creamy and lump-free (about 2 minutes).
- Add sugar, eggs, lemon juice, lemon zest, vanilla extract, and a pinch of salt. Mix until just combined.
- Pour cheesecake filling over cooled crust and smooth the top.
- In a small bowl, lightly mash raspberries with raspberry jam. Dollop spoonfuls over the filling and swirl gently with a butter knife or spatula.
- Bake for 30–35 minutes, until edges are set and center is slightly wobbly. Tent with foil if browning.
- Cool completely on a rack (about 1 hour).
- Refrigerate for at least 2 hours, or overnight for best texture.
- Lift bars out using parchment and cut into squares.
- Top with extra fresh raspberries and optional mixed fruit or lemon zest.
- Serve cold for creamiest texture.
Notes
Use room temperature ingredients for a smooth filling. Don’t overmix to avoid cracks. For gluten-free, use gluten-free graham crackers. Bars are best chilled overnight. Double the recipe for a 9×13-inch pan. Minor cracks are easily hidden with fruit topping.
Nutrition
- Serving Size: 1 bar (1/12th of rec
- Calories: 220
- Sugar: 15
- Sodium: 180
- Fat: 13
- Saturated Fat: 7
- Carbohydrates: 22
- Fiber: 2
- Protein: 5
Keywords: cheesecake bars, raspberry lemon, creamy dessert, easy cheesecake, fruit bars, summer dessert, potluck recipe, homemade cheesecake, lemon bars, raspberry swirl