Let me set the scene: the irresistible aroma of sweet cherries and rich, creamy cheesecake wafting from my oven, mingling with the cozy scent of buttery crust and warm streusel. That first bite—crackly streusel yielding to silky cheesecake, studded with tart cherries—almost made me drop my fork (in a good way!). I remember the first time I made these creamy cherry cheesecake streusel bars, I was knee-high to a grasshopper and helping my grandma in her sunny, flour-dusted kitchen. She’d always say, “The best treats are the ones you can eat with your hands,” and, honestly, she wasn’t wrong.
Years ago, I tried to impress my college friends with a classic cherry cheesecake. The taste was great but the whole water-bath method? Way too fussy for my tiny apartment oven. Fast forward to a rainy Sunday, and I stumbled on the idea of layering everything into bars with a simple buttery base and a generous sprinkle of streusel. The kind of moment where you pause, take a deep breath, and just smile because you know you’re onto something truly special.
My family couldn’t stop sneaking bites straight from the cooling rack (and, let’s face it, neither could I). These creamy cherry cheesecake bars with buttery crust have become our staple for birthdays, bake sales, and those “just because” moments. They’re dangerously easy, giving pure nostalgic comfort without the fuss. If you’re looking for a dessert that brightens up your Pinterest board, wows at potlucks, or simply satisfies your sweet tooth on a Wednesday night—bookmark this recipe. I’ve tested it more times than I care to admit (in the name of research, of course), and every batch feels like a warm hug.
Why You’ll Love This Recipe
If you want a dessert that’s as easy as it is impressive, these creamy cherry cheesecake streusel bars check every box. Over years of baking (and, you know, a few kitchen disasters), I’ve honed this recipe to be both foolproof and totally delicious. Here’s why it stands out:
- Quick & Easy: Comes together in under 1 hour—no springform pan, water bath, or fancy baking skills needed. Perfect for busy weeknights or last-minute gatherings.
- Simple Ingredients: You won’t need any obscure ingredients. Most are pantry staples or easy to grab at any grocery store.
- Perfect for All Occasions: These bars are ideal for potlucks, holiday mornings, birthday parties, or just treating yourself. They travel well and slice up beautifully.
- Crowd-Pleaser: Kids love the sweet cherry layer, adults rave about the creamy cheesecake. I’ve never come home with leftovers!
- Unbelievably Delicious: The buttery crust, rich cheesecake, and tangy cherry filling combine for next-level comfort food. That crunchy streusel on top? Chef’s kiss.
What makes my version unique? I blend the cream cheese until ultra smooth and use a hint of lemon zest for brightness. The streusel is extra generous, so you get a crunchy bite every time. If you’ve ever struggled with soggy crust or bland cheesecake, this recipe solves it—the base stays crisp, and the filling never cracks. It’s comfort food reimagined: faster, easier, and just as satisfying.
This isn’t just another cherry cheesecake recipe. It’s the one you’ll make when you want that “wow” factor without stress. Trust me, the first bite will have you closing your eyes, savoring the creamy texture and sweet-tart burst of cherries. Whether you want to impress guests or cozy up with a treat after dinner, these bars are your answer.
What Ingredients You Will Need
This recipe uses simple, wholesome ingredients to deliver bold flavor and a satisfying texture—no fancy store runs required. Most items are pantry staples, and there’s plenty of room for swaps if you’re missing something. Here’s what you’ll need:
- For the Buttery Crust:
- 1 cup (226g) unsalted butter, melted (adds rich flavor and keeps the base tender)
- 2 cups (240g) all-purpose flour (or use gluten-free flour blend for GF option)
- 1/2 cup (100g) granulated sugar (for just-right sweetness)
- 1/4 teaspoon salt (balances the flavors)
- For the Creamy Cheesecake Layer:
- 16 oz (454g) cream cheese, softened (full-fat for maximum creaminess—Philadelphia brand is my go-to)
- 2/3 cup (135g) granulated sugar
- 2 large eggs, room temperature (helps keep the filling smooth)
- 1 teaspoon vanilla extract (for warmth and depth)
- Zest of 1 lemon (optional, but adds a bright, fresh note)
- For the Cherry Layer:
- 1 1/2 cups (375g) cherry pie filling (store-bought or homemade—use fresh cherries in summer!)
- For the Streusel Topping:
- 3/4 cup (90g) all-purpose flour
- 1/3 cup (70g) brown sugar (adds depth and a caramel-like flavor)
- 1/4 cup (56g) unsalted butter, cold and cubed
- 1/2 teaspoon ground cinnamon (totally optional, but I love it for extra coziness)
- Pinch of salt
Substitutions & Tips:
- Swap the cherry pie filling for blueberry or raspberry if you prefer.
- Use almond flour for a gluten-free crust and streusel.
- If you’re dairy-free, try Tofutti or Kite Hill cream cheese and vegan butter—texture will be a bit lighter, but still tasty.
- Add sliced almonds or pecans to the streusel for crunch.
- If cherries are in season, pit and cook fresh cherries with a little cornstarch and sugar for homemade filling.
You can tweak the filling or toppings based on what’s in your fridge. I’ve even used leftover cranberry sauce when cherries weren’t available—came out surprisingly delicious!
Equipment Needed
You won’t need any fancy gadgets to whip up these creamy cherry cheesecake bars, just your basic kitchen workhorses. Here’s what I use every time:
- 9×13-inch (23x33cm) baking pan (lined with parchment for easy removal)
- Mixing bowls (a few sizes help for separating crust, filling, and streusel)
- Electric mixer or stand mixer (makes the cheesecake layer ultra smooth, but a whisk and strong arms work in a pinch)
- Measuring cups and spoons (accuracy counts!)
- Rubber spatula (for scraping every last bit of cheesecake goodness)
- Pastry cutter or fork (for blending streusel—fingers work too!)
- Cooling rack (bars firm up best if cooled out of the pan)
If you don’t have a 9×13 pan, split the recipe between two 8×8 pans or use a rimmed baking sheet. I’ve even made mini versions in muffin tins (just reduce the bake time). For budget-friendly options, I stick with Wilton or Pyrex pans. Keep parchment paper handy—it saves so much cleanup.
Pro tip: Keep your electric mixer’s beaters clean between crust and filling mixing for the best results. And if you’re short on equipment, hand mixing works—it just takes a little more elbow grease!
Preparation Method
- Prep the Pan: Line a 9×13-inch (23x33cm) baking pan with parchment paper, leaving an overhang for easy lifting. Preheat your oven to 350°F (175°C). (Trust me, parchment is a lifesaver when it comes time to slice and serve!)
- Make the Buttery Crust: In a large bowl, stir together 2 cups (240g) flour, 1/2 cup (100g) sugar, and 1/4 teaspoon salt. Pour in 1 cup (226g) melted butter and mix until the dough is crumbly but holds together when pressed. The mixture should smell rich and slightly nutty—if it feels greasy, add a tablespoon more flour.
- Press & Bake the Crust: Press the crust mixture evenly into the prepared pan, making sure to reach all corners. Bake for 15 minutes, until lightly golden. If your oven runs hot, check after 12 minutes so the edges don’t burn.
- Prepare the Cheesecake Layer: While the crust bakes, beat 16 oz (454g) cream cheese in a medium bowl until smooth. Add 2/3 cup (135g) sugar, 2 eggs, 1 teaspoon vanilla, and lemon zest (if using). Beat until just combined and creamy—don’t overmix! (Overbeating introduces air and can cause cracks later.)
- Spread the Cheesecake Filling: Pour the cheesecake mixture over the slightly cooled crust, smoothing evenly with a spatula. It should look glossy and thick, with no lumps.
- Add the Cherry Layer: Spoon 1 1/2 cups (375g) cherry pie filling over the cheesecake layer. Use a spatula to swirl gently or spread evenly. You want pockets of cherries but not a solid block—think marbled effect.
- Make the Streusel: In a small bowl, combine 3/4 cup (90g) flour, 1/3 cup (70g) brown sugar, 1/2 teaspoon cinnamon, and a pinch of salt. Cut in 1/4 cup (56g) cold butter using a pastry cutter or fork until mixture resembles coarse crumbs. If it’s too powdery, squeeze with your fingers until clumps form.
- Top & Bake: Sprinkle the streusel evenly over the cherry layer. Bake at 350°F (175°C) for 30–35 minutes, until the edges are set and the center is just slightly jiggly. (Bars will firm up as they cool.)
- Cool Completely: Remove from the oven and let cool in the pan for 30 minutes, then transfer to a cooling rack. Chill in the fridge for at least 2 hours before slicing—this step makes all the difference for neat bars.
- Slice & Serve: Lift the bars out using the parchment overhang. Slice into squares or rectangles (I usually get 18 bars). The layers should be distinct and the streusel crisp—if they’re too soft, chill a bit longer.
Troubleshooting: If your crust seems soggy, bake it a few minutes longer before adding the filling. For runny cheesecake, make sure cream cheese is at room temp and don’t skip the chilling step. If the streusel melts too much, your butter might be too warm—pop it in the fridge for a few minutes before using.
Personal tip: I always make these a day ahead for parties—the flavors meld overnight and slicing is a breeze!
Cooking Tips & Techniques
Over the years, I’ve picked up a few tricks for making these creamy cherry cheesecake bars absolutely foolproof. Here’s what I wish I’d known from the start:
- Room Temperature Ingredients: Always use room temp cream cheese and eggs for a smooth, lump-free filling. Cold ingredients lead to clumps—trust me, I’ve learned the hard way.
- Don’t Overmix: Once you add the eggs, beat just until combined. Overmixing makes the cheesecake layer dense and can cause cracks.
- Chill Before Slicing: These bars need time in the fridge to set up. If you rush it, the layers can slide around (not pretty, but still tasty!).
- Streusel Crunch: Use very cold butter for a crumbly, crisp topping. If your kitchen is warm, chill the streusel bowl for 10 minutes before baking.
- Prevent Soggy Crust: Blind baking the base for 15 minutes ensures it stays firm—not mushy.
- Multi-tasking: While the crust bakes, prep your cheesecake and streusel layers to save time.
- Personal Failures: I once forgot the parchment paper and ended up chiseling bars out of the pan—learn from my mistakes!
- Consistency: For perfectly even bars, use an offset spatula to spread each layer. It’s a tiny detail but really helps.
If you’re new to bar desserts, don’t worry if your first batch isn’t bakery-perfect. The flavors are so good, no one will notice a little messiness! And if you want smaller bites, cut the bars into triangles or use a mini muffin tin for bite-sized treats.
Variations & Adaptations
One of my favorite things about these creamy cherry cheesecake bars is how adaptable they are. Here are some fun ways to switch things up:
- Seasonal Fruit Swap: Use blueberry, raspberry, or apple pie filling instead of cherry. In summer, fresh berries with a sprinkle of sugar work beautifully.
- Gluten-Free Version: Substitute all-purpose flour with almond flour or a 1:1 gluten-free blend. The crust and streusel will be a bit more tender but equally delicious.
- Nutty Streusel: Add 1/4 cup chopped pecans or sliced almonds to the streusel for extra crunch and nutty flavor.
- Lemon Cheesecake: Increase the lemon zest and add a splash of lemon juice to the filling for a zesty twist.
- Dairy-Free Adaptation: Use vegan cream cheese and plant-based butter. The texture will be slightly lighter but still creamy.
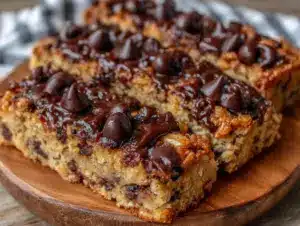
- Chocolate Cherry Bars: Sprinkle mini chocolate chips over the cherry layer before adding the streusel. (My kids go wild for this version!)
For different cooking methods, try making these in a muffin tin for individual portions—just reduce the baking time to about 18–20 minutes. I’ve even baked them in a toaster oven while traveling (worked surprisingly well!).
One personal favorite: swapping the cherry layer for raspberry preserves and topping with white chocolate chips. It’s sweet, tangy, and totally decadent!
Serving & Storage Suggestions
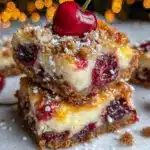
These creamy cherry cheesecake bars are best served chilled, straight from the fridge. I like to slice them into squares and arrange them on a pretty platter—makes them perfect for parties or dessert tables.
If you want to get fancy, dust with powdered sugar or drizzle with a little melted chocolate. For brunch, pair with coffee or a tart lemonade. At potlucks, I serve them alongside fresh fruit for balance.
Storage: Store leftovers in an airtight container in the refrigerator for up to 5 days. The flavors deepen after a night in the fridge, making them even more delicious. For longer storage, wrap tightly and freeze for up to 2 months. Thaw overnight in the fridge before serving.
Reheating: If you prefer your bars slightly warm, microwave individual pieces for 10–15 seconds. Just note the streusel won’t be as crisp. Honestly, chilled is my favorite—everything stays layered and the texture is spot-on.
Tip: Separate layers with parchment if stacking bars to prevent sticking. The bars are sturdy enough for lunchboxes or picnic baskets, too!
Nutritional Information & Benefits
Each creamy cherry cheesecake bar (assuming 18 bars per batch) offers approximately:
- Calories: 220
- Fat: 14g
- Carbohydrates: 22g
- Protein: 3g
- Sugar: 15g
Key ingredients like cherries provide antioxidants and vitamin C, while cream cheese offers a bit of protein and calcium. Using fresh fruit or reduced-sugar pie filling can help lighten things up. Almond flour swaps add healthy fats and reduce carbs for a lower-carb version.
Dietary Notes: These bars contain dairy, eggs, gluten (unless adapted), and may include nuts if you try the streusel variation. Always check labels if you’re baking for those with allergies.
From my personal experience, I love that these bars satisfy my sweet craving without being overly rich. They’re a sweet treat I can enjoy in moderation, and my family appreciates the burst of fruit flavor with every bite!
Conclusion
If you’ve been searching for the ultimate creamy cherry cheesecake bars with a buttery crust and crunchy streusel, this recipe is the one you’ll want to pin, bake, and share. It’s easy enough for beginners, yet impressive every single time.
Honestly, I love how you can tweak it to suit your tastes or pantry—add chocolate, swap fruits, go gluten-free. Every batch feels like a celebration. Whether you’re baking for family, gifting to friends, or sneaking a midnight snack (no judgment), these bars deliver pure comfort wrapped up in handheld slices.
Give them a try and let your family and friends taste why these bars have become a staple in my kitchen. Drop a comment below if you make them or try a new twist—I always love hearing your stories! Don’t forget to share this recipe on Pinterest, and tag me if you make it. Here’s to many happy, delicious bites!
FAQs
Can I use fresh cherries instead of pie filling?
Absolutely! Pit and chop 1 1/2 cups (375g) fresh cherries, cook with 2 tablespoons sugar and 1 tablespoon cornstarch until thickened, then cool before layering.
How do I make these creamy cherry cheesecake bars gluten-free?
Use a 1:1 gluten-free flour blend or almond flour for both the crust and streusel. The texture will be slightly more tender but still delicious.
Can I freeze cheesecake bars?
Yes. Wrap tightly in plastic and foil, then freeze for up to 2 months. Thaw overnight in the fridge for best texture.
What’s the best way to slice perfect bars?
Chill the bars thoroughly, use a sharp knife, and wipe the blade clean between cuts. For extra neat slices, run the knife under hot water and dry before cutting.
Can I use other fruit fillings?
Definitely! Try blueberry, raspberry, or apple pie filling—each adds a unique twist to the creamy cheesecake base and crunchy streusel.
Pin This Recipe!
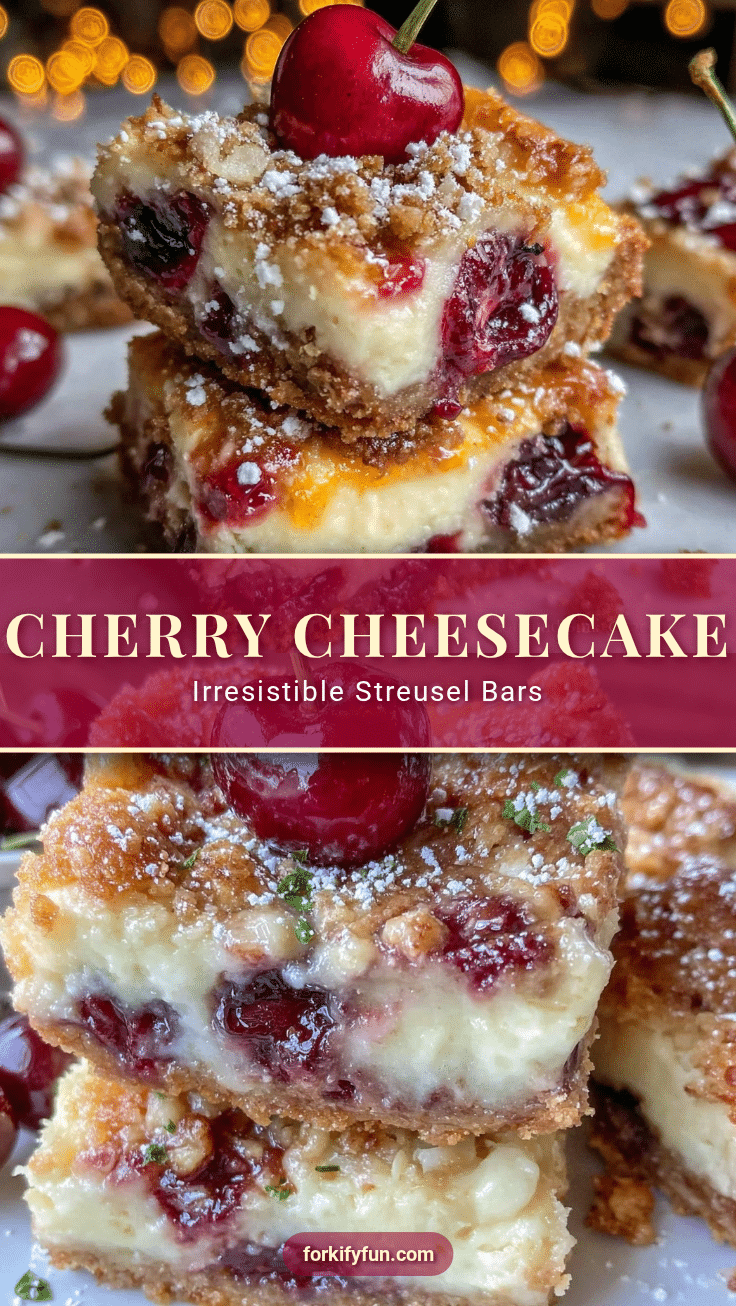
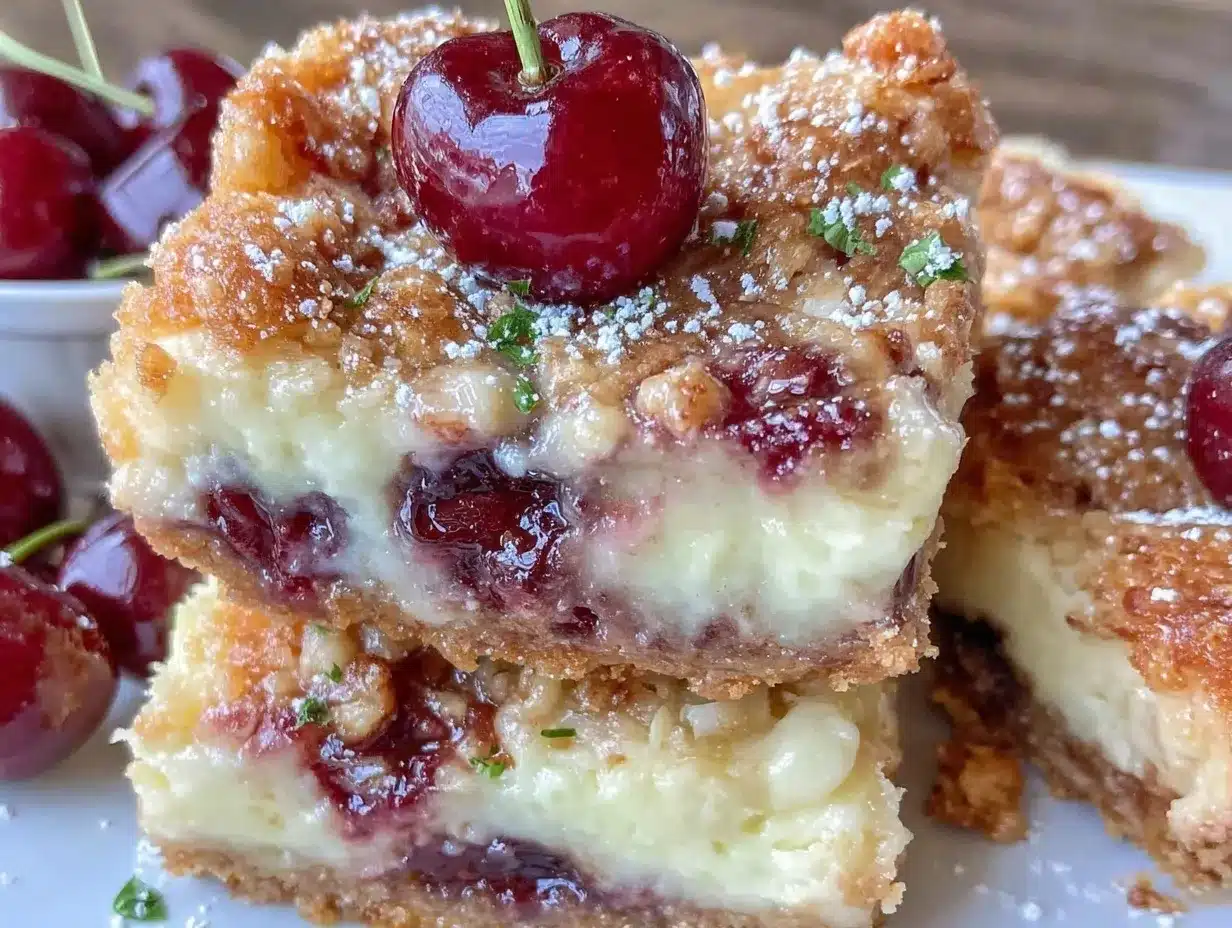
Creamy Cherry Cheesecake Bars – Easy Streusel Dessert with Buttery Crust
These creamy cherry cheesecake bars feature a buttery crust, silky cheesecake filling, sweet-tart cherry layer, and a crunchy streusel topping. They’re easy to make, perfect for parties or potlucks, and deliver nostalgic comfort in every bite.
- Prep Time: 20 minutes
- Cook Time: 45 minutes
- Total Time: 2 hours 35 minutes (including chilling)
- Yield: 18 bars 1x
- Category: Dessert
- Cuisine: American
Ingredients
- 1 cup unsalted butter, melted
- 2 cups all-purpose flour (or gluten-free flour blend)
- 1/2 cup granulated sugar
- 1/4 teaspoon salt
- 16 oz cream cheese, softened
- 2/3 cup granulated sugar
- 2 large eggs, room temperature
- 1 teaspoon vanilla extract
- Zest of 1 lemon (optional)
- 1 1/2 cups cherry pie filling (or fresh cherries cooked with sugar and cornstarch)
- 3/4 cup all-purpose flour
- 1/3 cup brown sugar
- 1/4 cup unsalted butter, cold and cubed
- 1/2 teaspoon ground cinnamon (optional)
- Pinch of salt
Instructions
- Line a 9×13-inch baking pan with parchment paper, leaving an overhang for easy lifting. Preheat oven to 350°F (175°C).
- In a large bowl, stir together 2 cups flour, 1/2 cup sugar, and 1/4 teaspoon salt. Pour in 1 cup melted butter and mix until crumbly but holds together.
- Press crust mixture evenly into prepared pan. Bake for 15 minutes, until lightly golden.
- While crust bakes, beat cream cheese until smooth. Add 2/3 cup sugar, eggs, vanilla, and lemon zest. Beat until just combined and creamy.
- Pour cheesecake mixture over slightly cooled crust, smoothing evenly.
- Spoon cherry pie filling over cheesecake layer. Swirl gently or spread evenly for a marbled effect.
- In a small bowl, combine 3/4 cup flour, 1/3 cup brown sugar, 1/2 teaspoon cinnamon, and a pinch of salt. Cut in 1/4 cup cold butter until mixture resembles coarse crumbs.
- Sprinkle streusel evenly over cherry layer.
- Bake at 350°F for 30–35 minutes, until edges are set and center is slightly jiggly.
- Cool in pan for 30 minutes, then transfer to a cooling rack. Chill in fridge at least 2 hours before slicing.
- Lift bars out using parchment overhang. Slice into squares or rectangles (about 18 bars). Serve chilled.
Notes
For gluten-free bars, use almond flour or a 1:1 gluten-free blend for crust and streusel. Chill bars thoroughly before slicing for neat layers. Swap cherry filling for blueberry, raspberry, or apple for variety. Add nuts to streusel for extra crunch. Bars can be made a day ahead for best flavor and easy slicing.
Nutrition
- Serving Size: 1 bar (1/18th of rec
- Calories: 220
- Sugar: 15
- Sodium: 120
- Fat: 14
- Saturated Fat: 8
- Carbohydrates: 22
- Fiber: 1
- Protein: 3
Keywords: cherry cheesecake bars, creamy cheesecake, streusel dessert, buttery crust, easy dessert, potluck bars, handheld cheesecake, cherry dessert, bake sale recipe